Honda: How to Install Car Stereo
Jam to your favorite tunes with the help of this guide. This step-by-step article will guide you through the process of installing a new stereo to your Honda Accord or Civic.
This article applies to the Honda Civic (1992-2000), and Accord (1992-2002).
A radio is almost the most essential utility in a car. It helps to keep you entertained and to pass the time as you drive. It gives you an opportunity to stay in touch with the news, or listen to your favorite music. So if it breaks, why wouldn't you want to replace it? If you replace it with the same model, this is a task that can easily be done. If you opt for a more advanced, higher quality, aftermarket radio, then it may require a little extra time to replace it, but it is still a very easy task. Learning how to replace your own radio will save you time, money, and prevent you from ever having to drive without music.

Materials Needed
- Flat head screwdriver
- Phillips head screwdriver
- 8mm, and 10mm socket
Step 1 – Disconnect battery and remove center console
- Pop the hood, and remove the connections from the battery terminals using the 10mm socket. To disconnect the battery, remove the negative (black) terminal first.
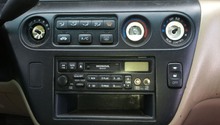
- Using the flat head screwdriver, place it under the clock and between the center console. Use it to easily pry out the clock.
- Once removed, a Phillips head screw should be visible. Use the screwdriver to remove it.
- Remove two more Phillips screws from the curved, under portion of the console.
- Starting from the bottom, slowly peel the console off. Remove its face from its clips, and detach the connections from behind it.

Figure 1. Locate and disconnect the battery. 
Figure 2. Unscrewing the Phillips head screw behind the clock. 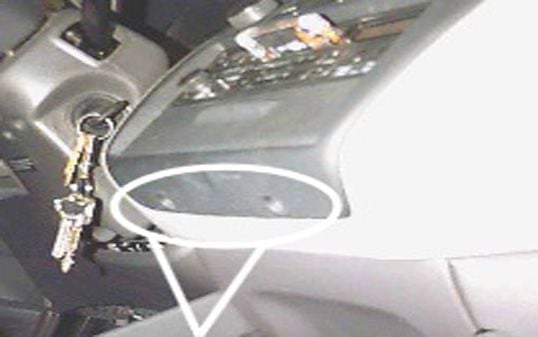
Figure 3. Removing the screws under the dash. 
Figure 4. Disconnecting the center console plugs.
Pro Tip
If you are replacing it with the same type, you will need to get the radio code from Honda.
Step 2 – Remove the Radio
- Use the 8mm socket to unscrew the radio. Some require a Phillips head screwdriver instead.
- Slowly pull the radio up, and towards you. Detach the connections, and fully remove the radio.

Step 3 – Install new radio and re-install
- Insert the new radio half way into position, connect the antenna and power. Then set the radio in place.
- Screw the radio in.
- Re-plug the center console before attaching it.
- Attach the center console, and replace the three screws.
- Plug the clock back in, and then slide it back into place.
- Reconnect the battery, and test to make sure the radio works.
Featured Video: Honda Accord Stereo Replacement
Related Discussions
- Radio Code - Honda-Tech.com
- Aftermarket Radio DIY Removal - Honda-Tech.com
- Need Help Wiring My New JVC Radio - Honda-Tech.com
- Do I Need an Installation Kit to Replace My Stock Radio - Honda-Tech.com