Honda Civic: How to Install Car Stereo
A stock radio can leave a lot to desire, so upgrading it may yield some untapped sound potential. Continue reading to learn how to install a car stereo in your Honda Civic.
This article applies to the Honda Civic (1992-2000).
Honda Civics are known for their reliability and efficiency, but not their sound systems. If you are ready to treat yourself and your passengers with a superior music experience, upgrading your radio is the way to do it. Installing a new radio requires the removal of a few body panels and some wiring. So if you aren't comfortable with that, then you might want to visit a shop. If you are ready to take on the project, then continue reading to learn how to install a car stereo in your Honda Civic.

Materials Needed
- Phillips screwdriver
- Flat head screwdriver
- Panel or trim removal tool (optional)
- 8mm socket and ratchet
Step 1 – Disconnect battery and remove body panels
- Use an 8mm socket and ratchet to loosen the bolt from the battery's negative (black) lead. Then, disconnect the negative battery terminal.
- With a Phillips screwdriver, remove the two screws above the cigarette lighter socket.
- Open the glove box to remove two Phillips screws located at the top left and lower left corner of the compartment.
- Remove the three Phillips screws from the driver's side dash panel.
- Then wiggle the center console, glove box compartment, and driver's side dash panels free.
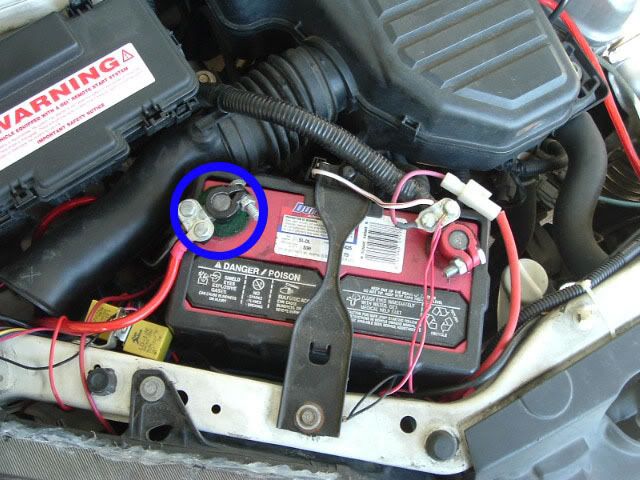
Figure 1. Disconnect the negative battery terminal (circled in blue). 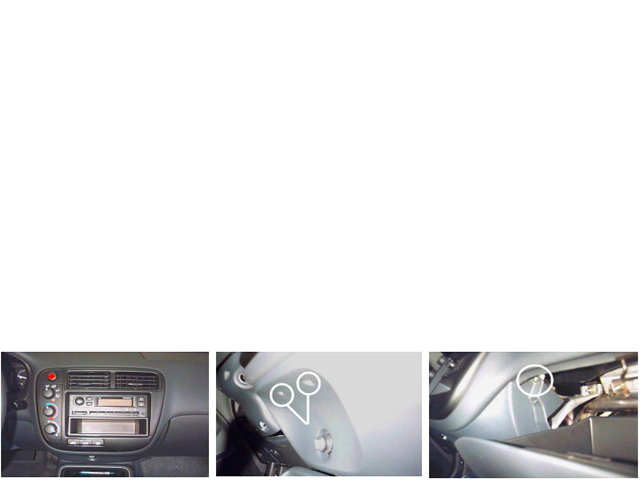
Figure 2. Remove screws from the center console and glove box. 
Figure 3. Remove the driver's side dash panel.
Step 2 – Unplug the connectors
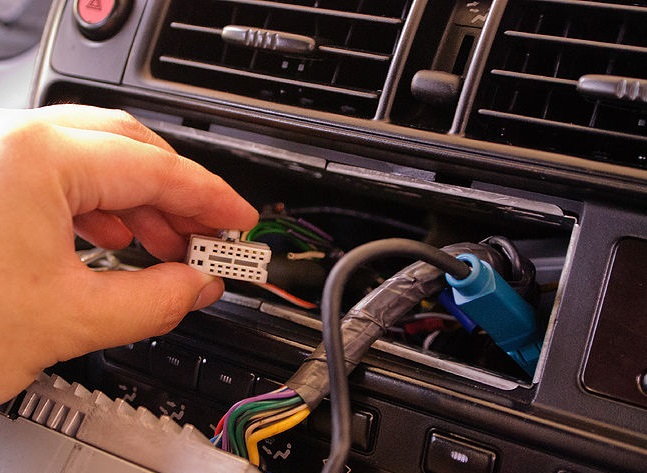
- With the panels removed, locate the connector on the back of the cigarette lighter, and unplug it.
- Locate the light blue and brown (stereo and speaker) connectors on the back of the stereo.
- Press down on the clip of the connector, and pull it out.
- Then, remove the antenna cable from the back of the stereo.
Step 3 – Remove the stereo
- With both hands, hold on to the top and bottom trim of the stereo cover. It is attached to the stereo.
- Carefully and slowly, pull out the trim along with the attached stereo.
- Do not unbolt the stereo bracket from the trim because it will be easier to install if it isn't removed.
- Facing the front of the stereo, use a Phillips screwdriver to remove two screws along the right side of the stereo bracket.
- Then, remove one Phillips screw on the left side of the stereo bracket.

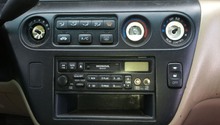
Figure 5. Remove the stereo and trim piece. 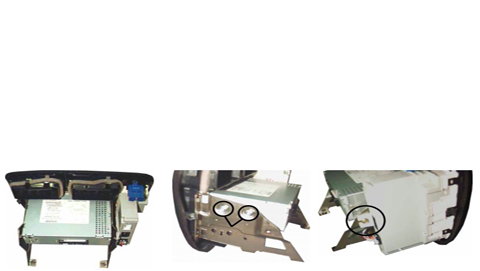
Figure 6. Unscrew the stock stereo.
Step 4 – Install the new stereo
Install the new stereo in reverse order to the steps above.
- Screw in the new stereo into the bracket.
- Plug in the antenna.
- Plug in the stereo and speaker connectors.
- Plug in the cigarette lighter connector.
- Re-install the driver's side dash panel.
- Re-install the glove box compartment.
- Re-install the center console panel.
- Reconnect the negative (black) battery terminal.
- Turn your car on to test the new stereo.
Featured Video: How to Remove Civic Radio
Related Discussion and Site
- Honda Civic Stereo Wiring - Honda-Tech.com
- The Complete Installation Guide for Radios - InstallDr.com