Honda Civic: How to Replace Shocks
If your Civic isn't riding like it should, it may be time to get your shocks replaced. If you are concerned about the costs of such a job, you can save a bundle by doing it yourself. This article will help you save money by guiding you through the process of replacing the shocks on your Civic.
This article applies to the Honda Civic (1992-2000).
Replacing the shocks in your Honda Civic isn't as bad as it sounds, and there are many suspension options for you to choose from. Whether or not you want a stiffer ride for on the track or a smoother ride for on the streets, it is completely up to you. A track setup such as a coil-over suspension system is going to take a little longer to install, but it isn't that much more difficult than a standard OEM or aftermarket replacement. By far, the easiest and the safest way to get this job done is to replace the entire shock/strut assembly. The rear struts come out through a simple two-step process, and while the fronts take a little longer, they are still just as easy to install yourself. If you give yourself enough time, you will save a bundle by avoiding expensive labor costs.

Materials Needed
- 10, 14mm sockets, and ratchet
- Two 17mm sockets
- 14mm wrench
- 5mm Allen wrench (if necessary)
- Spring compressor (if necessary)
- Breaker bar (optional)
- Hydraulic floor jack or lift
- Jack stands
Step 1 – Lift the car
- While the wheels are still on the ground, break the lugs nuts free.
- Lift the car using a hydraulic floor jack.
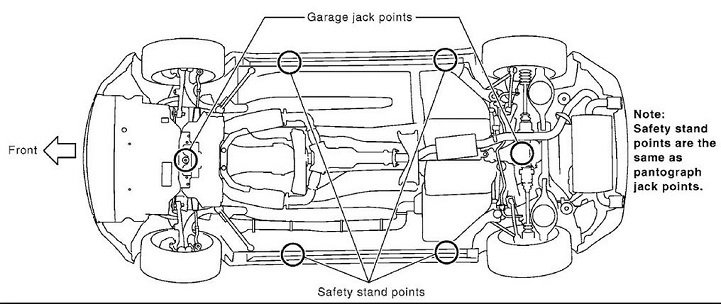
- Place the jack stands under the car. Be sure to use the correct lift and stand points.
- If you do not have four jack stands, then first replace the front shocks followed by the rear shocks.
- Then, remove the lug nuts and wheels. Set them aside.
(Related Article: How to Jack Up Your Civic - Honda-Tech.com)
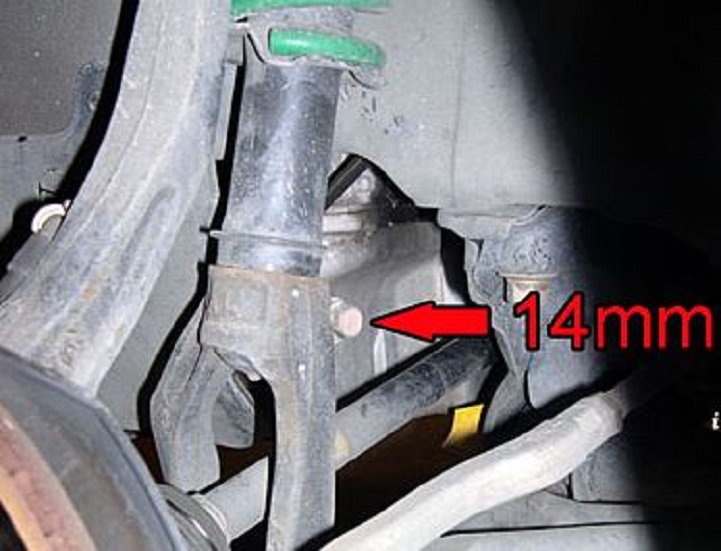
Step 2 – Remove the damper pinch bolt
- Locate the damper pinch bolt, which secures the bottom strut to the damper fork.
- With a 14mm socket and ratchet, remove the damper pinch bolt. Set it aside.
- Repeat this step on the other side.
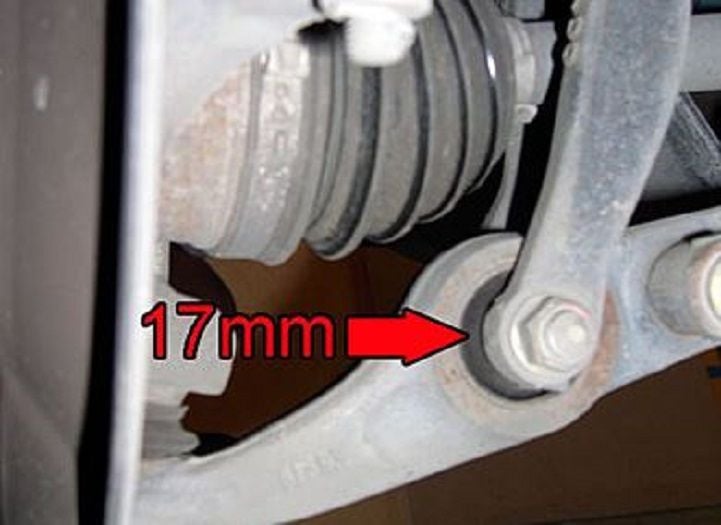
Step 3 – Remove the damper fork bolts
- Locate the two damper fork bolts that connect the damper fork to the lower control arm.
- With your socket and ratchet, remove the two 17mm damper fork bolts.
- Pull down on the damper fork, and away from the bottom strut.
- Repeat this step on the other side.
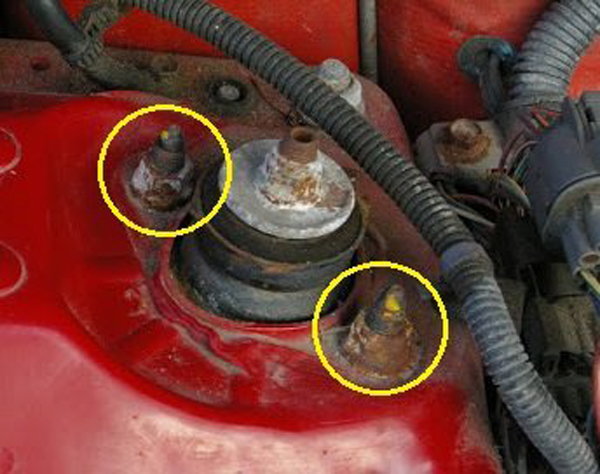
Step 4 – Remove the strut tower mounting bolts
- If you haven't already, open the hood of your car.
- Locate the strut tower mounts on each corner of the engine bay near the firewall.
- Near the firewall on the side you are working on, you will see the two 14mm strut tower mounting bolts.
- Support the strut assembly from inside the wheel well, because it might fall to the floor after the mounting bolts are removed.
- With your 14mm socket and ratchet, remove the two mounting bolts of the strut tower.
- Make sure not to remove the center nut. This secures the strut top to the assembly, and maintains the compression of the spring.
- Repeat this step on the other strut tower.
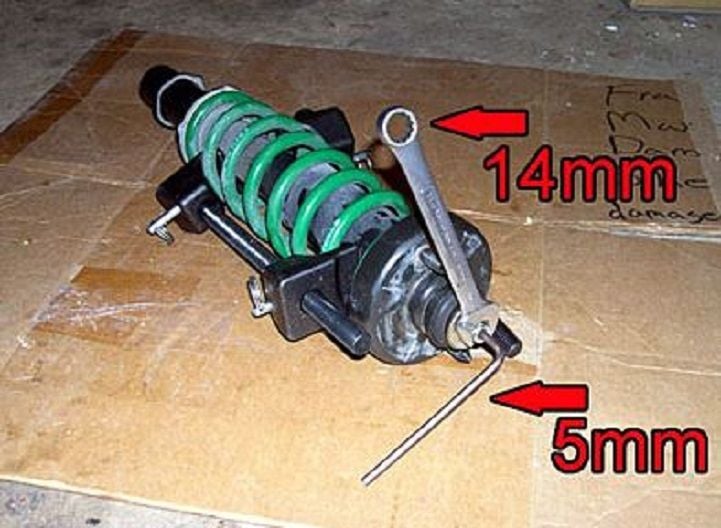
Step 5 – Remove the strut tops (if applicable)
Perform this step only if you are replacing the springs, or installing new ones to the strut assembly.
- Place the spring compressor tool on each end of the spring.
- Compress the spring to where it is no longer holding up the strut top.
- Use a 5mm Allen wrench to hold the shaft in place.
- Then, use a 14mm wrench to remove the top nut, and pull the strut top off.
- Carefully and slowly decompress the old spring.
- Repeat this step in the reverse order to install the new spring and strut assemblies.
Warning
Take great care when compressing the spring as it is under a lot of pressure. The spring may cause bodily injury if the spring compressor comes loose.
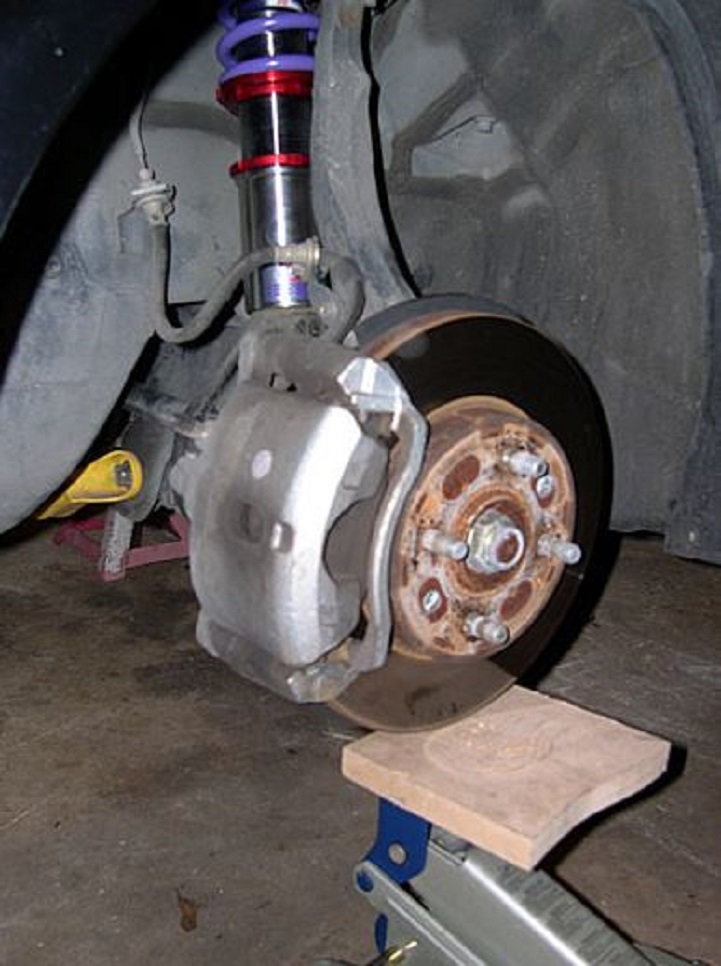
Step 6 – Install the new shock/strut assembly
- Insert the new strut assembly into the wheel well, and support the strut tower mount.
- Place the bottom strut into the damper fork, and secure it with the damper pinch bolt.
- Connect the damper fork to the lower control arm using the damper fork bolts. You may need the floor jack to raise the control arm to line up the bolt holes.
- Repeat this step on the other side.
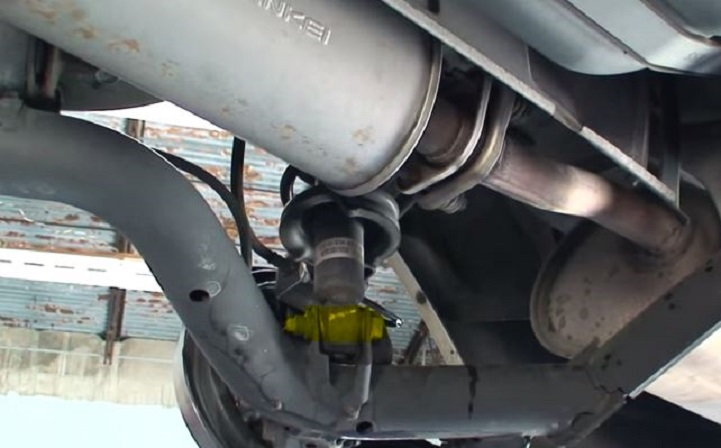
Step 7 – Remove the rear lower shock/strut bolt
- Use the 14mm socket and wrench to remove the lower strut bolt as well as the nut.
- You may need to place the breaker bar in between the lower strut and control arm to wiggle the bolt loose.
- Repeat this step on the other side.
Step 8 – Remove the rear strut tower mounting bolts
- Open the trunk, pull back on the carpet covering each side wall, and locate the top of the rear strut tower.
- With your socket and ratchet, remove the two 10mm mounting bolts of the strut tower.
- Pull out the entire strut assembly, and replace the coil if necessary.
- Do the same process on the other side.
Step 9 – Install the new rear shock/strut assembly
Install the new rear shock/strut assembly in reverse order to the steps above.
- Support the rear strut assembly from inside the wheel well.
- Secure the strut tower with the two 10mm mounting bolts.
- Use the hydraulic jack to lift the control arm, and insert the lower strut.
- Secure the lower strut with the two 10mm bolts.
- Install the wheels, and secure them with the lug nuts.
Featured Video: Honda Civic Shock Replacement
Related Discussions
- Front/Rear Shock Replacement - Honda-Tech.com
- Shock Removal/Installation on Civic EG - Honda-Tech.com
- Labor Costs for Shock/Springs Replacement - Honda-Tech.com