Honda Accord: How to Install Lowering Kit
Whether you've got aftermarket coilovers or just lowering springs, this guide will see you through the install process. So continue reading to learn what it takes to install a lowering kit to your Honda Accord.
This article applies to the Honda Accord (1998-2002).
Are you planning to give your Honda Accord a nice lowered look, but have felt frustrated trying to figure out which route to take? It all really comes down to looks, utility, and price. If you just want the look for a cheaper price, you can go with lowering springs with your standard struts. This method will only lower the ride, and it is only recommended if the struts are newer because lower, stiffer springs will wear out the shocks prematurely. If you can afford to go the slightly more expensive route, then get lowering springs with new struts. This method will cut down the installation time, and will save you the risk of lowering your ride on standard struts. The final way to go is to get coilovers. This is the most recommended route if you feel you may want to adjust heights. Typically, getting a new setup with coilovers will be the most expensive, but will last the longest and give the best handling. But this how-to will be covering the first option: lowering springs with standard struts. This will give a great overview of uninstalling all parts, and suit even the lowest of budgets. This replacement is an easy one, but it will be very time consuming. It also works best if you have a partner to help you.

Materials Needed
- A jack and 4 jack stands
- Tire iron
- Assorted sockets (12, 14, and 17mm)
- 17mm open box wrench
- 6mm Allen wrench
- Rubber mallet
- Flat head screwdriver
- Spring compressor
Pro Tip
To reduce installation time, it is suggested buying a new set of springs and struts that have already been assembled.
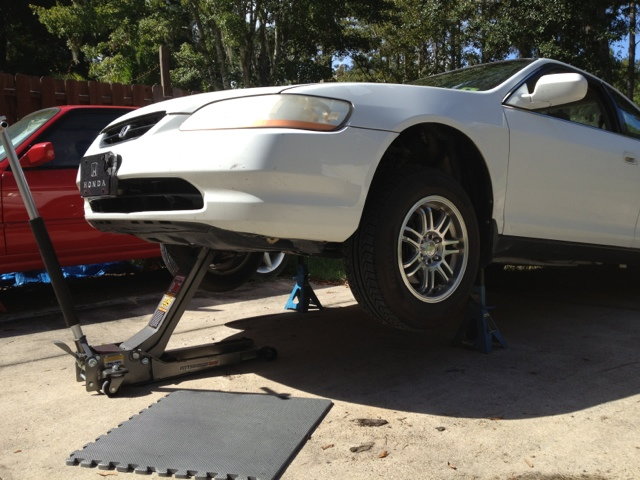
Step 1 – Elevate the car and remove the wheels
- Loosen the bolts on all four tires using the tire iron.
- Using a jack, raise the car, and secure it with jack stands.
- When the car is completely elevated, finish removing the bolts and completely remove the tires.
(Related Article: How to Jack Up Your Accord - Honda-Tech.com)
Step 2 – Remove the rear struts
- Unlock and lower the backseat.
- Unscrew the plastic piece that holds the tray in place, and pop out the tab on the frame. Now you will be able to access the top of the rear struts.
- Take off two 14mm bolts located on top of the strut.
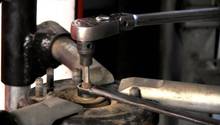
- Remove the 17mm bolt holding the bottom of the shock. If the bolt keeps rotating but stops moving, you may want to use the rubber mallet to help knock it out.

Figure 2. Unlocking back seat. 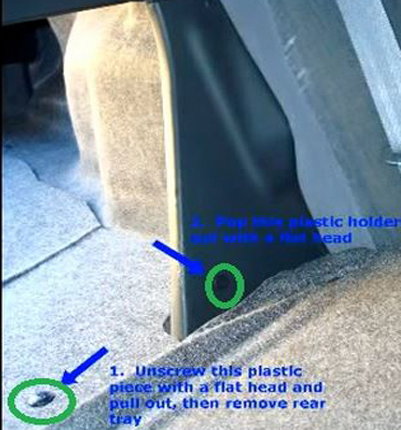
Figure 3. Unscrew and remove plastic tabs. 
Figure 4. Peel back the plastic cover. 
Figure 5. In trunk removal of strut. 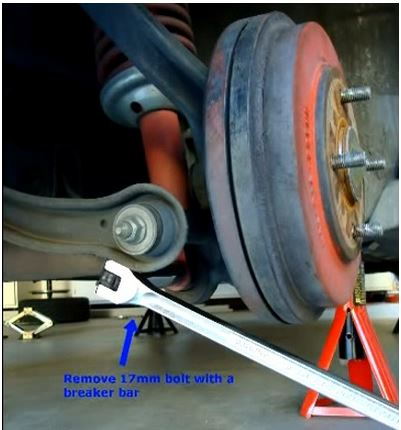
Figure 6. Breaker bar and socket wrench bolt removal.
Step 3 – Replace the rear springs
- Take the spring compressor, and then compress the spring.
- Use the 17mm box wrench in combination with the 6mm Allen wrench to remove the top bolt, and then remove the other components on the top of the spring.
- Once off, slide the old spring off, remove the compressor, and use it to compress the new spring.
- Slide the new spring into place.
- Replace the top mount and other components. Then, replace the top bolt of the strut with the Allen wrench/box wrench combo. Make sure the spring end is aligned with the special bent washer.
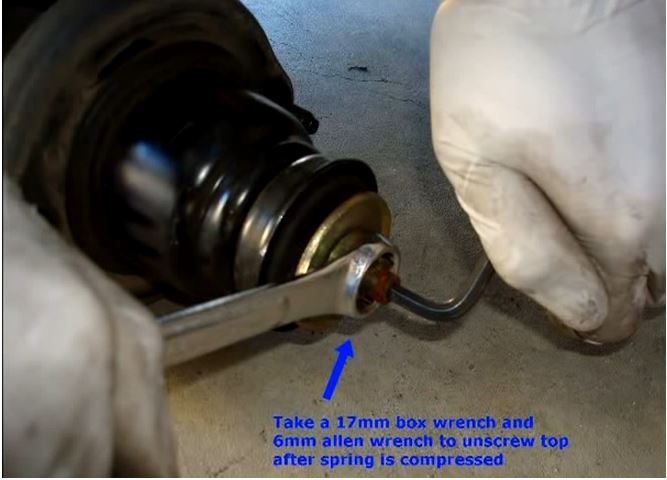
Figure 7. Using box wrench and Allen wrench to remove the compressed spring. 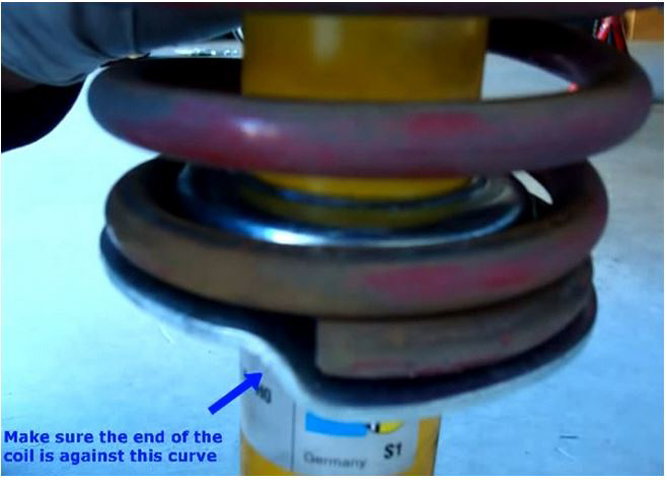
Figure 8. Replaced spring alignment.
Pro Tip
It is always advised to use new springs and shocks when attempting to lower a car.
Step 4 – Re-install the rear struts
- Replace the strut, and in the trunk area, lightly screw on the top bolts to hold it in place.
- Under the car, you will have to align the strut with the lower control arm of the breaking system by pushing down the arm, putting in the bolt, and screwing it in place. You may have to use the rubber mallet again to help you get the bolt back through.
- Once the bottom is finished, return to the top and completely screw it in. Remember that the instructions are the same for both sides.
Pro Tip
Have a friend or family member handy to help re-install the struts. It will make the process much easier and faster.
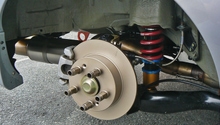
Step 5 – Remove the front struts
- Remove the two 12mm bracket bolts.
- Remove the 14mm bolt that is holding the fork to the breaks.
- Now, use the breaker bar and the socket wrench to remove the 17mm bolt that holds the fork to the control arm.
- Remove the fork from the shock body.
- Open the hood of the car, and use the 14mm socket to remove the three bolts holding it in place.
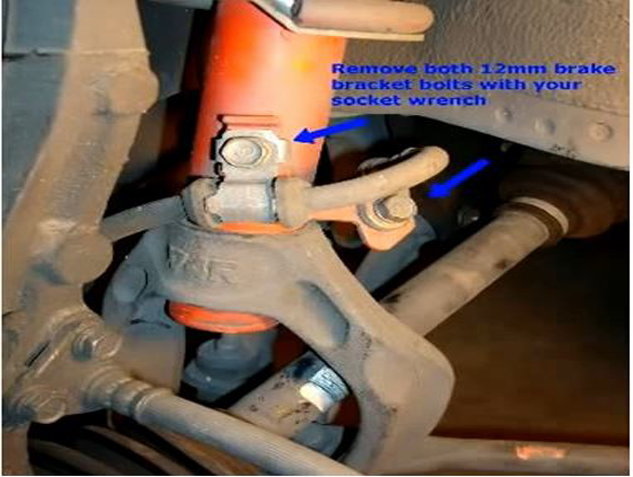
Figure 9. Removing bracket bolts. 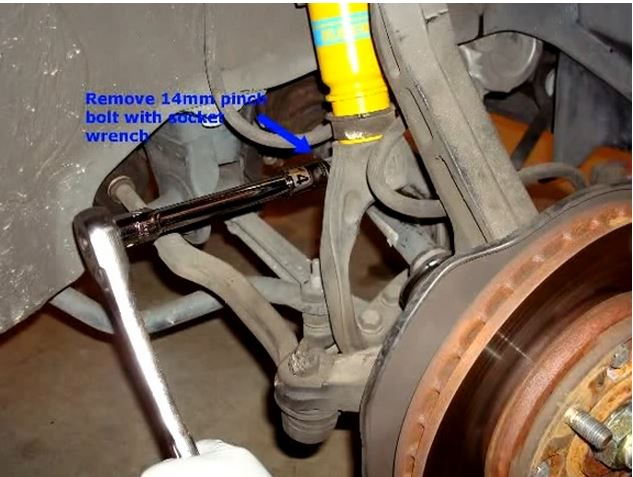
Figure 10. Removing pinch bolts. 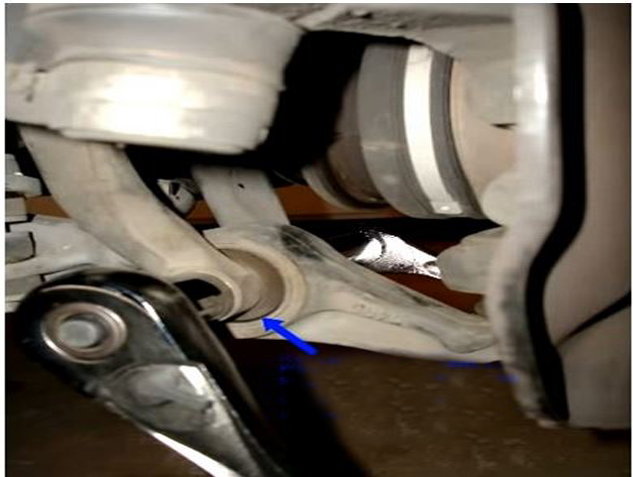
Figure 11. Breaker bar and socket wrench bolt removal. 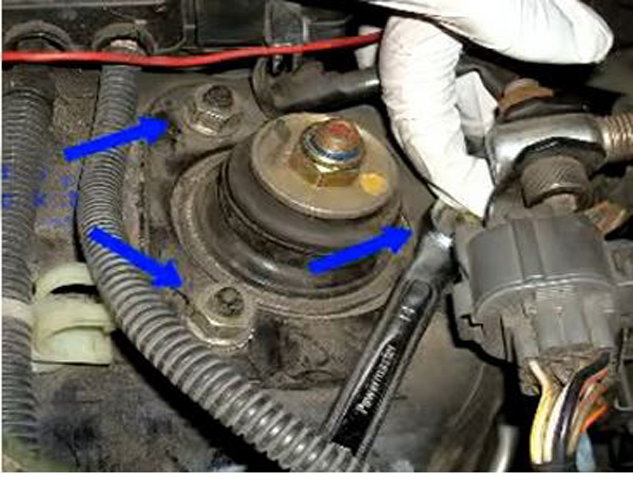
Figure 12. Under the hood strut removal.
Step 6 – Replace the front springs
- Take the spring compressor, and then compress the spring.
- Use the 17mm box wrench in combination with the 6mm Allen wrench to remove the top bolt, and then remove the other components on the top of the spring.
- Once off, slide the old spring off, remove the compressor, and use it to compress the new spring.
- Slide the new spring into place.
- Replace the top mount and other components, and then replace the top bolt of the strut with the Allen wrench/box wrench combo. Make sure the spring end is aligned with the special bent washer.

Pro Tip
Make sure to follow the notches on the struts in order to properly re-bolt your brake lines to the brake brackets.
Step 7 – Re-install the front struts
- Replace the strut, and lightly screw on the top bolts to hold it in place.
- Under the car, you will have to align the strut with the lower control arm of the breaking system by pushing down the arm, putting in the bolt, and screwing it in place.
- Replace the 14mm bolt used to hold the fork to the breaks, and then the two 12mm bolts.
- Once the bottom is finished, return to the top and completely screw it in.
Related Discussions
- Coilovers vs. Springs - Honda-Tech.com
- Lowering Car, Looking at Springs - Honda-Tech.com
- Lowering Springs - Honda-Tech.com