Honda Civic: How to Replace Ball Joints
Ball joints work hard, but don't get a lot of credit. Learn why you need to keep up with the maintenance on your ball joints, and how to replace them on your Honda Civic.
This article applies to the Honda Civic (1992-2000).
Ball joints are the smallest components that play a big role in making sure you arrive safely to your destination. Think of them as pivots that allow the suspension to flex as your wheel moves. You can tell if they need a replacement just by looking at them. If the rubber boot around the ball joint is busted, this is an indication that there is no grease left inside. You may also feel a wobble or vibration at the wheel. Replacing ball joints can take quite some time and requires specialty tools, so you may prefer going to a repair shop if you don't have them.

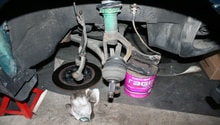
Materials Needed
- Ball joint press
- 10, 12, and 17 mm socket
- 32 mm (or 36 mm) deep well socket
- Ratchet
- Flat head screwdriver
- Torque wrench
- Small hammer
- Pliers
- Floor jack and jack stands
Step 1 – Lift car and remove the wheels
- Disconnect the negative (black) battery terminal.
- Loosen up the lug nuts on your front wheels.
- Jack the car up.
- Secure it with jack stands.
- Remove the front wheels.

(Related Article: How to Jack Up Your Accord - Honda-Tech.com)
Step 2 – Remove spindle nut
- With the flat head screwdriver, undo the clip on the center of the spindle nut.
- With the 32 mm deep well socket, loosen the spindle nut by rotating it counterclockwise. This is easier if you position the wrench to push down instead of up.
- Remove the spindle nut by hand.
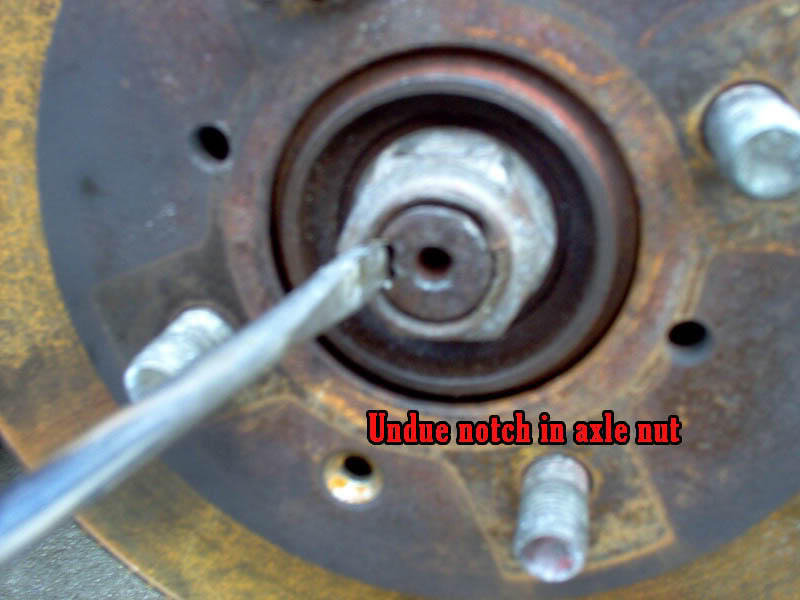
Figure 2. Undo the safety clip on the edge of the spindle nut. 
Figure 3. Use your deep well socket and ratchet to undo the spindle nut.
Pro Tip
Spindle nut could be 36 mm depending on the your Accord's model year.
Step 3 – Remove the brake assembly
- Once the spindle nut is off, unfasten the two bolts on the back of the caliper.
- Unfasten two additional bolts securing the brake line to the knuckle.
- Remove the caliper assembly, and use a bungee cord or zip ties to hang the caliper. Set it aside.
- Slide the rotor out.
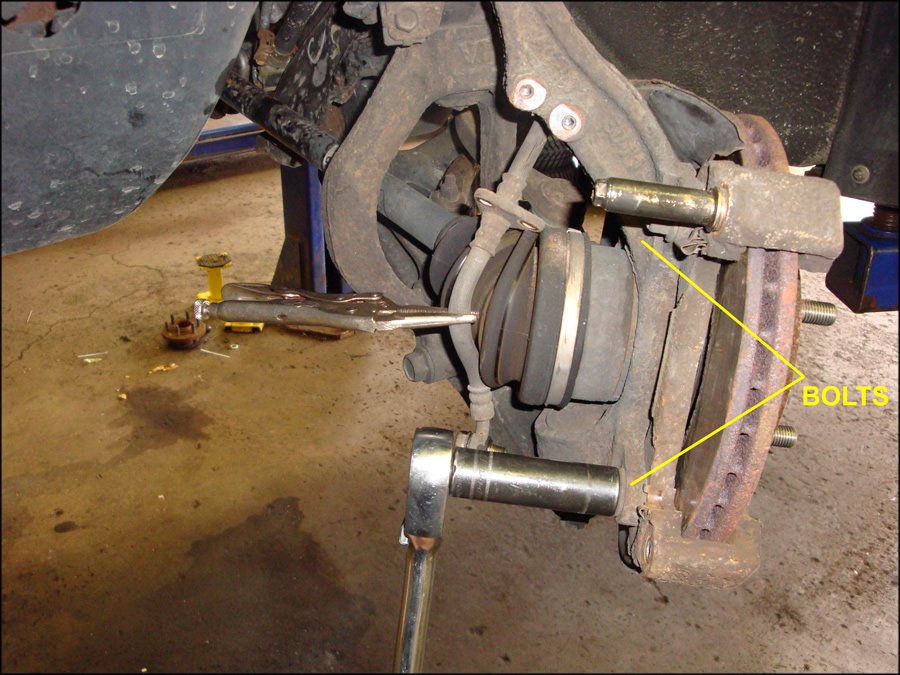
Figure 4. Unfasten the caliper bolts to free up the caliper. 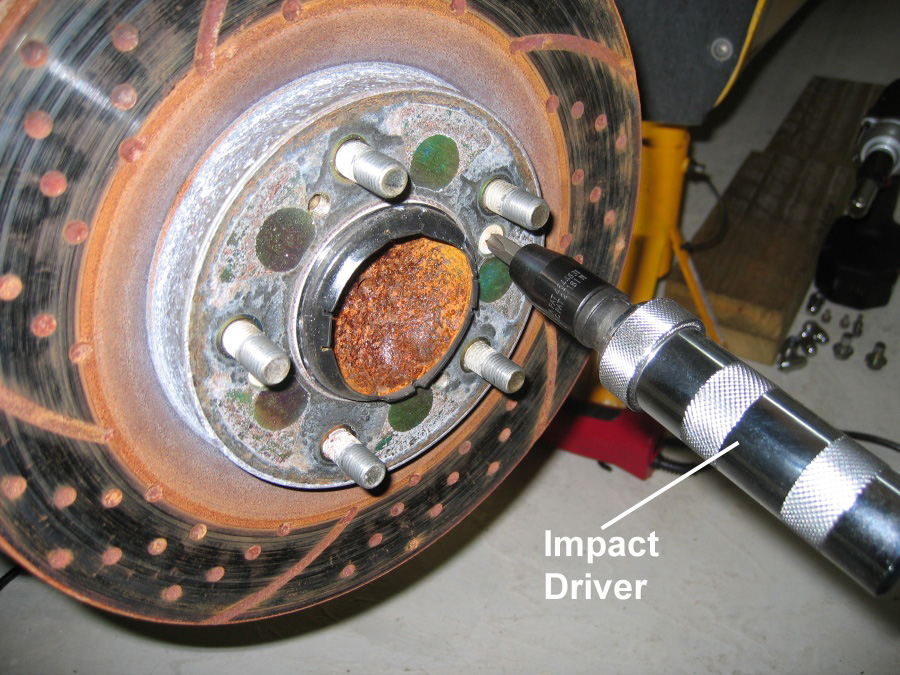
Figure 5. Remove screws and slide the rotor out.
Step 4 – Undo the pinch bolt
- Locate the damper pinch bolt. it's above the spindle and near the brake line support bracket.
- Use the 12 mm socket to remove it.

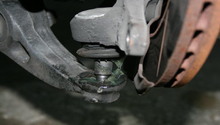
Step 5 – Loosen the castle nut
- With pliers, remove the safety cotter pin from the lower castle nut.
- Use a ratchet with 17 mm socket to loosen the lower castle nut, and remove it by hand.
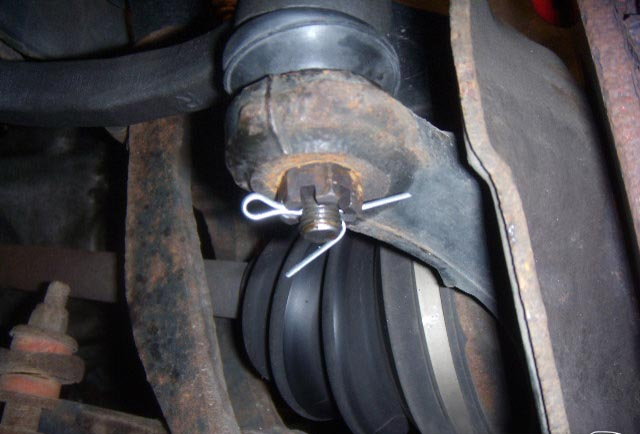
Figure 7. Remove the cotter pin. 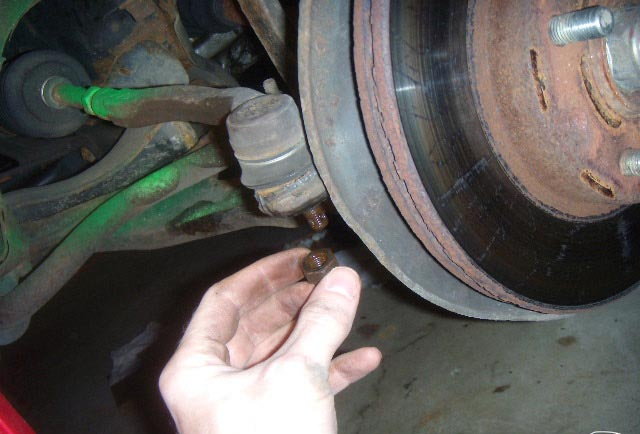
Figure 8. Remove the lower castle nut.
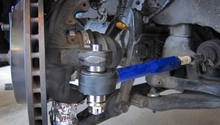
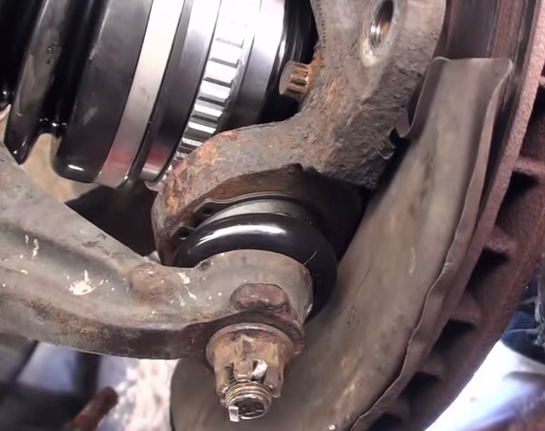
Step 6 – Remove and detach the ball joint
- Slide the open end of the ball joint press on top of the boot. The tip of the ball joint press should be at the bottom of the boot.
- Use a 9 mm wrench to crank the pivot. Push the ball joint out.
- Use the hammer to hit the ball joint up and out.
- With the pliers, remove the snap ring from the rubber boot of the ball joint.
- Use a hammer to drive the ball joint up until it pops off the tie rod.
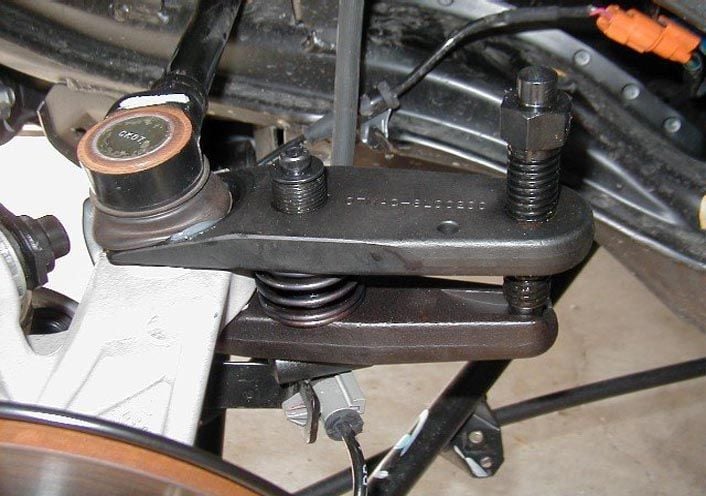
Figure 9. Use the ball joint press for leverage. 
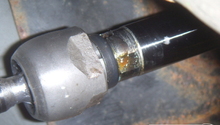
Figure 10. Detached tie rod end.
Step 7 – Install the new ball joint
- With the bolt of the ball joint facing down, insert it into the hole of the knuckle.
- Use hammer to tap it into place.
- Replace the snap ring.
- Insert the ball joint into the tie rod end.
- Fasten the ball joint with the lower castle nut, and insert a new cotter pin.
- Reattach the pinch bolt.
- Insert and tighten up the spindle bolt with the torque wrench (134 ft/lbs).
- Slide brake rotor back in.
Step 8 – Re-install the brake assembly
- Reattach the caliper and fasten the two bolts.
- Mount and tighten the wheel.
- Lower the car and reconnect the battery.
- Take your car for a test drive.
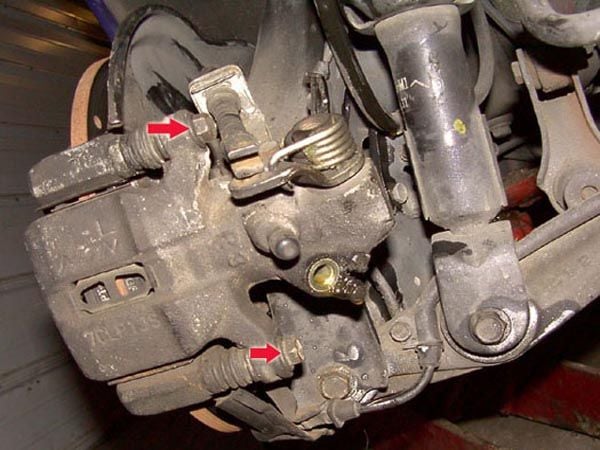
Figure 12. Reattach the brake caliper. 
Figure 13. Torque spindle nut to the right spec.
Featured Video: How to Replace Ball Joints on Civic
Related Discussion
- Ball Joint Replacement Advice - Honda-Tech.Com