Honda: How to Replace Battery
Have you ever felt like your car struggles when you start the engine? Fixing it could be as simple as swapping the battery.
This article applies to the Honda Accord (1990-2002), and Civic Del Sol (1992-2000).
Even though batteries are a simple component, they're one of the key items required for a car to run. The more you know about them, the less chance there is of a dead battery leaving you stranded. While swapping a battery in your Honda is a straightforward affair, there are a few details that you should know in order to perform a safe and efficient job.

Materials Needed
- Safety goggles
- Gloves
- Adjustable wrench
Step 1 – Unlatch and open the hood
Locate the interior release lever inside the car to pop the hood. Pull the lever and walk up to the front of the car. Pull the hood latch and open it.
Figure 1. Pull this lever and you will hear the hood "pop." Figure 2. Push this latch down to open the hood.


Pro Tip
Make sure the hood support rod is inserted into the right opening of the hood. Most of the time, the right opening will have a special marking. This will keep the hood stable so it won't collapse.
Step 2 – Disconnect the battery
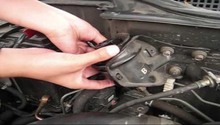
Use the adjustable wrench to undo the bolt around the negative (black) terminal. You don't have to unscrew it completely off, but just enough to slide the cable from the post. Once its off, repeat with the positive (red) terminal.
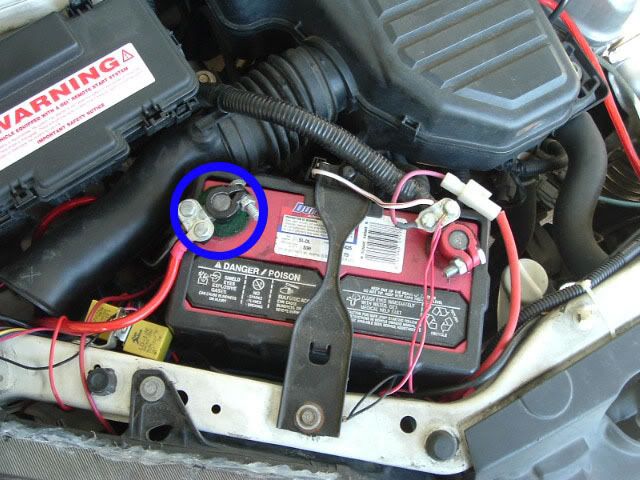
Figure 3. The negative battery terminal is usually black. 
Figure 4. Remove battery cable from terminal post.
Warning
Make sure you always remove the negative (black) terminal FIRST; otherwise, you run the risk of creating sparks or electrical shock.
Step 3 – Loosen up and remove bracket
After both battery cables are removed from the battery, there is a bracket that holds the battery in place. Undo each of the two screws as much as possible without removing them all the way. Once done, wiggle the rods attached to the bracket until it comes loose.

Figure 5. Battery holding bracket. 
Figure 6. Remove bracket completely to access the battery.
Step 4 – Remove battery and insert new battery
Some Honda models may have a second bracket that surrounds the battery. If this applies, then slide the bracket out and free up the battery. Lastly, firmly grab the battery and pull it straight out.

Figure 7. Make sure to get a good grip to pull the old battery out. Gloves are recommended. 
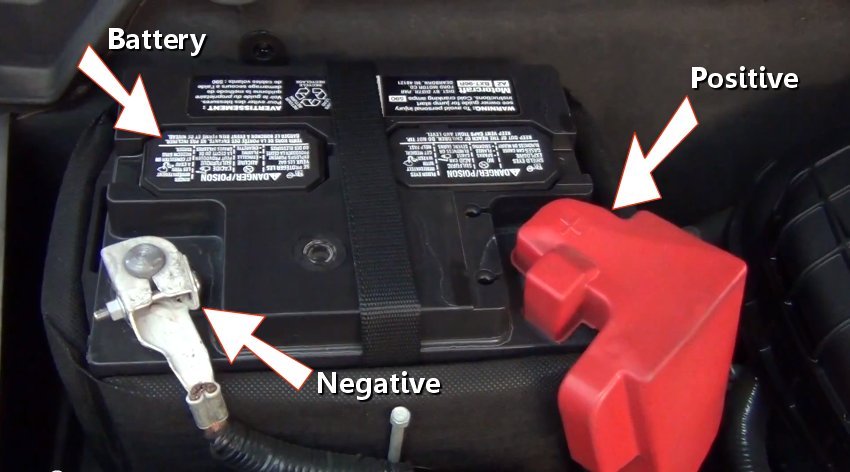
Figure 8. Set new battery into place, making sure the negative and positive terminals are facing the right way.
Step 5 – Re-attach and reconnect battery
Start by sliding the surrounding cover and brackets into place. If your new battery has plastic protectors on its terminals, remove them. Then reconnect the battery cables.
Pro Tip
When reconnecting your battery, it is important to connect the negative (black) terminal first. Also, make sure that the cables are pushed all the way down on the terminal posts before tightening them.
Step 6 – Start the car
It's time to start the engine and make sure everything is working. For optimum performance, it is recommended to replace your battery every three years. In areas with extreme weather may require it to be changed more frequently.

Featured Video: Honda Accord Battery Replacement
Related Discussions
- Replacement Battery Discussion and Pricing - Honda-Tech.com
- Battery Brand Discussion - Honda-Tech.com