Honda Civic: How to Repair a Broken Hood Latch
Almost all mechanical repairs start with this one component-the hood latch. Without it, you wouldn't have easy access to the engine bay. But what happens if it breaks? Read on to find out how easily it can be fixed.
This article applies to the Honda Civic/Del Sol (1992-2000).
Every time you need to complete a repair, you must gain access to the engine. But over some time, the hood latch on your Civic may give out and will not be able to engage or disengage. Replacing it will require some basic tools and a new hood release cable. So here are the steps you can follow to do so. If you don't want to be hands on with this task, you should visit an auto shop to get the job done.

Materials Needed
- New hood release cable
- Flat head screwdriver
- Phillips screwdriver
- 10mm socket, extension, and ratchet
- Wire cutters
- Needle nose pliers
- String or wire (5 feet or longer)
Step 1 – Remove the grille
- Open the hood, and use a flat head screwdriver to pop off the five plastic clips located on top of the grille.
- If you slightly pry the grille out, you can see four screws that still hold the grille in place.
- Reach through the bumper grille, and with a Phillips screwdriver, remove the four screws.
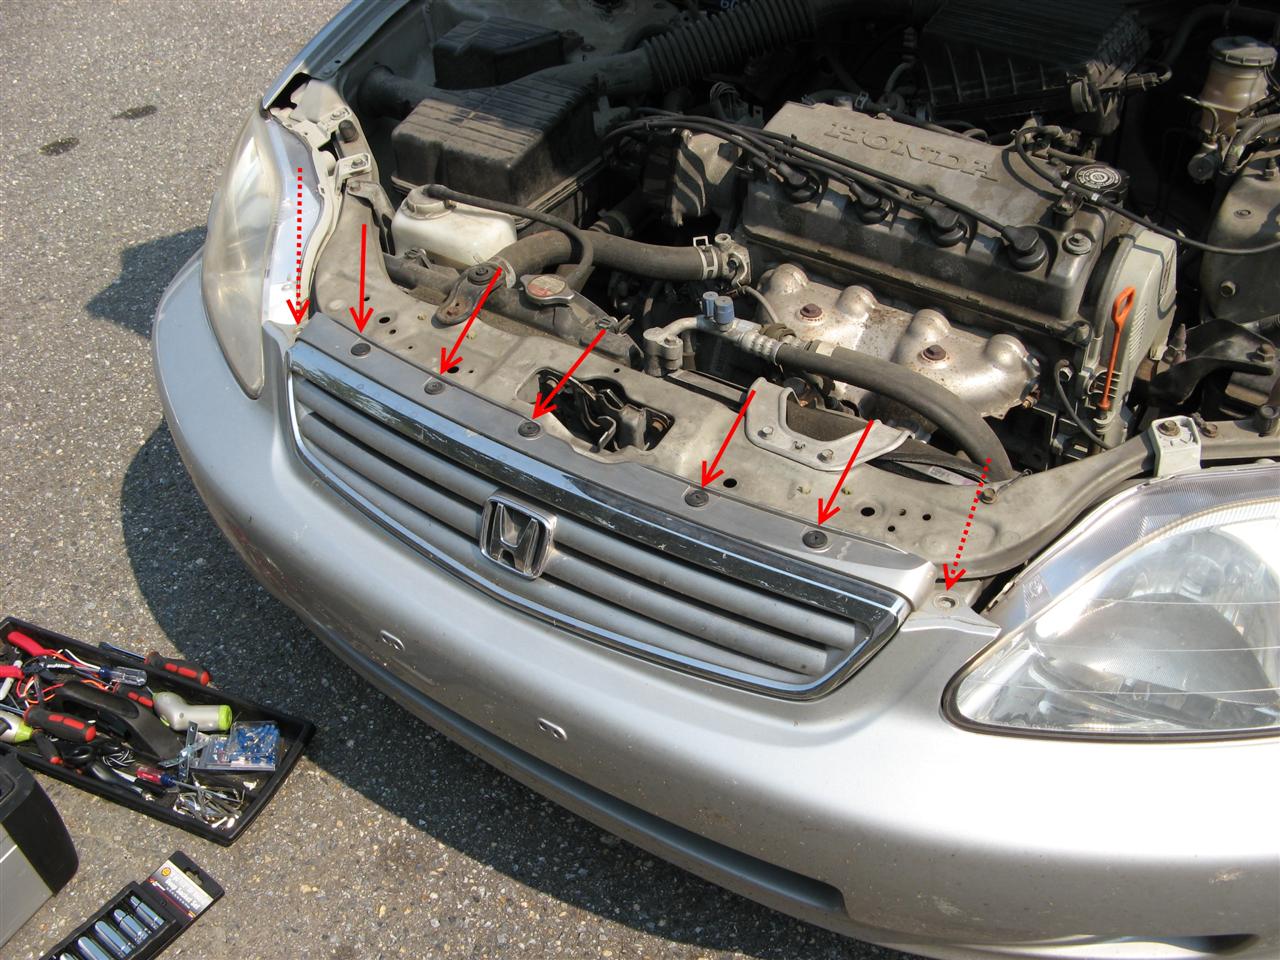
Figure 1. Remove the five plastic clips from the grille. 
Figure 2. Reach under the bumper grille to access the four Phillips screws.
Step 2 – Remove the hood latch
- Use a 10mm socket, ratchet and extension to remove the three bolts securing the hood latch to the frame.
-
Then, remove the latch and disengage the hood release cable.

Step 3 – Detach the hood release cable clips
- Move to the driver's side wheel well.
- With the Phillips screwdriver, remove five screws from inside the inner fender. There are four screws located on the rear of the fender, and one screw located on the front of the fender.
- Slightly pry off the inner fender liner to gain access to the hood release cable.
- Use the needle nose pliers to squeeze and pop out the clips guiding the release cable.
- Completely pull out the release cable from all of the clips.

Figure 4. Remove five screws from the inner fender. 
Figure 5. Remove hood release cable from the clips (red arrow).
Step 4 – Remove the hood release cable
- Move to the driver's side foot well.
- With the flat head screwdriver, remove two plastic clips from the kick panel and remove it.
- Behind the kick panel is a metal bracket that holds the hood release cable in place.
- With the 10mm socket and ratchet, remove the two bolts from the bracket and set them aside.
- Pull out the hood release cable until it comes to a stop. This means that the end of the cable has reached the wheel well, and the rubber plug of the firewall has stopped it.
- Use wire cutters to cut the plug off, and pull out the cable completely.

Figure 6. Remove two 10mm bolts (circled in red) from the metal bracket. 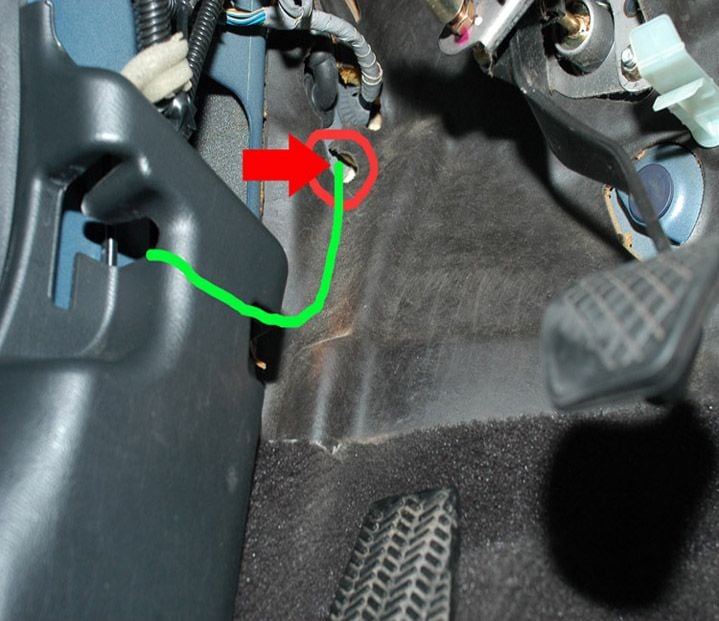
Figure 7. The hood release cable travels through the foot well (as outlined in green) and into the inner fender (circled in red).
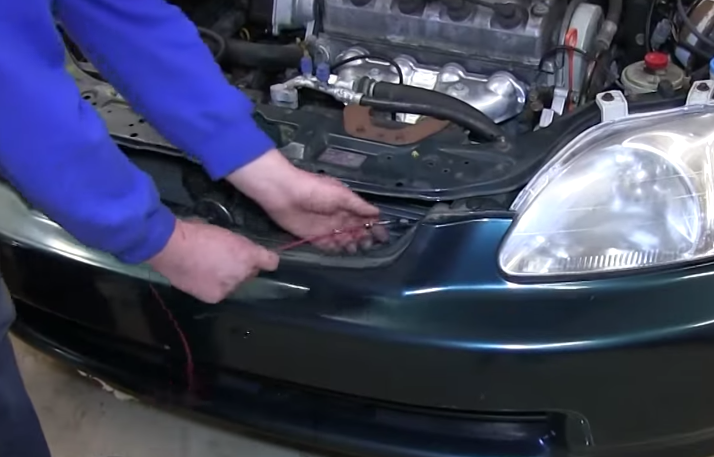
Step 5 – Install the new hood release cable
- Tie a long piece of string (or wire) to the end of the new release cable. Make sure to attach it to the "hood end" of the cable. This will help you reach through the wheel well (and other tight spots) to the hood latch.
- Insert the "hood end" of the cable with its attached string or wire through the firewall of the foot well.
- With the needle nose pliers, pull the string or wire from the inner fender until it stops.
- Then, insert a new plastic plug into the firewall.
- Insert the opposite end of the release cable through the metal bracket, and bolt the bracket to its original location.
- Continue to run the hood release cable until it reaches the hood.
Step 6 – Install the new hood latch
- Attach the release cable to the notch of the new hood latch.
- Then, secure the hood latch to its corresponding location with the three 10mm bolts.
- Reattach the grille with the four Phillips screws and five plastic clips.
- Close the hood, and test the new hood latch.
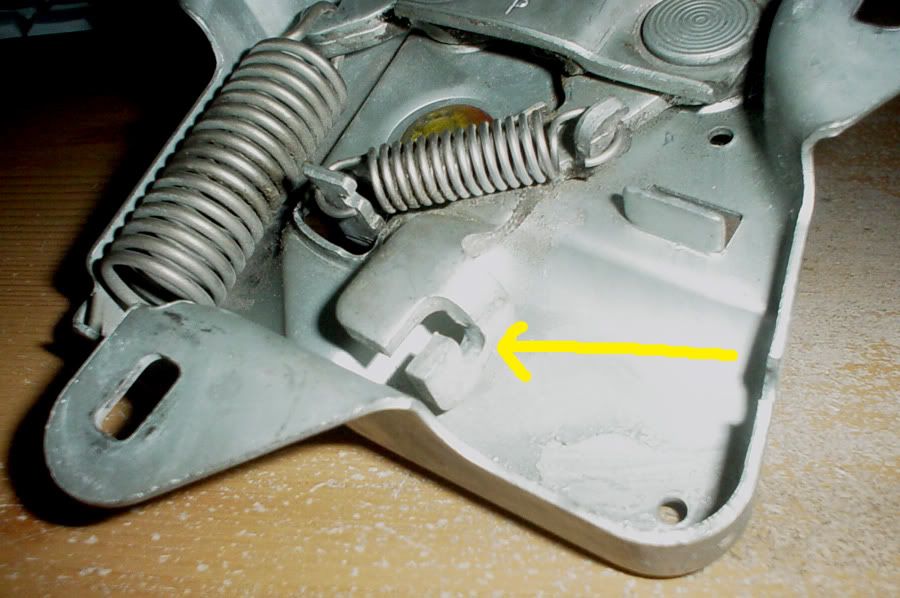
Figure 9. Attach the new hood release cable to the notch of the hood latch (yellow arrow).
Featured Video: How to Install New Hood Latch
Related Discussion
- Broken Hood Latch - Honda-Tech.com