Honda Civic: How to Install Air Conditioning Unit
Don't drive your Honda Civic in blazing heat, while the cars around you are cruising like it's winter time. Follow the steps below as this guide will help you to install a new A/C system into your car.
This article applies to the Honda Civic/Del Sol (1992-2000).
Although air conditioning is considered a standard feature in most modern cars, in the early 1990s it was not. As such, a fair number of Honda Civic sedans, coupes, and hatchbacks were produced without this option, leaving many to fend off the heat with their windows down and the standard fan on blast. The A/C system has several components, which are linked through a separate fuse box to ensure it functions properly. A proper installation requires mounting a new compressor, condenser, blower, and wire harness. Its an extensive process, but if you are up for the task, this article details how to correctly install a complete A/C system into your Honda Civic. Fortunately, Honda offers all the parts to install air conditioning into your Honda Civic.

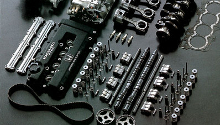
Materials Needed
- 3/8 inch socket and ratchet
- Metric socket set
- Pliers
- Air conditioning kit
- Torque wrench
- Phillips screwdriver
- Belt tension gauge
Step 1 – Remove the interior trim
- Disconnect the negative terminal (black) of the battery, and then the positive (red) terminal. Unbolt the brackets and rods to remove the battery from the tray liner. Set it aside.
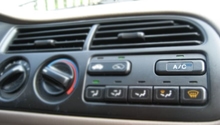
- Remove the plastic cover from the climate control panel to insert the A/C button.
- Press the A/C button onto the switch.
- With the glove box closed, remove the two Phillips screws underneath the glove box frame.
- Open and hold up the glove box.
- Use a 10mm socket and ratchet to remove the two remaining bolts above the glove box frame.
- With a Phillips screwdriver, remove the two screws located on the bottom corners of the glove box frame.
- Remove the glove box.

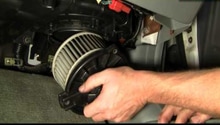
Step 2 – Install the evaporator
- Use a screwdriver to loosen the two Phillips screws holding the heater duct in place. Then, remove the heater duct.
- Pull the floor insulation back, and remove the firewall plugs for the A/C hard lines.
- Install grommets in each of the three holes.
- From the engine bay, insert the drain hose into the firewall and connect it to the evaporator.
- Mount the evaporator in the compartment with four Phillips screws located on each corner of the evaporator.
- Plug the evaporator connector and blower housing connector into the main harness. The blower harness is attached to the evaporator.
- Re-install the glove box.

Figure 2. Remove the heater duct. 
Figure 3. Remove firewall grommet plugs. 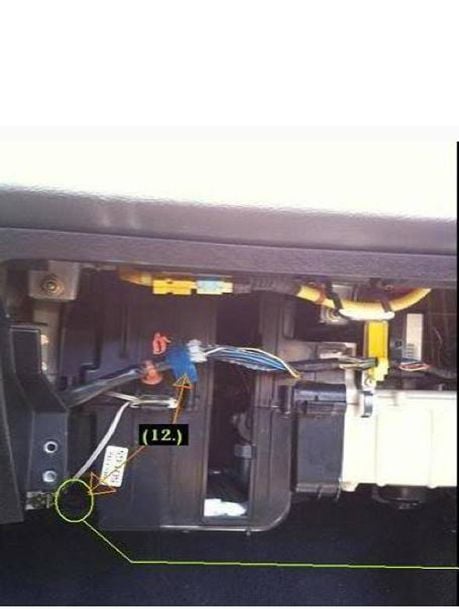
Figure 4. Install the evaporator.
Step 3 – Install the A/C compressor and condenser
- Move to the engine bay, and remove the air intake duct as well as the coolant reservoir.
- Remove the power steering pump, but not the reservoir.
- Pry off the clips, and remove the condenser cover.
- Remove the radiator upper bracket, coolant reservoir, and air intake box, which are held in place by 10mm bolts.
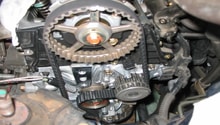
- Remove the 12mm bolts from the top of the compressor bracket.
- Install the idler pulley onto the compressor bracket, and then mount it to the engine block.
- Install the compressor belt, and tighten it to 35 ft lbs of torque. Make sure to check the belt alignment on the crank pulley.
- With a belt tension gauge, measure the tension of the compressor belt. The tension should be 70-85 kgf.
- Re-install the power steering pump.
- Mount the condenser, and use two 12mm bolts to tighten its bracket.
- Plug the condenser and compressor connectors into the A/C harness.
- Attach the A/C relays to the harness, and mount them to the chassis using a bracket.
- Connect the suction hose to the dryer using a 6 x 25mm flange bolt.
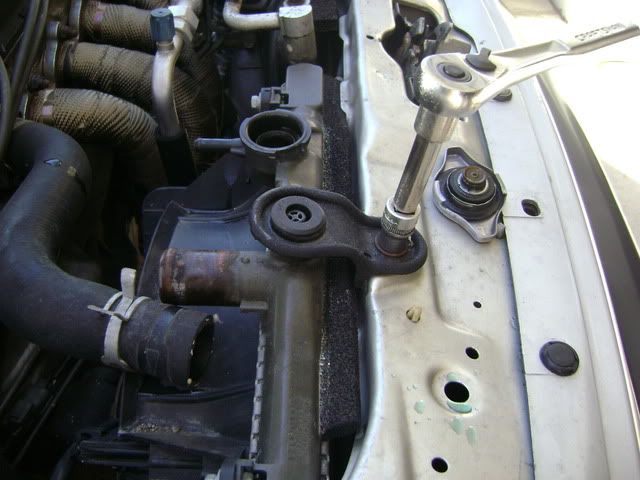
Figure 5. Remove the upper radiator bracket. 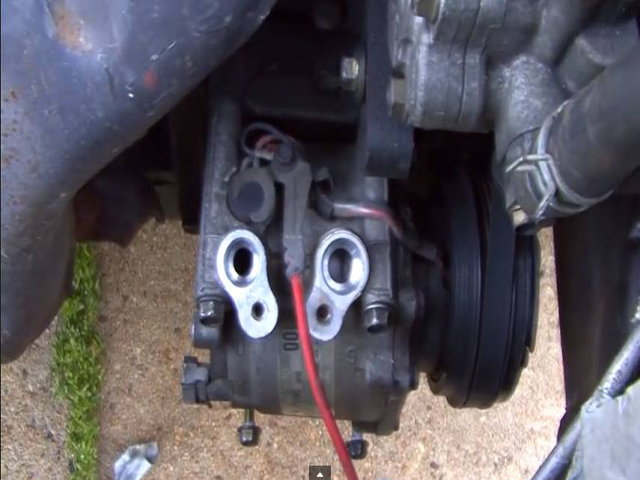
Figure 6. Mount the A/C compressor. 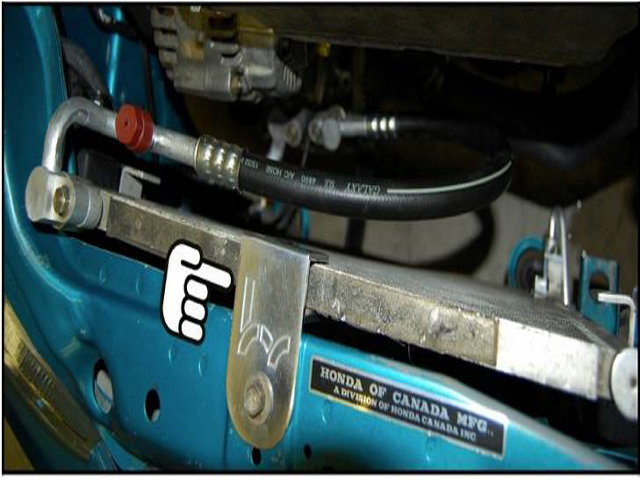
Figure 7. Install the condenser.
Step 4 – Install the A/C harness and line brackets
- Mount the suction line bracket under the radiator.
- Locate the main vehicle harness, which is in the front passenger's side of the engine bay. Remove the plug cap.
- Plug in the A/C harness connector to the main harness.
- Mount the harness with the pre-installed bracket.
- The harness routes through the front of the engine bay—in between the radiator support and headlights.

Step 5 – Install dryer, receiver, and suction lines
- Connect the receiver line B to the evaporator with one 6 x 25mm bolt.
- Route receiver line C under the wire harness.
- Connect the suction line B to the evaporator with one 6 x 25mm bolt.
- Push the radiator back, and mount the receiver lines to the pre-installed clips on the front wall of the engine bay.
- Mount the dryer to the engine compartment, but do not tighten it.
- Connect receiver line A from receiver line B, and then to the dryer.

Pro Tip
Mounting the suction line will be different on both manual and automatic cars. On manual cars, route suction line A through the underside. On an automatic, route it under and around the radiator.
Step 6 – Install the pressure hoses
- Attach suction line A to suction line B.
- Mount a suction hose bracket to the condenser with a rubber mount, collar, and 6 x 25mm bolt.
- Connect the low pressure suction hose to the condenser.
- Connect the suction, and discharge hoses to the compressor.

Step 7 – Re-install engine components and charge the A/C.
- Re-install the radiator upper bracket, coolant reservoir, and air cleaner intake duct.
- Re-install and connect the battery.
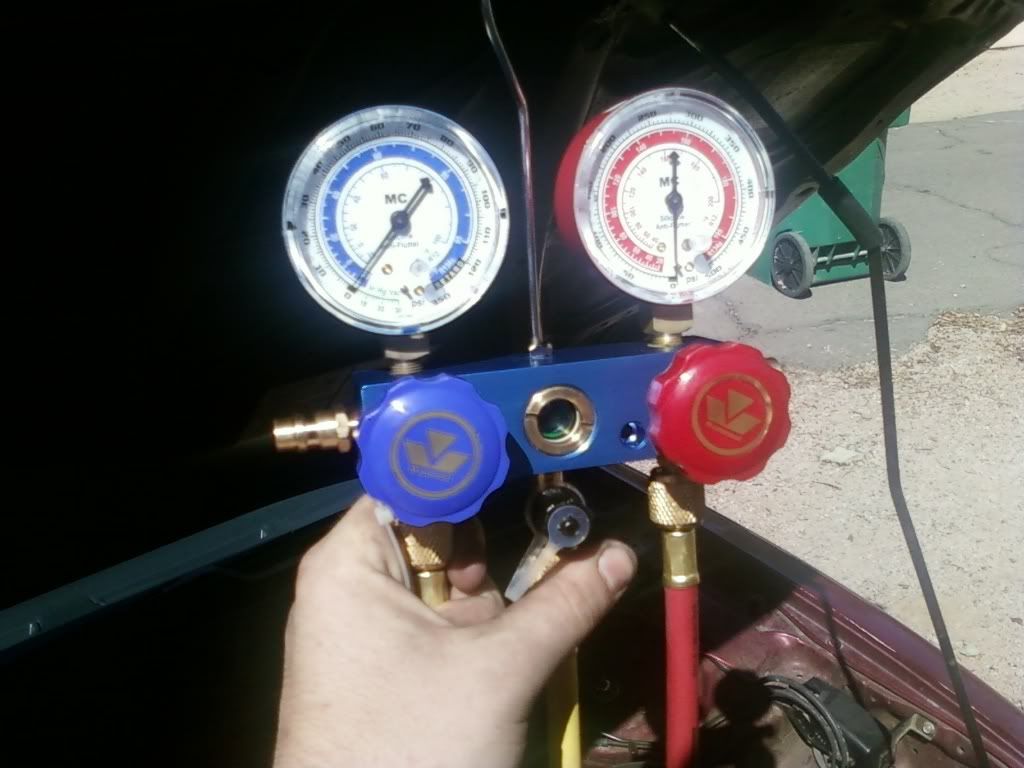
- Charge your new A/C system.
Featured Video: How to Install A/C Compressor and Charge the System
Related Discussions
- 1992-1995 Civic A/C Installation Manual - Honda-Tech.com
- How-To Install A/C in a '92-'95 Civic - Honda-Tech.com