Honda Civic: How to Swap Manual for Electronic Climate Control
This guide will help you to properly swap a manual to an electronic climate control unit on your lower trim level Honda Civic.
This article applies to the Honda Civic/Del Sol (1992-2000).
Manufacturers often design a couple of different trim levels and models for the cars they offer. Some of the lower trim level models are equipped with accessories and components like manual climate control, which you might not find in higher trim level models. The higher trim levels will have an automatic or electronic climate control. The lower trim level accessories usually bring the price of vehicles down for far much less than their higher trim level counterparts. Still, car enthusiasts may find they want to have all creature comforts of those models without paying the higher price tag up front.

Materials Needed
- Electronic climate control unit ('99-'00 EK)
- Solder
- Philips screwdriver
- Pin/hook screwdriver
- Thin flat head screwdriver
- Pliers
- Seven 3mm LEDs
- Three T5 wedge LED bulbs
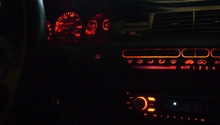
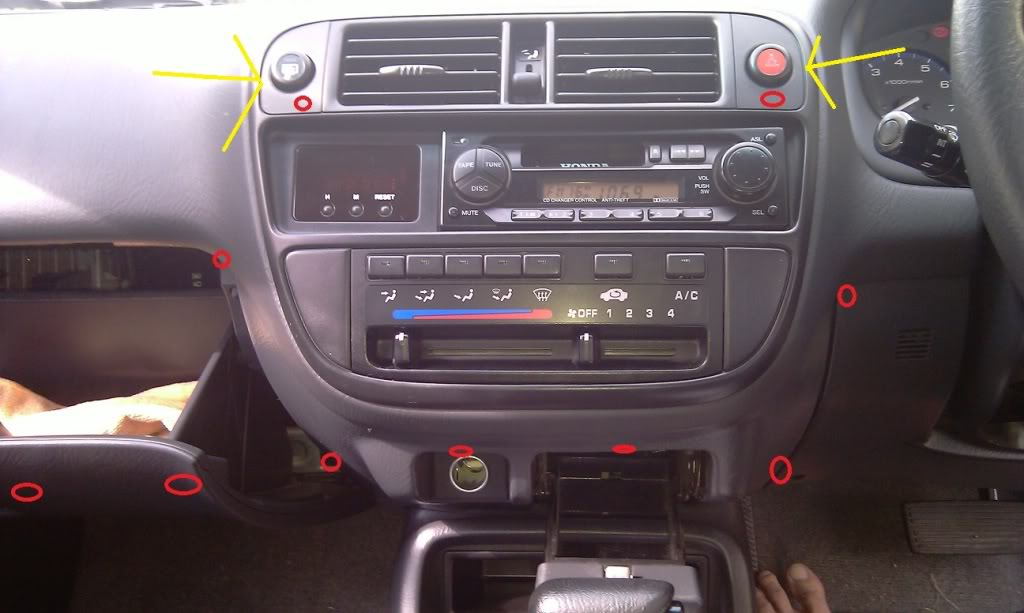
Step 1 – Remove the dash panels and screws
The dash contains separate panels (yellow arrows) that cover an assortment of screws (red circles).
- Using a thin, flat head screwdriver, pop off the indicated panels around the hazard and defroster switches.
- Unscrew the exposed screws with a Phillips head screwdriver.
- Remove the glove box.
Pro Tips
- Be very careful when removing the panels, so you don't crack them.
- Use a magnetic tray to keep the screws together.
Step 2 – Disconnect the climate control harness
The lower panel can be now be removed, allowing you to access and disconnect the harness of the existing climate control. Also, this will allow you to remove the factory head unit.
- Remove the two screws from the lower panel.
- Unclip the connector of the climate control harness (yellow circle).
- Remove the brass screws behind and underneath the climate control (red arrows).
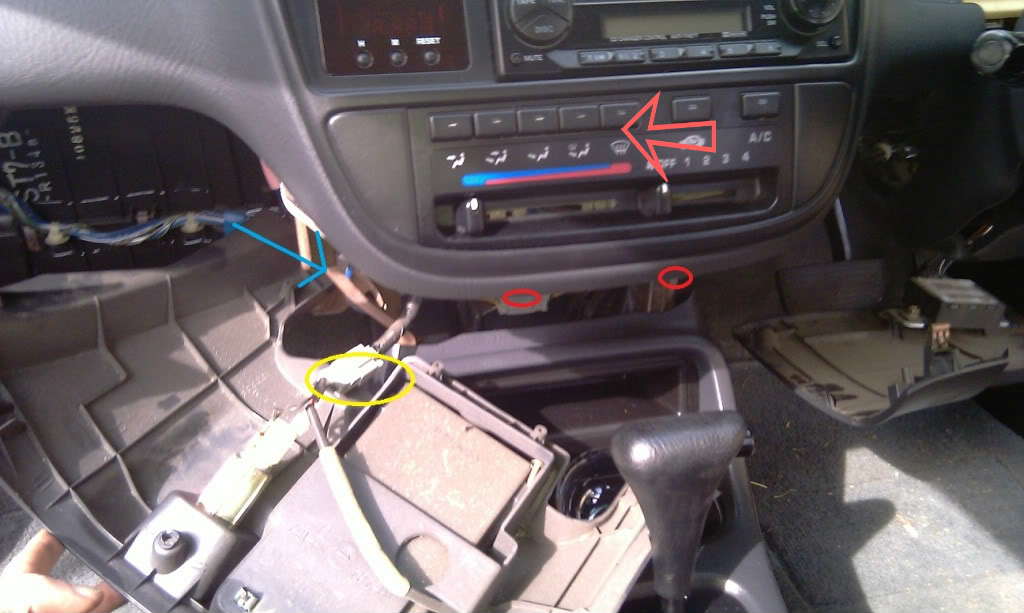
Pro Tip
You can swap out the ashtray bulb for a T5 wedge LED bulb at this time.
Step 3 – Disconnect the connectors and remove the head unit
There are a couple of connectors attached to the the head unit, clock, and climate control system. Additionally, there is a cable control for the A/C.
- Pull down the silver wire to release the A/C cable control (yellow circle in Figure 3). The yellow arrow indicates how the cable is held in place, and the red arrow indicates which direction to pull the wire.
- Remove the two screws from the bottom of the head unit and the dash.
- Remove the head unit.
- Disconnect the connectors for the clock and climate control.
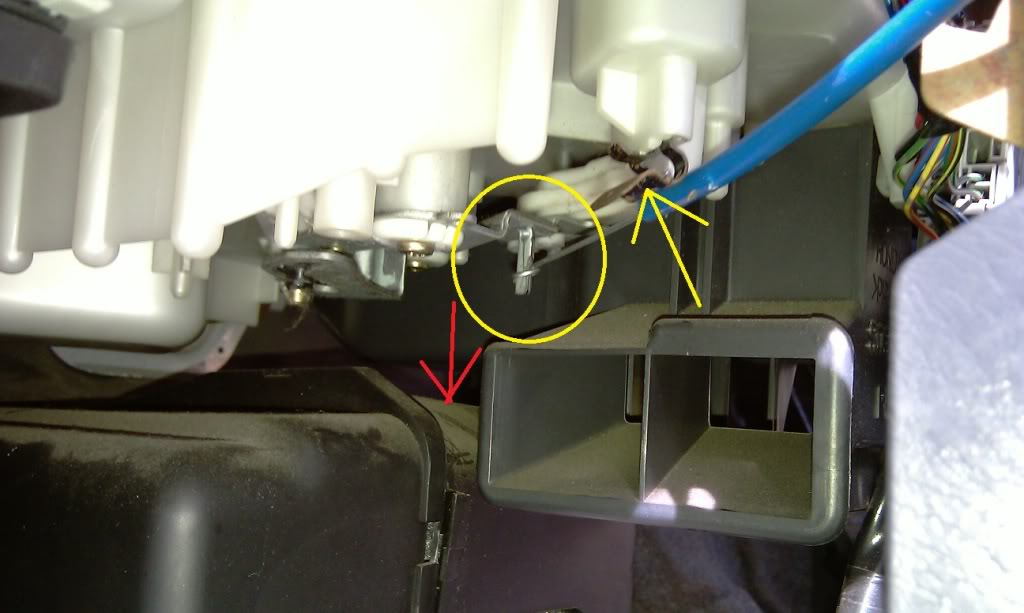
Figure 3. Release A/C cable control. 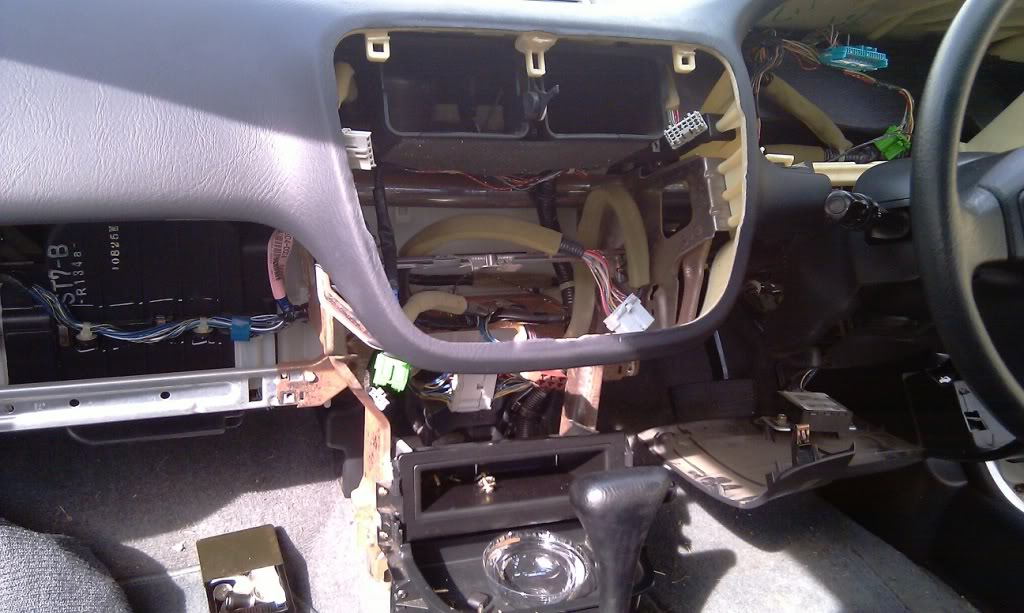
Figure 4. Remove head unit with climate control.
Step 4 – Modify the climate control lighting
With the original climate control unit out, you can now take it apart to install the LED bulbs.
- Use the flat head screwdriver to pry the defogger, air recirculation, and A/C buttons off. They will be installed into the new unit.
- Remove the five screws that surround the unit.
- Loosen and remove the plastic white casing.
- Unplug the connectors connecting the circuit board to the unit (red arrows in Figure 6).
- Remove the circuit board, and wire in the seven 3mm LED bulbs.
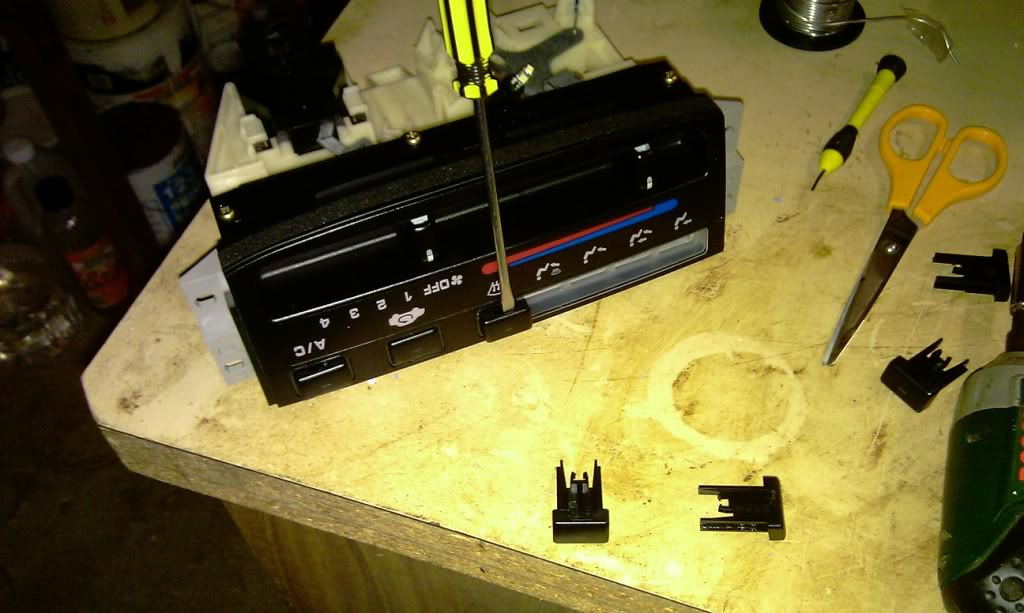
Figure 5. Pry of the climate control buttons. 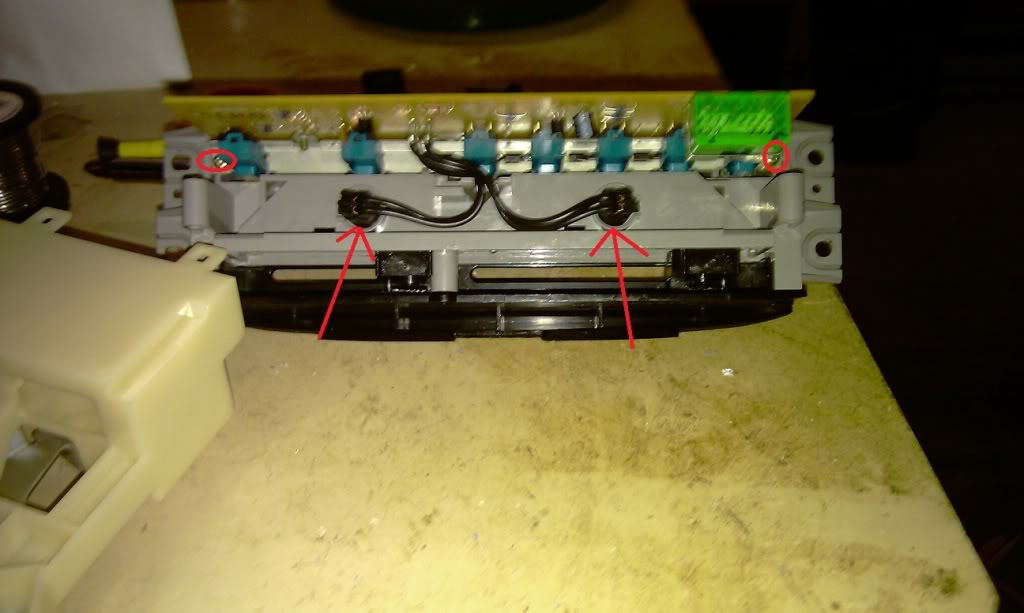
Figure 6. Unplug, unscrew, and disconnect the circuit board. 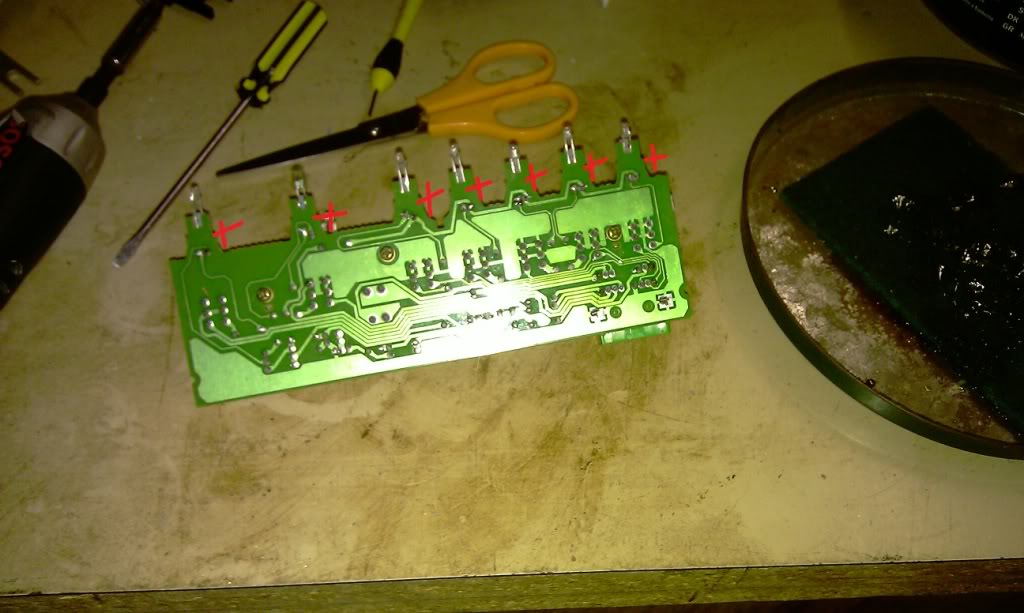
Figure 7. Install seven 3mm LED bulbs with the positive ends (red crosses) on the right side.
Step 5 – Install the LEDs into the switches
The three buttons that were removed in the previous step can now be upgraded to LED lighting.
- Turn the new climate control unit over with the bottom side facing up.
- Insert and solder the two T5 wedge LED bulbs into the slot holders of the new unit. Be sure to connect the positive and negative ends of the wire resistors to their correct positions.
- Snap the factory buttons onto the new unit.
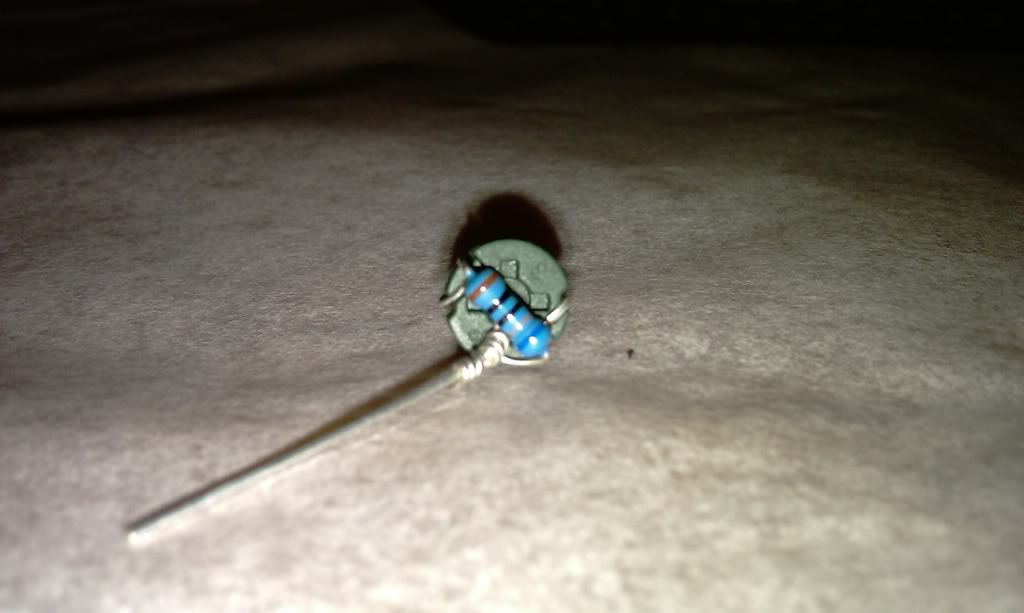
Figure 8. A new T5 wedge LED bulb. 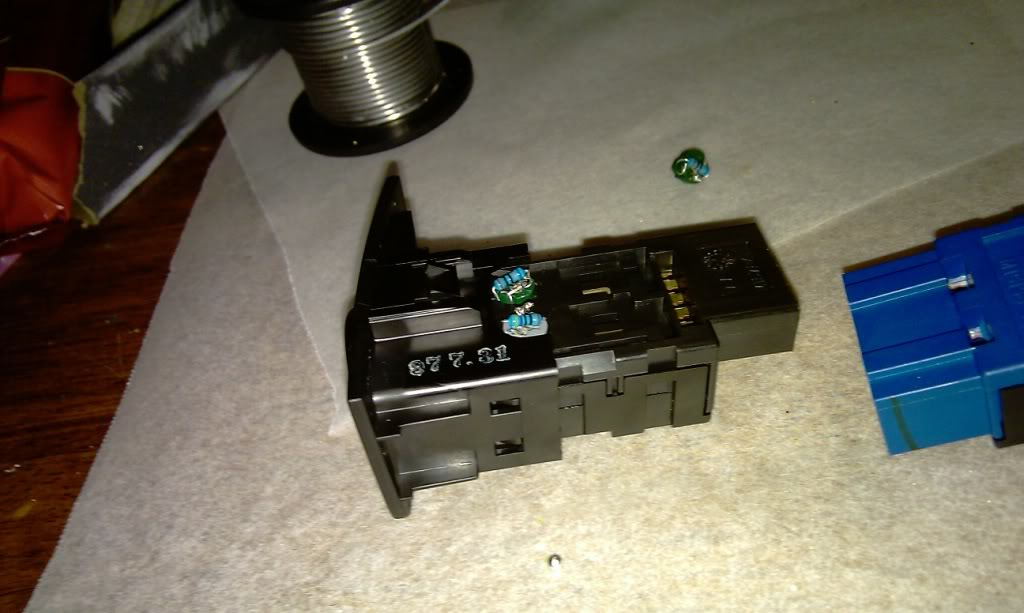
Figure 9. Install new T5 wedge LED bulbs into the new unit.
Pro Tip
If the lights don't illuminate when you test the switches, turn the modified bulb holder 180 degrees because they are polarized.
Step 6 – Re-install the head unit and panels
Install the new climate control and head unit in reverse order of removal.
- Attach the circuit board.
- Reconnect the A/C cable control wire.
- Plug in the climate control harness.
- Screw on the factory head unit, and snap the panels back on.
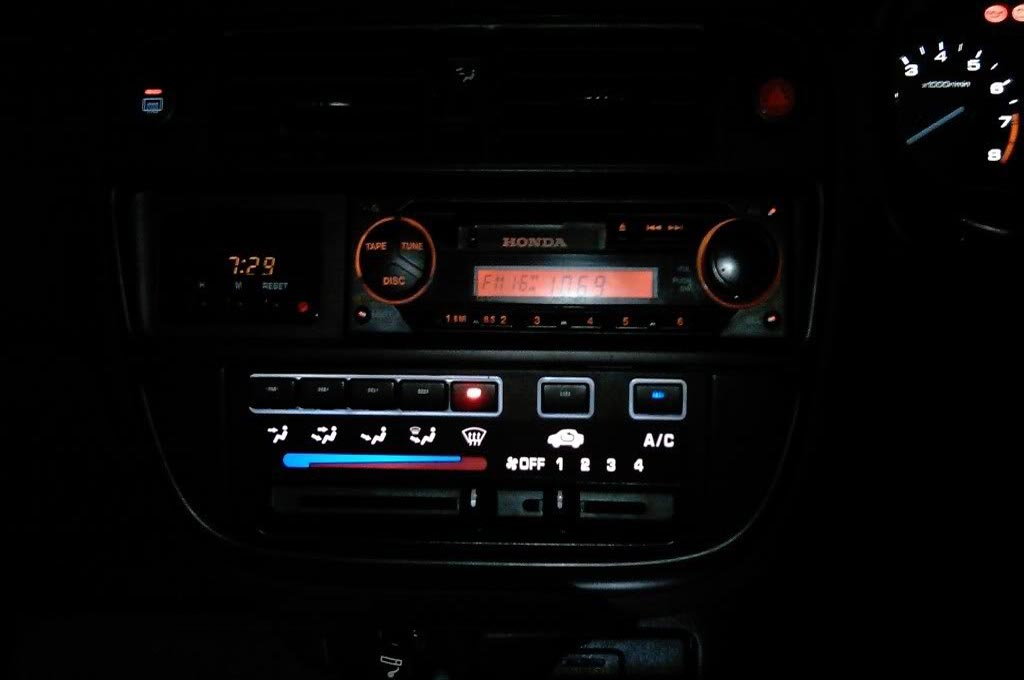
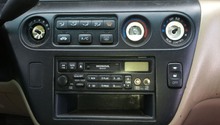
Figure 10. Old factory climate control unit. 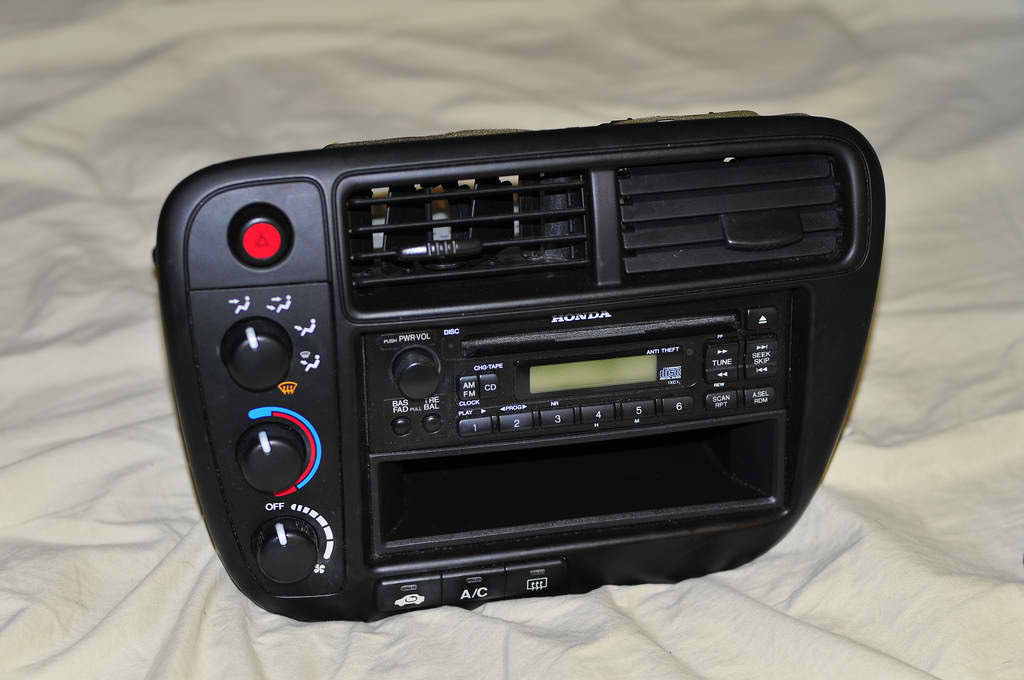
Figure 11. New climate control unit ready to be installed.
Related Discussion and Videos
- Swapping from Manual to Electric Climate Control - Honda-tech.com
- Defroster and Hazard Switch Removal - YouTube.com
- Head Unit Removal - YouTube.com