Honda Civic: Why is My Transmission Leaking?
An oil leak on the transmission is a big problem. Not only does it cause unsightly spills, but it also affects lubrication inside the powertrain's moving components. Make sure your Honda Civic is free of transmission leaks with the options below.
This article applies to the Honda Civic (1992-2000).
Nothing is worse than walking to your Civic only to find a huge puddle of oil under your car. An oil leak is a messy and dangerous situation for your car because it can cause the oil pressure inside of the engine to drop and starve it of oil. Internal components can wear, grind, and eventually break. Luckily, the transmission does not have too many seals, so narrowing down the leak is not as difficult as finding one in an engine. The downside, however, it that each seal connected to the transmission may be difficult to replace. Read on to learn how to locate three of the most common causes of transmission oil leaks.
Materials Needed
- Hydraulic jack and jack stands
- Ratchet, extension, and metric socket set
- Breaker bar
- Shop rags
- Oil pan
- Flat head and Phillips screwdrivers
- Pliers
- Flashlight
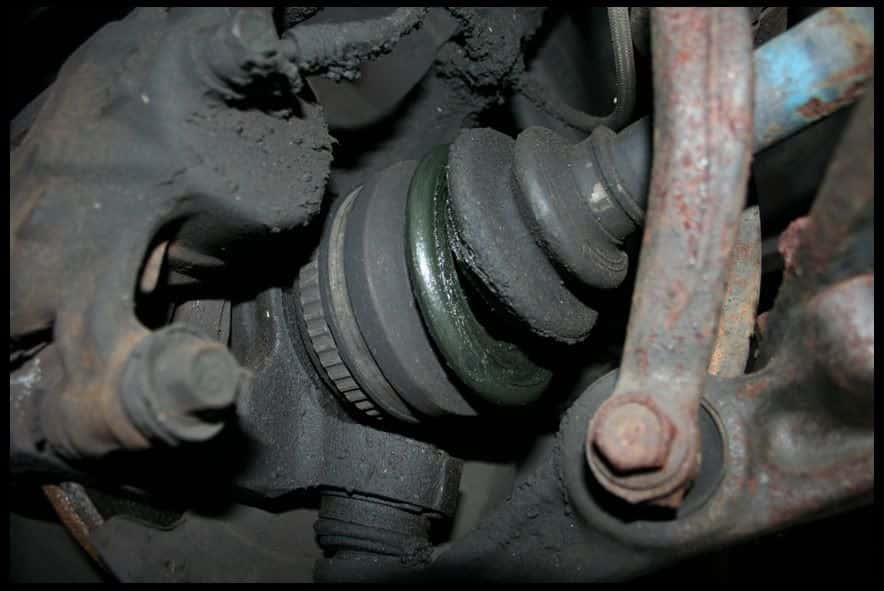
Step 1 – Check the axles/CV joints and CV boots
These drivetrain components may be leaking grease.
The axles and CV joints are components of the drivetrain that allow engine torque to be transmitted to the wheels. The CV boots house the gears that allow the joints to turn. They also contain a lot of grease, so each bearing has enough lubrication to spin freely and smoothly. When the boot tears, the grease will leak out and eventually cause the joints to fail. To diagnose:
- Shine a flashlight on the font axles.
- Focus on each boot, and look for any tears or leaks.
- Wipe a rag over the boot, and squeeze to check if any grease leaks out.
- If a leak is found, the axle assembly will need to be replaced.
The best option (if you see a leak) is to replace the entire axle. If the axle is not clicking or showing signs of excessive wear, a new CV boot can be repacked with grease and installed on the shaft. However, with replacing the boots alone, you risk damaging the axle or letting unchecked damage go.
If there are no leaks around the axle assembly, move on to the following step.
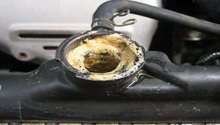
Step 2 – Check the transmission axle shaft seal
Also known as the output shaft seal, this component is the most common source of the leak.
The axle shaft seal is located between the axle and transmission. Here are the steps to diagnose:
- Raise the vehicle, and set it down on jack stands.
- Shine a flashlight through the chassis to where the axle shaft meets the transmission.
- Use a shop rag to wipe it, and inspect for any leaks.
If the axle shaft seal is worn and leaking, the axle must be completely removed from the transmission housing and the seal replaced. Make sure the seal sits flush with the outer surface of the differential, and only use OEM seals to ensure it doesn't leak again.

If there is no leak in the output shaft seal, move on to the following step.
(Related Article: Why Are My Axle Seals Leaking? - Honda-Tech.com)
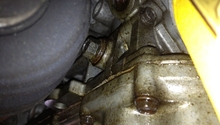
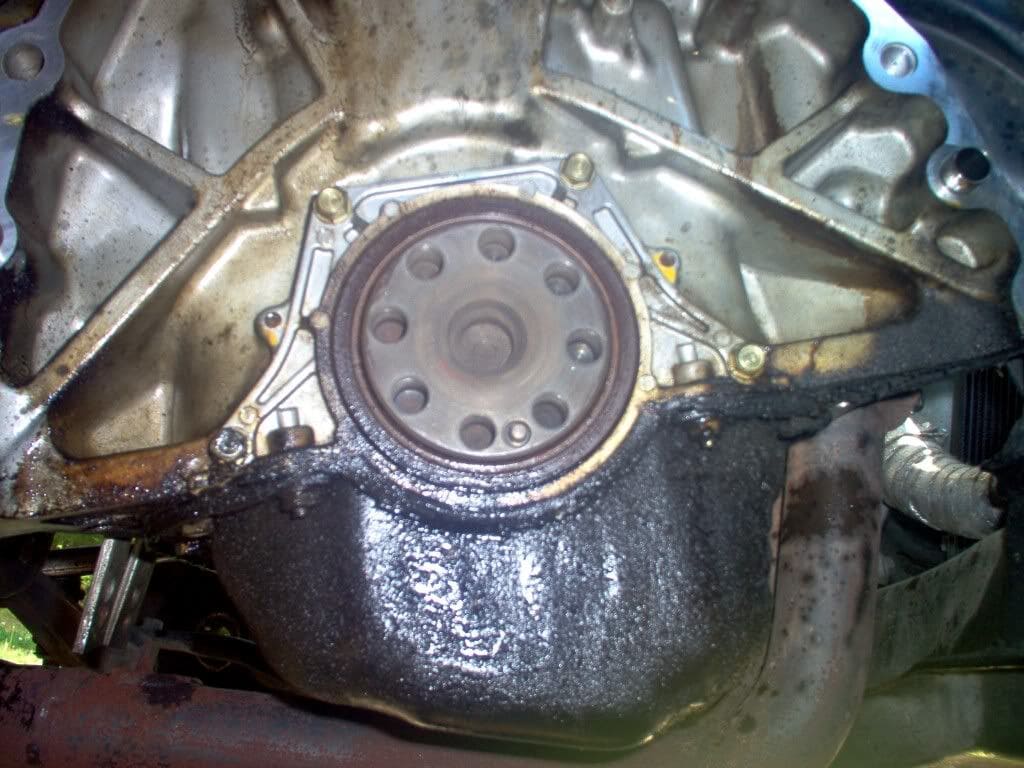
Step 3 – Check the rear main seal
The seal between the transmission and engine (the rear main seal) may be leaking.
This component seals the mating surface between the crankshaft and the transmission. Unfortunately, this seal wears out as cars age. To diagnose:
- Raise the car and set it down on jack stands.
- Shine a flashlight under the engine. You should see a leak in the seal between the engine and transmission.
- Also, check if the VSS or any other components around the housing are doused in oil. When oil is leaking from the rear main seal, it may make contact with the flywheel and splatter throughout the engine bay.
Replacing the rear main seal is cost prohibitive, and requires the removal of the transmission for the seal to be replaced. This job requires draining the oil and coolant by removing the starter, disconnecting the shift linkage, and disassembling several other components. Additionally, the oil pan gasket will have to be replaced. When the seal is being installed, it must be properly lubricated and should sit flush against the flywheel; otherwise, the mating area may still leak. It is common for this procedure to take up to ten hours, and shops generally charge upwards of thousands of dollars for labor. However, if you can manage the repair, a gasket set generally costs less then twenty dollars.
(Related Article: How to Replace Rear Main Seal - Honda-Tech.com)
Featured Video: Why is My Transmission Leaking?
Related Discussions
- [FAQ] How-To: Change Rear Main Seal and Oil Pan Gasket - Honda-Tech.com
- CV Boot Tore - Need Some Help with Identifying Parts - Honda-Tech.com
- I Just Replaced Axle Seals so Why is It Still Leaking?- Honda-Tech.com