Honda Civic: Why is My Temperature Gauge Not Working Correctly?
There are only a handful of parts that can cause a faulty temperature. Figure out which one is malfunctioning with this guide.
This article applies to the Honda Civic, Del Sol (1992-2000).
Most of the time drivers rarely even glance at the temperature gauge. If something goes wrong and your car does overheat, that gauge can warn you of impending doom and save thousands of dollars in the process. So if the temperature gauge is completely broken or not functioning properly, it goes without saying that fixing it should be a priority.

Materials Needed
- Voltmeter
- Flat head screwdriver
- Phillip's head screwdriver
Step 1 – Check your thermostat
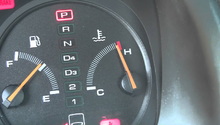
One common cause of a temperature gauge that malfunctions is the thermostat. Sometimes the thermostat gets stuck open, which can cause the temperature gauge to "warm up" slowly, never move back down to operating temperature range, or fluctuate randomly. If the thermostat is not stuck open, it may simply need to be replaced. If your thermostat is fine, move on to Step 2.

Step 2 – Check the voltage to the temperature gauge
There are a few wires from the temperature sending unit that should be checked. First, check the grounding cable from the gauge to the center console. Follow the black wire from the temperature gauge to the grounding point. The contact point might be corrded which can cause the temperature gauge to behave erratically.
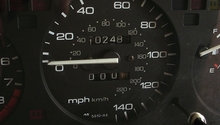
If the speedometer and tachometer are functioning properly, that leaves three other options. Either the gauge itself is toast, the Engine Coolant Temperature Sending unit itself is toast, or the wiring between the two are toast.
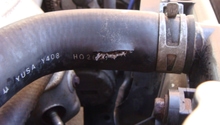
Follow the wiring from the engine back to the temperature gauge. Look for damage from heat (melted plastic) or rubbing specifically. If there aren't any clear wiring issues, test the wiring coming from the ECT sending unit (see Figure 3) with a multimeter. A warmed up engine should provide a resistance of about 38 ohms. If there's no reading car is turned on, but a reading when the car is turned off, the gauge is likely the culprit.
Pro Tip
A sender installed using Teflon tape or pipe sealant will be badly grounded. Be sure to use proper liquid gasket when installing a new sender.

Figure 2. Use a digital voltmeter to check resistance at the temperature gauge, and compare it to factory specs. 
Figure 3. The ECT Sending Unit (top) sends the signal to your gauges.
Featured Video: How to Test a Temperature Sensor, Sending Unit and Temperature Gauge
Related Discussion
- Temp Gauge Tops Out, Not Overheating - Honda-Tech.com