Honda Civic: How to Repair a Squeaky Clutch
Over time, you may start hearing a squeaking sound when you press the clutch. There are two simple ways of addressing and resolving this noise, and here's what you need to do.
This article applies to the Honda Civic (1992-2000).
If pressing down on the clutch causes a squeak, you may need to lubricate the clutch pedal itself or lubricate the slave cylinder in the engine bay. Usually, the sound is caused when the lubricant already there dries out, which causes metal to rub against metal and produce the squeaking sound you hear. You can use the same type of high-temperature lithium grease in both situations. Some Civic owners simply lubricate both the clutch and the slave cylinder when they start to hear a squeak. Both projects take next to no time, and this way you know for sure that you've addressed the underlying reason why your clutch squeaks when you press it.

Materials Needed
- High-temperature lithium grease
- 12mm socket and ratchet
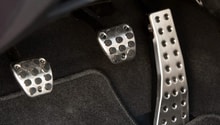
Step 1 – Lift up mat and carpeting on driver's side
Remove driver's side mat and pull up carpeting.
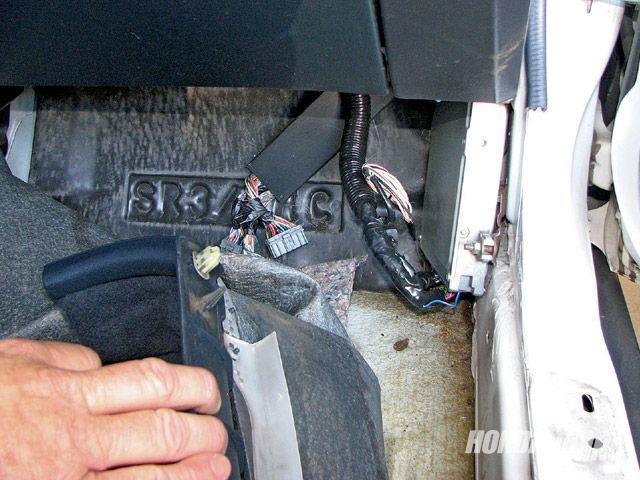
Step 2 – Locate cylinder
Locate the cylinder connected to the clutch. This is above your clutch at the pedal assembly. Look for where the clutch connects to a cylinder in the firewall.
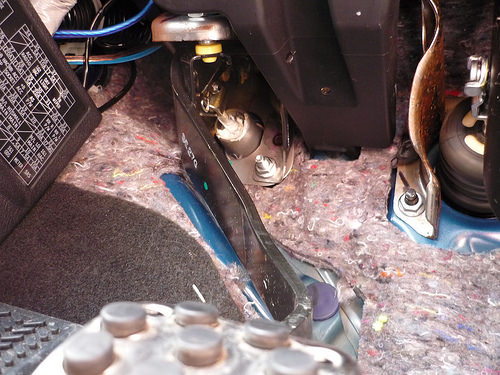
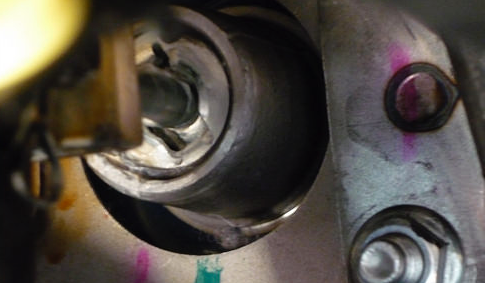
Step 3 – Grease hole on cylinder
Locate a tiny hole. It is on the face of the cylinder. Some Honda owners find getting to the hole easier if they press clutch a little. Insert tip of lithium grease into hole and squeeze. Pump the clutch by hand about 20 times. Insert tip of lithium grease back into hole and squeeze. Pump the clutch by hand about 20 times.
Pro Tip
Pump too hard and you may cause lithium grease to come out of hole and drip on your car.
Step 4 – Replace carpet and driver's side mat
Push carpet back into place and put driver's side mat down.
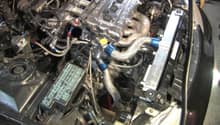
Step 5 – Locate slave cylinder
Lift hood and lock into place. Locate the slave cylinder. You will see a pair of 12mm bolts securing it to the clutch housing and a boot cover.
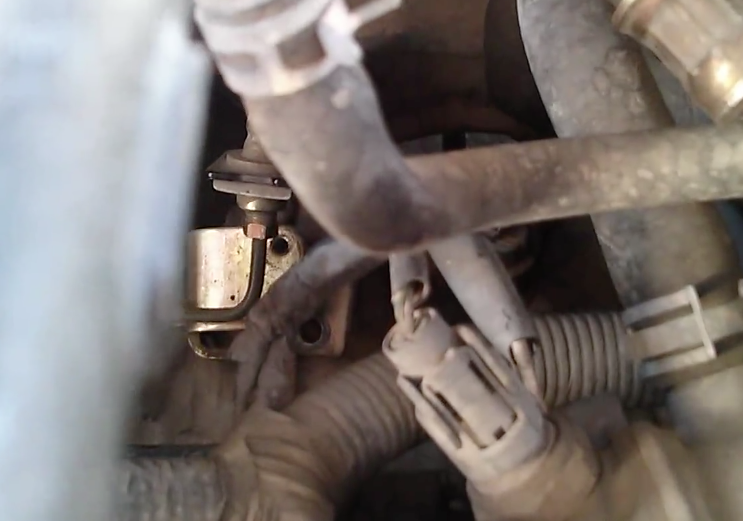
Step 6 – Remove slave cylinder
Remove slave cylinder by removing two 12mm bolts. Remove boot cover as well. Once you remove the bolts and the boot cover, the slave cylinder will dangle, letting you more easily access it.
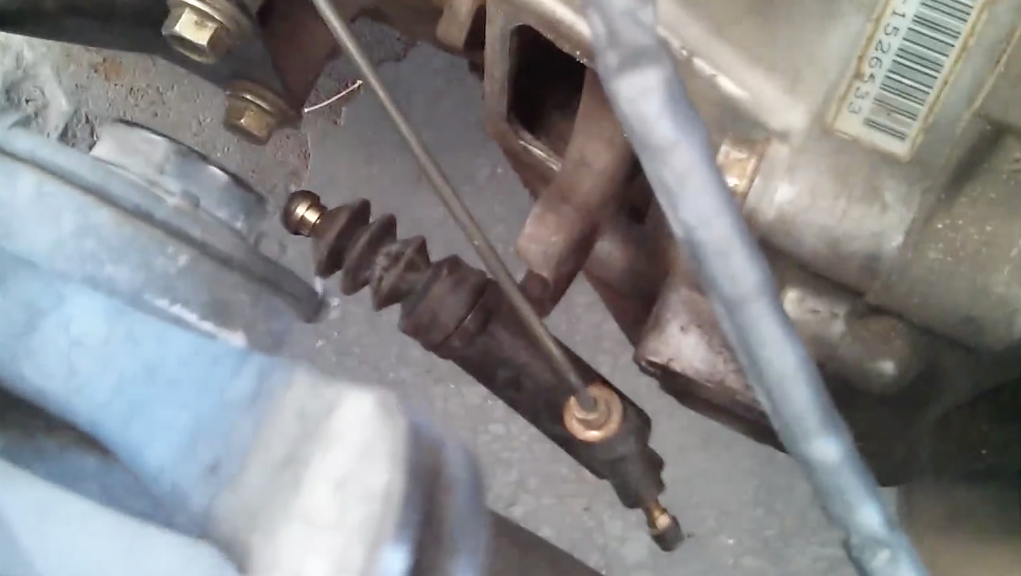
Step 7 – Lubricate slave cylinder
Apply grease in hole where the ball touches the slave cylinder and also on the ball itself. Use one bead of high-temperature grease.

Step 8 – Reattach slave cylinder
Insert slave cylinder back into clutch. Use 12mm socket and ratchet to reattach the two 12mm bolts, and replace the boot cover. Press clutch to make sure you no longer hear a squeak. If you do, redo Steps 6 and 7 until you no longer hear a squeak. Close the hood when finished.
Featured Video: How to Fix a Squeaky Clutch in a Civic
Related Discussions and Video
- DIY: Fix Squeaky Clutch - Honda-Tech.com
- Squeaky Clutch - Honda-Tech.com
- 2007 Honda Civic SI Squeaky Clutch - Youtube.com