Honda Civic: How to Install/Hard-Wire Radar Detector
A radar detector warns you of any hiding police officers just waiting to give you a speeding ticket. However, with a wire blatantly hanging from the windshield, you may not be very inconspicuous when it comes to evading law enforcement. Learn how to properly install a radar detector on your Honda Civic, so no one from outside will suspect anything.
This article applies to the Honda Civic (1992-2000).
Although radar detectors do the job they are designed for, they can be quite a distraction when mounted right out of the box. Most will use the accessory outlet as the power source for the radar detector, but this also means there will be a few feet of wire hanging in the middle of the windshield. To get rid of this obstruction, you will have to hard-wire the radar detector into the the car's ignition circuit. The process is relatively simple and inexpensive. Plus, it will take under an hour to complete. This article quickly explains how to safely hard-wire a radar detector in your Honda Civic.

Materials Needed
- Radar detector hard-wiring kit
- Flat head screwdriver
- Wire-tap connectors
- Pliers
- 10mm socket and ratchet
Step 1 – Locate the 12 volt ignition wire
- Disconnect the negative terminal (black cover) from the battery.
- Remove the driver's side kick panel.
- Within the bundle of wire harnesses (under the driver's side dash), locate a yellow 12 volt ignition wire. You should find the yellow 12 volt ignition wire attached to a thin, white plug.
- The radar detector will be attached to this 12 volt ignition wire, so it will turn on when the ignition is started.

Step 2 – Clamp the 12 volt wire
- Place the yellow 12 volt wire inside a wire-tap connector, but do not clamp it yet.
- Place the red wire of the radar detector's power adapter inside the wire-tap connector.
- Then, clamp the wire-tap connector with your pliers. Both wires should now be connected.

Step 3 – Install the ground wire
- Determine which bolt will be connected to the ground wire; anywhere near the fuse box will do.
- Loosen the bolt with a 10mm socket and ratchet.
- Connect the ground wire (black) of the power adapter to the bolt, and tighten the bolt to a snug fit.
- Hide and securely mount the power adapter to somewhere behind the kick panel.

Step 4 – Connect and hide the power wire
- Use a flat head screwdriver to carefully pry off the driver's side interior A-pillar trim.
- Plug in the black power wire harness to the power adapter.
- Route the opposite end of the power wire harness through the A-pillar and to the radar detector, which you can mount behind the rear view mirror.
- Re-install the trim, and reattach the kick panel to hide the power adapter as well as the wire harnesses.

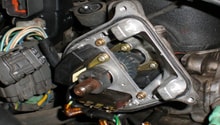
Figure 4. Route power wire harness through the dash. 
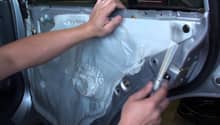
Figure 5. Remove the interior A-pillar trim.
Step 5 – Test the radar detector
- Reconnect the negative (black) terminal of the battery.
- Turn on the ignition to confirm that the radar detector is working properly.

Related Discussion
- Radar Detector Hard-Wire - Honda-Tech.com