Honda Accord: Why are My Air Vents Stuck?
Before throwing in the towel and calling your mechanic, take a look at what can cause your air vents to get stuck.
This article applies to the Honda Accord (1990-2002).
Stuck air vents tend to indicate a problem with your mode control motor. The problem can be as simple as a blown fuse, or you may need to replace it. Replacing it is not difficult at all. If the problem is that your air/heat works intermittently—in other words, it works when on one mode, but not in another mode—then replacing the blower motor resistor may resolve the issue. Before trying to resolve the issue, run a self-diagnostic test. It should tell you where the problem is.

Materials Needed
- Number 8 fuse
- Lubricant
- New mode control motor
- Phillips screwdriver
Step 1 – Run the self-diagnostic function
Running a self-diagnosis can help identify the problem.
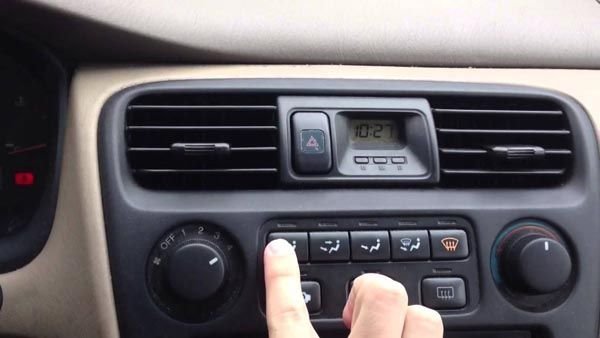
- To diagnose the problem, press the MODE (VENT/FLOOR) button several times. The LED should flash on and off as you press the button.
- Turn the ignition and the fan switch to the "OFF" position.
- Set the temperature control dial on Max Cool. Push the mode control button and select Vent.
- Turn on the ignition.
- Press and hold the recirculation control button.
- While holding the button down, press the rear window defogger button five times within 10 seconds. The recirculation indicator should blink twice, and then the self-diagnostic will begin.
- After the self-diagnostic is complete, the recirculation indicator will flash to indicate the problem. If the light flashes between one and six times, there is a problem in the system. If it flashes seven or eight times, it signals a problem with the evaporator temperature sensor circuit. If the light doesn't flash, then the self-diagnostic test didn't turn up any problems.
Step 2 – Check mode control motor fuse
When only air comes out of face vents, there may be a problem with the mode control motor. Before replacing the mode control motor, make sure the problem isn't a blown fuse. A blown fuse will prevent the motor from working, which means the doors that control air direction won’t move. Open the fuse panel on the driver’s side. The fuse for the mode control motor is the number 8 fuse. The fuse is a 7.5 amp fuse. Replace the fuse and check if this resolves the problem. If not, move on to the next step.

Step 3 – Replace mode control motor
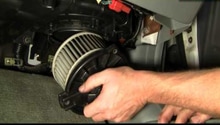
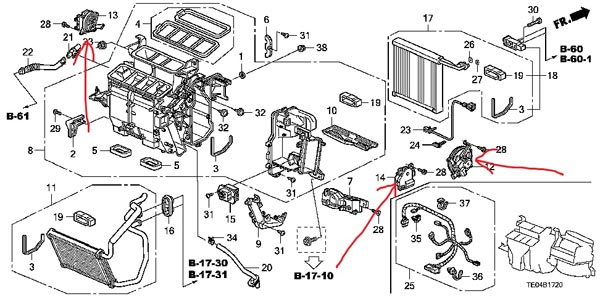
- Locate the mode control motor. The mode control motor changes how air travels through the system, depending on which mode you've selected. It is on the driver’s side under the instrument panel, and on the left of the heater case. The blower motor is on the right of the heater case. The mode control motor should be parallel to the left fender.
- There are seven wires going into the mode control motor. The motor gets voltage on one of the wires whenever the key is in the "II" position. One wire will also be grounded. Another wire will be grounded depending on the mode selected on the dashboard.
- Disconnect the mode control motor, and install new mode control motor.
- Turn on ignition to check if this solved the problem.
Step 4 – Manually adjust slide levels
The motor has problems turning dry slide levers, and sometimes can't turn them at all. Turning the levers by hand and lubricating the slides can help resolve the problem. To access the slide levers, push driver's side seat as far back as you can. The slide levers are located underneath the dashboard in the center.
Step 5 – Replace blower motor resistor
There may be a problem with your blower motor resistor if your fan works on one speed, but not on another. For example, the fan works in position two and not in position three, but then does in position four. Expect to pay between $12 and $30 for a new blower motor resistor.
- Locate the blower motor resistor. It is underneath the glove box. You will see a brown plug and several blue connections coming out of it. Push on the tab, and pull plug out of the resistor.
- Use a Phillips screwdriver to unscrew the two mounting screws. The resistor should fall right out.
- Replace the old resistor with a new one, re-mount and plug back in the connections.
- Turn the ignition to the "ON" position, and rotate through your different fan speeds.

Featured Video: How to Install Blower Motor Fan
Related Discussions
- Heat/Air Stuck on Vents Only - Honda-Tech.com
- No Air Coming Out of 1996 Accord Defrost Vents - Honda-Tech.com