Honda Accord: How to Replace TPS
If you are having rough idling or acceleration and deceleration problems, your TPS may need to be replaced. Continue reading to learn how to replace the TPS on your Accord in less than an hour.
This article applies to the Honda Accord (1990-2002).
The throttle position sensor (TPS) on your Accord controls many aspects of the car's engine performance. Symptoms of a bad TPS include rough idling, bouncing RPMs upon deceleration, or a lurch/lag response upon acceleration. Unfortunately, many folks are lead to believe that bad gas or clogged injectors are to blame, only to find that the problem still exists after fixing those "causes." If your Accord is showing those signs, an easy way to test your TPS is to use a voltmeter to read the output when the throttle is pressed and released. The TPS should show .5 volts with no throttle and 4.5 with the throttle wide open. If your voltmeter is not reading the right output, then it is very likely you need to replace the TPS. This is an extremely easy task that any novice with mechanical skills can do in their own garage, and within a matter of minutes. Doing this yourself is not only easy, but it will save you a lot of money from having a professional do the job.

Materials Needed
- Ratchet with 5 mm socket
- Two 5 mm bolt (16 mm in length) with washers and nuts
- Hacksaw or Dremel tool
- Flat head or slotted screw driver
- Eye protection
Step 1 – Disconnect the battery and TPS
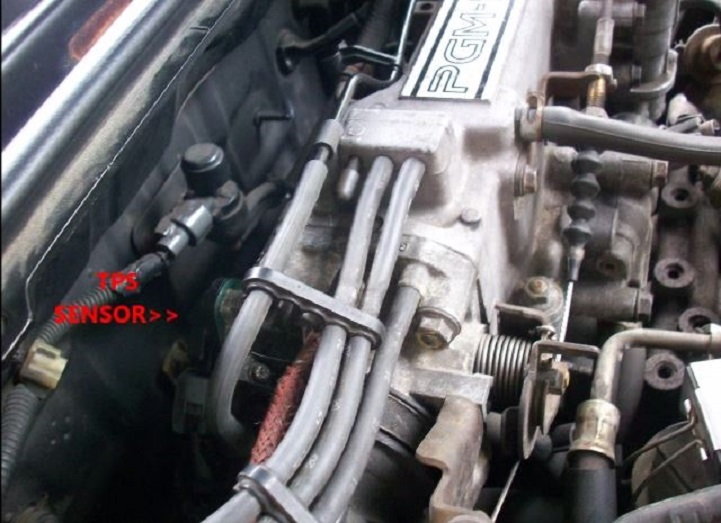
First, disconnect the negative battery terminal (black cover). Then, locate the TPS. The TPS is mounted to the throttle body, which is on the rear side of the engine and close to the firewall. Disconnect the electrical connectors of the TPS. These lead to the throttle body and intake tube.
Step 2 – Remove TPS from the throttle body
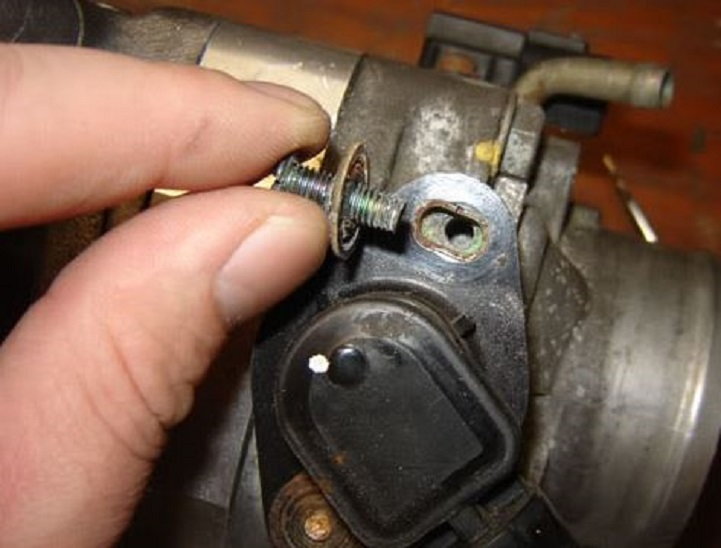
The TPS is mounted to the throttle body by two threaded rivets, which were not designed to be removed. Use your hacksaw or Dremel tool with the grinding wheel to cut a long deep slot into each rivet head. With the flat head screwdriver, remove the rivets by rotating counterclockwise. The TPS should come right out.

Figure 2. Cut a slot in the rivet with a hacksaw or Dremel tool. 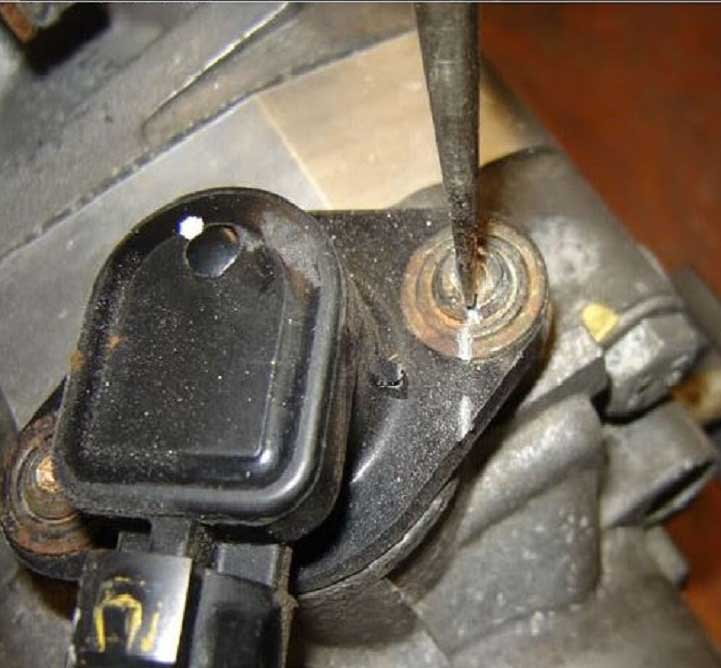
Figure 3. Remove the rivet with a flat head screwdriver.
Pro Tips
- Be sure to wear eye protection when grinding slots in the metal rivets.
- In some model Accords, the TPS is bolted on and easier take off. Simply use the ratchet with a 5 mm socket to remove the TPS.
Step 3 – Install the new TPS
Position your new TPS sensor on the throttle body. Thread each 5 mm bolt (16 mm in length) into the slots that secure the TPS. Use a locking washer and nut on the opposite end of the bolts to fasten. Do not completely tighten the bolts as the TPS must be rotated to calibrate the voltage correctly.
Step 4 – Calibrate the new throttle position sensor
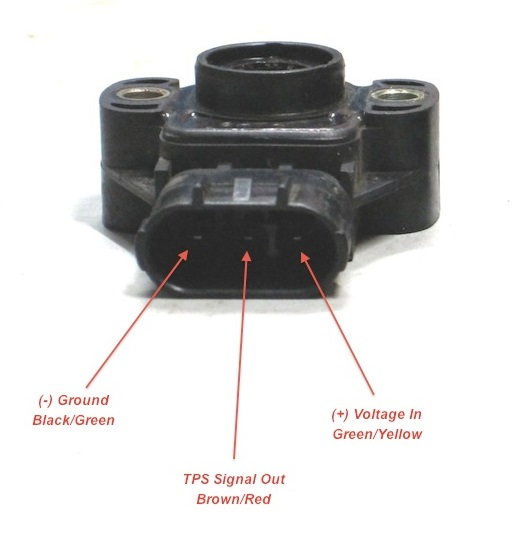
The correct voltage of the new TPS is .5 volts with no throttle and 4.5 volts with the throttle wide open. The Brown/Red wire (center wire) from the connector is what sends the voltage to the D11 position of the Engine Control Unit (ECU), telling it if the throttle is open or closed. This wire connects to the center pin of the TPS. Ground one lead of your voltmeter to the frame of the chassis, and test the other lead on the center pin of the TPS connector. Rotate the TPS until you get a reading of .5 volts at idle and 4.5 volts with a wide open throttle. Once you have received the correct voltage, tighten the bolts of the TPS to a snug fit.
Featured Video: Honda Accord TPS Sensor Removal
Related Discussion and Site
- Accord TPS Removal - Honda-Tech.com
- Wiring and Calibration Instructions - HondaSwap.com