Honda Civic: How to Wire Your Horn to a New Steering Wheel
If someone doesn't see you coming, the horn lets them know where you are. Check out this step-by-step guide and learn how to get it wired up properly.
This article applies to the Honda Civic (1992-2000).
Sometimes, car enthusiasts get so caught up in installing big upgrades that they forget about important little details. One of the most common is making sure the horn continues to work properly after installing an aftermarket steering wheel. While this may not be a big deal to some, a car horn can be more than just a way to let the person who cut you off know what you think about his/her antics. It is really intended as a safety device. It is a way to get someone's attention before something ugly happens. But how exactly do you wire up an aftermarket wheel to ensure the horn continues to work? Keep reading. This guide will show you how it's done.

Materails Needed
- Philips screwdriver
- 10 mm socket with extension
- Speaker wire
- Male or female connectors
- Small strip of metal
- Multimeter
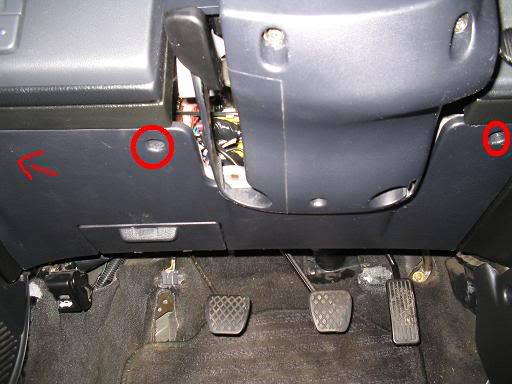
Step 1 – Remove kick panel and metal brace under dash
First, disconnect your battery by disconnecting the negative (black) terminal. To gain access to your horn's wiring, you'll need to remove the kick panel and metal brace, which are located under your steering wheel. Remove the three screws in the kick panel and pull it out. Then, you will need to lay down on the floorboard and look up to see the metal brace. It is held in place by two 10 mm bolts. Remove them and set the brace aside.
Step 2 – Locate the horn wiring
The horn wire will be where the cable reel is connected to the wire loom. To locate the horn wire, you will need to use the multimeter and search for the one that is still hot, even with the battery disconnected. On a 1994 Civic, there are five wires on the loom, and the horn wire is located to the far left.

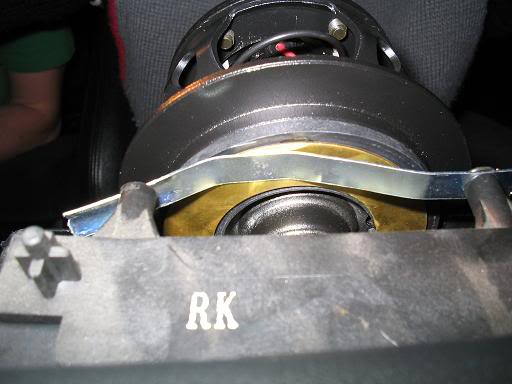
Step 3 – Bridge the gap for the horn
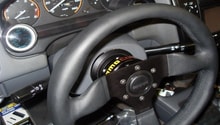
Once you've found the horn wire, connect a male or female connector to the end of it. Remove the top piece of your steering wheel. Place a thin piece of metal over the hole where the cable reel was connected, and put a screw through the hole to hold it in place. Make sure the metal strip is touching the brass ring on the back side of the hub.
Step 4 – Connect the horn wire
Tuck a piece of speaker wire under the screw you used to hold the metal piece in place, so that it is pinched between the two. Ground the wire. Use the male or female connector you wired to the horn wire and hook it up. Now your horn should work! Re-install the metal brace and kick panel, and you're good to go. And to honk to your heart's content.

Related Discussions
- How to Wire Up Your Horn to an Aftermarket Wheel - Honda-Tech.com
- Honda Civic Horn Wires - Honda-Tech.com
- Honda Civic Horn Not Working - Honda-Tech.com