Honda Civic: How to Install Rear Intermittent Wiper
Don't let your Civic hatchback's one-setting, one-speed rear wiper slow you down. Follow this DIY guide to retrofit your car with a rear wiper capable of running at multiple intervals and speeds.
This article applies to Honda Civic hatchbacks (1992-2000).
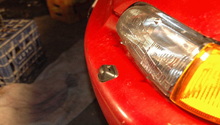
Some 5th and 6th generation Honda Civic hatchbacks have been manufactured with a rear windshield wiper. Though designed to enhance your visibility of the road behind you, the wiper can act more of an annoyance because of its one-setting function. Lo and behold, you can give your rear wiper multiple functions with a little retrofitting. You will need to do some drilling and wiring, but it's not an impossible task. Follow the steps below to upgrade your rear wiper to a whole new level.

Materials Needed
- Phillips screwdriver
- Tiny flat head screwdriver
- Wire snips
- Spot weld cutter or drill bits
- Metric socket set and ratchet
- 10mm bolt
- Electric tape
- Wiring supplies (i.e., bullet connector, wiring crimps, spare wire)
- 1997 Honda CR-V rear intermittent washer/wiper relay
The following instructions assume that your 5th or 6th generation Honda Civic hatchback has windshield wipers already installed. These steps show you how to hardwire intermittent rear wipers.
Step 1 – Disconnect the battery and remove the relay
- Disconnect the negative terminal (black cover) of the battery. This DIY consists of mostly electrical wiring, so it's important that the power is not connected.
- With a Phillips screwdriver, remove seven screws holding up the dash panel under the steering column (under-dash knee bolster).
- Separate the top and bottom cover surrounding the ignition with your hands. Plastic tabs are holding them in place.
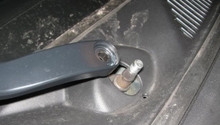
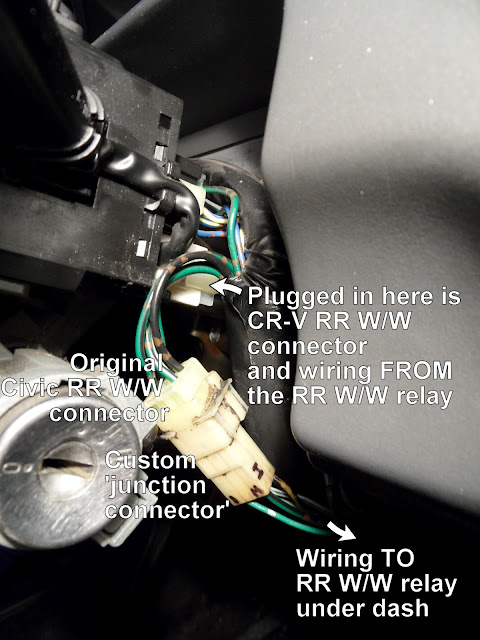
- Remove the connector from the Rear Window Wiper (RR W/W) switch, which is near the ignition.
- The bracket for the RR W/W relay is spot welded to another relay bracket under under the dash.
- Drill out the RR W/W relay bracket using a spot weld cutter. You will mount this bracket and the new relay in its place.
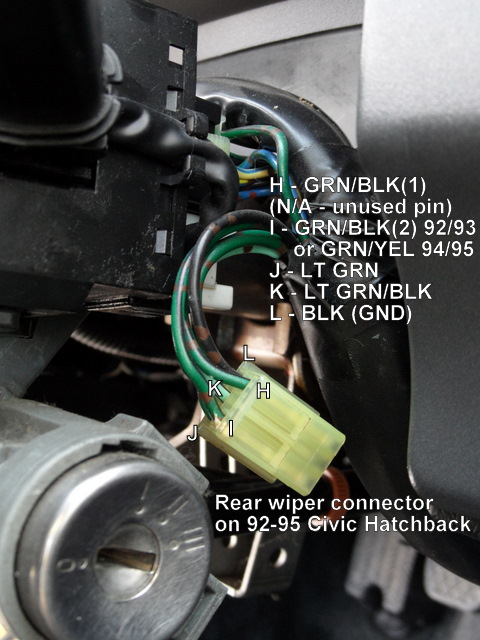
Figure 1. Remove the rear wiper connector. 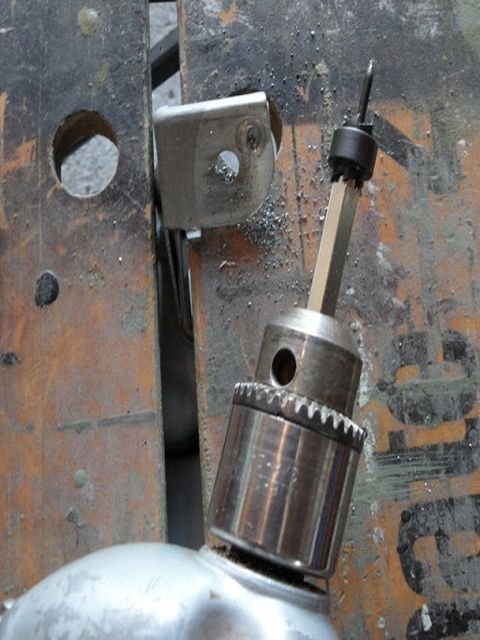
Figure 2. Drill a new hole into the relay's mounting bracket.
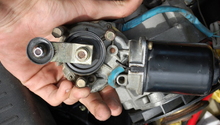
Step 2 – Mount the relay
- With a 10mm bolt, mount the bracket's new Rear Intermittent Window Wiper (RR Int. W/W) relay to the spot weld hole.
- Make sure the distance between the relay and the RR W/W switch is at least 14 inches.
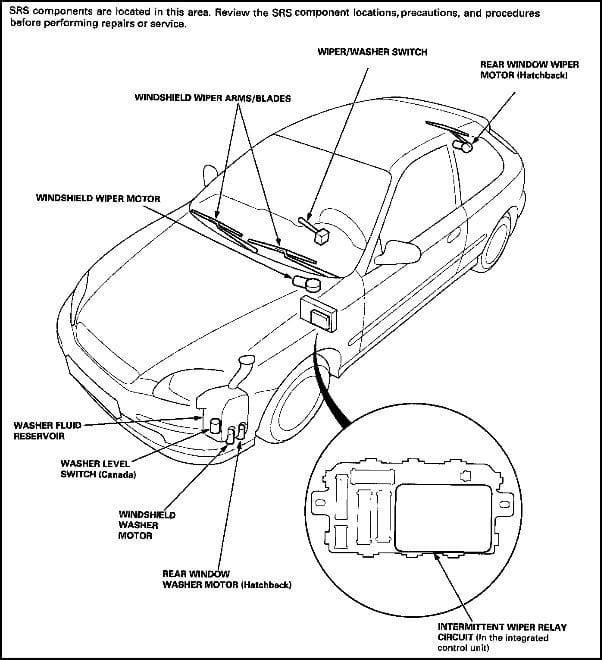
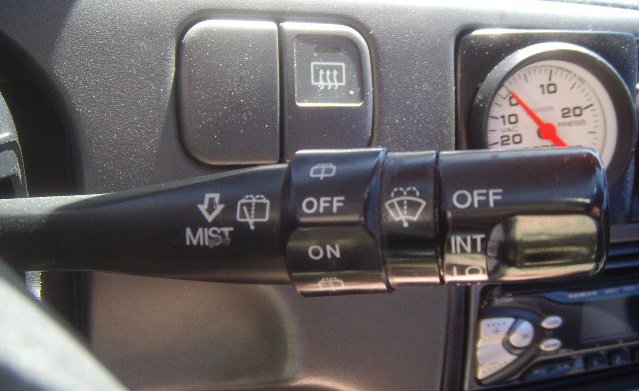
Figure 3. Diagram with location of washer switch and intermittent wiper relay. 
Figure 4. Mount the relay under the dash.
Step 3 – Connect the wires
The wires from the RR W/W junction connector near the ignition must be replaced with new ones to create a proper connection. Refer to Figures 5 and 6 for the correct wiring.
Beginning with the CR-V RR W/W pigtail:
- Connect the "LT GRN/RED" wire to the relay.
- Connect the "GRN" wire to "PIN I" on the RR W/W connector junction and to the relay.
- Connect the "GRN/BLK" wire to "PIN H" on the RR W/W connector junction and to the relay.
Then, with the CR-V RR Int. W/W relay:
- Connect the "LT GRN," "LT GRN/BLK," and "BLK" wires to "PINS J, K and L." Then, connect them on the RR W/W connector junction.
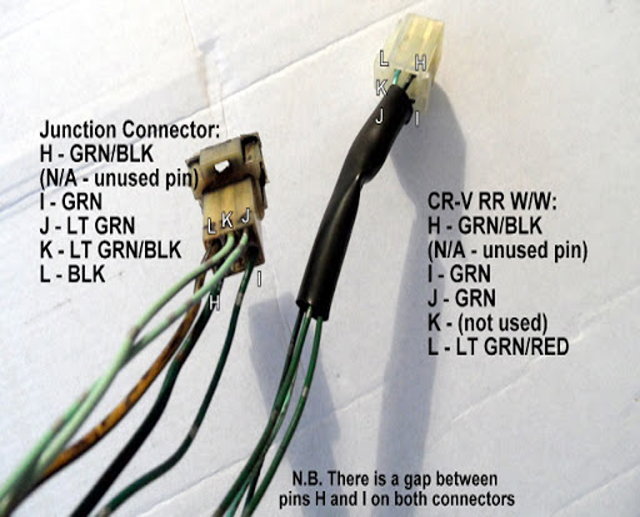
Figure 5. Wiring placement for the junction and switch connectors. 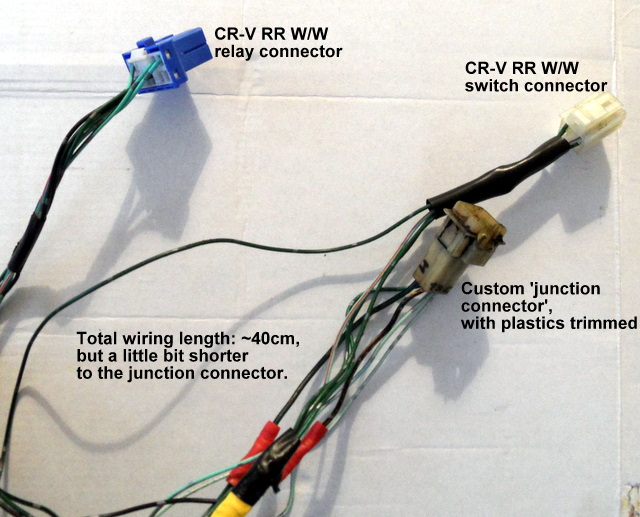
Figure 6. End result of junction and switch connectors.
Step 4 – Attach the patch cable connectors
- Attach the connectors by hand, and simply snap each one into place.
- Wrap the bundles of wires with electrical tape, so the connections do not come loose.
Step 5 – Test the wipers
- Reconnect the negative (black) terminal of the battery.
- Turn on the ignition, and wait a few seconds.
- Flip the RR W/W switch to various settings to confirm that it can run at different times and speeds.
Related Discussions
- Honda Civic Rear Wiper Retrofit - Honda-Tech.com
- Civic Rear Wiper DIY Install - Honda-Tech.com