Honda Civic: How to Flush Radiator and Replace Thermostat
Keep your car running cool with a radiator flush and a new thermostat, which will ensure that the cooling system is running at its best. Continue reading to learn how to flush the radiator and replace the thermostat on your Honda Civic.
This article applies to the Honda Civic (1992-2000).
Coolant does exactly what the name implies, it keeps the engine cool. Overtime, the coolant breaks down and picks up contaminants from your cooling system, so flushing around the 50 to 100k interval can help prolong the life of your motor. By performing a flush versus a drain, you are removing all the old coolant as well as any contaminants that may have settled in the system. The thermostat basically acts as a thermometer for the engine, and it tells it when it's warm, so that it knows when to start pumping the coolant through. Faulty thermostats can cause engine damage because the engine may not get the coolant it needs, which will cause it to overheat.

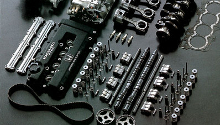
Materials Needed
- Full socket set
- Socket extensions
- Large drain pan
- Funnel
- Screwdriver
- Distilled water
Step 1 – Drain the radiator
Depending on your size and where you are working, you may need to place the car on jack stands to be able to work under it.
- Let the engine cool down completely, hot coolant can and will burn you.
- Locate the drain valve on the underside of the radiator.
- Place your drain pan underneath.
- Slowly open the drain valve until coolant begins to flow steadily.

Pro Tip
Be sure to remove the radiator overflow cap and cap on the radiator (if applicable). This process will take a while, but if you have two drain pans, you can move on to the next step.
(Related Article: How to Jack Up Your Civic - Honda-Tech.com)
Step 2 – Drain the engine block
If you want to do a full flush, this step is necessary. However, many people do partial flushes (removes about 3/4th's of the fluid) due to the huge hassle it is to get to this bolt, and to re-torque it.
- The bolt is located on the engine block close to the oil filter.
- Place your drain pan as best you can underneath.
- Loosen the bolt until fluid begins to flow out. Have shop towels ready as you'll probably get some on you as well.
- Once the fluid is finished draining, re-install the bolt and torque to 58 lb-ft.

Step 3 – Thermostat replacement
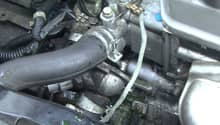
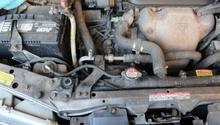
- Locate the thermostat housing. You can do so by following the upper radiator hose to the engine block.
- Position your drain pan as best you can under the hose, so that it can catch any fluid when you disconnect it.
-
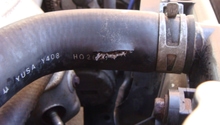
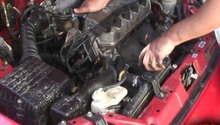
Remove the radiator hose from the thermostat housing. Depending on the type of clamp on it, you may have to push the clamp together to slide it back or use a screwdriver to loosen it.
- Once the hose is disconnected, bend it upwards to keep any remaining fluid in it from running out everywhere.
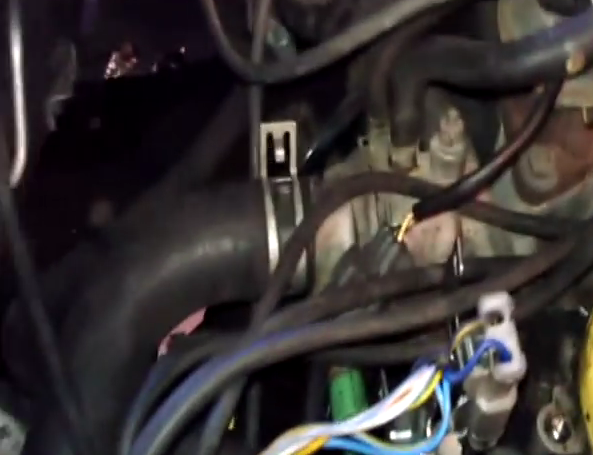
- Disconnect any electrical connections from the thermostat housing.
- Remove the two bolts holding the thermostat housing in place. One is located on top, and the other is on the side coming at a perpendicular angle from the top one. It is recommended leaving the bottom bolt in place because it's the grounding bolt, and it can be hard to get it to make a proper connection after removing it.
-
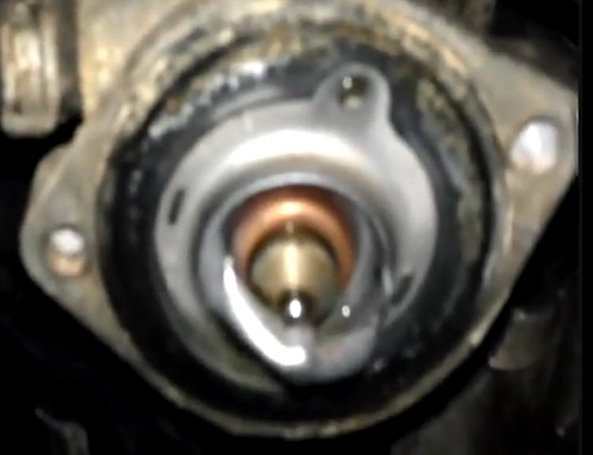
Pry off the thermostat housing to reveal the thermostat.
- You can pull off the old thermostat by hand; however, using a screwdriver to pry it off may be easier. Be prepared for fluid sitting behind the thermostat to come out.
- Install the new gasket onto your new thermostat.
- Position the new thermostat with gasket in place. The gasket will have two little rubber nubs that will line up with the holes to help locate it into place easier.
- With the new thermostat in place, place the thermostat housing back on.
- Re-install the two bolts you removed to hold the housing in place.
- Re-install any electrical connections you removed.
- Re-install the radiator hose by positioning it onto the housing, and then tightening the clamp.
Featured Video: How to Replace Thermostat
Step 4 – Drain reservoir
To drain the reservoir, you'll need to:
- Remove the cap and coolant line.
- Lift the reservoir out of the car, it'll slide out of its bracket relatively easily.
- Drain into your drain pan.
While the reservoir is out, it is recommended cleaning it out to remove any built up contaminants. This can be easily cleaned with a pressure washer, or at least cycling clean water through it several times.
Step 5 – Flush coolant
You've already drained the majority of the old coolant out of the system by disconnecting the thermostat and draining the radiator, so all that's left now is to get the coolant that is settled in low places.
- Make sure the radiator drain valve and the engine block drain valve is on tight if your removed it.
- Fill up the radiator until it is full with distilled water.
- Top of the reservoir with distilled water.
- Re-install the radiator cap and the reservoir cap.
- Set the heat in your car to high, and turn the fan blower on.
- Start the car, and let it idle until warm. You'll know when the engine fans cut off.
- Once warm, let it run for an additional 3 to 5 minutes to allow the water to circulate.
- Turn off the car, and let it start to cool down.
- Place a drain pain under the radiator to drain it again in order to remove as much water and old coolant as possible.
- If the water is still coming out (mainly a coolant color), repeat this process.
While not completely necessary, you can also remove the thermostat again to allow more fluid to drain out.
Featured Video: Honda Civic Coolant Flush
Step 6 – Refill coolant
- Make sure the radiator drain valve and engine block drain valve are on tight.
- With the car cool, fill up the radiator with new coolant.
- Top off the reservoir with new coolant as well.
- With the radiator cap off, start the car. Let it run, so that it can work out any air bubbles. Make sure to keep the coolant in the radiator full. You may have to overflow, so be prepared for that.
- Once the air bubbles are out of the system, replace the radiator cap.
- Make sure the reservoir is still full, and then allow the car to run until warm.
- Allow the car to run for 3 to 5 minutes while warm.
- Turn off the car, and allow it to cool down.
- Top of the reservoir.
Related Discussions
- Coolant Flush and Thermostat Replacement - Honda-Tech.com
- Best Way for Coolant Flush - Honda-Tech.com