Honda Civic: How to Aim Your Headlights
Straightened headlights greatly minimize your risk of a collision at night. Learn how to line up your headlights in less than thirty minutes with these simple steps.
This article applies to the Honda Civic (1992-2000).
Safety on the road is always important, especially in low-light environments or times of low visibility. To avoid a collision and achieve a complete, balanced view of the road, learn the most effective way to properly line up the headlights on your Honda Civic. The process is simple, and you won't need to pay a professional to do it. With only a few simple tools, this DIY guide will show you how.

Materials Needed
- Owner's manual (optional)
- Measuring tape
- Paper and pencil
- Tape
- Phillip's screwdriver
- Level work area with an available wall
Step 1 – Wait for proper lighting and remove objects from vehicle
Wait until it's dark outside in order to see the headlights projecting clearly onto a wall. Remove any objects that do not travel with you on a daily basis, such as heavy machinery or special equipment.
Pro Tip
For a most accurate adjustment, ask a friend to sit in the driver's seat while you work.
Step 2 – Park the vehicle on a leveled surface
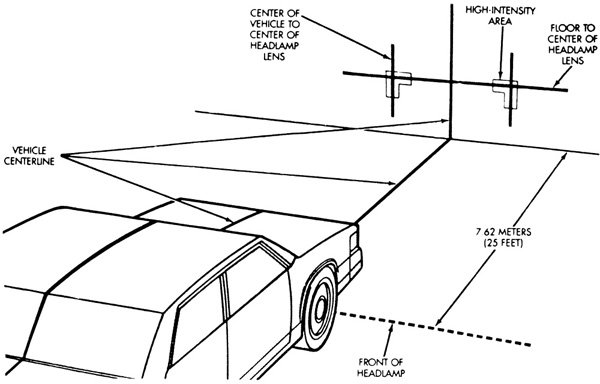
Park your vehicle on an even-level surface, facing a wall or garage door. Position the vehicle as close to the wall or garage door as possible.

Step 3 – Mark horizontal center-lines
Turn on the headlights. Using masking tape, section off the headlights' horizontal center-lines allowing the axis of symmetry to guide you.
Step 4 – Mark the low beams' vertical center-lines
Tighten the precision of your measurement by standing behind the vehicle at the center most point. Looking through the back window, have an assistant mark the vertical dead center.
Step 5 – Re-position the vehicle
Re-position your car within 25 feet of the garage or wall. Keeping the vehicle positioned in a straight line, adjust the position of the low beam's intensity zones. Turn the top adjusting screws in a clockwise direction to raise and lower the beam. Use the side adjusters to move the beam left and right. Stop when the intensity zones are positioned two inches below and to the right of the taped center-lines.

Step 6 – Adjust the high beam's intensity zones
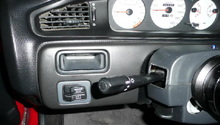
The adjustment is handled by turning the mechanical gear on the back of the headlight. Doing so will adjust the beam angle up or down accordingly. There is also an 8mm fitting on the back of the headlight for accessory adjustments. Position so they are below the lines, but vertically centered. The center lines will be your marker.

Pro Tip
Always respect the safety and comfort of other drivers. Adjust intensity zones low and to the right, when possible. Allow the above instructions to be your guide, and always deviate to the cautious side when in doubt.
Related Discussion
- How to Aim Your Headlights - Honda-Tech


