Honda Civic: How to Adjust Ignition Timing
If you suspect that your ignition timing is off, it's important that you get it set correctly as soon as possible. Learn how to adjust it here.
This article applies to the Honda Civic (1990-2000).
In order to keep your Honda running great, the ignition timing has to be set properly. Symptoms of poorly-set timing include engine pinging, running rich, or running lean. To successfully get this job done you will need a timing light. You can purchase or borrow one. It's important to note that if you don't feel comfortable doing this job, you should hire a mechanic or get help from a knowledgeable friend.

Materials Needed
- Timing light
- Small piece of wire or paper clip
- small socket wrench set
Before starting this job, make sure your car is fully warmed up and idling normally. Then, turn it off.
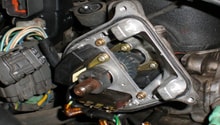
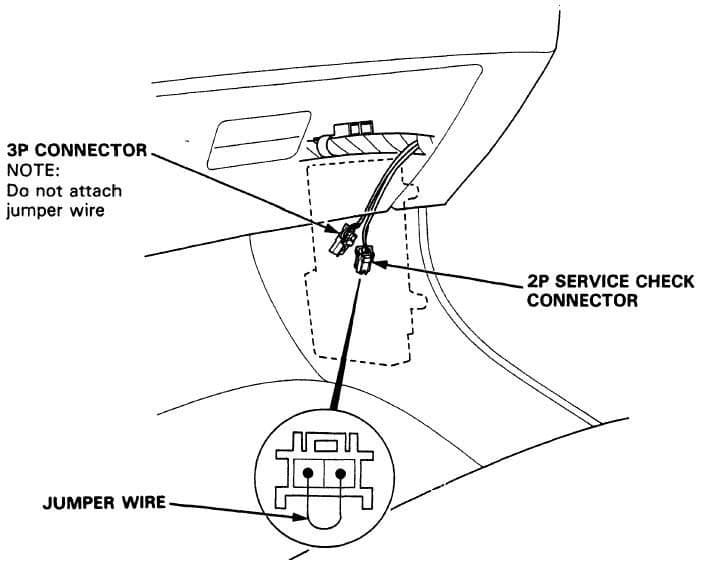
Step 1 – Short service connector and connect timing light
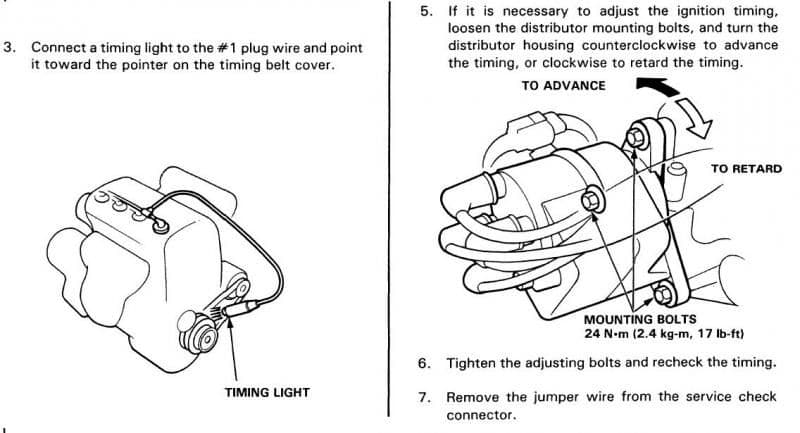
The service connector is located on the passenger side. It is underneath the glove box by the kick panel. It's the same connector used to read check engine lights. You need to disconnect it and put a small wire connecting both sides of the connector in order to short it. You want to do this so the computer doesn't try adjusting after you do your own adjustments. Next, connect the timing light; do so by connecting the positive connection to the positive battery terminal and the negative connection to the negative battery terminal. Then, connect the clip to the first spark plug wire.
Step 2 – Read and adjust timing
After you have the service connector properly jumped, you can now turn on your car and start the actual reading and adjusting. First, loosen the three small bolts around the distributor cap in case you end up having to retard or advance the timing. Under the hood there should be a label that gives you the timing requirements. Follow these closely. Using the timing light, you want to line up the degree marks (16 or 12) with the indicator on the timing cover. Check out the graphics below for more details.
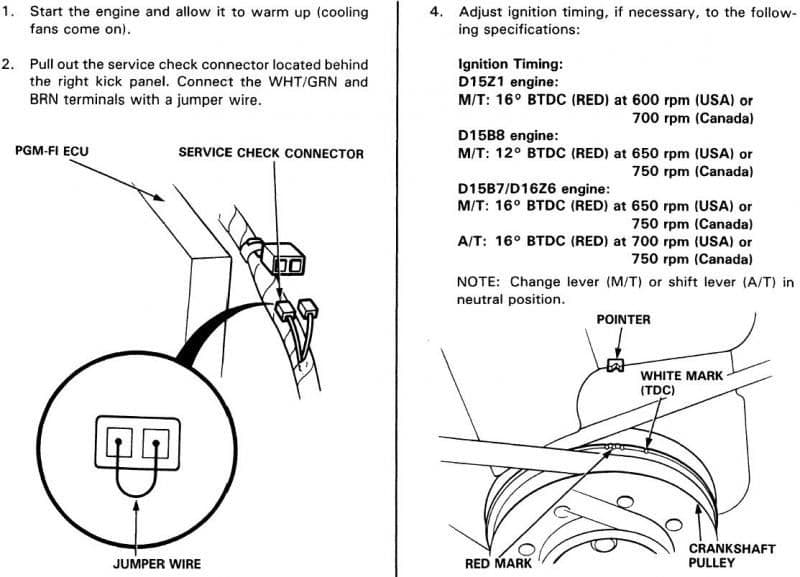
Figure 2. Complete step-by-step guide. 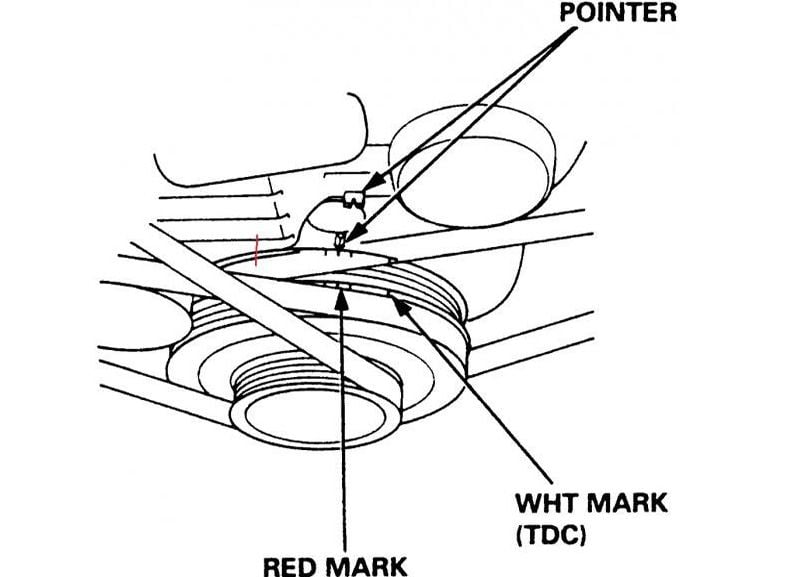
Figure 3. Detailed graphic of marks you need to read.
Pro Tip
BTDC stands for "before top dead center."
Step 3 – Distributor cap adjustment
If you deem it necessary, you will have to adjust the distributor cap in order to advance or retard the timing. You need to turn the distributor housing towards the firewall to advance the timing and turn towards the front end to retard the timing. The distributor cap should be adjusted in order to get the timing marks to line up as indicated in Step 2.
Pro Tip
When you advance your ignition timing, you're beginning the lighting of the air/fuel mixture earlier during the compression stroke in the combustion chamber. Once you're done, tighten the top distributor cap bolt to secure its position.
Related Discussions, Site, and Video
- Ignition Timing Discussion Thread - Honda-tech.com
- Adjusting Ignition Timing - Honda-Tech.com
- In-depth Write Up - Superhonda.com
- Ignition Timing How-to Video (Acura Integra) - Youtube.com