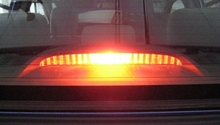
Honda Accord: Why is My Emergency Brake Light On?
Emergency brake lights that stay on even when the car is off can indicate a larger problem. Diagnosing and resolving the most common causes can take between five and 30 minutes, depending on the problem.
This article applies to the Honda Accord (1990-2002).
Emergency lights that stay on can signal a number of problems. The most common reason is low brake fluid level. Another common reason is a worn or faulty brake light switch stopper. Worn brake pads also can cause the emergency lights to stay on, but this is a less-common reason. Before troubleshooting the problem, make sure your emergency brake is not engaged. This sounds like a no-brainer, but double-checking can save you time and money if you've accidentally engaged it.

Materials Needed
- Flashlight
- Flathead screwdriver
- Thin, long piece of wood to act as wedge (optional)
- Brake light switch stopper (sometimes called a brake pedal bumper)
- Brake fluid
- Brake fluid reservoir filter
- Jack
- Brake cleaner
- Large C-clamp
- Grease
- 7mm socket wrench
- Tire iron
- Brake pads
- Brake pad grease
Step 1 – Check brake fluid and brake fluid reservoir filter
Your emergency brake lights could be on if your brake fluid is low or because of a faulty brake fluid reservoir filter. A faulty brake fluid reservoir filter can prevent the cap from properly venting and cause your car to read the brake fluid level as low, even when it isn't.
- Open hood and check brake fluid. If low, add brake fluid until the fluid level is just below the max line; do not exceed this under any circumstance. If brake fluid is full yet the emergency brake lights remain on, then you will need to replace your brake fluid reservoir filter.
- Open brake fluid reservoir cap.
- Reach into reservoir and remove reservoir filter. It should pull right out.
- Insert new reservoir filter.
- Close reservoir cap and let sit. Turn on car and see if your emergency brake lights are off.
If this doesn't solve the issue, proceed to Step 2.
(Related Article: Honda Accord: How to Replace Brake Fluid - Honda-Tech.com)

Step 2 – Replace brake light switch stopper
One common reason why emergency brake lights stay on is a missing or damaged brake light switch stopper. Without this piece in place, your brakes don't know that they're not in use, which means your lights stay on. Expect to pay between $2 and $5 for a new one.
- Pull driver's side seat as far back as you can.
- Press down on brake pedal. You can't install the brake light switch without pressing the brake pedal down. You likely won't be able to do both at the same time. You can get someone to help, or consider wedging down the pedal with a weight.
- Locate brake light switch. It is under the dashboard on the driver's side.
- Press down on the button on top of the brake light switch, giving you enough clearance to insert the brake light switch stopper.
- Insert the brake light switch stopper.
- Release brake pedal (remove the wedge if you used one). Your emergency brake lights should now be off.
If the brake light switch stopper isn't the culprit, proceed to Step 3.
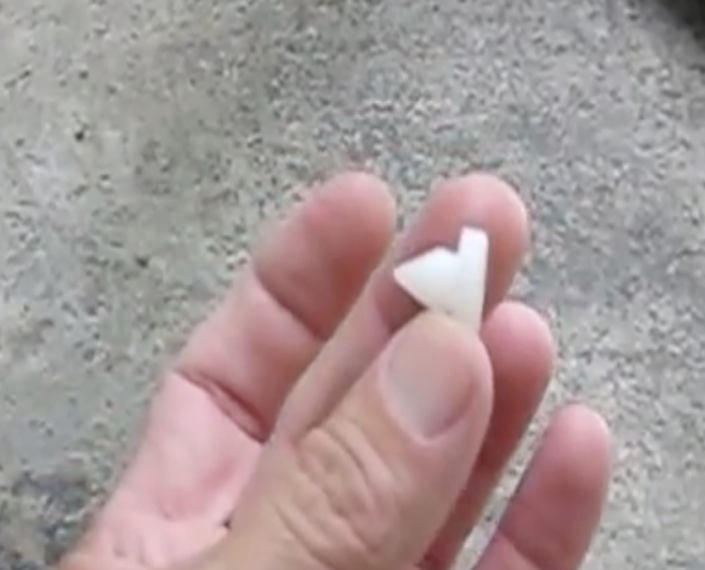
Figure 2. A missing or damaged brake light switch stopper can prevent your emergency brake lights from turning off. 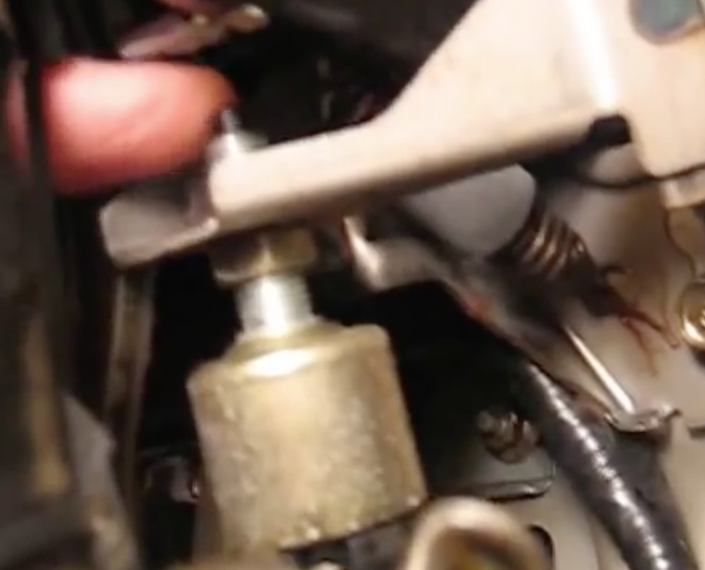
Figure 3. This button, when depressed, indicates that the brake lights are not in use. 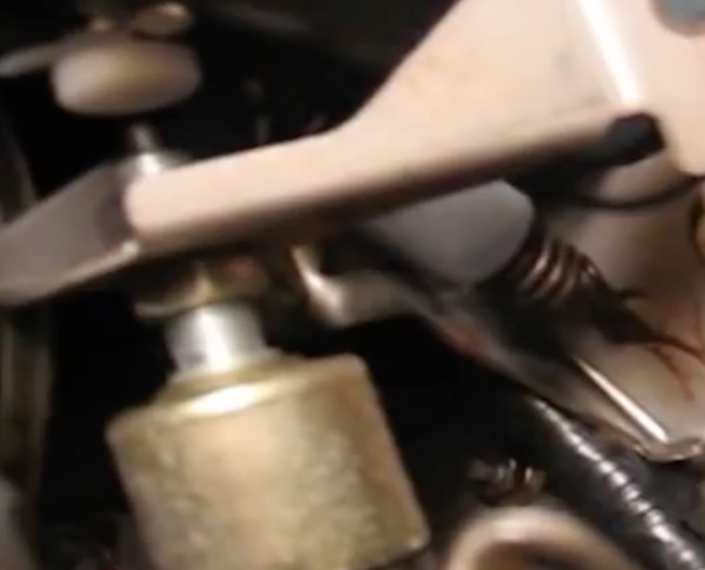
Figure 4. Insert the brake light switch stopper pointed end up.
Step 3 – Check and replace brake pads
Worn brake pads can sometimes cause your emergency brake lights to stay on. This is likely the culprit if you hear noise when you push on your brake pedal or if you find your braking time is increasing. Expect to pay between $25 and $40 for new brake pads.
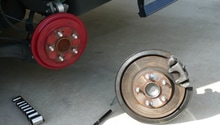
- Jack up car. Use tire iron to remove wheel. Turn steering wheel all the way in the direction that gives you best access to the brake.
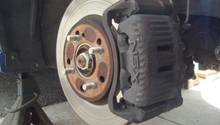
- Use 17mm socket wrench to remove the brake caliper bolt.
- Flip up the caliper to open it, grabbing it by the bottom and flipping up.
- Remove old brake pads by pulling back on top and then pulling out.
- Check rotor for wear. If there aren’t any grooves, then the rotor is likely OK. If there are grooves, then you may need to replace it.
- Clean brake assembly with brake cleaner.
- Apply brake grease to back of pads in the raised areas.
- Put in new pads. The greased part goes on the outside. Put in bottom part first, and then push top part in. The pad with the wear indicator goes on the back.
- Compress the piston. One way to do it is with a C-clamp and an old brake pad.
- Flip caliper down over brake.
- Grease brake caliper bolt and then insert it. Use 17mm socket and ratchet to tighten.
- Turn steering wheel back to center, so you can put wheel back on.
- Put on wheel and lower car.
- Start car and pump brakes until you feel resistance. Do not drive before doing this.
(Related Article: How to Jack Up Your Accord - Honda-Tech.com)
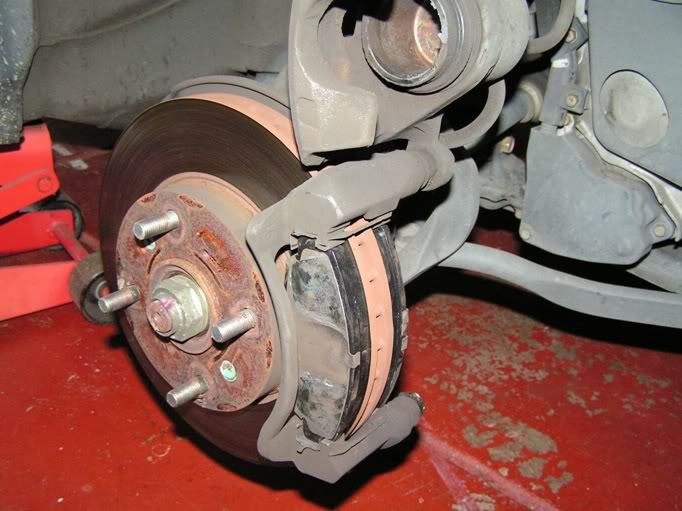
Figure 5. Caliper bolt removed, and caliper flipped up. 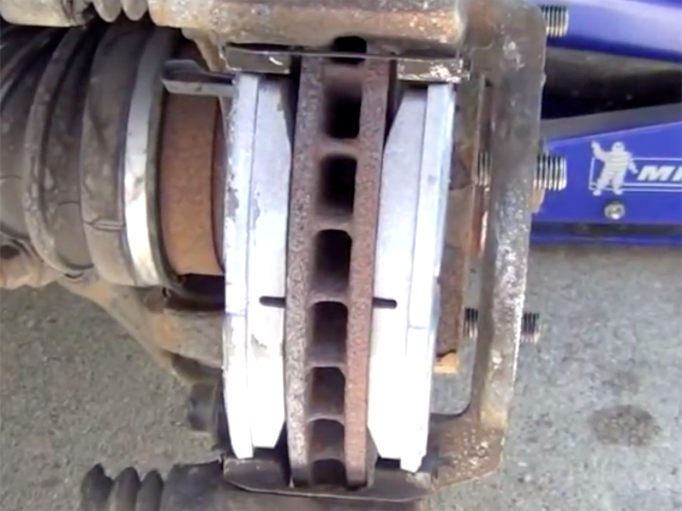
Figure 6. Make sure brake pads are in tight after replacing them and before completing installation.
Featured Video: Brake Light Stays On In Honda Civic
Related Discussions
- Why Does My Emergency Brake Light Stay On - Honda-Tech.com
- E-brake Occasionally Stays On - Honda-Tech.com