Honda Accord How to Replace Your Header
Creating a free flowing exhaust with header is one of the easiest performance enhancements. Repairing headers is a way to restore power and eliminate unwanted noise. Learn how to do these easy fixes in this blog.
This article applies to the Honda Accord (1990-2002).
The original equipment exhaust manifold on your Honda requires very little in the way of servicing. However, with age and heat, it is not common for the manifold to develop cracks or begin leaking. When this happens, you either have to repair the manifold, or replace it. Alternatively, if you're looking to extract the most amount of power that you can get from your ride, you may want to install an aftermarket header to free up some exhaust flow. Aftermarket headers take the place of the original exhaust manifold and offer less restriction and more tuning of the piping to optimize the extraction of exhaust gasses.
Installing and repairing Honda headers is typically a bolt in procedure. Cracked or broken headers may require welding in addition to removal and installation. For the most part, this is a basic procedure that can be performed by beginners with a few, simple tools.

Materials Needed
- Metric socket set (3/8") drive, ratchet, extension, universal joint
- Metric open end/box end combination wrench set
- Specialized oxygen sensor removal tool (some parts houses may sell it to you and allow a free return after use)
- Rust inhibitor spray to free rusted bolts
- Jack stands (and a jack) however having a lift is the best option
- Torque Wrench (most are 1/2" drive. Have a 1/2" to 3/8" adapter or a 3/8" torque wrench with enough range to meet the specs)
The procedure involves removing the existing components for new headers. For leaky gaskets, simple unbolting of the joints may be possible. For cracked headers, welding in places depends on the accessibility to the damaged area.
Realize the 4 cylinder engines have one exhaust manifold whereas V6 models have two. The general instructions apply to each.
Step 1 - Remove the existing exhaust manifold and down pipe
To install gaskets, simply unbolt the parts at the joints. To remove the exhaust, follow these steps.
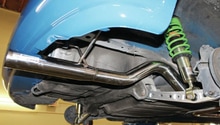
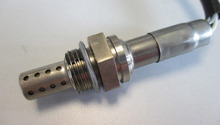
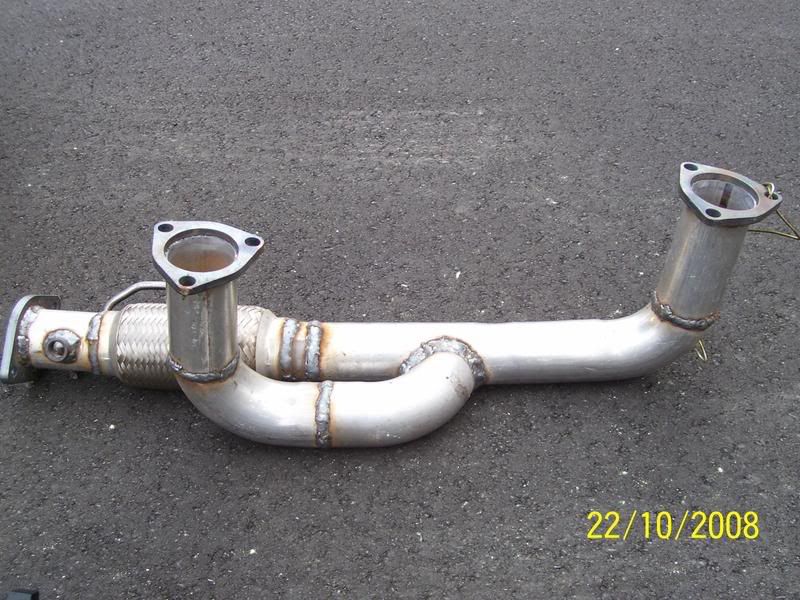
Start by working under the vehicle first. This will determine if you have enough clearance to continue above. Remove the down pipe. First, unplug the oxygen sensor. Remove it from the exhaust if you have room. If not, leave it in the pipe and remove it after the pipe is out. Unbolt the down pipe from each end. Remove it if you can. You might have to remove the manifold to get more room to get the down pipe out.
Remove the bolts holding the heat shield from the exhaust manifold. Unbolt the manifold from the engine and remove it. It is not common that the manifold may be stuck to the head of the engine. If you have confirmed that all fasteners have been removed from the manifold, wiggle it around to free it, but take care to not damage the oxygen sensor. If it's really stuck on there, a few raps from a rubber mallet will set it free.
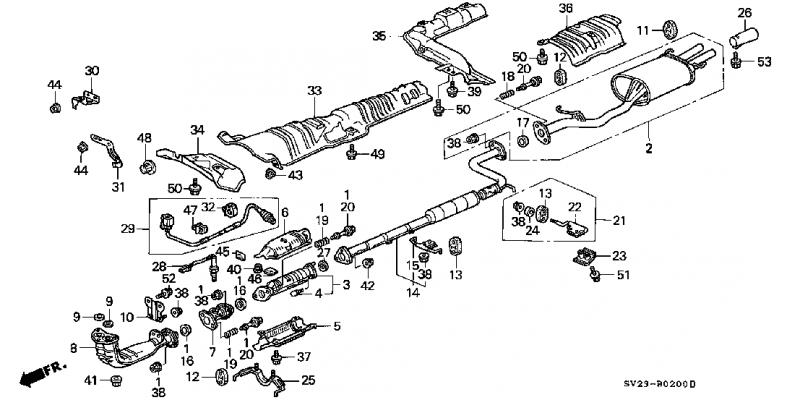
Figure 1. Parts illustration in a Honda Exhaust. Item 8 is the down pipe.
Pro Tip
Spray bolts with rust inhibitor first. This may free them up and avoid breaking them.
Step 2 - Install the exhaust
Fit the parts loosely in place. There is a bracket at the end of the down pipe that fits into a rubber mount. Put the gaskets in their appropriate places. Use the bolts to hold the gaskets and the header to the engine and the down pipe to the exhaust. Ensure that you can install the oxygen sensors. Once it looks like you have everything in place, loosely install all of the bolts.
Start by tightening the header to the engine. Start in the center working outwards in the "star pattern". Torque in increments from snug to final spec. The factory torque spec is 28 ft pounds however the header manufacturer should be able to provide the correct specification for their product. This is the spec for torquing the manifold to the car. Joints should be torqued snug for the bolt size. The web and forums can provide more information on specs.
Pro Tip
Save tightening up everything for the end. Even the guys in muffler shops do this as it allows final adjustment for sealing the system on the first try.
Step 3 - Start the engine and check for leaks
The best time to check for leaks is before lowering the vehicle. Listen for noises and air leaks. After driving for a while, inspect the joints for tightness and black soot that could indicate a leak. If everything checks out, then you are done.
Related Discussions
- Header Install - Honda-tech.com
- V6 Headers Install - Honda-tech.com
- Custom V6 Header/Downpipe Install - Honda-tech.com
- Header Installation Video - YouTube.com