Honda Accord: How to Replace Spark Plugs and Wires
If you're hearing a constant miss, it's time to replace those spark plugs. Continue reading to learn how to replace the spark plugs and wires on your Honda Accord.
This article applies to the Honda Accord (1992-2002).
Changing the spark plugs at the recommended 105,000 mileage interval is the best practice; however, if your engine codes are indicating misfire, check the plugs regardless of the mileage because they may be worn. The engine spark plugs are essential to obtaining maximum performance. You may not see an improvement in gas mileage, but performance should increase and error codes may diminish. This article focuses on the logistics of changing out your old plugs for new ones.
Note that the fix varies by engine. Older 4-cylinder versions have a distributor with wires leading to the plugs. On the other hand, V6 versions may have covers over the plugs, which have individual coils per plug—versus "distributing" the spark individually from a distributor.

Materials Needed
- Plug gapping tool
- 7/32" hex head or Allen wrench (6-cylinder version for removing coils)
- 3/8" ratchet, extension, and universal joint
- 5/8" deep well or spark plug socket
- A coin (for removing slotted connectors on engine covers in 6-cylinder)
- Tape
- Shop-vacuum
- Anti-seize and boot grease (optional)
Step 1 – Removing the plug wires or coils
V6 Engine Model
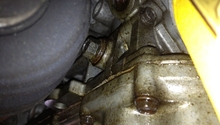
Raise the hood and locate the spark plugs. For V6 models, they are under the engine covers behind the coils. Remove the covers from the engine. The covers are held in with a slotted fastener or tabs. Be careful when disengaging the tabs to avoid breaking them.
Unscrew the bolts on the ignition coils, and disconnect the coils from the wiring harness. Pull the coils off of the plugs and set them aside.

Figure 1. Twist the coin counterclockwise to undo the fastener. 
Figure 2. Ignition coil access.
4-Cylnder Engine Model
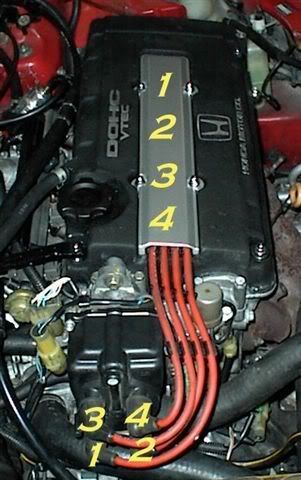
For the 4-cylinder engine, they are located at the end of the plug wires in the engine block. Remove the covers and pull the plug wire off by grasping the boot until it disengages. NEVER pull by the wire. The boot forms a seal that might take some effort to break.
Pro Tip
Note the location of the individual wires before removing them. Label them with a piece of tape.
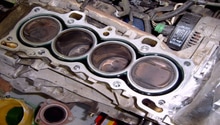
Step 2 – Removing the spark plugs from the engine
Now that the plugs are accessible, the procedure is the same for each of the individual plugs. You will be using the socket to unscrew the plug from the engine block. Use the extension in order to reach the plugs, and the universal joint if objects are in the way. Note that you need a way for the plug socket to grasp the plug. Most sockets have an insert that handles this. If you have a bare socket, insert a rolled up piece of paper in the socket near the top as shown in Figure 4.

Pro Tip
Use a shop-vacuum or compressed air to remove dirt from around the spark plug before you remove it. This keeps the dirt from falling into the engine cylinder.
Step 3 – Gap the new plugs
Check and set the gap (if necessary) using the plug gapping tool. The gap specifications are on a label under the hood or the owner's manual. You can also have the parts person look it up for you.

Step 4 – Re-install spark plugs into the engine
Insert the plugs into the engine by placing them into the spark plug socket. Begin by finger tightening, so the threads are protected. Tighten the plug to the recommended torque specification. Do not over tighten as you may damage the plug, the engine, or both. Use anti-seize and boot grease if the engine sees a lot of road salt or dirt and moisture.
Pro Tip
Apply steady even pressure when tightening the plugs. Do not get off center or lever extremely hard because any slip will cause the plug's ceramic to break.
Step 5 – Replace the wires and covers
For V6 models, replace the coils on the spark plugs. Push them down firmly until they seat. Tighten them down with the bolts and connect the electrical connectors.
On the 4-cylinder, you will need to seat the plug wires by pushing the boot firmly over the plug. You should feel (and maybe even hear) it snap on.
While you have the covers off, start the engine. Ensure that it is running smoothly, and no error codes are present. If the engine isn't running smoothly or there is a misfire code, check the connections. Make sure the correct wire is on the correct plug. Once the engine is operating properly, shut the car off. Replace the covers and you're good to go.
Featured Video: Honda Accord V6 Spark Plug Replacement
Related Discussions
- Spark Plug Wiring Diagram - Honda-Tech
- Step by Step Instructions for Replacing Plugs on '99 Accord - Honda-Tech