Honda: Why are My Brakes Squeaking?
If you're noticing a slight squeaking sound when you apply the brakes, the problem can be found in a number of places. Let's take a look where.
This article applies to the Honda Civic and Accord (1992-2000).
Brake squeal can be caused by a couple of things: glazed brake pads, dirty rotor surfaces, missing pad shims, or a worn out e-brake are all possible culprits. Replacing these parts (and identifying them as damaged) will require tearing down the brakes to the rotors. This guide will walkthrough that process, while pointing out the possible reasons the brakes are squeaking.

Pro Tip
The DIY price is for the brake pads ($20-30), anti-squeak solution ($5-10), brake cleaner ($5), and for resurfacing rotors ($100).
Materials Needed
- Hydraulic jack and jack stands
- Tire iron
- Phillips screwdriver
- C-clamp
- Sandpaper or emery cloth
- Wire brush
- Brake cleaner
- Punch tool
- Rubber mallet
- WD-40
- Anti-squeak solution or brake pad grease
Step 1 – Draging emergency brake
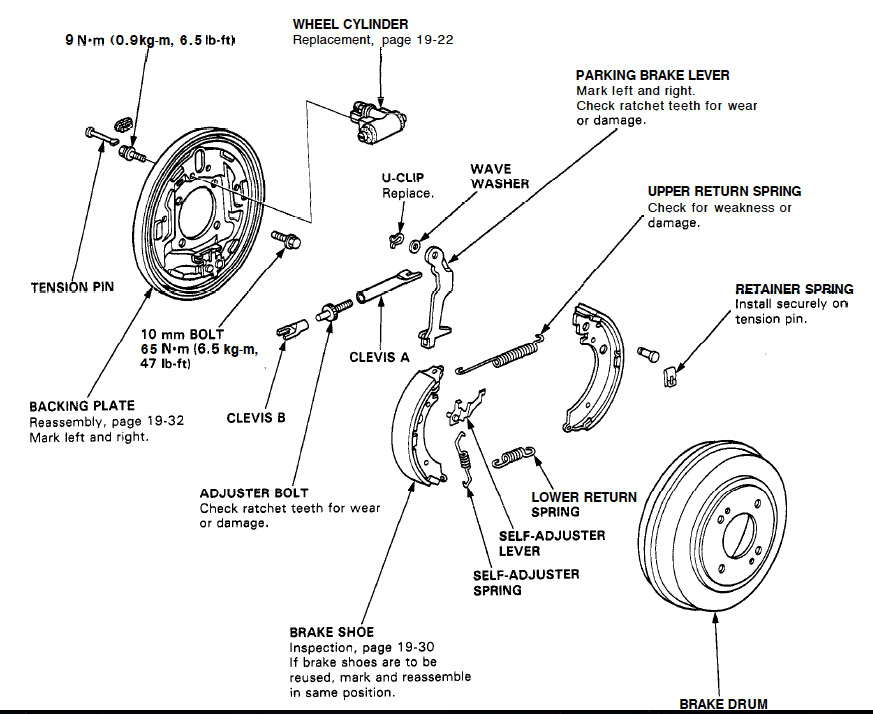
An emergency brake that needs adjustment will badly squeal. Make sure the emergency brake is not engaged and lift the rear of the car. Remove the wheel and sping the rotor by hand. If there's squeaking, the emergency brake probably needs to be adjusted. Likewise, the drum brakes should be inspected as well.
Pro Tip
If you hear squeaking when the rotor is spun by hand, you might need to adjust your e-brake.
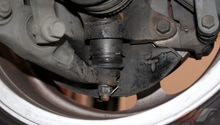
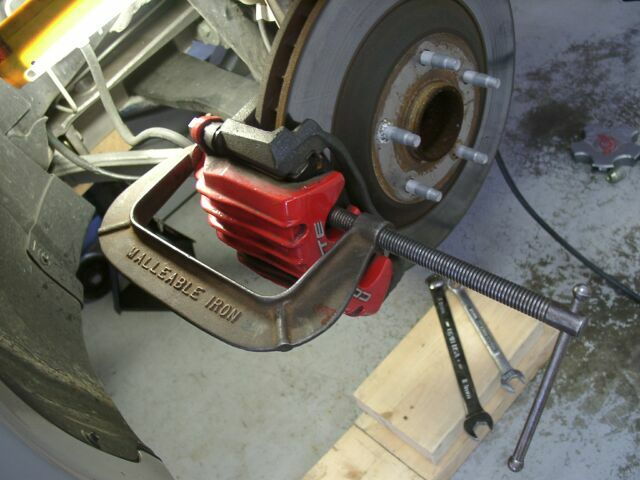
Step 2 – Dirty or damaged caliper
It is possible that the brake caliper has dirt or other debris trapped between the pad and the rotor. If the car has had an "unintended off-road excursion" recently, this might be the case.
To inspect this, remove the brake caliper from the squeaking wheel to clean it with a wire brush and brake cleaner.
Pro Tip
Brake cleaner can strip paint and wear rubber components, so be careful not to spray directly onto the components. Instead, use a shop towel or rag.
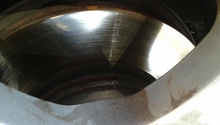
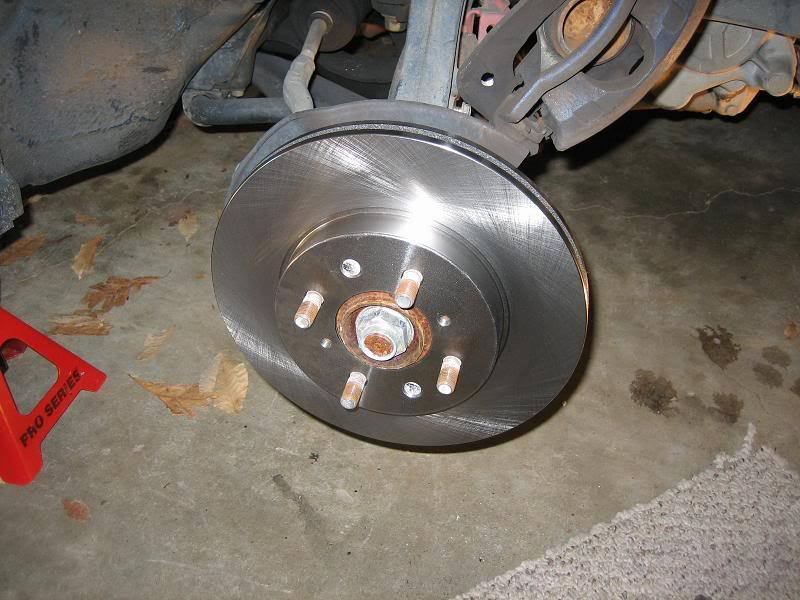
Step 3 – Uneven or worn rotor surface
The rotor could be the source of the squeak. Typically, a worn out rotor will also vibrate heavily under braking. Run your finger nail across the surface and determine if it catches any grooves. If your finger nail catches a groove, it may be necessary to remove the rotor for resurfacing.
Pro Tip
Prior to removal, it is a good idea to soak the bolts and screws being removed with WD-40 or penetrating oil to loosen any rust.
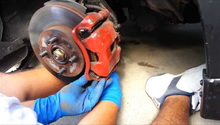
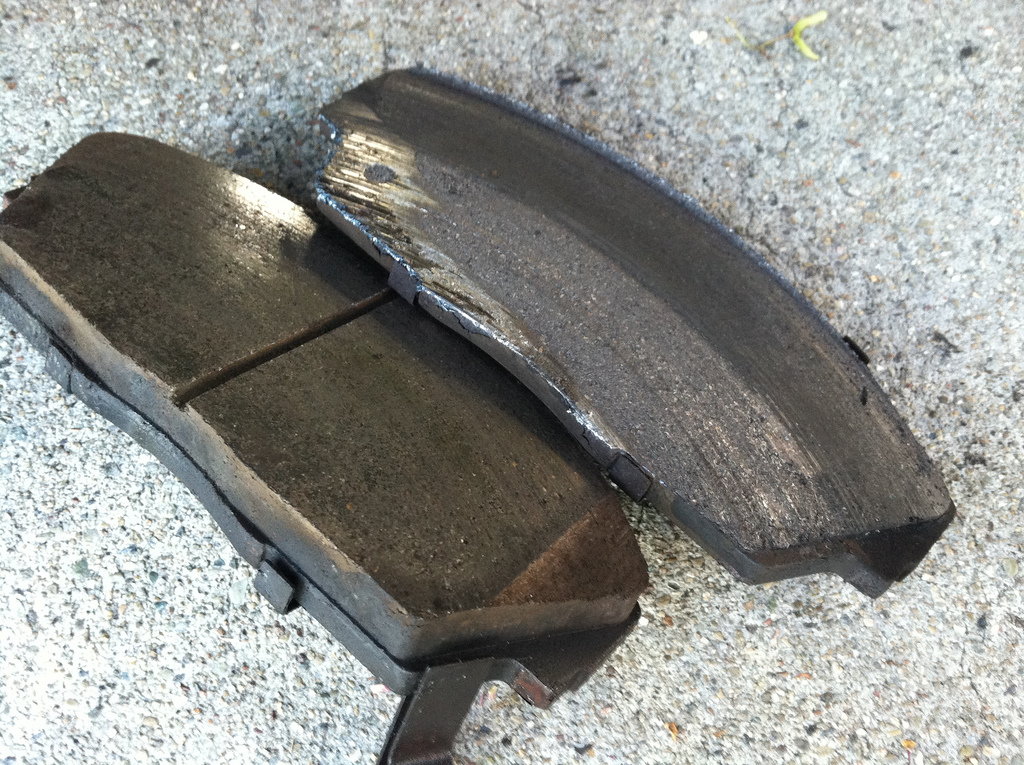
Step 4 – Malfunctioning brake pads
The new brake pads may be faulty or they haven't been changed. Low brake pads are designed to squeal when they're low. Also, most brake pads must be installed with shims between them and the rotor. If these shims aren't installed with grease, the brake pads will rattle and squeal.
Pro Tip
Applying brake pad grease or anti-squeak solution can greatly aid in brake pad noise.
Step 5 – Other possible causes
Worn out ball joints and other suspension components can squeak and squeal under braking due to the transfer of weight. If the squealing continues after maintaining the brakes, the next step should be to examine the control arm bushings, sway bar bushings, tie-rod ends, and ball joint. Worn out bushings will look worn out or cracked. Tie-rod ends and ball joints have a rubber boot to protect them.
Pro Tip
At this point, practically all related components have been addressed and the squeak should be gone. Typically, when servicing brakes, it is better to replace all components at the same time as they normally wear simultaneously.
Related Discussions
- How to Change Front/Rear Rotors & Pads - Honda-Tech.com
- DIY: Brake Rotor Replacement - Honda-Tech.com
- Brakes Squealing after Pad change - Honda-Tech.com