
Plastic Headlight Restoration (Pics and Video!!!)
 03-29-2008, 08:07 PM
#1
Honda-Tech Member
Thread Starter
Join Date: Feb 2008
Location: Houston, Tx, USA
Posts: 430
Likes: 0
Received 0 Likes
on
0 Posts
Plastic Headlight Restoration
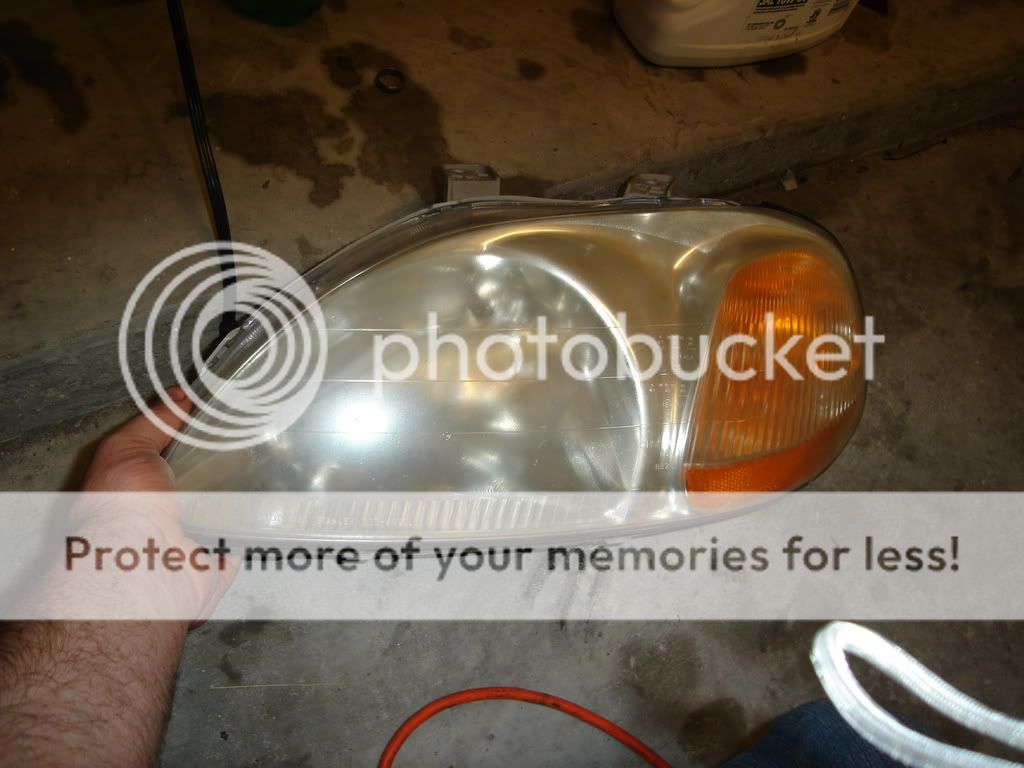
Okay it's finally here. The passenger headlight assembly was busted on my 98 EX so we pulled the front off and I buffed the other side to match the new one. I've done this so many times its like clockwork and hopefully it will all make sense to you when its over.
Since I had to remove the bumper to replace the other side, I thought it was a good idea to remove the one I was buffing for easier access with sanding and buffing. If you want, you can do the same because this is easier- you don't have to worry about taping up the surrounding areas which are painted.
**IF YOU DON'T REMOVE THE HEADLIGHTS, YOU MUST TAPE OFF ABOUT 4" AROUND THEM TO PREVENT DAMAGE TO YOUR PAINT JOB WHILE WETSANDING AND BUFFING**
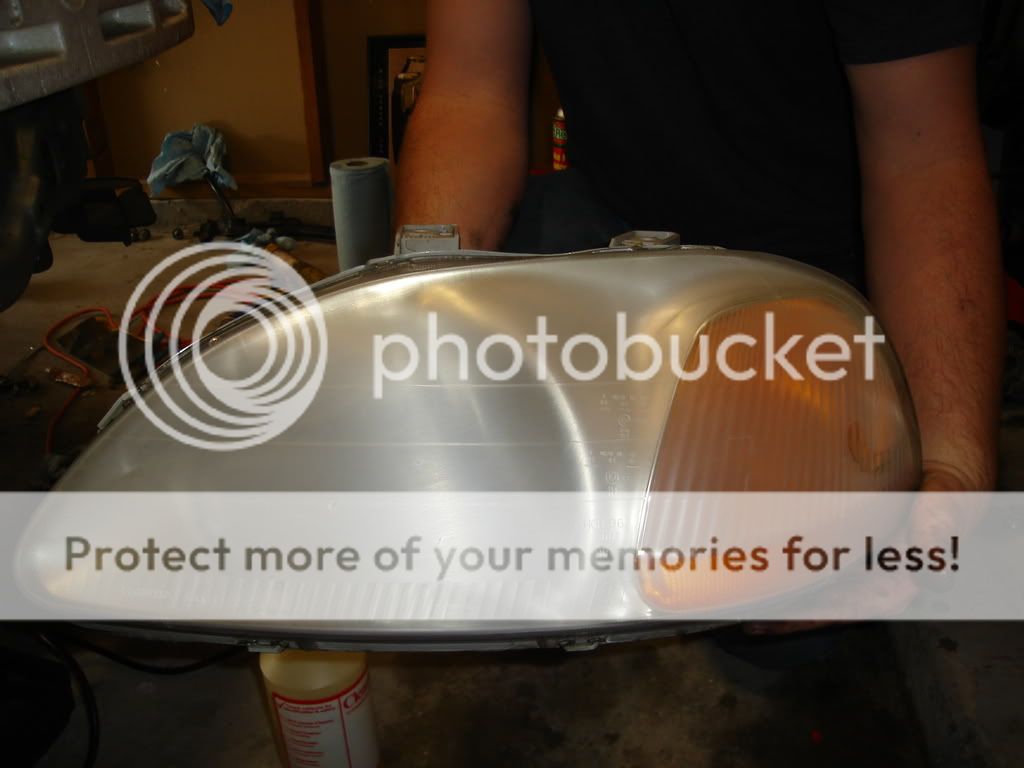
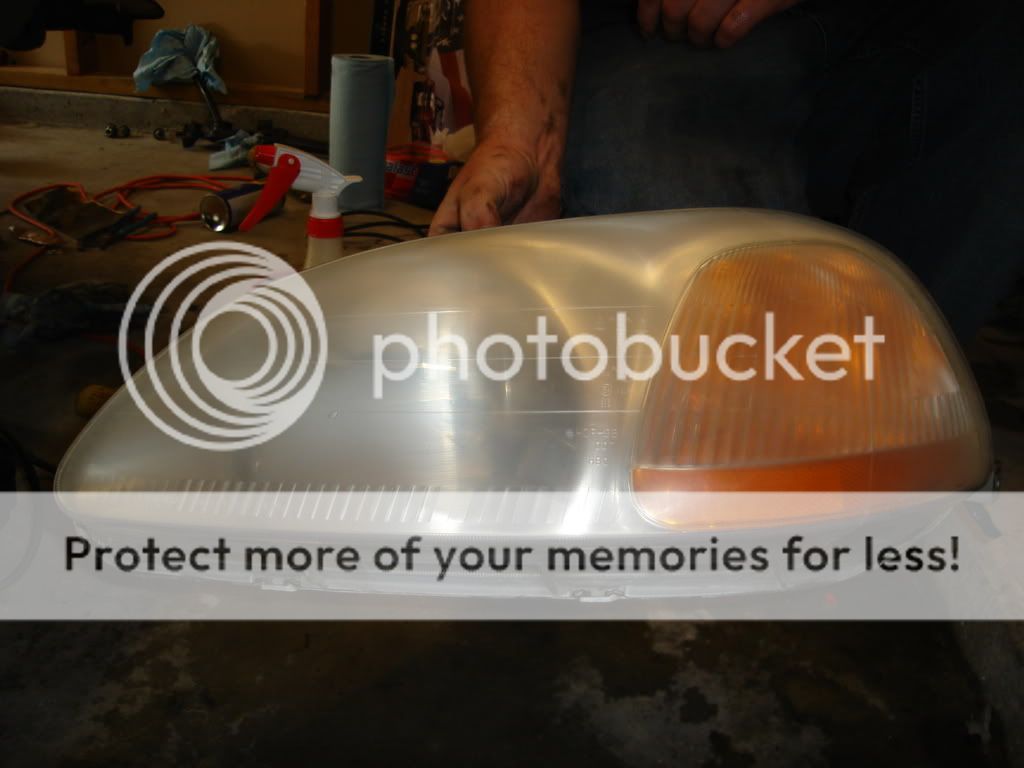
Here's a couple pictures of my headlight before I buffed it. Its not too bad but it definitely needed to be done.
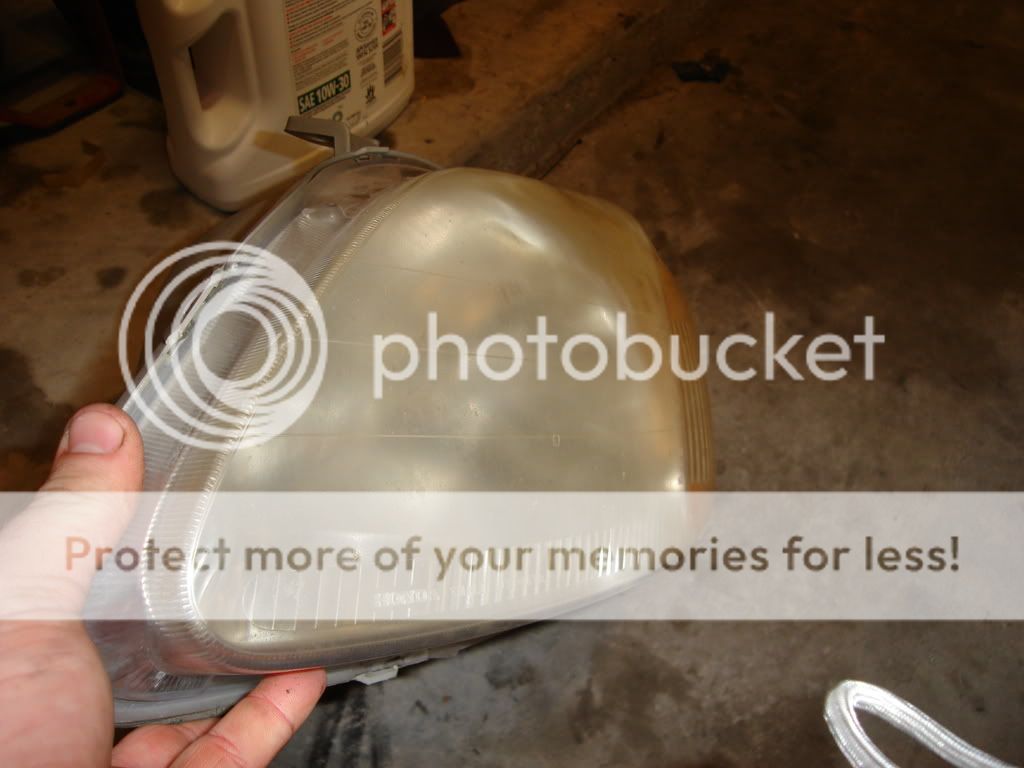
Next we'll talk about what else you need besides an oxidized plastic headlight and tape.
Here's a couple pics of everything you need to perform this service on a headlight(Mountain Dew not requred but it always helps me out):
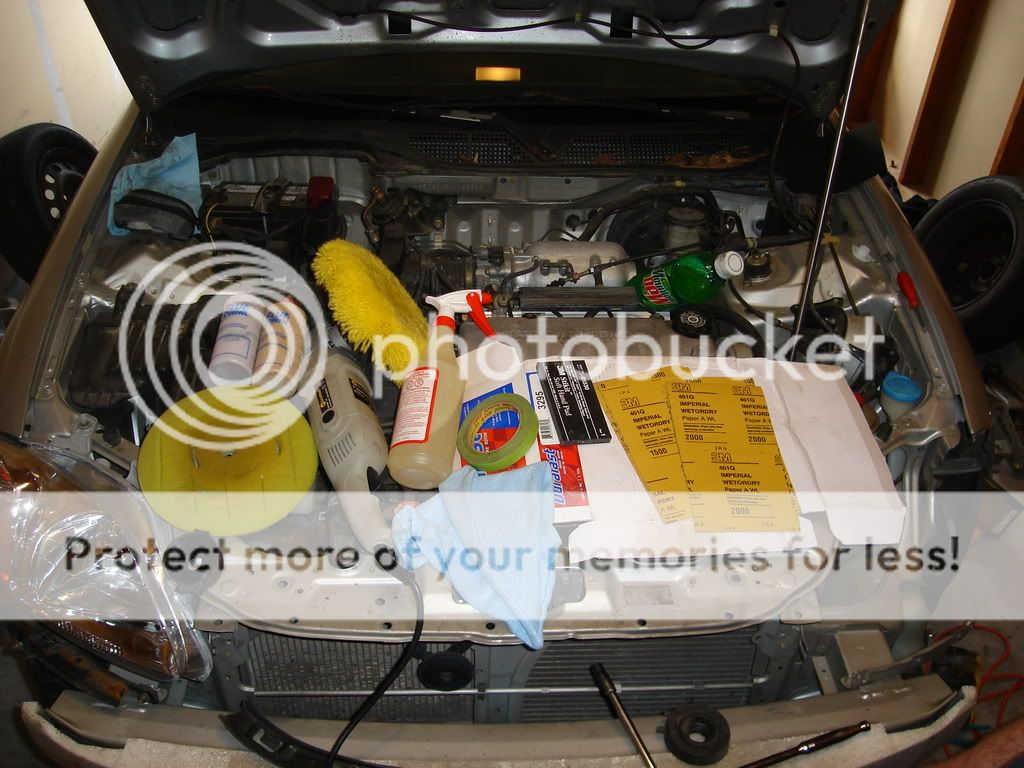
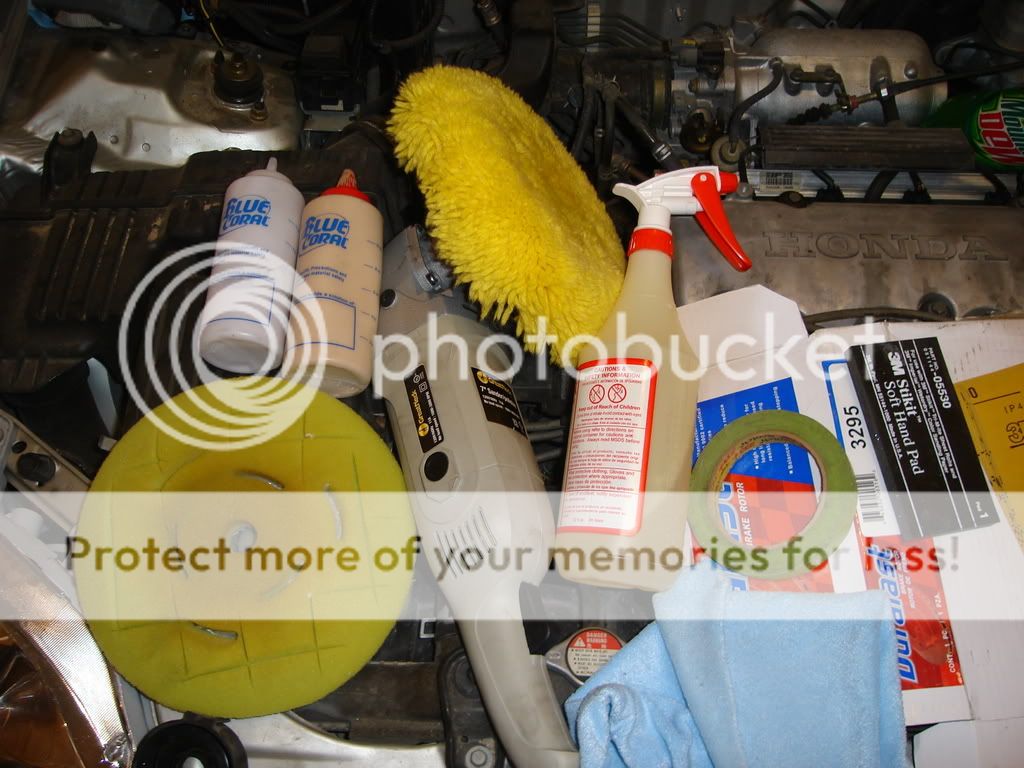
Things you need:
1. Tape. I already mentioned why and this is the only reason you need it.
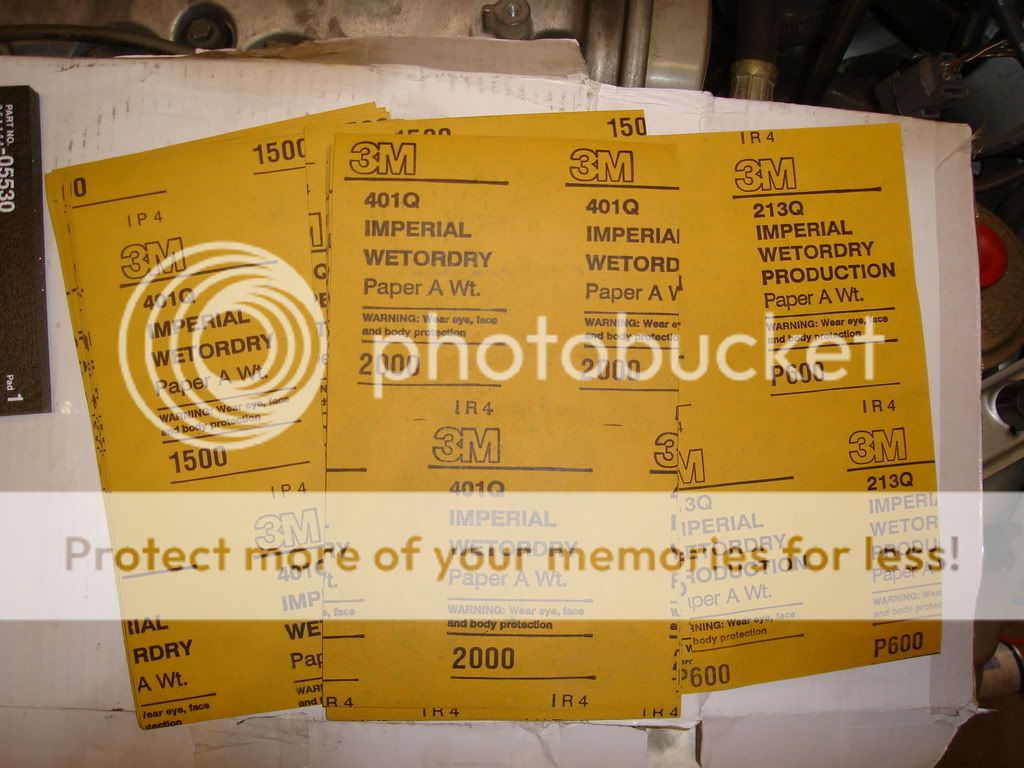
2. Wetsanidng paper. I usually use 600, 1500, and 2000 grit. You'll see why.
3. 3M Stick it pad for sanding. This keeps your fingers from gouging the plastic with the sandpaper.
4. Industrial squirt bottle full of very diluted soapy water. Use this for cleaning/keeping sandpaper wet during the sanding process.
5. Buffer, buffing pads and buffing compounds. I'll cover this more specifically when I get to it.
Please read before you start sanding: If you are performing this on any headlight that is made by a high-end car manufacturer, it may have a UV protective coating that SANDING WILL DAMAGE. Most of the time this coating is colored. Please check with your OEM parts dealer to verify that it does not have one of thse coatings because you'll be really pissed off at yourself if it does.
SANDING PROCESS
Be sure to clean the headlight(s) you plan on repairing before you start sanding them. This makes the sanding process a lot easier and creates a much more uniform surface after you're done.
Start with your 600 grit and get it as wet as possible along with spraying down the headlight before you start sanding. If your headlight is worse than mine, you could use 400 grit but I urge you to be patient; 600 grit will take out any imperfection in plastic very quickly and moving down in grit could permenantly damage the headlight.
Here's what you'll see when you start sanding. All the oxidized plastic is getting chewed up by the sandpaper and the water will turn a milky yellow color and start running off.

Don't get too crazy with the 600. I use it very lightly to get things broken down and get the hard imperfections removed. I only get heavy-handed with it when the oxidation is extremely tough.
Here's what it should look like after 600:

Do the same with 1500 but stop every once in a while to make sure that you're sanding as evenly as possible. Sand with 1500 until the water coming off the headlight doesn't have any yellow in it what so ever. Also make sure that the deeper scratches from the 600 grit are completely removed.
It should look like this:
See how it is clearer than the post-600 grit photo? This is a good thing.
With the 2000 grit you can sand as much as you want. There really isn't any way you'll damage the headlight with 2k grit unless you're trying to. The only reason I use sandpaper this fine is to prep it for buffing and remove the wetsanding marks from 1500. Remember throughout your sanding process to use plenty of water and keep your sanding surface and paper clean. Otherwise, the tiny pieces of plastic will get caught in the sandpaper and turn 1500 grit into 800 grit and so on.
After 2000 grit sanding:
Here's the hard part. Any child with half a brain can sand imperfections out of a headlight. It takes someone with common sense to buff it. For this project I used my $50 'small-task' Autozone buffer and left my DeWalt(I've switched to a Makita recently) at work. So this project is cheaper than buying two new headlights any way you cut it. Since it was removed from the vehicle, the headlight needs to be held in place by a friend because I've had bad luck with a vice.
You'll need two buffing pads. A wool pad for heavy cutting, a foam pad for high-speed polishing, heavy cut(for the wool pad) and medium polishing(for the foam pad) compounds are all you'll need.
The buffing pad already attached to the buffer is a wool pad. We use it first because it has a better 'cutting' ability and gets things moving very quickly.
The green foam pad is a polisher and makes the plastic a lot clearer and very shiny. This second step is what makes old plastic look new.
I have two compounds I use. Compounds are like liquid sandpaper and much finer than anything you can find on a shelf. They break down with heat and polish their own sanding marks out before they dry up.
You understand the 'what' and the 'why' so lets dive into the 'how'. I made three videos doing a demo on buffing this headlight and the link is below. This is much better, in my mind at least, than trying to tell you how to do it. I figured I'd show you. Excuse the fact that its a little sloppy. Totally amatuer film job but it gets it done. Just follow the link. These are the only videos I have so just watch them in order you should be just fine.
/roadrage212
Okay it's finally here. The passenger headlight assembly was busted on my 98 EX so we pulled the front off and I buffed the other side to match the new one. I've done this so many times its like clockwork and hopefully it will all make sense to you when its over.
Since I had to remove the bumper to replace the other side, I thought it was a good idea to remove the one I was buffing for easier access with sanding and buffing. If you want, you can do the same because this is easier- you don't have to worry about taping up the surrounding areas which are painted.
**IF YOU DON'T REMOVE THE HEADLIGHTS, YOU MUST TAPE OFF ABOUT 4" AROUND THEM TO PREVENT DAMAGE TO YOUR PAINT JOB WHILE WETSANDING AND BUFFING**
Here's a couple pictures of my headlight before I buffed it. Its not too bad but it definitely needed to be done.
Next we'll talk about what else you need besides an oxidized plastic headlight and tape.
Here's a couple pics of everything you need to perform this service on a headlight(Mountain Dew not requred but it always helps me out):
Things you need:
1. Tape. I already mentioned why and this is the only reason you need it.
2. Wetsanidng paper. I usually use 600, 1500, and 2000 grit. You'll see why.
3. 3M Stick it pad for sanding. This keeps your fingers from gouging the plastic with the sandpaper.
4. Industrial squirt bottle full of very diluted soapy water. Use this for cleaning/keeping sandpaper wet during the sanding process.
5. Buffer, buffing pads and buffing compounds. I'll cover this more specifically when I get to it.
Please read before you start sanding: If you are performing this on any headlight that is made by a high-end car manufacturer, it may have a UV protective coating that SANDING WILL DAMAGE. Most of the time this coating is colored. Please check with your OEM parts dealer to verify that it does not have one of thse coatings because you'll be really pissed off at yourself if it does.
SANDING PROCESS
Be sure to clean the headlight(s) you plan on repairing before you start sanding them. This makes the sanding process a lot easier and creates a much more uniform surface after you're done.
Start with your 600 grit and get it as wet as possible along with spraying down the headlight before you start sanding. If your headlight is worse than mine, you could use 400 grit but I urge you to be patient; 600 grit will take out any imperfection in plastic very quickly and moving down in grit could permenantly damage the headlight.
Here's what you'll see when you start sanding. All the oxidized plastic is getting chewed up by the sandpaper and the water will turn a milky yellow color and start running off.
Don't get too crazy with the 600. I use it very lightly to get things broken down and get the hard imperfections removed. I only get heavy-handed with it when the oxidation is extremely tough.
Here's what it should look like after 600:
Do the same with 1500 but stop every once in a while to make sure that you're sanding as evenly as possible. Sand with 1500 until the water coming off the headlight doesn't have any yellow in it what so ever. Also make sure that the deeper scratches from the 600 grit are completely removed.
It should look like this:
See how it is clearer than the post-600 grit photo? This is a good thing.
With the 2000 grit you can sand as much as you want. There really isn't any way you'll damage the headlight with 2k grit unless you're trying to. The only reason I use sandpaper this fine is to prep it for buffing and remove the wetsanding marks from 1500. Remember throughout your sanding process to use plenty of water and keep your sanding surface and paper clean. Otherwise, the tiny pieces of plastic will get caught in the sandpaper and turn 1500 grit into 800 grit and so on.
After 2000 grit sanding:
Here's the hard part. Any child with half a brain can sand imperfections out of a headlight. It takes someone with common sense to buff it. For this project I used my $50 'small-task' Autozone buffer and left my DeWalt(I've switched to a Makita recently) at work. So this project is cheaper than buying two new headlights any way you cut it. Since it was removed from the vehicle, the headlight needs to be held in place by a friend because I've had bad luck with a vice.
You'll need two buffing pads. A wool pad for heavy cutting, a foam pad for high-speed polishing, heavy cut(for the wool pad) and medium polishing(for the foam pad) compounds are all you'll need.
The buffing pad already attached to the buffer is a wool pad. We use it first because it has a better 'cutting' ability and gets things moving very quickly.
The green foam pad is a polisher and makes the plastic a lot clearer and very shiny. This second step is what makes old plastic look new.
I have two compounds I use. Compounds are like liquid sandpaper and much finer than anything you can find on a shelf. They break down with heat and polish their own sanding marks out before they dry up.
You understand the 'what' and the 'why' so lets dive into the 'how'. I made three videos doing a demo on buffing this headlight and the link is below. This is much better, in my mind at least, than trying to tell you how to do it. I figured I'd show you. Excuse the fact that its a little sloppy. Totally amatuer film job but it gets it done. Just follow the link. These are the only videos I have so just watch them in order you should be just fine.
 03-31-2008, 01:38 AM
#2
Honda-Tech Member
Join Date: Sep 2002
Location: hittin corners so hard you can taste my rims..
Posts: 5,415
Likes: 0
Received 0 Likes
on
0 Posts
wow.. great instruction.
recently ive learned how to spray automotive paint, and untill i wetsanded the clear, i never knew how much orange peel was on paint jobs..
anyways.. i had to buff, and polish, and it really does make any surface stand out. great job on the write up, and great job on the civic.
recently ive learned how to spray automotive paint, and untill i wetsanded the clear, i never knew how much orange peel was on paint jobs..
anyways.. i had to buff, and polish, and it really does make any surface stand out. great job on the write up, and great job on the civic.
04-02-2008, 04:41 AM
#5
Honda-Tech Member
Thread Starter
Join Date: Feb 2008
Location: Houston, Tx, USA
Posts: 430
Likes: 0
Received 0 Likes
on
0 Posts
LOL thanks and I want to see how yours turn out!!! Feel free to post your before and after pics!!!
04-07-2008, 09:16 PM
#7
Honda-Tech Member
Thread Starter
Join Date: Feb 2008
Location: Houston, Tx, USA
Posts: 430
Likes: 0
Received 0 Likes
on
0 Posts
Thanks. Glad I could help. I want to see before and after pics on this thread from anyone who has used these instructions to repair their headlights!!!
Trending Topics
04-08-2008, 06:46 AM
#8
Honda-Tech Member
Join Date: Feb 2007
Location: Eastern Shore, MD, usa
Posts: 534
Likes: 0
Received 0 Likes
on
0 Posts
Ok will do. I got some old ones for free cause of the yellow fog on them.....so I will use your instructions to clean them off and put them on my car that way i can do a retrofit on my current headlights! 
04-15-2008, 02:33 AM
#9
Honda-Tech Member
Thread Starter
Join Date: Feb 2008
Location: Houston, Tx, USA
Posts: 430
Likes: 0
Received 0 Likes
on
0 Posts
Bumpity...Still looking for some of your before/after pics. Anyone else find this thread helpful?
04-21-2008, 02:58 AM
#10
Honda-Tech Member
Thread Starter
Join Date: Feb 2008
Location: Houston, Tx, USA
Posts: 430
Likes: 0
Received 0 Likes
on
0 Posts
This method has come under some scrutiny as of late so I'm going to post this as a way of clarifying my intentions here.
There are plenty of ways to repair plastic headlights. This is the method I find most useful because of the universal aspect of it. I can perform this on nearly any make and model without dire consequenses, and I don't have to worry about things such as: overspray from shooting a clear on top of them, (which you could do instead of buffing if you wanted), or applying a 'clear-coat' product by hand that could potentially fail or make the problem worse in the future.
I think a lot of people could use this as a great reference since most companies I do this for aren't even aware that this is possible in the first place.
Also, let me add that if I didn't think this would help anyone, I wouldn't have posted this at all. I'm not the type of person to waste your time like that.
I've done a set of CTR headlamps that the local JDM shop I did them for refuses to sell and uses them as their trophy piece on their sales desk. Those headlights still look like I just did them and it's going on a year.
Look, my point is this: If you have a better way of doing things, I'm open for suggestions. But don't lecture me about damaging factory protective coatings or what wikipedia says about headlights. I simply don't care. If the factory protective coatings worked properly, we wouldn't have this type of problem to fix. I'm all for doing a good job and doing it right the first time. I'm glad you are too. Lets work together instead of bitching at each other. So IM me if you have problems with my how-to. You just might be able to teach me something.
04-23-2008, 10:19 AM
#15
Join Date: Apr 2008
Posts: 30
Likes: 0
Received 0 Likes
on
0 Posts
<TABLE WIDTH="90%" CELLSPACING=0 CELLPADDING=0 ALIGN=CENTER><TR><TD>Quote, originally posted by spoonhatchblack »</TD></TR><TR><TD CLASS="quote">Great Write Up  </TD></TR></TABLE>
x2
</TD></TR></TABLE>x2
04-26-2008, 04:45 PM
#17
Member
Join Date: Apr 2001
Location: Baghdad
Posts: 1,429
Likes: 0
Received 0 Likes
on
0 Posts
what sort of rubbing compound do you use ?? for the cutting and polishing ??
is it has to be a special plastic polish type ?
thanks
is it has to be a special plastic polish type ?
thanks
04-27-2008, 07:02 PM
#18
Honda-Tech Member
Thread Starter
Join Date: Feb 2008
Location: Houston, Tx, USA
Posts: 430
Likes: 0
Received 0 Likes
on
0 Posts
<TABLE WIDTH="90%" CELLSPACING=0 CELLPADDING=0 ALIGN=CENTER><TR><TD>Quote, originally posted by Cyber ITR »</TD></TR><TR><TD CLASS="quote">what sort of rubbing compound do you use ?? for the cutting and polishing ??
is it has to be a special plastic polish type ?
thanks </TD></TR></TABLE>
It doesn't have to be a special plastic polish. You can use any automotive clear coat compound that will remove 1200-1500 grit sanding marks with your wool pad, then use a medium polishing compound with your foam pad. Follow up with a liquid wax.
05-15-2008, 04:22 AM
#22
Honda-Tech Member
Thread Starter
Join Date: Feb 2008
Location: Houston, Tx, USA
Posts: 430
Likes: 0
Received 0 Likes
on
0 Posts
<TABLE WIDTH="90%" CELLSPACING=0 CELLPADDING=0 ALIGN=CENTER><TR><TD>Quote, originally posted by hondatunedbboy »</TD></TR><TR><TD CLASS="quote">oh snap didn't realize you were in Houston</TD></TR></TABLE>
Yup. Work on the SW, live on the NE. Holla if you need any work done.
Yup. Work on the SW, live on the NE. Holla if you need any work done.
06-02-2008, 04:26 PM
#24
Join Date: Jun 2008
Location: Houston, TX, USA
Posts: 1
Likes: 0
Received 0 Likes
on
0 Posts
Sorry I don't have pictures, but this worked like a charm on the yellowed, opaque headlights on my 93 Camry. I thought I was screwed when my car failed inspection, but this fixed everything for $25. They really look like new. Thanks!

