

 03-25-2015, 12:17 PM
Last edit by: IB Advertising
See related guides and technical advice from our community experts:
Browse all: Lighting
- Honda Accord: How to black out your headlights
Step by step instructions for do-it-yourself repairs.
Browse all: Lighting

DIY JDM black housing headlights
03-27-2006, 11:57 PM
#1
Honda-Tech Member
Thread Starter
Join Date: May 2004
Location: PAISA town aka san diego, ca
Posts: 7,765
Likes: 0
Received 0 Likes
on
0 Posts
well i got the shitty chrome ones and they sucked decided to do it myself and make them black housing ......
Tools needed:
Small philips screwdriver
Oven
Tinfoil
Cookie sheet
High-temp spray paint
Painting tape (I recommend 3M #2080, 3/4" or smaller width)
Small flathead screwdriver (optional)
Step 1: Preheat the oven to about 300�F.
Step 2: Get a cookie sheet and lay some tinfoil on it. Remove the four metal clips from the headlights. I found it unnecessary to remove bulbs or rubber pieces.
Step 3: Heat one headlight at a time for 7-8 minutes until the sealant is gooey. Make sure to cover it in tinfoil first, exposing only the seam, then place it on the cookie sheet. Try not to let any part of the headlight touch the walls, the rack, or especially the heating coils of the oven.
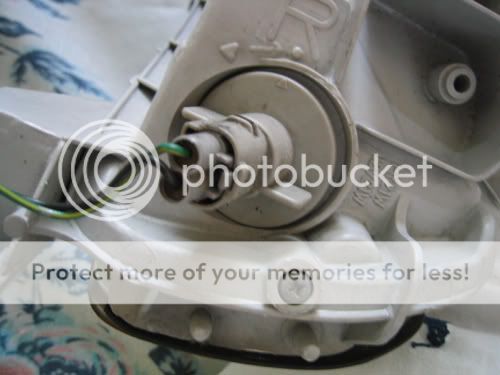
Step 4: Remove this screw while the sealant is still soft.
Step 5: Pry up the plastic tabs carefully and carefully separate the housing. You may want to use a small flathead to get it started, but be very gentle.
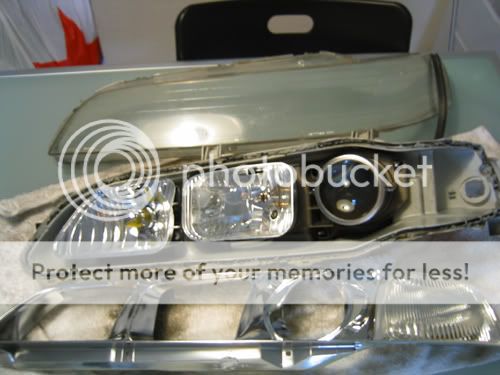
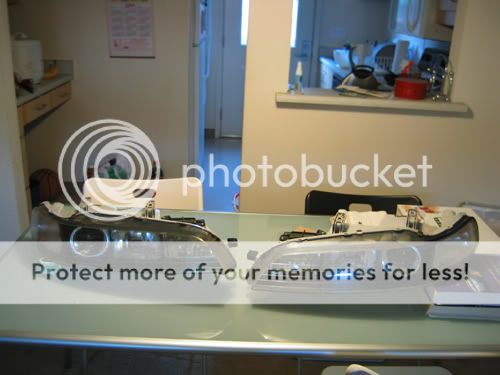
Step 6: Once you have the headlight open, set the projector part of the housing aside. Unscrew the four screws that hold the chrome housing to the clear plastic headlight lens.
Step 7: Carefully remove the chrome housing from the lens, making sure not to get any sealant stuck on the chrome housing. You now have three pieces.
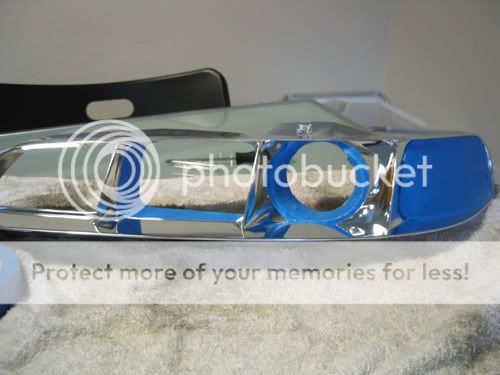
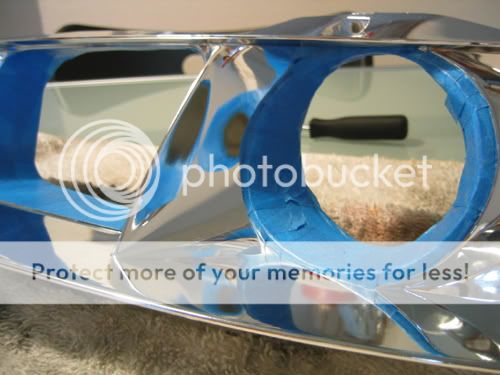
Step 8: Using your painter's tape, mask off the chrome ring around the headlight projector, the turn signal lens, and the back part of the highbeam section.
As is the case whenever you are masking anything, THIS STEP IS CRITICAL. How good of a masking job you do will determine how good your headlights will look in the end. The hardest sections to mask are the curved sections and the chrome ring around the projector. In these cases it is best to use small strips of tape overlapping each other to get the mask as round as possible. It is somewhat better to overspray very little and later remove it than to mask too much and have to mask and spray it again.
Step 9: In a well-ventilated and dust-free area, put your chrome housing on a drop cloth or newspaper, etc. and apply light, even coats, starting off of the housing, moving across slowly, and ending off the housing. Be sure to turn over the housing and get all the areas on the underside that you may have missed.
Step 10: After the housings have dried, reassemble everything in reverse order and admire your work! Make sure you put in that last screw while the sealant is still gooey.
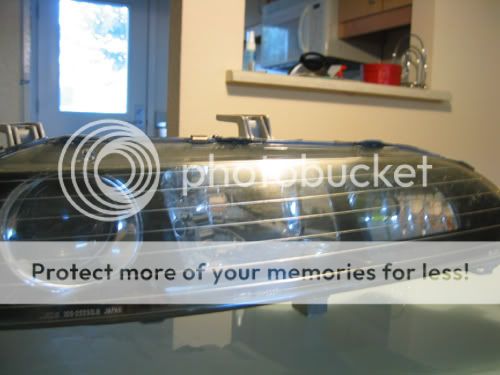
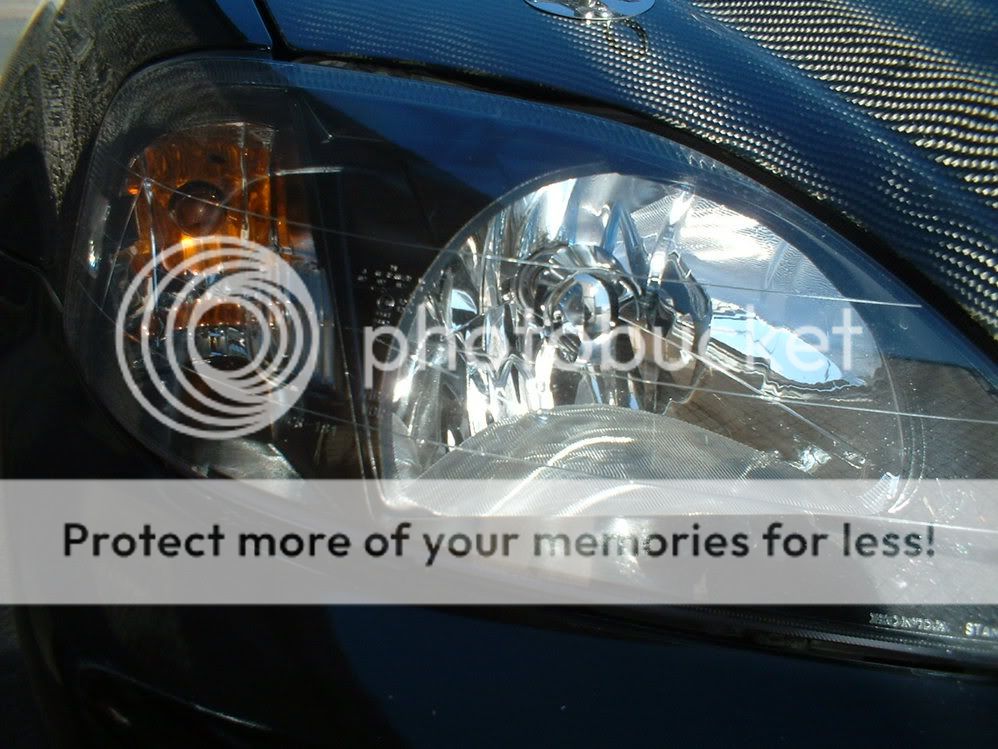
The final product:
Tools needed:
Small philips screwdriver
Oven
Tinfoil
Cookie sheet
High-temp spray paint
Painting tape (I recommend 3M #2080, 3/4" or smaller width)
Small flathead screwdriver (optional)
Step 1: Preheat the oven to about 300�F.
Step 2: Get a cookie sheet and lay some tinfoil on it. Remove the four metal clips from the headlights. I found it unnecessary to remove bulbs or rubber pieces.
Step 3: Heat one headlight at a time for 7-8 minutes until the sealant is gooey. Make sure to cover it in tinfoil first, exposing only the seam, then place it on the cookie sheet. Try not to let any part of the headlight touch the walls, the rack, or especially the heating coils of the oven.
Step 4: Remove this screw while the sealant is still soft.
Step 5: Pry up the plastic tabs carefully and carefully separate the housing. You may want to use a small flathead to get it started, but be very gentle.
Step 6: Once you have the headlight open, set the projector part of the housing aside. Unscrew the four screws that hold the chrome housing to the clear plastic headlight lens.
Step 7: Carefully remove the chrome housing from the lens, making sure not to get any sealant stuck on the chrome housing. You now have three pieces.
Step 8: Using your painter's tape, mask off the chrome ring around the headlight projector, the turn signal lens, and the back part of the highbeam section.
As is the case whenever you are masking anything, THIS STEP IS CRITICAL. How good of a masking job you do will determine how good your headlights will look in the end. The hardest sections to mask are the curved sections and the chrome ring around the projector. In these cases it is best to use small strips of tape overlapping each other to get the mask as round as possible. It is somewhat better to overspray very little and later remove it than to mask too much and have to mask and spray it again.
Step 9: In a well-ventilated and dust-free area, put your chrome housing on a drop cloth or newspaper, etc. and apply light, even coats, starting off of the housing, moving across slowly, and ending off the housing. Be sure to turn over the housing and get all the areas on the underside that you may have missed.
Step 10: After the housings have dried, reassemble everything in reverse order and admire your work! Make sure you put in that last screw while the sealant is still gooey.
The final product:
 03-28-2006, 12:12 AM
#2
Honda-Tech Member
Thread Starter
Join Date: May 2004
Location: PAISA town aka san diego, ca
Posts: 7,765
Likes: 0
Received 0 Likes
on
0 Posts
<TABLE WIDTH="90%" CELLSPACING=0 CELLPADDING=0 ALIGN=CENTER><TR><TD>Quote, originally posted by cire »</TD></TR><TR><TD CLASS="quote">not too bad. you could even do the diy halos while you had it apart (if you like halos)</TD></TR></TABLE>
thanks, but im not a big fan of halos....next project HID retrofit
thanks, but im not a big fan of halos....next project HID retrofit
 03-28-2006, 01:50 AM
#4
Honda-Tech Member
I remember seeing your thread on ti.net a while back and it gave me the inspiration to do it on mine. I did it about 2 months ago but it didnt turn our quite as nice, did you get a sharp edge on your circle?

Trending Topics
03-28-2006, 10:19 AM
#8
Junior Member
Join Date: Dec 2005
Location: Tucson/Chicago
Posts: 743
Likes: 0
Received 0 Likes
on
0 Posts
Good write up and finished product!! I did the same thing to my civic headlights
I think yours turned out better though.
I think yours turned out better though.
03-28-2006, 10:49 AM
#9
Honda-Tech Member
Thread Starter
Join Date: May 2004
Location: PAISA town aka san diego, ca
Posts: 7,765
Likes: 0
Received 0 Likes
on
0 Posts
<TABLE WIDTH="90%" CELLSPACING=0 CELLPADDING=0 ALIGN=CENTER><TR><TD>Quote, originally posted by CNSK »</TD></TR><TR><TD CLASS="quote">black housing looks better then chrome.......</TD></TR></TABLE>
duh
duh
03-29-2006, 12:56 AM
#12
Honda-Tech Member
Join Date: Jan 2006
Location: garden grove, ca, united states
Posts: 432
Likes: 0
Received 0 Likes
on
0 Posts
do u have ne pix of what the headlight is suppose to look like when its covered in foil when u put it into the over?
looks nice
looks nice
03-29-2006, 06:35 AM
#16
Honda-Tech Member
Join Date: Oct 2003
Location: Seattle, WA
Posts: 3,661
Likes: 0
Received 0 Likes
on
0 Posts
nice DIY, now go do that retrofit!
you planning on using s2ks? they are same as the JDM HID headlights
you planning on using s2ks? they are same as the JDM HID headlights
03-29-2006, 07:27 PM
#18
Honda-Tech Member
iTrader: (7)
Join Date: Dec 2005
Location: Anchorage, AK
Posts: 3,032
Likes: 0
Received 0 Likes
on
0 Posts
<TABLE WIDTH="90%" CELLSPACING=0 CELLPADDING=0 ALIGN=CENTER><TR><TD>Quote, originally posted by Stryker »</TD></TR><TR><TD CLASS="quote">my headlights don't fit in my oven</TD></TR></TABLE>
Ditch the toaster oven.
Ditch the toaster oven.
03-29-2006, 09:19 PM
#20
Junior Member
Join Date: Nov 2002
Location: Twin Cities, MN, USA
Posts: 657
Likes: 0
Received 0 Likes
on
0 Posts
<TABLE WIDTH="90%" CELLSPACING=0 CELLPADDING=0 ALIGN=CENTER><TR><TD>Quote, originally posted by gasper44` »</TD></TR><TR><TD CLASS="quote">
Ditch the toaster oven. </TD></TR></TABLE>
No seriously, my healights won't fit i need help!
Ditch the toaster oven.
</TD></TR></TABLE>No seriously, my healights won't fit i need help!
03-29-2006, 09:32 PM
#21
Join Date: Aug 2005
Location: Somewhere, No Thieves, United States
Posts: 768
Likes: 0
Received 0 Likes
on
0 Posts
you can use a:
Heat Gun
Hair Dryer
or a variable temperature soldiering iron with a flat head screwdriver like tip (this is the hardest not to screw up)
Heat Gun
Hair Dryer
or a variable temperature soldiering iron with a flat head screwdriver like tip (this is the hardest not to screw up)
03-30-2006, 02:00 AM
#22
Honda-Tech Member
<TABLE WIDTH="90%" CELLSPACING=0 CELLPADDING=0 ALIGN=CENTER><TR><TD>Quote, originally posted by Stryker »</TD></TR><TR><TD CLASS="quote">
No seriously, my healights won't fit i need help!</TD></TR></TABLE>
Lol that **** is true, my one doesnt fit my oven either. Damn you americans with your fat ovens
BTW I used a hair dryer and it was perfect (y)
No seriously, my healights won't fit i need help!</TD></TR></TABLE>
Lol that **** is true, my one doesnt fit my oven either. Damn you americans with your fat ovens
BTW I used a hair dryer and it was perfect (y)
03-30-2006, 02:26 AM
#23
Honda-Tech Member
Join Date: Apr 2004
Posts: 424
Likes: 0
Received 0 Likes
on
0 Posts
<TABLE WIDTH="90%" CELLSPACING=0 CELLPADDING=0 ALIGN=CENTER><TR><TD>Quote, originally posted by kcjohnnyboy »</TD></TR><TR><TD CLASS="quote">what type of silicone sealant do you use to seal the headlights back up? and where do you get it?</TD></TR></TABLE>
I was wondering the same or did you use the same sealant that was already on the headlights?
I was wondering the same or did you use the same sealant that was already on the headlights?
03-30-2006, 12:54 PM
#25
Junior Member
Join Date: Nov 2002
Location: Twin Cities, MN, USA
Posts: 657
Likes: 0
Received 0 Likes
on
0 Posts
holy crap did this take forever, using a heat gun sucks *****, and my outer housing is all bent out of shape this sucks, but they do look good though when the hood is shut