
DIY: Type R Valve Cover....Write up...56K BEWARE...
 03-05-2006, 11:41 PM
#1
Honda-Tech Member
Thread Starter
Join Date: Jul 2002
Location: Stockton, CA
Posts: 469
Likes: 0
Received 0 Likes
on
0 Posts
I got bored of my black valve cover so I decided to painted it. It's not the best but it looks better now. It cost me less than $50...Here's my write up, hopefully it's helpful to all of you...
Things I used...
Aircraft paint removal
Paint Brush (Brush off original coating of the valve cover)
VHT Red Wrinkle Plus Paint
Tape
Sand paper
Gloves


Here's a look of my original valve cover. First, I took off all the bolts to remove the valve cover. After the valve cover was removed, I took off all of the seals.

Then pour the Aircraft Remover over the valve cover and allowed the solution do its thing. Let it sit for about 10-15 mins and brush off all of the original coating. You might have to use some more Aircraft Remover to remove the remaining coating.

I then watered down the valve cover and dried it for prepping. I only covered the oil hole and the spark plug holes.

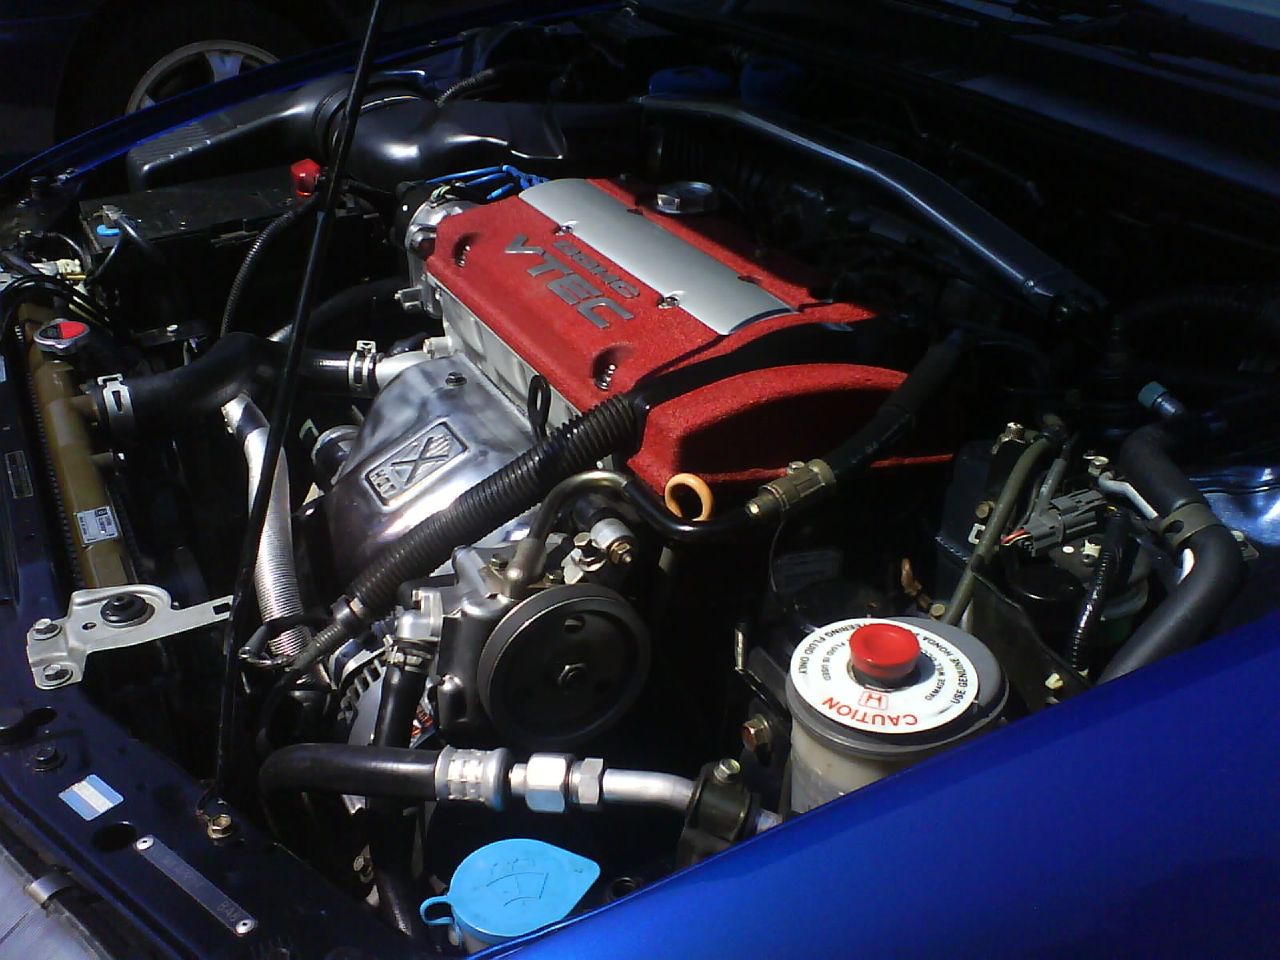
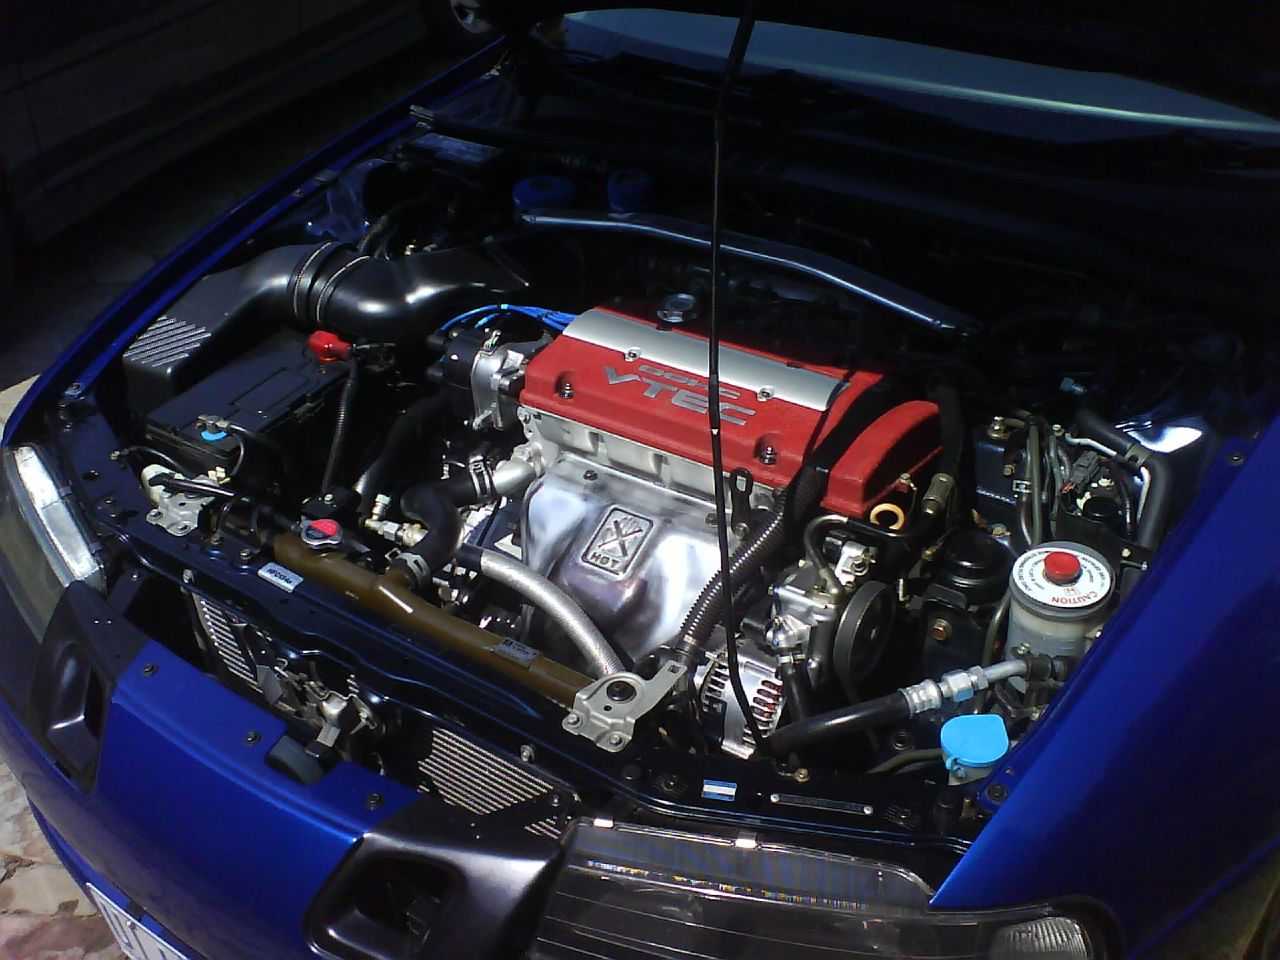
I then painted my valve cover 3 coats with 2-3 mins in between. It took about 4-5 hours to dry and because it was cold outside. After it was dried, I sanded down the letters for a smooth finish. I replaced all of my valve cover seals and put the valve cover back on. Be careful with tightening the bolts because they can break easily. Here are pics of my finished valve cover. Comments are welcome...This is my first write up, I apologize if its not perfect...Thanks...


Modified by igone916 at 12:56 AM 3/6/2006
Things I used...
Aircraft paint removal
Paint Brush (Brush off original coating of the valve cover)
VHT Red Wrinkle Plus Paint
Tape
Sand paper
Gloves
Here's a look of my original valve cover. First, I took off all the bolts to remove the valve cover. After the valve cover was removed, I took off all of the seals.
Then pour the Aircraft Remover over the valve cover and allowed the solution do its thing. Let it sit for about 10-15 mins and brush off all of the original coating. You might have to use some more Aircraft Remover to remove the remaining coating.
I then watered down the valve cover and dried it for prepping. I only covered the oil hole and the spark plug holes.
I then painted my valve cover 3 coats with 2-3 mins in between. It took about 4-5 hours to dry and because it was cold outside. After it was dried, I sanded down the letters for a smooth finish. I replaced all of my valve cover seals and put the valve cover back on. Be careful with tightening the bolts because they can break easily. Here are pics of my finished valve cover. Comments are welcome...This is my first write up, I apologize if its not perfect...Thanks...
Modified by igone916 at 12:56 AM 3/6/2006

 03-05-2006, 11:50 PM
#6
Honda-Tech Member
Join Date: Jul 2005
Location: Bay Area, CA, USA
Posts: 9,781
Likes: 0
Received 0 Likes
on
0 Posts
<TABLE WIDTH="90%" CELLSPACING=0 CELLPADDING=0 ALIGN=CENTER><TR><TD>Quote, originally posted by dreww.. »</TD></TR><TR><TD CLASS="quote">Nice work  </TD></TR></TABLE>
</TD></TR></TABLE>
03-05-2006, 11:57 PM
#7
Honda-Tech Member
Thread Starter
Join Date: Jul 2002
Location: Stockton, CA
Posts: 469
Likes: 0
Received 0 Likes
on
0 Posts
<TABLE WIDTH="90%" CELLSPACING=0 CELLPADDING=0 ALIGN=CENTER><TR><TD>Quote, originally posted by playalistic2 »</TD></TR><TR><TD CLASS="quote">nice now clean the bay</TD></TR></TABLE>
Hahhahaah...thanks, thats my next step...
Hahhahaah...thanks, thats my next step...
Trending Topics
03-06-2006, 12:07 AM
#8
Honda-Tech Member
Join Date: May 2005
Location: Jerk Empire SoKaL, cA, USA
Posts: 727
Likes: 0
Received 0 Likes
on
0 Posts
<TABLE WIDTH="90%" CELLSPACING=0 CELLPADDING=0 ALIGN=CENTER><TR><TD>Quote, originally posted by dreww.. »</TD></TR><TR><TD CLASS="quote">Nice work </TD></TR></TABLE>
</TD></TR></TABLE>
03-06-2006, 02:42 AM
#10
thanks for the 100th write up on this but please keep the pics hosted for future help.also you can use chapstick or vasoline on the letters then paint the valve cover when dried the paint on the letter just wipe off no sanding or dremel tool required.
03-06-2006, 02:46 AM
#11
Member

<TABLE WIDTH="90%" CELLSPACING=0 CELLPADDING=0 ALIGN=CENTER><TR><TD>Quote, originally posted by EJ8 DAVID »</TD></TR><TR><TD CLASS="quote">thanks for the 100th write up on this but please keep the pics hosted for future help.also you can use chapstick or vasoline on the letters then paint the valve cover when dried the paint on the letter just wipe off no sanding or dremel tool required. </TD></TR></TABLE>
wow thats a good idea, would you suggest doing this for the headlight housing?
</TD></TR></TABLE>wow thats a good idea, would you suggest doing this for the headlight housing?
01-07-2007, 03:13 PM
#13
Junior Member
Join Date: Nov 2003
Location: Melbourne, Victoria, Australia
Posts: 362
Likes: 0
Received 0 Likes
on
0 Posts
heres a tip for using the VHT stuff
I found that it takes its sorry *** time to get the desired wrinkle effect, so i used a heatgun on it, ever so gently though, heat the area until it wrinkles and then move on to the next spot, always move the gun and don't stay in one spot for too long.
Voila!
Modified by skinnyboy at 10:53 AM 1/8/2007
01-07-2007, 03:29 PM
#16

Join Date: Nov 2006
Posts: 471
Likes: 0
Received 0 Likes
on
0 Posts
the next time i paint my valve cover
ill do 3-4 coats. after each light coat, blowdry the bitch and youll see it wrinkle on the spot.
now, instead of waiting days for it to completely dry, ill just wait a day and install it and let vtec finish baking itl
ill do 3-4 coats. after each light coat, blowdry the bitch and youll see it wrinkle on the spot.
now, instead of waiting days for it to completely dry, ill just wait a day and install it and let vtec finish baking itl
01-07-2007, 03:48 PM
#17
Junior Member
Join Date: Nov 2003
Location: Melbourne, Victoria, Australia
Posts: 362
Likes: 0
Received 0 Likes
on
0 Posts
my method was to paint one horizontal light coat, then wait 1 hour, then paint 1 vertical coat, wait an hour, then one thickish horizontal coat, let dry for 30 minutes, then heatgun that coat. Its all in the prep as well, make sure its squeaky clean and for vibrant red, use an etch primer. I also used Vaseline on the lettering and sprayed over this, the once the paint is dry, used a razer blade and skimmed off the paint easily off the lettering. Waiting a day, then steel wool'ed the letters for a nice smooth finish.
01-07-2007, 04:14 PM
#18
Honda-Tech Member

Join Date: Jun 2004
Location: Pawt RI
Posts: 1,037
Likes: 0
Received 0 Likes
on
0 Posts
<TABLE WIDTH="90%" CELLSPACING=0 CELLPADDING=0 ALIGN=CENTER><TR><TD>Quote, originally posted by Conechasing »</TD></TR><TR><TD CLASS="quote">Nice work. </TD></TR></TABLE>
</TD></TR></TABLE>
01-07-2007, 04:40 PM
#20
Honda-Tech Member
<TABLE WIDTH="90%" CELLSPACING=0 CELLPADDING=0 ALIGN=CENTER><TR><TD>Quote, originally posted by playalistic2 »</TD></TR><TR><TD CLASS="quote">nice now clean the bay</TD></TR></TABLE>
01-08-2007, 04:39 AM
#25
Junior Member
Join Date: Nov 2003
Location: Melbourne, Victoria, Australia
Posts: 362
Likes: 0
Received 0 Likes
on
0 Posts
<TABLE WIDTH="90%" CELLSPACING=0 CELLPADDING=0 ALIGN=CENTER><TR><TD>Quote, originally posted by Crasian »</TD></TR><TR><TD CLASS="quote">im still lookin for a place to buy that paint here in canada  </TD></TR></TABLE>
30 seconds in Google gives me this Canadian Retailer
http://www.hivolume.com/en/contact.php
And their line of VHT Paints
http://www.hivolume.com/en/list.php?ID=84
</TD></TR></TABLE>30 seconds in Google gives me this Canadian Retailer
http://www.hivolume.com/en/contact.php
And their line of VHT Paints
http://www.hivolume.com/en/list.php?ID=84