
2007 Honda Fit Header Install
 01-15-2008, 02:23 AM
#1
PHANTOM MENACE
Thread Starter
iTrader: (2)
Join Date: May 2005
Location: SYCUAN NINE, CA, USA
Posts: 6,042
Likes: 0
Received 3 Likes
on
3 Posts
*This thread should only be referred to as a general guide. Different aftermarket manufacturers may have header designs that differ greatly in comparison to the header you are about to see. Installation may vary for your particular application
**The header in the following pictures is a prototype for an undisclosed company which was provided to me for R&D and QA purposes
Tools required
ratchet
10mm regular socket
12mm regular socket
14mm regular and deep socket
socket extensions, various lengths
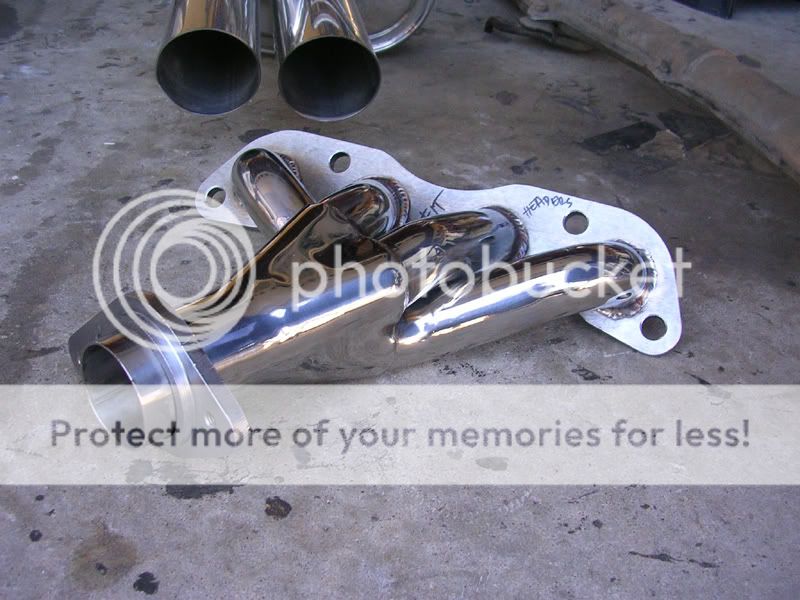
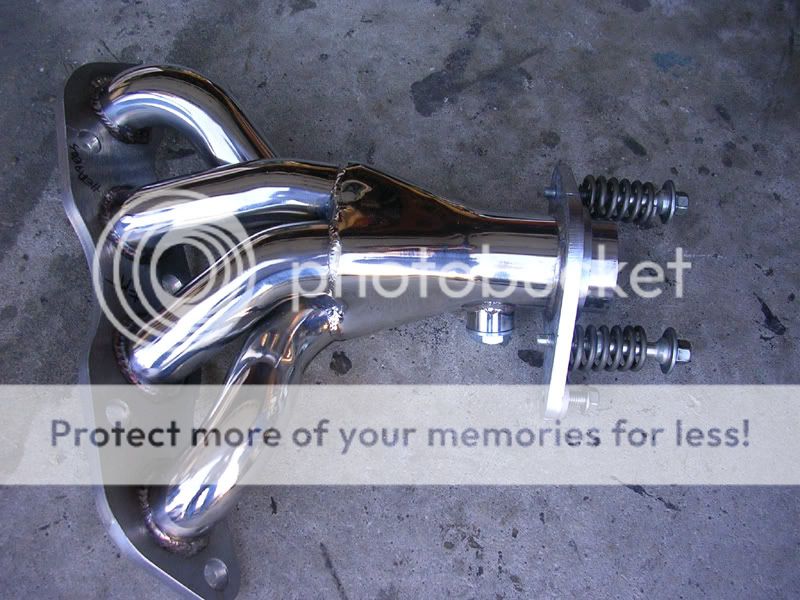
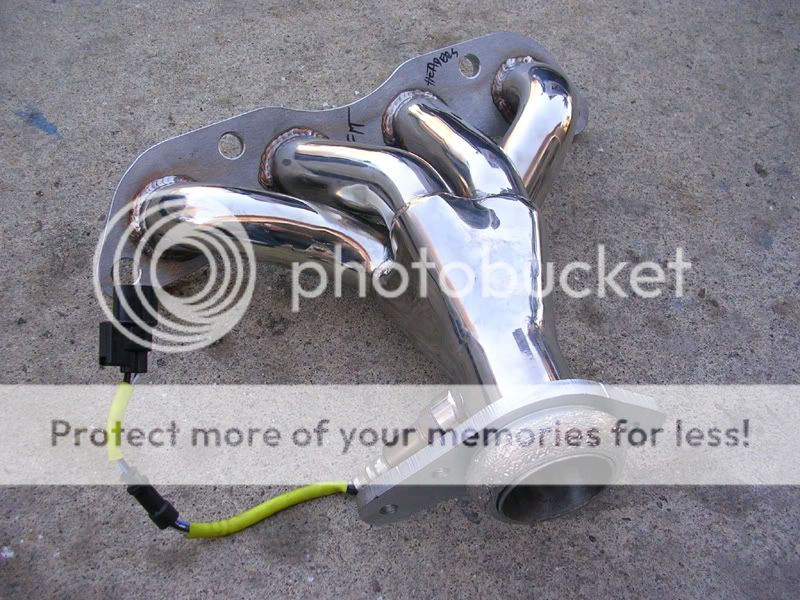
The header...
First step, remove 3 10mm bolts that secure the heat shield to the exhaust manifold. They may be hard to see and even harder to get to, but they are there and they aren't tough to remove.


Remove the heat shield and set aside.
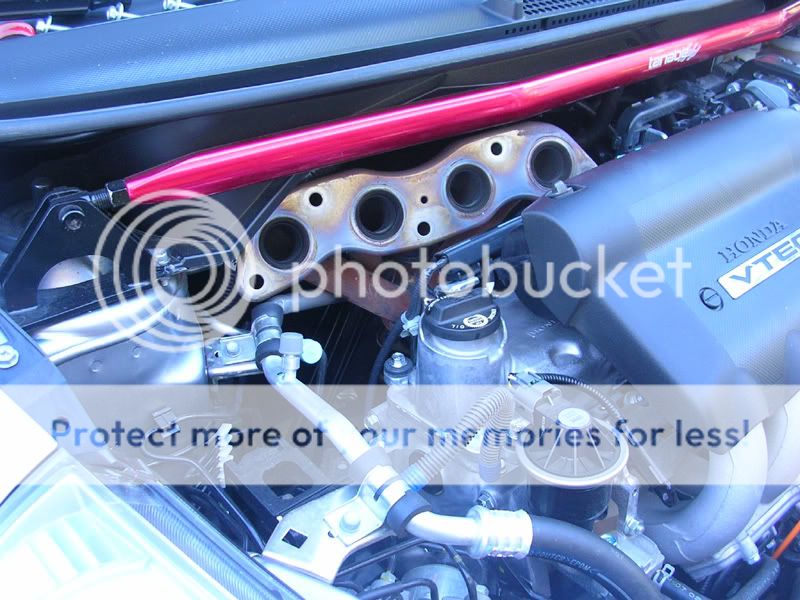
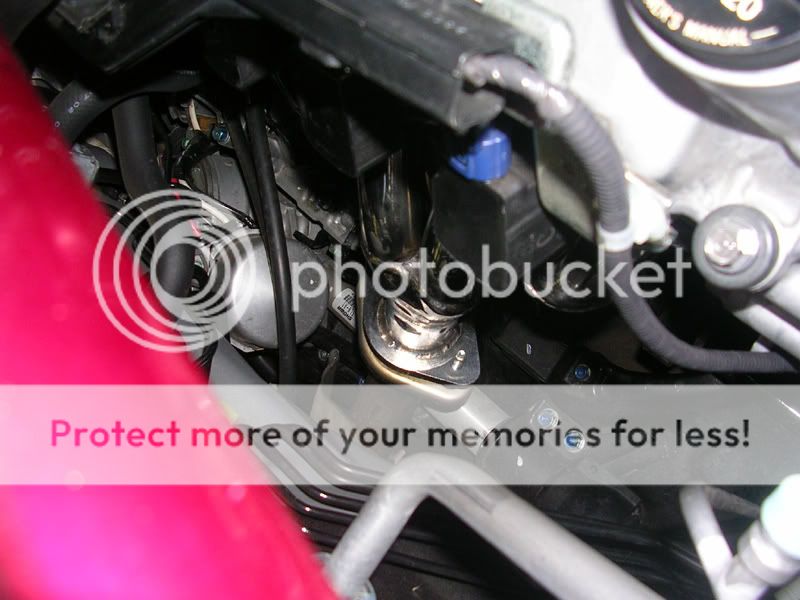
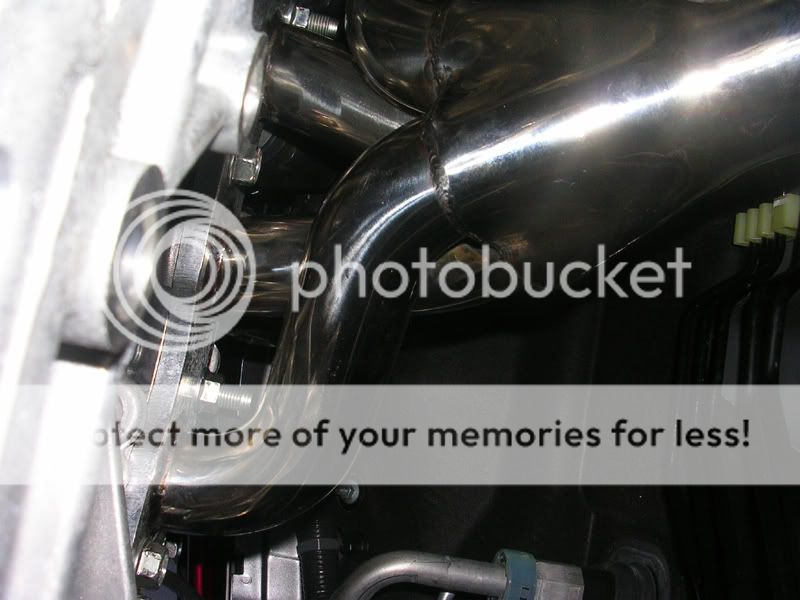
Next, remove 2 14mm nuts on the upper half of the exhaust manifold flange using a deep socket and remove the 3 14mm bolts that secure the lower portion of the flange to the head. They will be tough to remove due to the amount of space behind the engine in the engine bay.
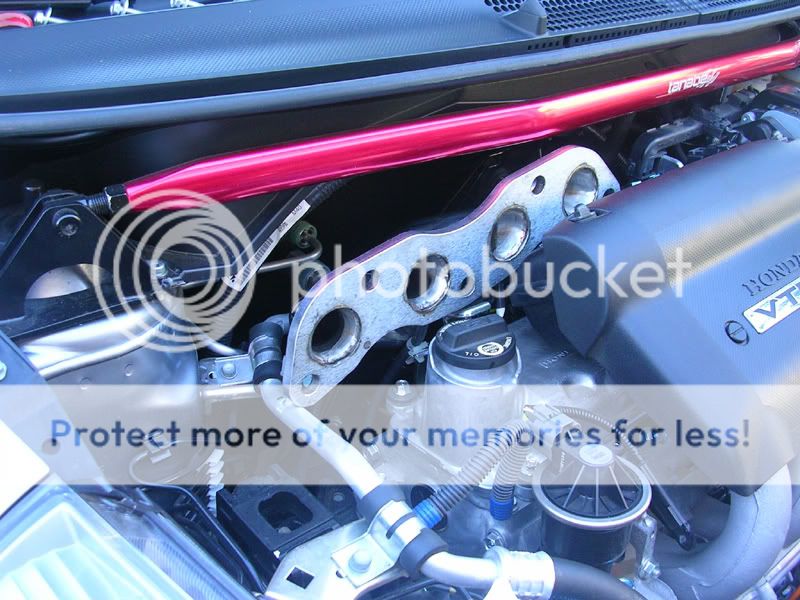
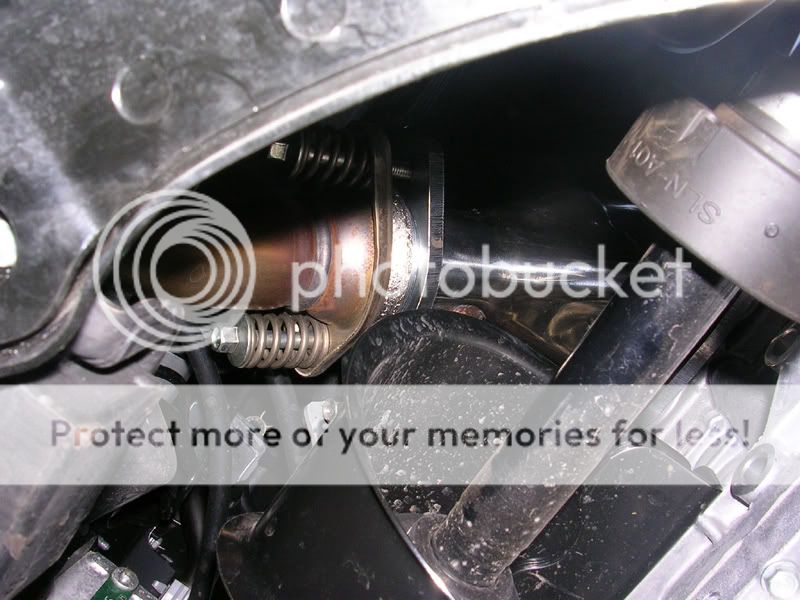
When I did this particular step, for some reason the two upper 14mm nuts removed each entire stud from the head as shown:
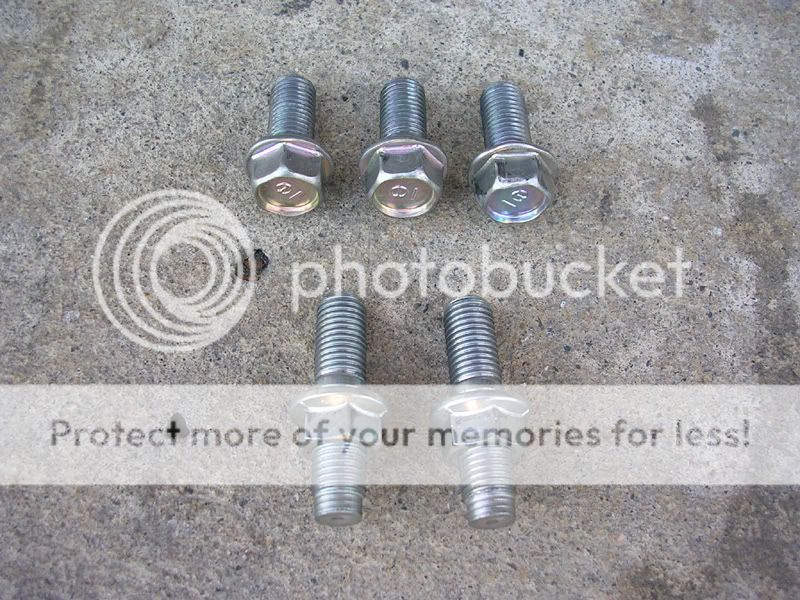
Later I reinstalled them as is with no issues but should you encounter this same scenario, I highly recommend separating each nut from it's respective stud, applying some sort of thread locker to the stud, and reinstalling the stud(s) back into the head.
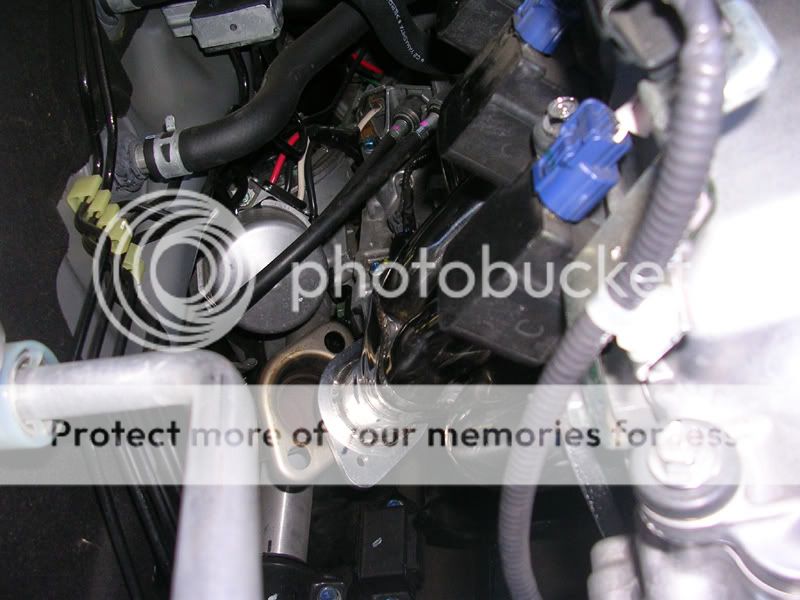
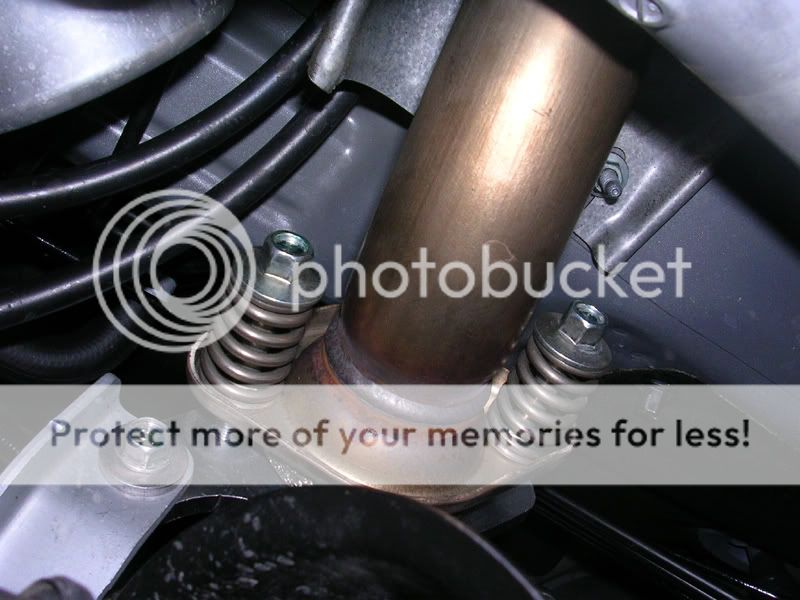
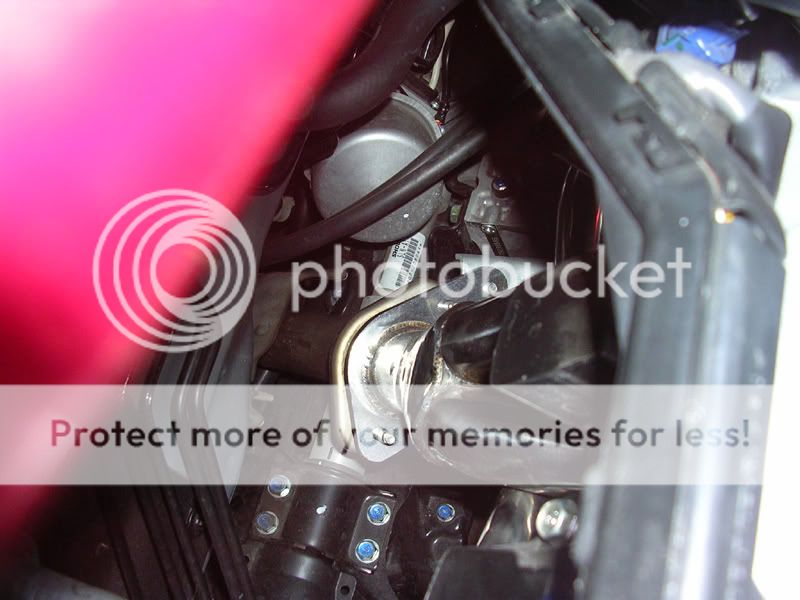
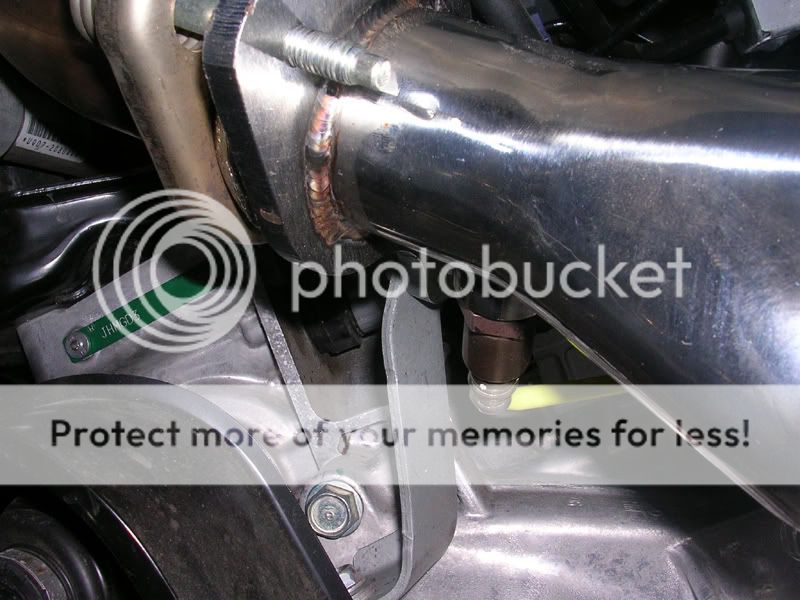
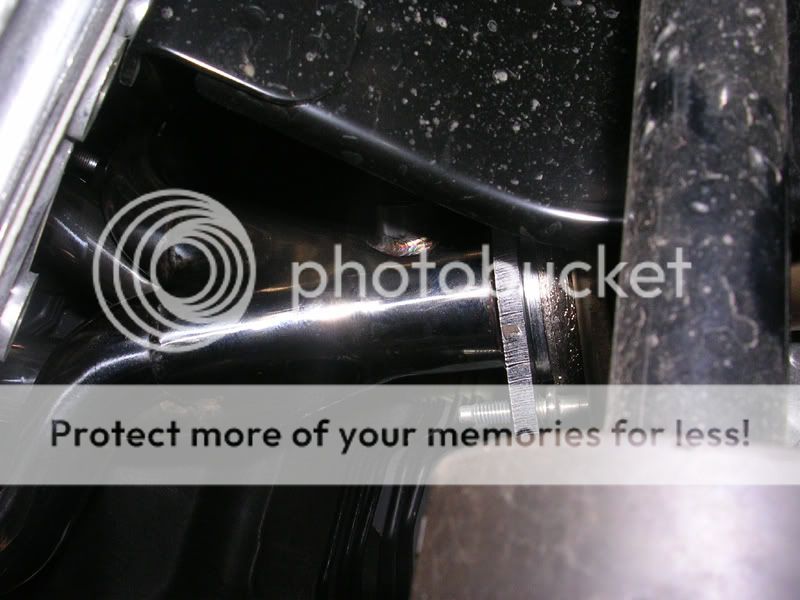
Next, you'll need to jack up the car in order to reach the two 12mm spring bolts at the collector as well as the 12mm bolt that secures the manifold to it's bracket. This part may be very difficult because there is very little room to work underneath there and it is difficult to maneuver an extension into place. I was unthreading each spring bolt about a 1/6 of a turn at a time. You may notice that the bolts are fairly long too. Take your time and do your best to remove them.
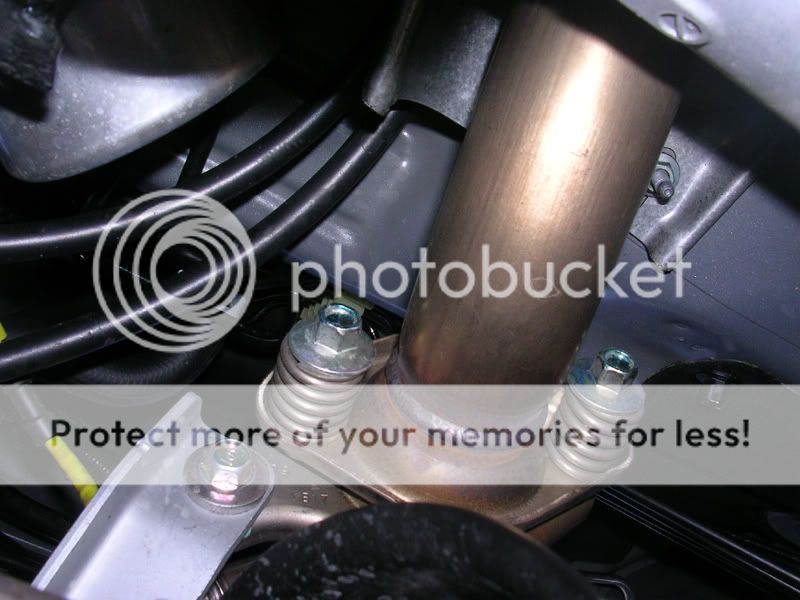
Disconnect your O2 sensor and you are ready to remove the exhaust manifold.
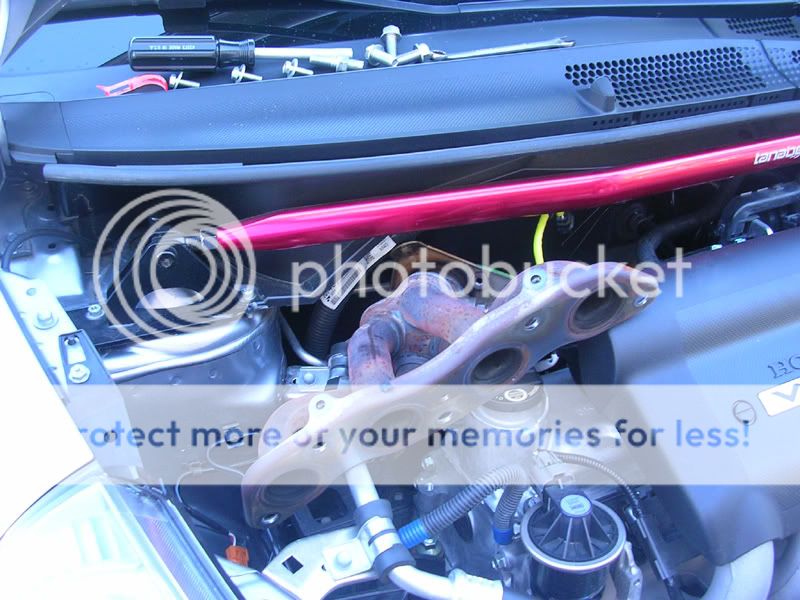
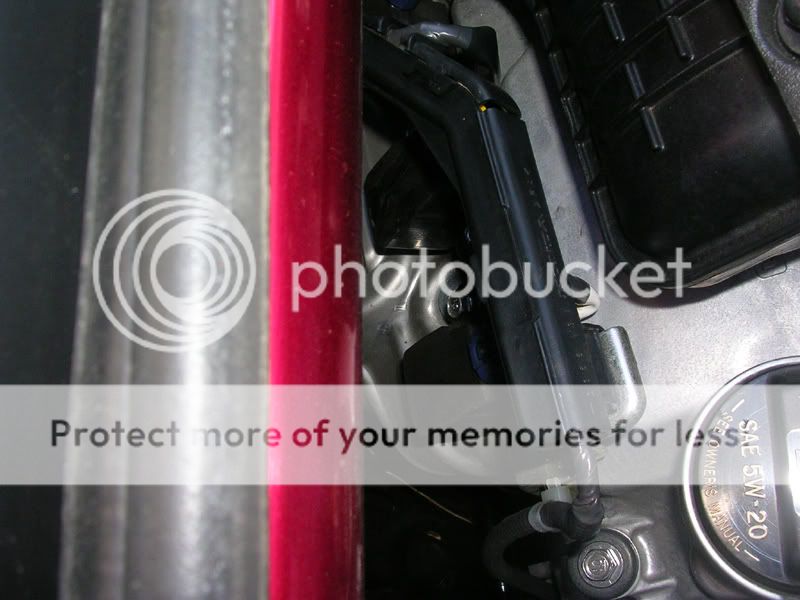
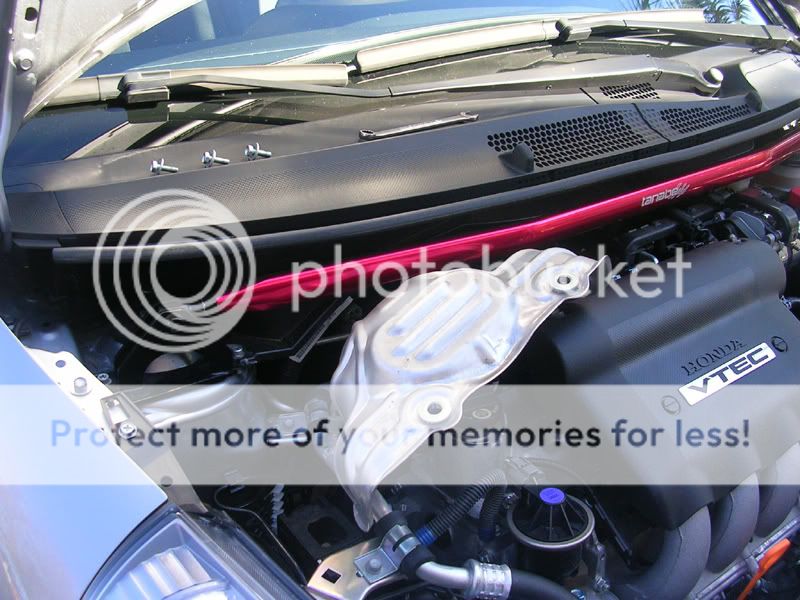
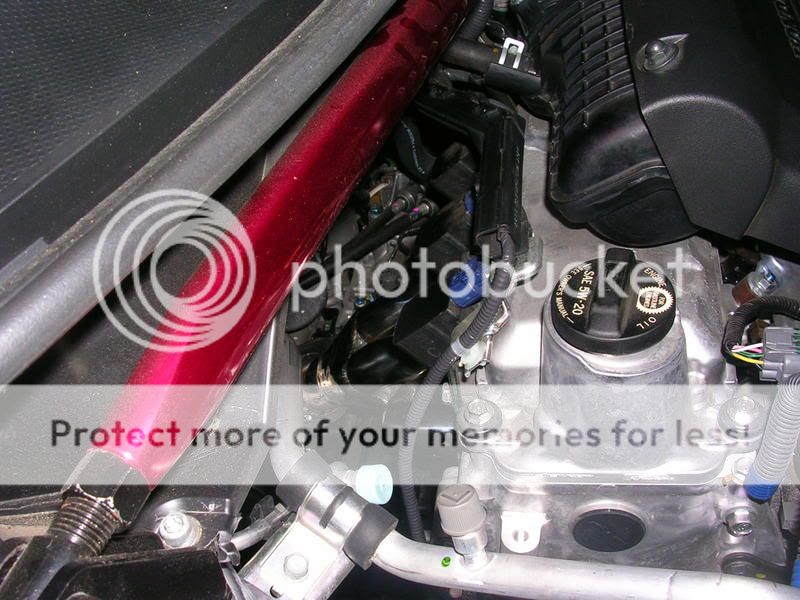
NOTE: The car I was working on was equipped with an aftermarket front strut tower bar. Although I was able to maneuver the exhaust manifold out without scratching the bar's finish, I highly recommend removing the bar if the vehicle you're working on is equipped with one to avoid possibly damaging it.
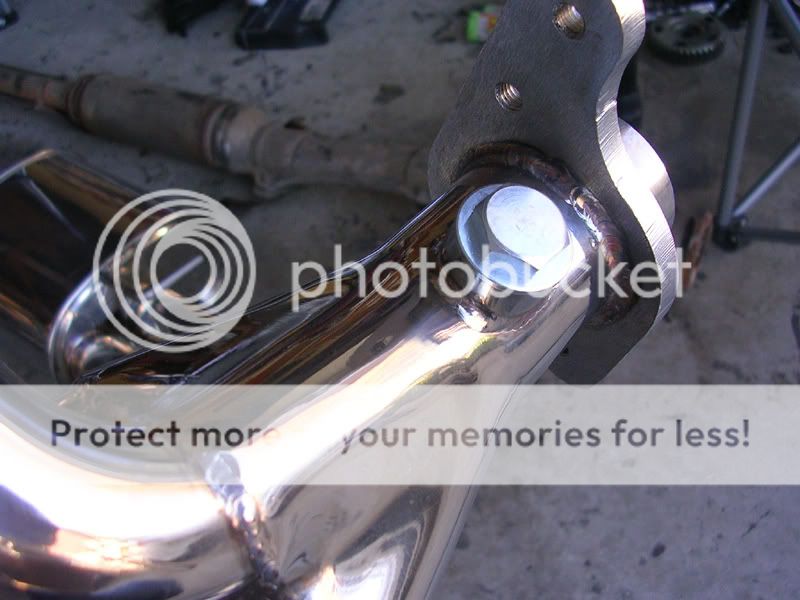
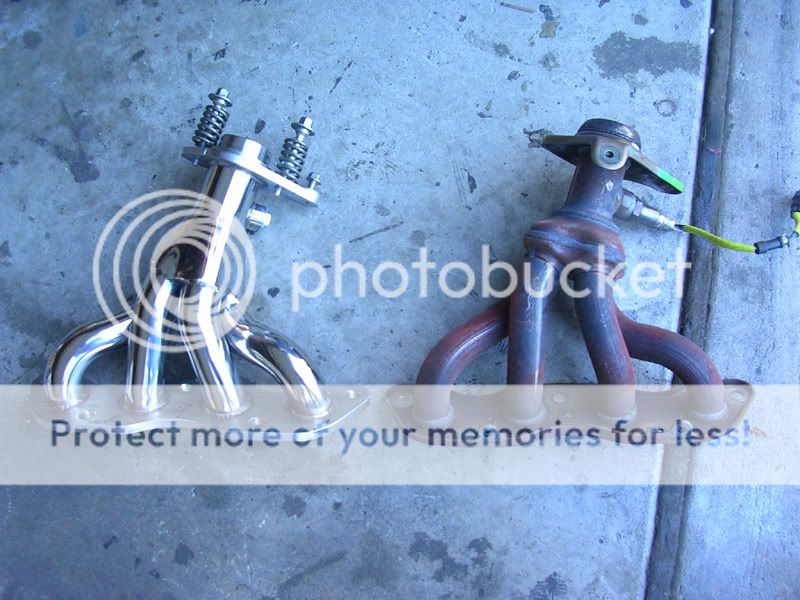
Now that the OEM exhaust manifold is out, I decided to double check and make sure that the bracket bolt and two spring bolts would thread correctly into the aftermarket header.
Just for reference, I took some comparison pics.

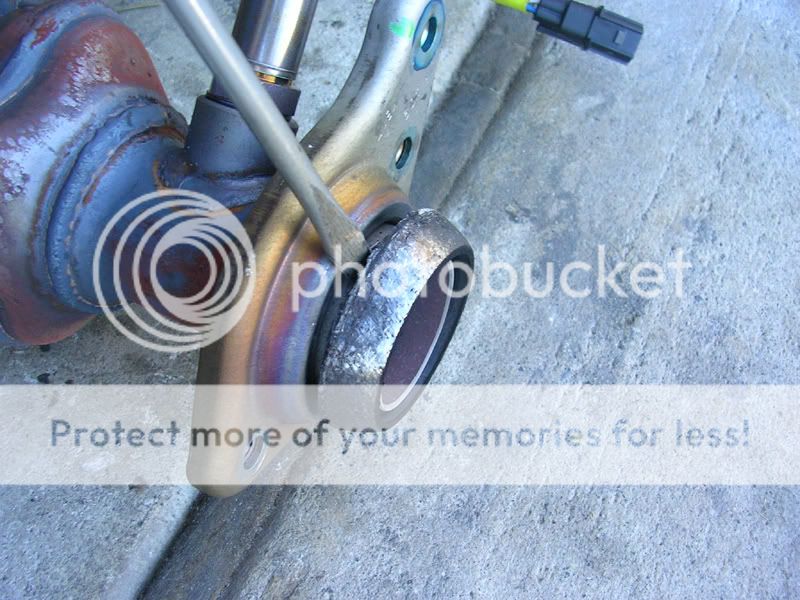
My buddy that provided the header instructed me to reuse the stock donut gasket. I proceeded to remove the original donut gasket...
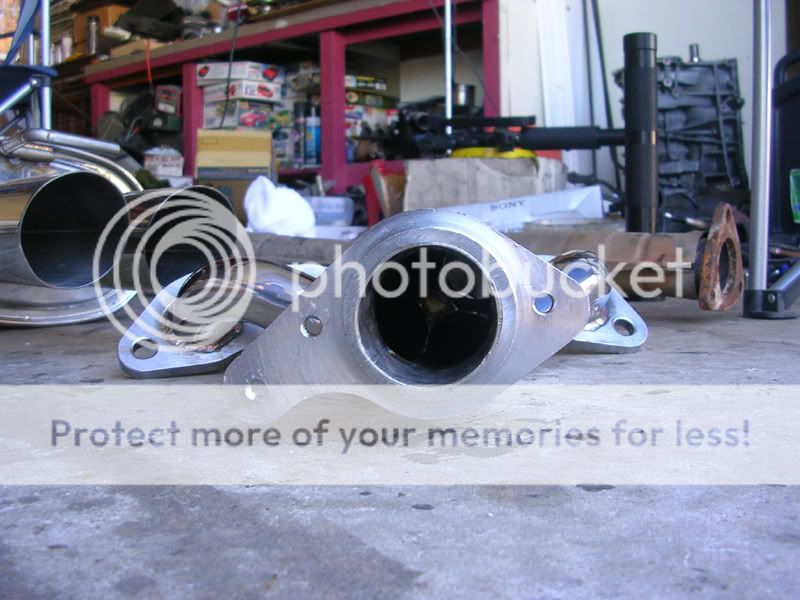
But then I noticed that the collector on the new header had a larger diameter than the collector on the OEM manifold so reusing the donut gasket was no longer an option. In order to find a solution, I took the header with me to the nearest parts store and asked for a new donut gasket that matched the diameter of the collector. Problem solved.
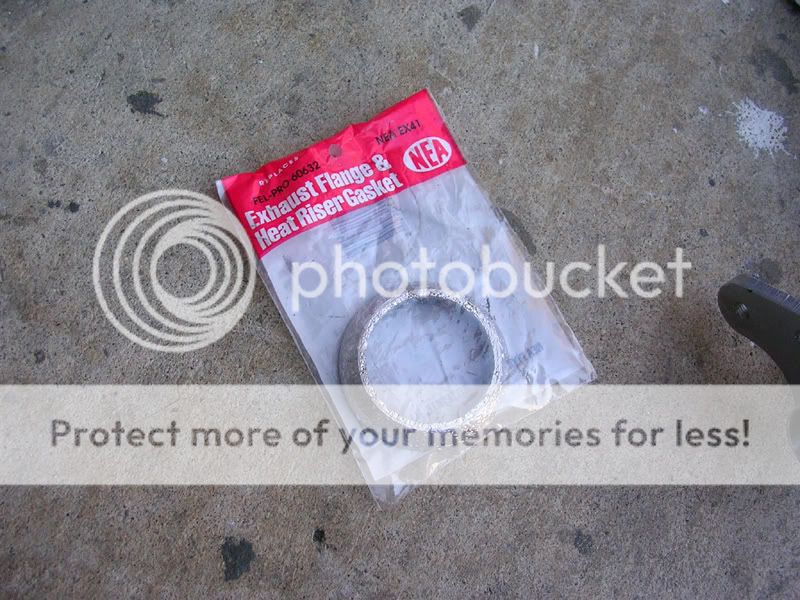
Comparison of the two donut gaskets, new one is on the left and the OEM one is on the right:

New donut gasket installed on the new header:
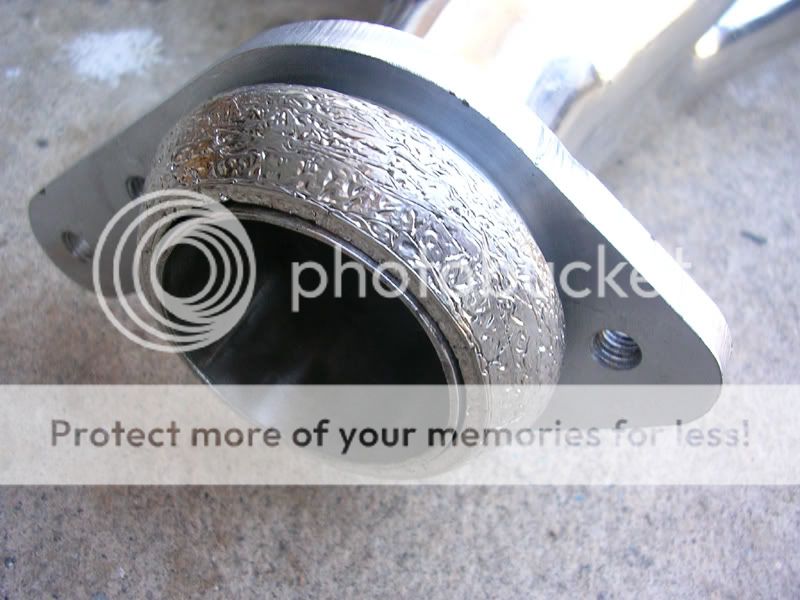
With the O2 sensor properly installed, the new header is ready:
Installation of the new header is the opposite/reverse of removing the OEM exhaust manifold. If the exhaust manifold studs had come out of the head and you did not separate/reinstall them back into the head, you'll have a difficult time installing the new header because you'll have to align the exhaust manifold gasket and header to the threaded holes on the head "blind" since they face the firewall. If they did not come out (or they came out but you reinstalled them properly) you should have no issues since the studs will align everything for you.
NOTE: The exhaust manifold gasket is not symmetrical in design which means that it can only be installed one way.
When installing the new header, install all nuts and bolts loose until everything is on and aligned correctly.
After that is done, you can tighten up all the bolts as necessary.
After everything was tightened and secure, I had reset the ECU and started up the car. I let the owner take it for a test run and there were no issues what so ever.
Questions or comments? Feel free to post...
Modified by 24TEN at 3:49 AM 1/15/2008
**The header in the following pictures is a prototype for an undisclosed company which was provided to me for R&D and QA purposes
Tools required
ratchet
10mm regular socket
12mm regular socket
14mm regular and deep socket
socket extensions, various lengths
The header...
First step, remove 3 10mm bolts that secure the heat shield to the exhaust manifold. They may be hard to see and even harder to get to, but they are there and they aren't tough to remove.
Remove the heat shield and set aside.
Next, remove 2 14mm nuts on the upper half of the exhaust manifold flange using a deep socket and remove the 3 14mm bolts that secure the lower portion of the flange to the head. They will be tough to remove due to the amount of space behind the engine in the engine bay.
When I did this particular step, for some reason the two upper 14mm nuts removed each entire stud from the head as shown:
Later I reinstalled them as is with no issues but should you encounter this same scenario, I highly recommend separating each nut from it's respective stud, applying some sort of thread locker to the stud, and reinstalling the stud(s) back into the head.
Next, you'll need to jack up the car in order to reach the two 12mm spring bolts at the collector as well as the 12mm bolt that secures the manifold to it's bracket. This part may be very difficult because there is very little room to work underneath there and it is difficult to maneuver an extension into place. I was unthreading each spring bolt about a 1/6 of a turn at a time. You may notice that the bolts are fairly long too. Take your time and do your best to remove them.
Disconnect your O2 sensor and you are ready to remove the exhaust manifold.
NOTE: The car I was working on was equipped with an aftermarket front strut tower bar. Although I was able to maneuver the exhaust manifold out without scratching the bar's finish, I highly recommend removing the bar if the vehicle you're working on is equipped with one to avoid possibly damaging it.
Now that the OEM exhaust manifold is out, I decided to double check and make sure that the bracket bolt and two spring bolts would thread correctly into the aftermarket header.
Just for reference, I took some comparison pics.
My buddy that provided the header instructed me to reuse the stock donut gasket. I proceeded to remove the original donut gasket...
But then I noticed that the collector on the new header had a larger diameter than the collector on the OEM manifold so reusing the donut gasket was no longer an option. In order to find a solution, I took the header with me to the nearest parts store and asked for a new donut gasket that matched the diameter of the collector. Problem solved.
Comparison of the two donut gaskets, new one is on the left and the OEM one is on the right:
New donut gasket installed on the new header:
With the O2 sensor properly installed, the new header is ready:
Installation of the new header is the opposite/reverse of removing the OEM exhaust manifold. If the exhaust manifold studs had come out of the head and you did not separate/reinstall them back into the head, you'll have a difficult time installing the new header because you'll have to align the exhaust manifold gasket and header to the threaded holes on the head "blind" since they face the firewall. If they did not come out (or they came out but you reinstalled them properly) you should have no issues since the studs will align everything for you.
NOTE: The exhaust manifold gasket is not symmetrical in design which means that it can only be installed one way.
When installing the new header, install all nuts and bolts loose until everything is on and aligned correctly.
After that is done, you can tighten up all the bolts as necessary.
After everything was tightened and secure, I had reset the ECU and started up the car. I let the owner take it for a test run and there were no issues what so ever.
Questions or comments? Feel free to post...
Modified by 24TEN at 3:49 AM 1/15/2008
 01-15-2008, 07:14 AM
#2
Honda-Tech Member
Join Date: Sep 2002
Location: southern, nj, usa
Posts: 1,389
Likes: 0
Received 0 Likes
on
0 Posts
wow that looks annoying hahaha.
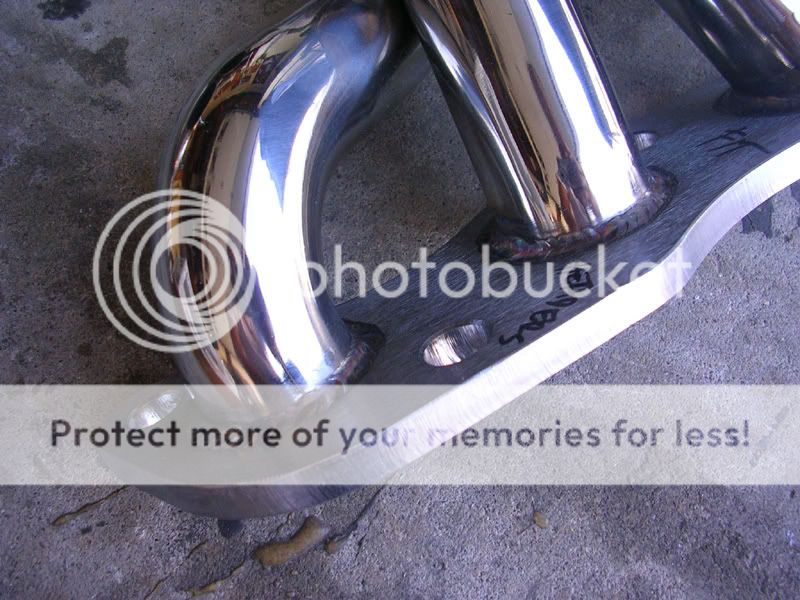
so do we know of the power gains, if any? no the butt dyno does count the oem header actually looks pretty good except for the merge and the merge on the aftermarket peice doesnt look too fabulous...
EDIT: "no the butt dyno does NOT count"
do you have any pics of the oem peice looking up at the merge? on the outside it looks quite bulbous but on the inside it might be smooth...
also, do you have weight dfferences between the two? the aftermarket peice looks a pound or two heavier just because of the flanges.
Modified by thisisntjared at 3:12 PM 1/15/2008
so do we know of the power gains, if any? no the butt dyno does count
the oem header actually looks pretty good except for the merge and the merge on the aftermarket peice doesnt look too fabulous...EDIT: "no the butt dyno does NOT count"
do you have any pics of the oem peice looking up at the merge? on the outside it looks quite bulbous but on the inside it might be smooth...
also, do you have weight dfferences between the two? the aftermarket peice looks a pound or two heavier just because of the flanges.
Modified by thisisntjared at 3:12 PM 1/15/2008
01-15-2008, 10:49 AM
#3
PHANTOM MENACE
Thread Starter
iTrader: (2)
Join Date: May 2005
Location: SYCUAN NINE, CA, USA
Posts: 6,042
Likes: 0
Received 3 Likes
on
3 Posts
<TABLE WIDTH="90%" CELLSPACING=0 CELLPADDING=0 ALIGN=CENTER><TR><TD>Quote, originally posted by thisisntjared »</TD></TR><TR><TD CLASS="quote">so do we know of the power gains, if any? no the butt dyno does count </TD></TR></TABLE>
I think you are the first person to say that a butt dyno does count
I asked the owner if she had noticed any difference in power or acceleration and she said it noticeably picks up better under normal load. I have yet to ask if she's done a full throttle run 1st-3rd gear so for now that's all I've got, no actual dyno specs (sorry).
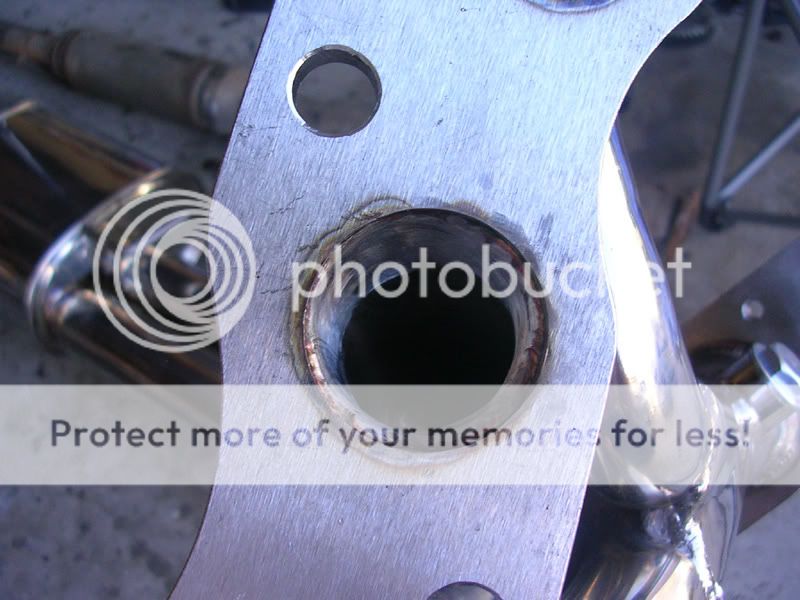
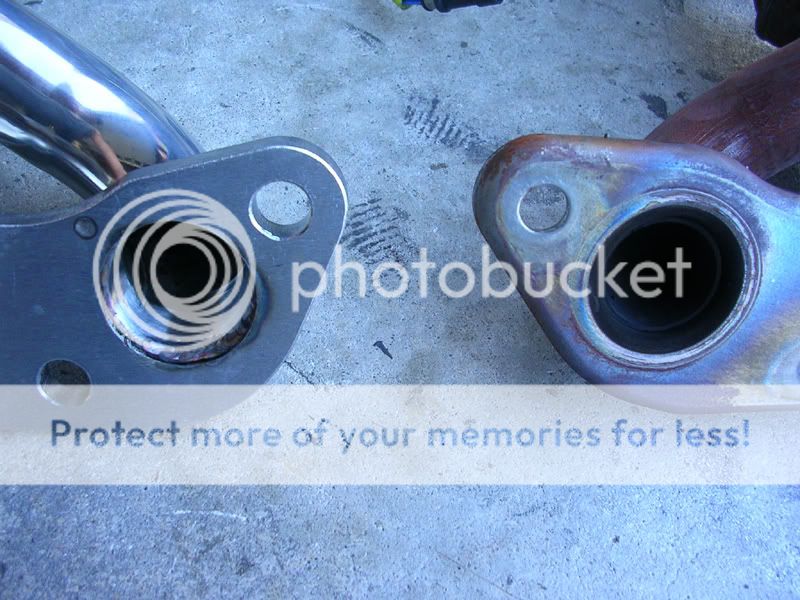
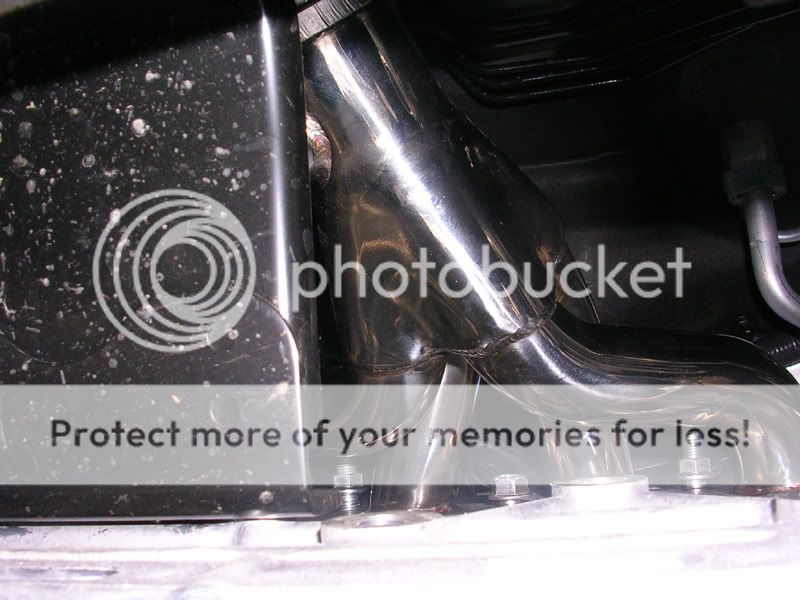
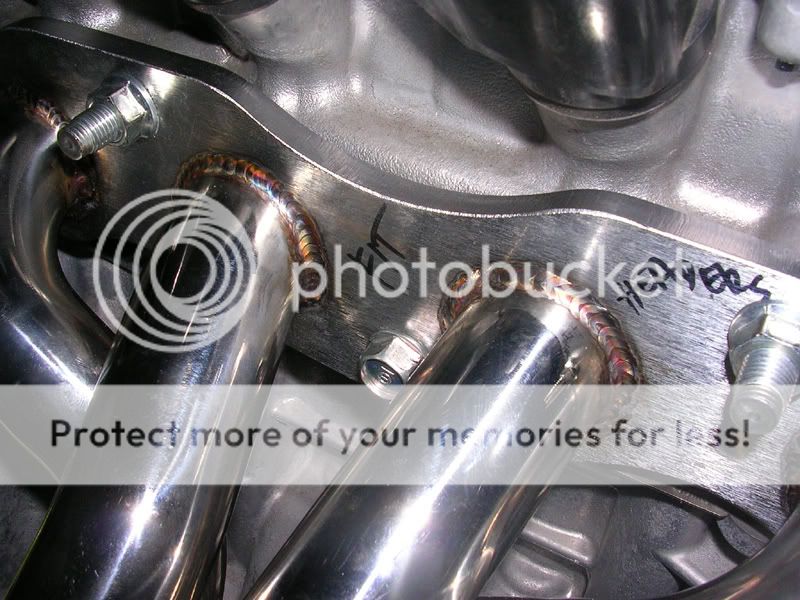
As for the design, I wondered how much difference it could make since it looks very similar to the stock piece. I'll snap a pic of the inside of the merge for comparison purposes later. Aside from that, there are two other differences that look beneficial for this piece. First, if you look at the inside of the piping on the flange side of the OEM piece, you can see the initial diameter if the primaries are smaller in comparison to the aftermarket piece. Second, the diameter of the collector is most definitely larger on the aftermarket header. These two elements combined with the collector design should lead to more volume and increased flow...but then again there's no actual dyno results to back up any possible gains.
I didn't notice any differences in weight but I wasn't looking for it either. I'm sure since the piece is so small the difference in weight is negligible.
</TD></TR></TABLE>I think you are the first person to say that a butt dyno does count
I asked the owner if she had noticed any difference in power or acceleration and she said it noticeably picks up better under normal load. I have yet to ask if she's done a full throttle run 1st-3rd gear so for now that's all I've got, no actual dyno specs (sorry).
As for the design, I wondered how much difference it could make since it looks very similar to the stock piece. I'll snap a pic of the inside of the merge for comparison purposes later. Aside from that, there are two other differences that look beneficial for this piece. First, if you look at the inside of the piping on the flange side of the OEM piece, you can see the initial diameter if the primaries are smaller in comparison to the aftermarket piece. Second, the diameter of the collector is most definitely larger on the aftermarket header. These two elements combined with the collector design should lead to more volume and increased flow...but then again there's no actual dyno results to back up any possible gains.
I didn't notice any differences in weight but I wasn't looking for it either. I'm sure since the piece is so small the difference in weight is negligible.
01-15-2008, 11:25 AM
#4
Honda-Tech Member
Join Date: Jul 2002
Location: FiveSixTwo
Posts: 911
Likes: 0
Received 0 Likes
on
0 Posts
damn that space is tight. good thing I don't have a Fit, might hurt my arm or something trying to install this. LOL. 
Nice write up Ceej!! When you gonna get the Fit exhaust too?
Nice write up Ceej!! When you gonna get the Fit exhaust too?
01-15-2008, 11:32 AM
#5
Honda-Tech Member
Join Date: Sep 2002
Location: southern, nj, usa
Posts: 1,389
Likes: 0
Received 0 Likes
on
0 Posts
yea i edited it. butt dyno doesnt work. usually a larger diameter collector or primaries with hurt fuel economy. smoother merges might help it.
are there many other header varieties out for the fit?
are there many other header varieties out for the fit?
01-15-2008, 11:54 AM
#6
PHANTOM MENACE
Thread Starter
iTrader: (2)
Join Date: May 2005
Location: SYCUAN NINE, CA, USA
Posts: 6,042
Likes: 0
Received 3 Likes
on
3 Posts
I was wondering about that too honestly. It's not my car so I don't really keep up with the latest aftermarket parts for it. At this point I couldn't compare it to anything other than the stock piece but this thread is only meant for installation purposes. Maybe when there are enough different aftermarket headers available there will be a comparison thread.
01-15-2008, 11:57 AM
#7
Honda-Tech Member
Join Date: Sep 2002
Location: southern, nj, usa
Posts: 1,389
Likes: 0
Received 0 Likes
on
0 Posts
<TABLE WIDTH="90%" CELLSPACING=0 CELLPADDING=0 ALIGN=CENTER><TR><TD>Quote, originally posted by 24TEN »</TD></TR><TR><TD CLASS="quote">Maybe when there are enough different aftermarket headers available there will be a comparison thread.</TD></TR></TABLE>that wont be for a couple years this forum is pretty slow compared to the 92-00 forum.
this forum is pretty slow compared to the 92-00 forum.
Trending Topics
01-15-2008, 12:01 PM
#8
PHANTOM MENACE
Thread Starter
iTrader: (2)
Join Date: May 2005
Location: SYCUAN NINE, CA, USA
Posts: 6,042
Likes: 0
Received 3 Likes
on
3 Posts
Agreed, plus the Fit is still fairly new for the US market and it's already going to the next body style soon. I wonder if manufacturers will even still develop parts for this body style or if they will focus on the new Fit after it's released.
01-18-2008, 10:01 PM
#10
Darth ModerVader
<TABLE WIDTH="90%" CELLSPACING=0 CELLPADDING=0 ALIGN=CENTER><TR><TD>Quote, originally posted by 24TEN »</TD></TR><TR><TD CLASS="quote">I wonder if manufacturers will even still develop parts for this body style or if they will focus on the new Fit after it's released.</TD></TR></TABLE>
There's actually a decent amount of aftermarket support for the Fit/Jazz. I suspect we'll begin seeing quite a bit more selection here now that the Fit has been on the US market for a year or two and proven popular with the tuner crowd.
It's a great platform, in my opinion reminiscent of the early Civics. Lightweight, inexpensive, sporty, and nimble.
01-19-2008, 05:49 AM
#11
Honda-Tech Member
Nice job on the DIY.
One piece of advice though, if you plan on doing more work on your Fit/Jazz even when you think you are putting the tools, nuts and bolts down softly eventualy you will get scratch marks in the plastic wiper cover... I know from experiance.
And at this point there are at least 4 different brands of header out for the USDM fit.
01-19-2008, 12:15 PM
#12
Honda-Tech Member
Good job on the install. I would love to see a before and after dyno for a header install.
I'm surprised you didn't remove your strut tower brace. It looks like you would have had a little more room without it there.
I'm surprised you didn't remove your strut tower brace. It looks like you would have had a little more room without it there.

 hey ceej. great install. how's the arm?
01-23-2008, 10:01 PM
hey ceej. great install. how's the arm?
01-23-2008, 10:01 PM
#17
PHANTOM MENACE
Thread Starter
iTrader: (2)
Join Date: May 2005
Location: SYCUAN NINE, CA, USA
Posts: 6,042
Likes: 0
Received 3 Likes
on
3 Posts
It's custom...it was a weird situation. It was a prototype for a totally different car but the original prototype had one tip in the middle. Customer feedback was "I wish it had twin tips" so I photoshopped it with two tips and sent the picture back to my buddy and a month later, he gave me that one in the background. It's not for a Honda, but it'll probably end up on my 94 Civic hatch after I test fit it on the correct car.
09-15-2011, 10:36 AM
#18
Trial User

Join Date: Sep 2011
Posts: 1
Likes: 0
Received 0 Likes
on
0 Posts
I have a question about what you said about resetting the ECU. What does this entail?
Can I take it to like and O'Reiley's or AutoZone and have them do their little electronic checkup thing?
Can I take it to like and O'Reiley's or AutoZone and have them do their little electronic checkup thing?
09-15-2011, 08:39 PM
#19
Honda-Tech Member
No all you have to do it disconnect the battery (have your radio code handy as you will need it to reset the radio). then just hook it back up and presto chango your ECM has been reset.


Thread
Thread Starter
Forum
Replies
Last Post