
front camber kit how to-n00b friendly
 10-20-2006, 01:54 PM
#1
Honda-Tech Member
Thread Starter
Join Date: Jan 2006
Posts: 429
Likes: 0
Received 0 Likes
on
0 Posts
first write up for me and the only reason i'm posting this is cause the ones on here either didn't work right or didn't have pics
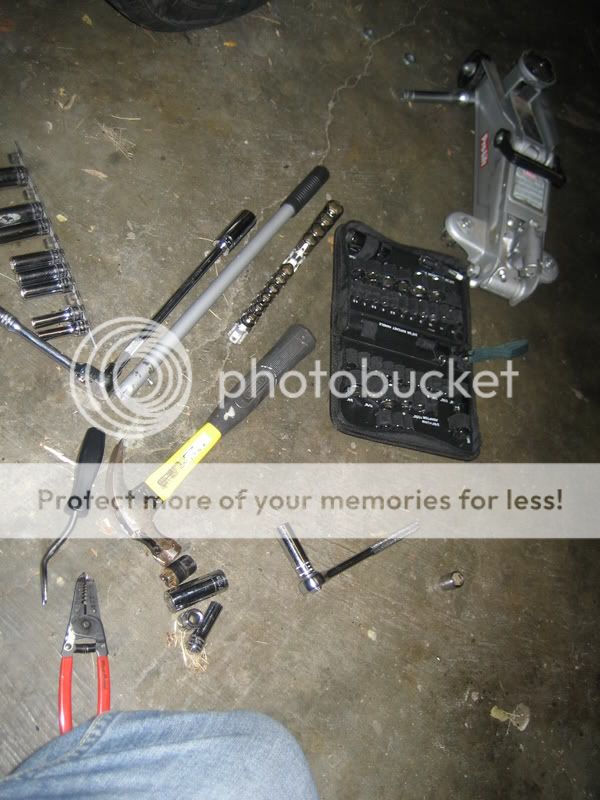
tools needed
hammer or ball joint seperator
socket rail(2)
ratchet(2)
pliers
jack
jack stands
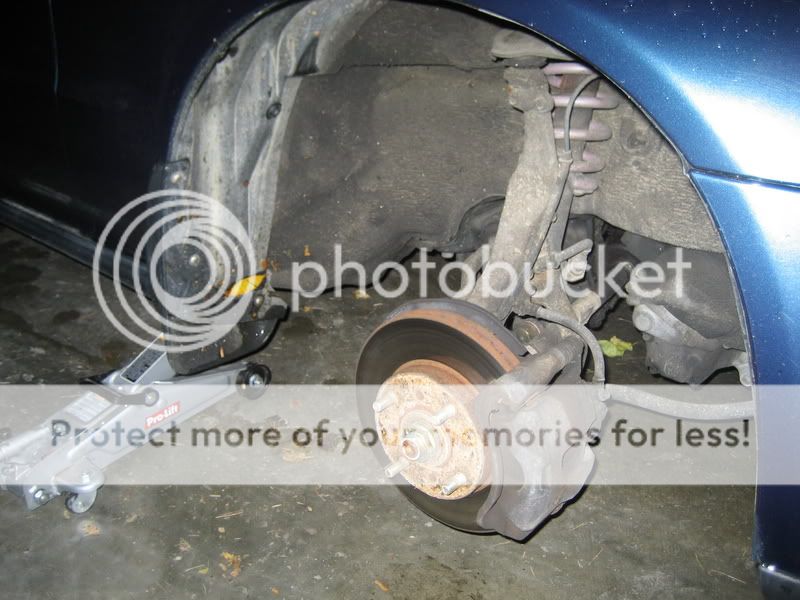
step 1
raise and support car and remove wheel<if you don't know ho wto do this, stop reading and learn about cars>
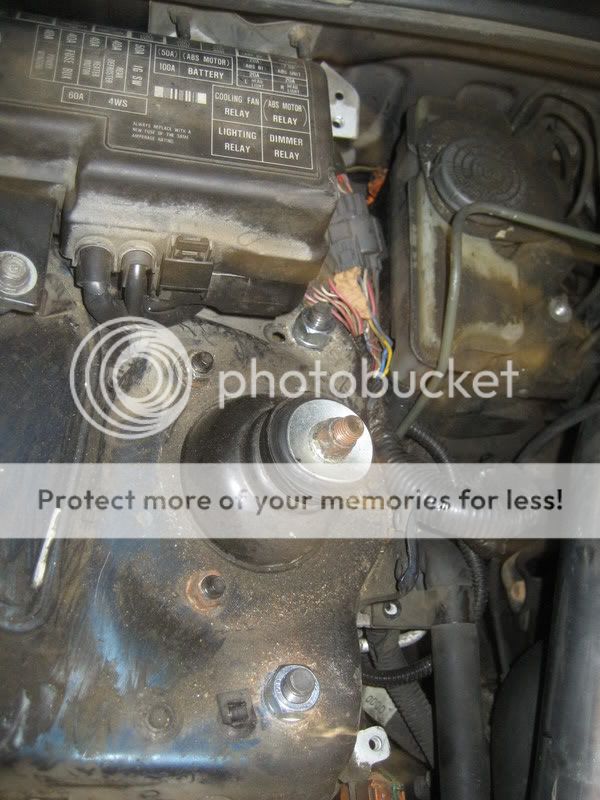
step 2
remove the ball joint nut cover using a 10MM socket

step 3
remove the pin going through the castle nut on the ball joint
step 4
remove the ball joint nut using a 17MM
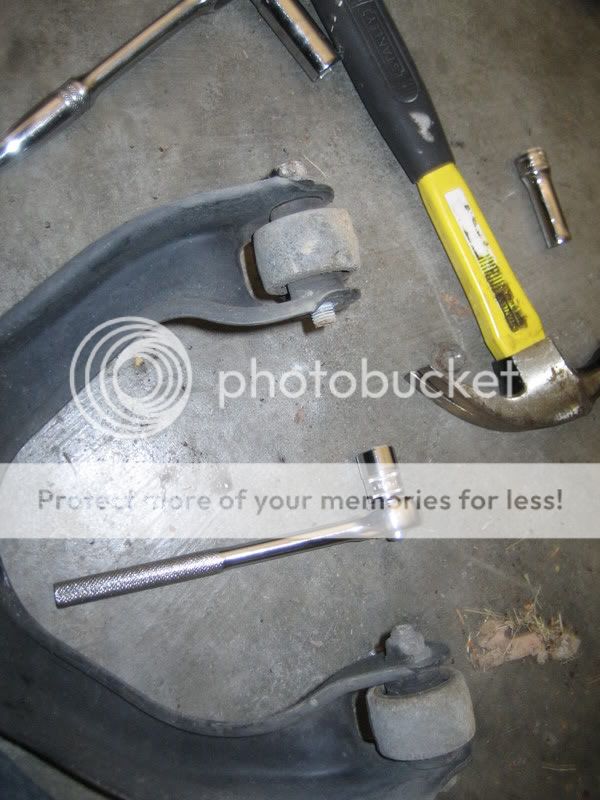
step 5
using the hammer or a ball joint seperator do the obvious
remove the ball joint from it's place

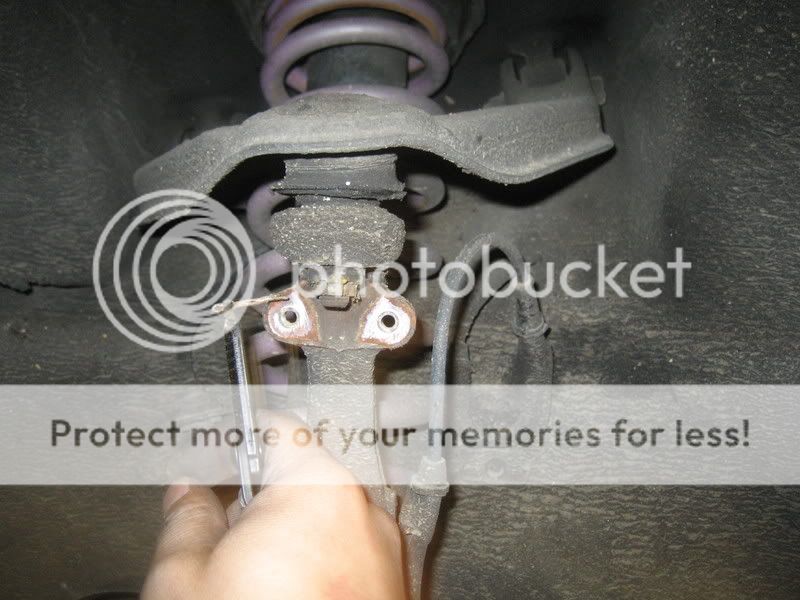
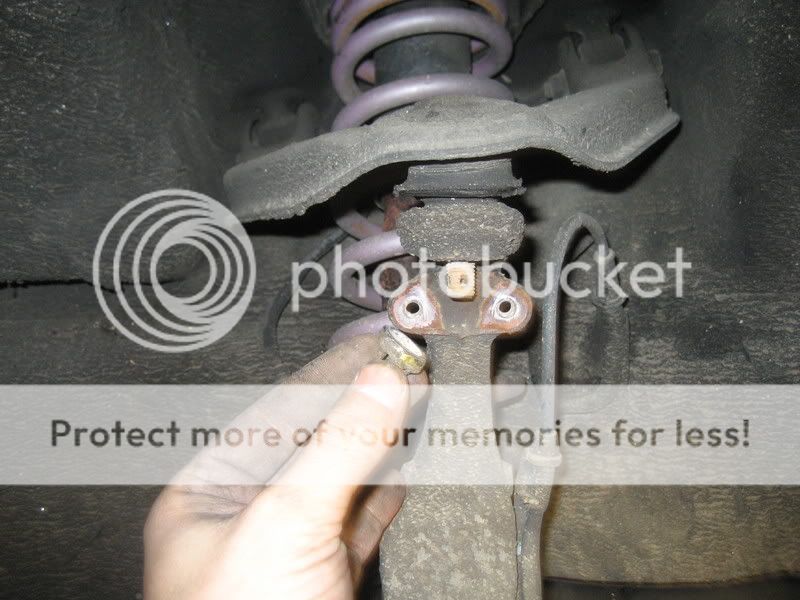
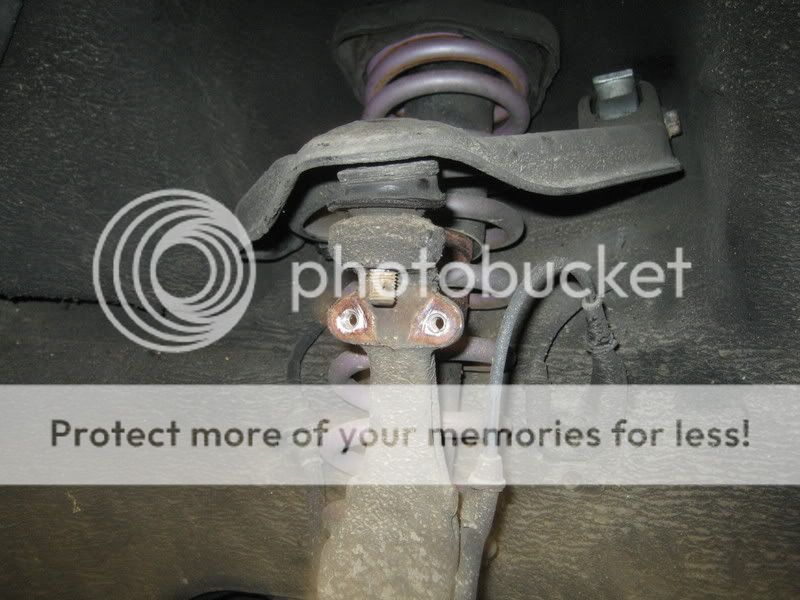
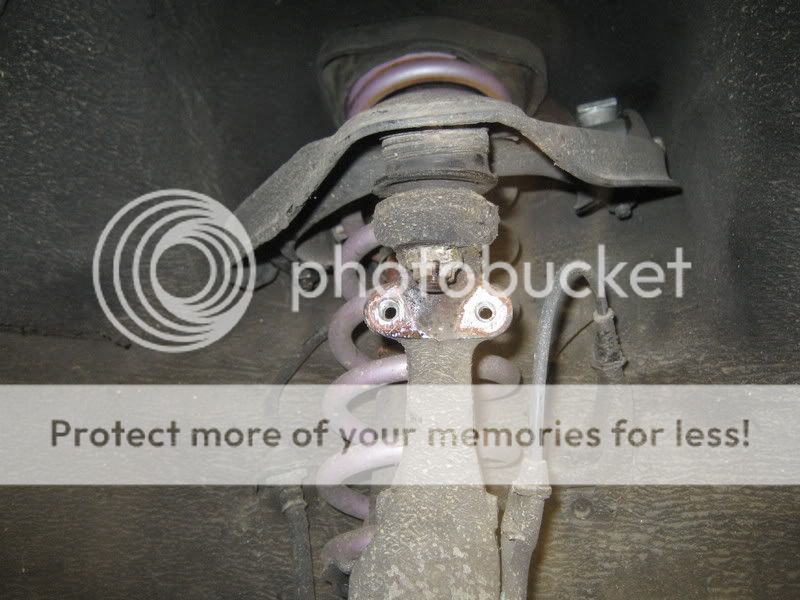
step 6 and step 7
remove the pictured nuts to drop the UCA using a 17MM
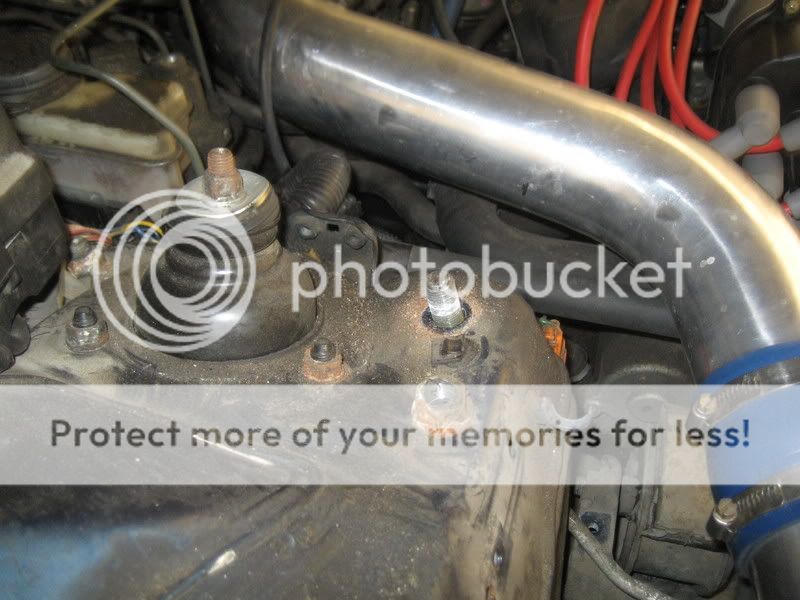

step 8
remove upper control arm
step 9
remove both through bolts using a 14MM on both the bolt and nut
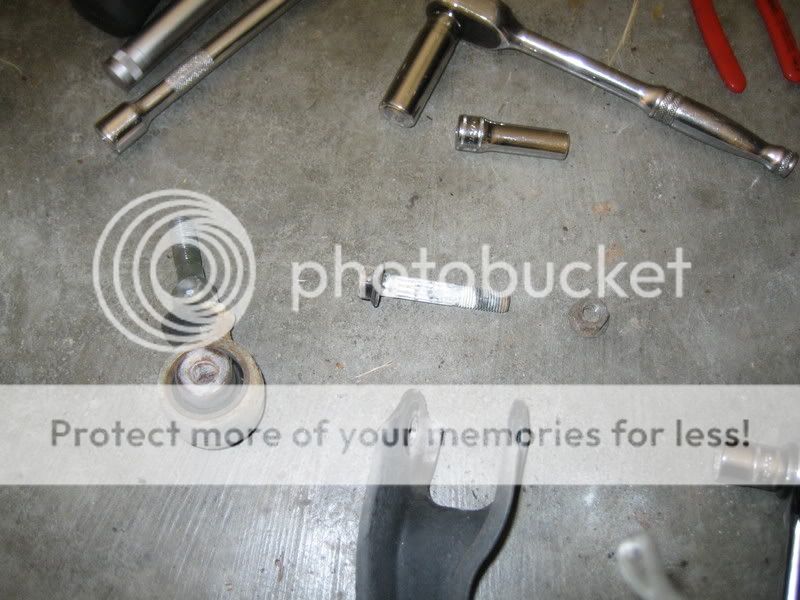
step 10
place camber kit to replace what you just removed<don't know what they're called>

tighten the 14MMs
step 11
place UCA back where you got it and put the 2 nuts back on
i had to use new bolts that were 19MM but you may not need to
step 12
put the ball joint back in the hole it was taken out of
step 13
put the 17MM castle nut back on the ball joint
step 14
put the pin back through the ball joint bolt
<no pic due to replacing ball joints this weekend>
step 15
put the cover back over the castle nut and tighten the 10MM bolts

be careful i broke the head off one bolt one the other side
step 16
double check everything and put the wheel back on and lower the car

be aware you may have to cut away some of the splash guard

step 17
get the car aligned
enjoy your new straight wheeled car!
let me know how my first write up went...
tools needed
hammer or ball joint seperator
socket rail(2)
ratchet(2)
pliers
jack
jack stands
step 1
raise and support car and remove wheel<if you don't know ho wto do this, stop reading and learn about cars>
step 2
remove the ball joint nut cover using a 10MM socket
step 3
remove the pin going through the castle nut on the ball joint
step 4
remove the ball joint nut using a 17MM
step 5
using the hammer or a ball joint seperator do the obvious
remove the ball joint from it's place
step 6 and step 7
remove the pictured nuts to drop the UCA using a 17MM
step 8
remove upper control arm
step 9
remove both through bolts using a 14MM on both the bolt and nut
step 10
place camber kit to replace what you just removed<don't know what they're called>
tighten the 14MMs
step 11
place UCA back where you got it and put the 2 nuts back on
i had to use new bolts that were 19MM but you may not need to
step 12
put the ball joint back in the hole it was taken out of
step 13
put the 17MM castle nut back on the ball joint
step 14
put the pin back through the ball joint bolt
<no pic due to replacing ball joints this weekend>
step 15
put the cover back over the castle nut and tighten the 10MM bolts
be careful i broke the head off one bolt one the other side
step 16
double check everything and put the wheel back on and lower the car
be aware you may have to cut away some of the splash guard
step 17
get the car aligned
enjoy your new straight wheeled car!
let me know how my first write up went...

 10-20-2006, 02:53 PM
#6
Honda-Tech Member
Join Date: Jan 2006
Posts: 217
Likes: 0
Received 0 Likes
on
0 Posts
Nice write up. I was looking for something that will help me with the balljoint type camber kit for a 5th gen and got all excited...
10-20-2006, 02:56 PM
#7
Honda-Tech Member
Thread Starter
Join Date: Jan 2006
Posts: 429
Likes: 0
Received 0 Likes
on
0 Posts
for one my springs are light purple!
not pink
and yes my engine bay is dirty as expletive but i don't have time to clean it the way i want to so i'm waiting till i get the engine out to do it. hopefully soon
thanks for the torque specs i lost them after i was done and couldn;t remember them
not pink
and yes my engine bay is dirty as expletive but i don't have time to clean it the way i want to so i'm waiting till i get the engine out to do it. hopefully soon
thanks for the torque specs i lost them after i was done and couldn;t remember them
Trending Topics
10-20-2006, 03:13 PM
#9
Member

Join Date: Jun 2006
Posts: 2,919
Likes: 0
Received 0 Likes
on
0 Posts
<TABLE WIDTH="90%" CELLSPACING=0 CELLPADDING=0 ALIGN=CENTER><TR><TD>Quote, originally posted by VtecFreePrelude »</TD></TR><TR><TD CLASS="quote">for one my springs are light purple!
not pink
</TD></TR></TABLE>
light purple is the word for people in denial. light purple..pink....tomatoe tomahtoe. it's all the same
not pink
</TD></TR></TABLE>
light purple is the word for people in denial. light purple..pink....tomatoe tomahtoe. it's all the same
10-20-2006, 03:18 PM
#10
Honda-Tech Member
Join Date: Jan 2006
Posts: 217
Likes: 0
Received 0 Likes
on
0 Posts
The control arm mount type is supposedly better. Better clearance and less stress to the control arms? So I've read. The problem with the 5th gen is that only the balljoint type exists.
10-20-2006, 03:35 PM
#11
Honda-Tech Member
Thread Starter
Join Date: Jan 2006
Posts: 429
Likes: 0
Received 0 Likes
on
0 Posts
that's why i got this kit.
clearance issues.
the ball joint type for the 4th genners has a tendancy to knock on the shock tower so i said expletive that.
i just need a kit for the back now
anyone???
clearance issues.
the ball joint type for the 4th genners has a tendancy to knock on the shock tower so i said expletive that.
i just need a kit for the back now
anyone???
10-20-2006, 03:44 PM
#12
Honda-Tech Member
i'd definatly rather have pink than "light purple'. I wear pink all the time. I've actually been wearing a pink bandanna in my back pocket every day for over 3 years as a memorial to my friend that died.. pink is for real men and lesbians..
at leats you didn't call it lavender.. then it woudl have been ghey
at leats you didn't call it lavender.. then it woudl have been ghey
10-24-2006, 07:11 PM
#13
Honda-Tech Member
Thread Starter
Join Date: Jan 2006
Posts: 429
Likes: 0
Received 0 Likes
on
0 Posts
update!!!
i had to replace my ball joints in the front and man was that a fiasco...
but i ended up haveing to get the ball joint camber kit so i mover the ingalls kit to the rear and...
it works like a charm. also for those of you wondering the balljoint type will also work on both ends
i had to replace my ball joints in the front and man was that a fiasco...
but i ended up haveing to get the ball joint camber kit so i mover the ingalls kit to the rear and...
it works like a charm. also for those of you wondering the balljoint type will also work on both ends
05-03-2009, 06:15 PM
#15
Honda-Tech Member
Join Date: Jun 2007
Location: NC
Posts: 186
Likes: 0
Received 0 Likes
on
0 Posts
Didn't have to separate the ball joint to do mine. Torqued everything down when the car was sitting at ride height. I really like the Ingalls kit (non-ball joint).

Thread
Thread Starter
Forum
Replies
Last Post
markspan6243
Honda Civic / Del Sol (1992 - 2000)
4
10-16-2009 10:50 PM