Wink mirror!
 01-19-2010, 07:18 AM
#351

 01-19-2010, 09:36 AM
#353
Honda-Tech Member

Join Date: Oct 2008
Location: Savannah, MO
Posts: 2,349
Likes: 0
Received 0 Likes
on
0 Posts
I just installed mine this weekend on my dc, I love it, can't wait to get some stickers on it though black is a little plain for me lol.
01-19-2010, 02:08 PM
#354
Honda-Tech Member
Join Date: Sep 2009
Posts: 114
Likes: 0
Received 0 Likes
on
0 Posts
Those of you with 96-00 civics, did you use the stock threaded holes to mount yours or did you drill your own? I mocked up mine and it seemed a little off center with the stock holes for the visors...HURRY UP AND GIVE ME AN ANSWER SO I CAN GET IT IN AND POST PICS!!!!!!
01-19-2010, 02:49 PM
#356
Honda-Tech Member
those "things" are real oldschool, i remember! my unlce with his brown rotary corolla way back in the late 80's in PR sporting one of these. nvr gave em much thought but they looked unique even to me at such a young age. but i think ill stick to my broadway.lol
a buddy of mine used to rock one of these in his coupe, me riding shotgun i always hit my head on it (the corner, ouch) getting in and out : /
my 2*
a buddy of mine used to rock one of these in his coupe, me riding shotgun i always hit my head on it (the corner, ouch) getting in and out : /
my 2*
01-19-2010, 03:42 PM
#357
Honda-Tech Member

Join Date: May 2009
Posts: 46
Likes: 0
Received 0 Likes
on
0 Posts
 01-19-2010, 07:34 PM
#360
Honda-Tech Member
Join Date: Aug 2006
Location: tuscaloosa, al, united states
Posts: 2,461
Likes: 0
Received 0 Likes
on
0 Posts
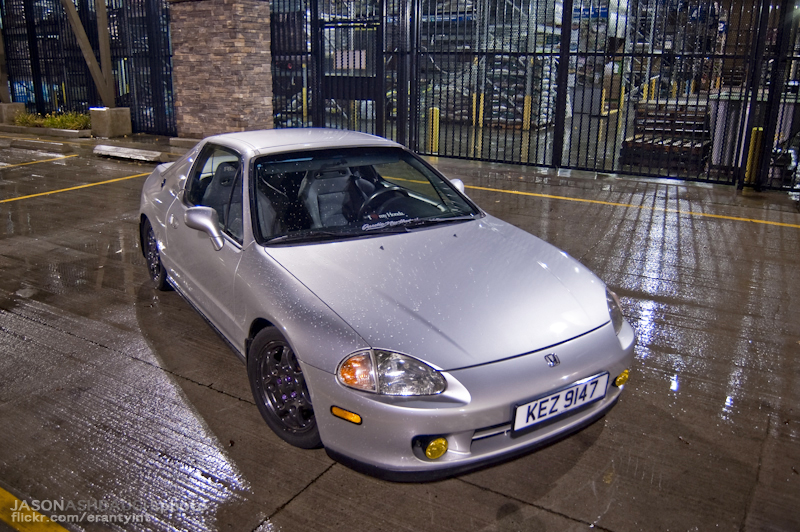
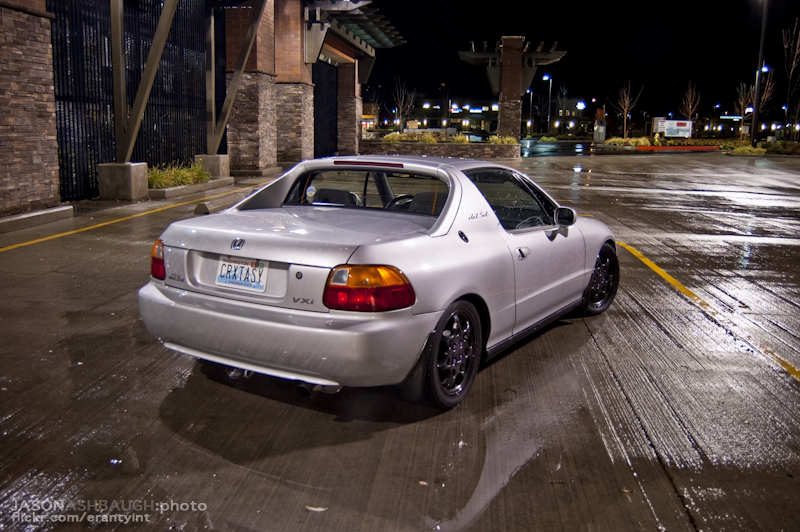
i love mine. i guess it looks cool sure. BUT my main reason is im not a tall guy....and i cant see crap for my oem spoiler and my buddy club seats....with this thing...i have no visibility issues whatsoever 
01-22-2010, 09:51 PM
#361
Honda-Tech Member
Join Date: Jul 2002
Location: SoCal, 909
Posts: 1,113
Likes: 0
Received 0 Likes
on
0 Posts
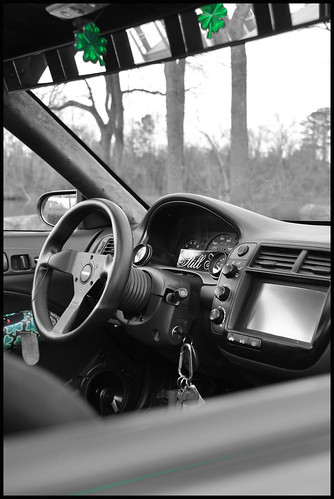
I finally installed mine today! LOL And I have the same air freshener as above^^^
Also have my matching shamrock/Kiss me I'm Irish headliner in too!
Also have my matching shamrock/Kiss me I'm Irish headliner in too!
 02-01-2010, 04:20 PM
#364
Honda-Tech Member
Join Date: May 2009
Location: Northwest, WA
Posts: 363
Likes: 0
Received 0 Likes
on
0 Posts
I love my wink too! Even though the sun can be a bitch at sometimes, it's probably one of the greatest things I've invested in. I've had it for about 4 months now, and have yet to stickerbomb the back of it haha
Sorry for the crappy cellphone pics!


I've had it for about 4 months now, and have yet to stickerbomb the back of it hahaSorry for the crappy cellphone pics!
02-02-2010, 12:06 AM
#368
HT White Ops
iTrader: (1)

Join Date: Mar 2006
Location: I see what you did there.
Posts: 16,222
Likes: 0
Received 3 Likes
on
3 Posts
I had some vibration issues when using the side mounts, so I drilled and tapped a hole in the dead center, and used one of the windshield mounts on my factory mirror shoe. Also, made some custom brackets with plumber's tape so I could retain my sun visors:
ATTENTION: WINK MIRROR USERS
I have solved the vibration issue utilizing the factory mounting points! I did this with JDM/EDM/GDM visors, but I'm sure with a longer length of plumber's tape, you could do this with the USDM visors.
Materials:
Wink Rally 5-Panel Mirror
One Wink window mounting kit
Plumber's Tape (Approx 3-4" to be safe)
Rubber Mallet / Plastic Mallet
Philip's Head Screwdriver
THIN philip's head OR flat head screwdriver
Drill + Bits
Thread Tap
T25 Torx Screwdriver
15mm box or adjustable box wrench
Tin Snips / Lever-Action Dikes
10mm Socket Wrench
Process:
1. Making the L-Brackets.
Using your tin snips / dikes, cut about an inch of plumber's tape -- about 4 perforations, and then cut halfway through the fifth and sixth perforations.
It'd look like this:
_________
) O O O O (
-------------
Using your snips, round the edges close to the outside perforations. The part that will be bolting to the roof should get MUCH closer to the perforation that the bolt will go through to give as much clearance as possible.
It'd look like this:
_______
( O O O O)
----------
Bend the new bracket into an L-shape and slip it over the outside hole on the visor mounting plate. Bolt them back into the roof. Then using the hardware for the original Wink L-brackets, bolt the adjuster arms to the new L-brackets using the lock washer and a 10mm socket wrench. Position them so they are resting at about a 45-degree angle towards the front of the car, resting against the A-Pillar garnish.
Should look like this:


2. Removing the stock mirror.
Follow the instructions in the service manual for removing the mirror. As far as I know, this fix we're doing only works for the "USA-Produced" mirrors.
Stick your little philips or flathead into the slot, and gently tap it up into the mount until you can slide the mirror off the metal shoe.
Thanks dSoc for the image!

3. Attaching the Wink Mount.
On the back of your wink mirror, there should be two metal threaded holes for where the two windshield mounts are supposed to attach. Measure the distance between the two, and make a mark in the middle. It should be right in the middle of the "Rally" logo, below the "AL". Find a drill bit (cobalt works the best/fastest) a tiny bit smaller than the threadstock on the Wink windshield mount.
Drill very slowly and gently through the back of the mirror. DO NOT DRILL INTO THE MIRROR. DUH. LOL! Find a thread tap approx. the same size as the threadstock on the mount. Spray it with WD-40 or Liquid Wrench or some sort of oil and tap the drilled plastic hole. The pitch of the tap doesn't matter, since it's plastic, and the threadstock is just going to rip it's own path. You just want some sort of threaded pattern for it to grab on to and start threading it.
Tighten the windshield mount to the mirror with a 15mm box wrench.
Wink mirror neck attached to Wink mirror:

4. Making it all come together.
With your L-brackets and adjuster arm in place in the car, and the windshield mount threaded into the Wink mirror, it's time to make it all work together!
Position the mirror in your car, and slide the windshield attachment onto the factory mounting shoe.
Wink mirror neck attached to stock mirror shoe:

Bend the passenger side mirror bracket out a little bit to get the adjuster bolt on the side of the Wink mirror through the bracket. Bend it back into place. Screw on the adjuster ****, but just finger tight.
Put the other adjuster bolt through the driver side of the Wink mirror and through the adjuster bracket. Screw on the adjuster ****, but just finger tight.
Pull the windshield attachment down as far as you can on the factory shoe (don't force it), and hold it in place while using a philip's head driver to tighten the screw. This will lock the mount into place.
Sit in your driver's seat how you would if you were driving comfortably. Adjust your mirror to the preferred angle. Tighten down the adjuster *****.
GO DRIVE AND ENJOY NOT FEELING LIKE YOU'RE GONNA PUKE WHEN YOU'RE ON THE FREEWAY!.
I have solved the vibration issue utilizing the factory mounting points! I did this with JDM/EDM/GDM visors, but I'm sure with a longer length of plumber's tape, you could do this with the USDM visors.
Materials:
Wink Rally 5-Panel Mirror
One Wink window mounting kit
Plumber's Tape (Approx 3-4" to be safe)
Rubber Mallet / Plastic Mallet
Philip's Head Screwdriver
THIN philip's head OR flat head screwdriver
Drill + Bits
Thread Tap
T25 Torx Screwdriver
15mm box or adjustable box wrench
Tin Snips / Lever-Action Dikes
10mm Socket Wrench
Process:
1. Making the L-Brackets.
Using your tin snips / dikes, cut about an inch of plumber's tape -- about 4 perforations, and then cut halfway through the fifth and sixth perforations.
It'd look like this:
_________
) O O O O (
-------------
Using your snips, round the edges close to the outside perforations. The part that will be bolting to the roof should get MUCH closer to the perforation that the bolt will go through to give as much clearance as possible.
It'd look like this:
_______
( O O O O)
----------
Bend the new bracket into an L-shape and slip it over the outside hole on the visor mounting plate. Bolt them back into the roof. Then using the hardware for the original Wink L-brackets, bolt the adjuster arms to the new L-brackets using the lock washer and a 10mm socket wrench. Position them so they are resting at about a 45-degree angle towards the front of the car, resting against the A-Pillar garnish.
Should look like this:
2. Removing the stock mirror.
Follow the instructions in the service manual for removing the mirror. As far as I know, this fix we're doing only works for the "USA-Produced" mirrors.
Stick your little philips or flathead into the slot, and gently tap it up into the mount until you can slide the mirror off the metal shoe.
Thanks dSoc for the image!
3. Attaching the Wink Mount.
On the back of your wink mirror, there should be two metal threaded holes for where the two windshield mounts are supposed to attach. Measure the distance between the two, and make a mark in the middle. It should be right in the middle of the "Rally" logo, below the "AL". Find a drill bit (cobalt works the best/fastest) a tiny bit smaller than the threadstock on the Wink windshield mount.
Drill very slowly and gently through the back of the mirror. DO NOT DRILL INTO THE MIRROR. DUH. LOL! Find a thread tap approx. the same size as the threadstock on the mount. Spray it with WD-40 or Liquid Wrench or some sort of oil and tap the drilled plastic hole. The pitch of the tap doesn't matter, since it's plastic, and the threadstock is just going to rip it's own path. You just want some sort of threaded pattern for it to grab on to and start threading it.
Tighten the windshield mount to the mirror with a 15mm box wrench.
Wink mirror neck attached to Wink mirror:
4. Making it all come together.
With your L-brackets and adjuster arm in place in the car, and the windshield mount threaded into the Wink mirror, it's time to make it all work together!
Position the mirror in your car, and slide the windshield attachment onto the factory mounting shoe.
Wink mirror neck attached to stock mirror shoe:
Bend the passenger side mirror bracket out a little bit to get the adjuster bolt on the side of the Wink mirror through the bracket. Bend it back into place. Screw on the adjuster ****, but just finger tight.
Put the other adjuster bolt through the driver side of the Wink mirror and through the adjuster bracket. Screw on the adjuster ****, but just finger tight.
Pull the windshield attachment down as far as you can on the factory shoe (don't force it), and hold it in place while using a philip's head driver to tighten the screw. This will lock the mount into place.
Sit in your driver's seat how you would if you were driving comfortably. Adjust your mirror to the preferred angle. Tighten down the adjuster *****.
GO DRIVE AND ENJOY NOT FEELING LIKE YOU'RE GONNA PUKE WHEN YOU'RE ON THE FREEWAY!.