
[DIY] - How To - Honda Access Window Visor Installation on an EK
 01-24-2009, 04:03 PM
#1
Honda-Tech Member
Thread Starter
Join Date: Oct 2006
Location: Tampa, FL
Posts: 887
Likes: 0
Received 0 Likes
on
0 Posts
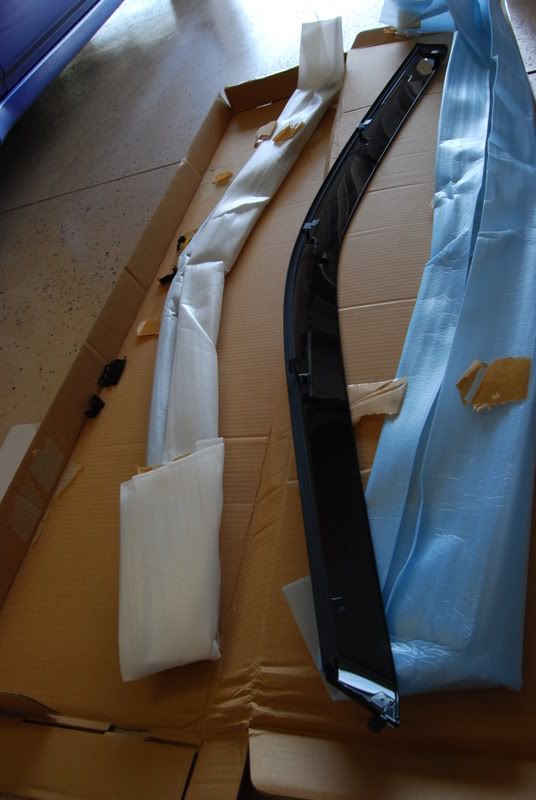
I installed a set of Honda Access window visors on my coupe today, and I figured I'd make a DIY write up since alot of people are clueless when it comes to installing these things. There's a couple of other write ups floating around, but they aren't very detailed and the pictures are no longer hosted.
This is my first write up, hope you it helps some of you guys out.
First off, installation of these visors can take some time (more than expected) and a good amount of patience..
-----
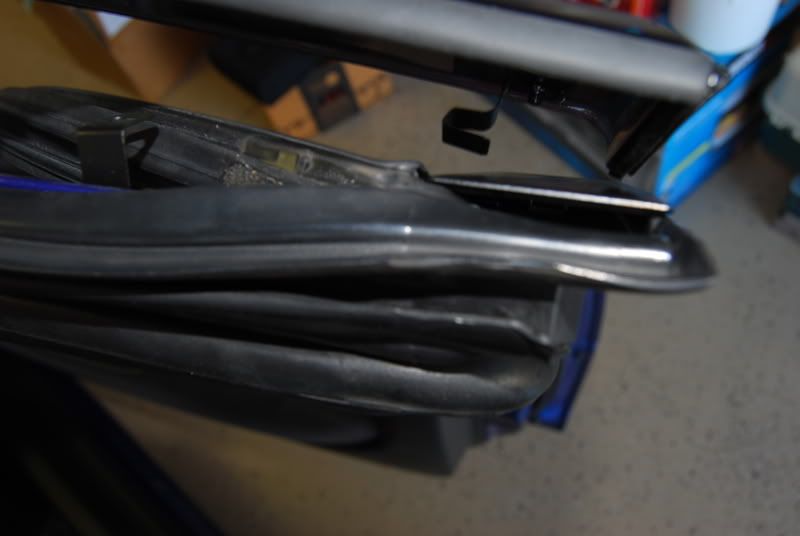
First, you need to install the D / F / H clips onto the visors themselves.
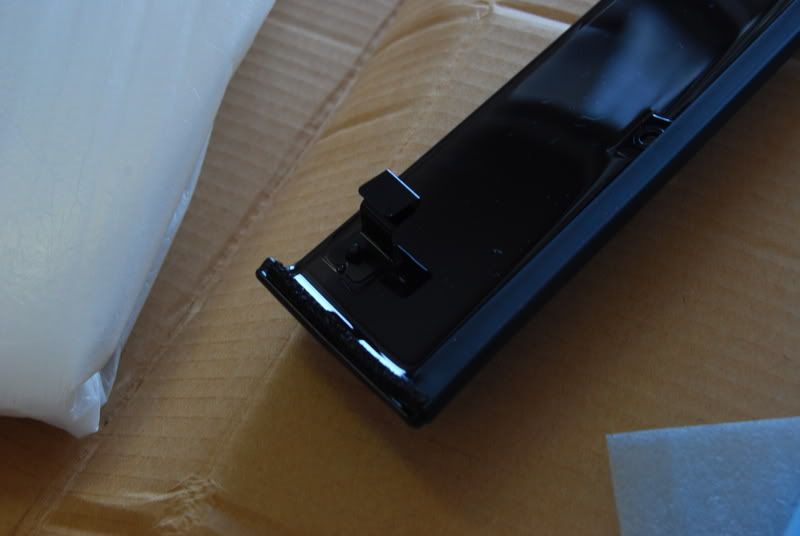
The first and last hole on the visor are for the B clips, which I will explain later on. Start off with the second hole from the FRONT of the visor, and install D / F / H clips as so, with the open end of the clip facing downwards. They go in that specific order and simply attach to the visor by pressing in the small round "clips" supplied.
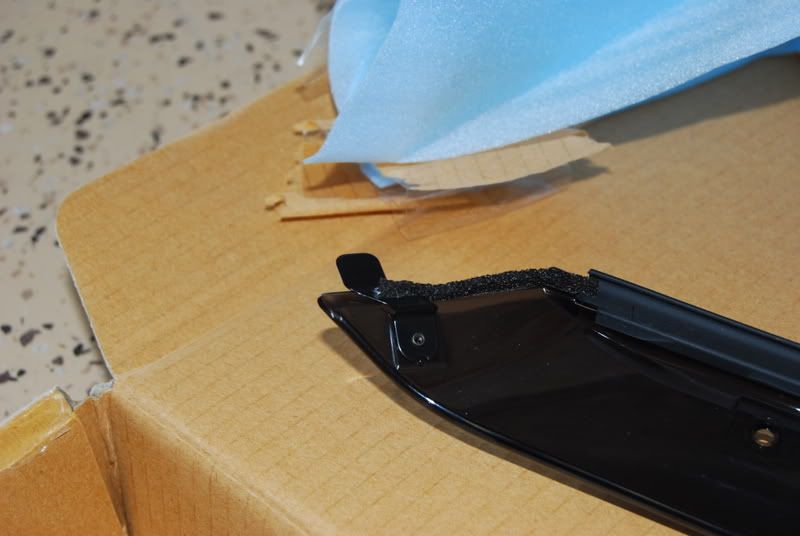
Now there is already 2 other clips installed on the visors from the factory. These clips will slide into the rubber lining behind your side-view mirror, and the rear one will slide in behind the vertical plastic piece on your door.
Here are the pre installed clips:
Front:
Rear:
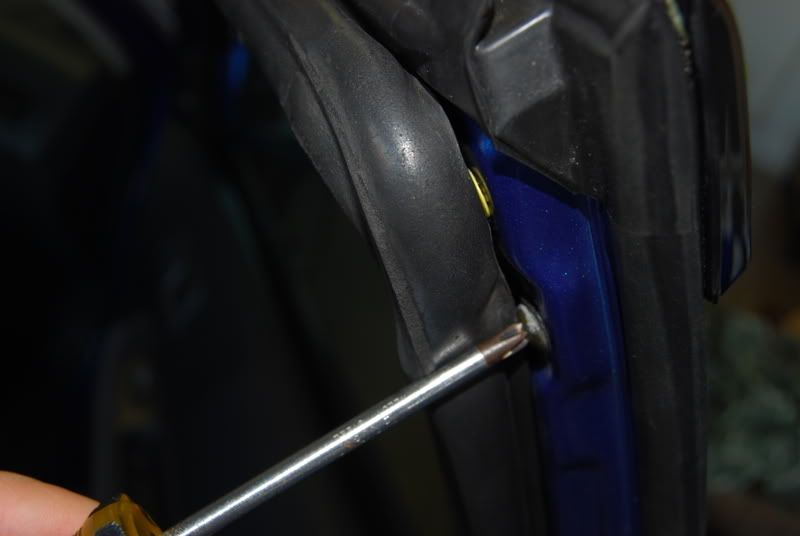
Now pull back the rubber lining on the backside of the door. Move it just enough so you can access the top screw which holds in the vertical plastic trim piece.
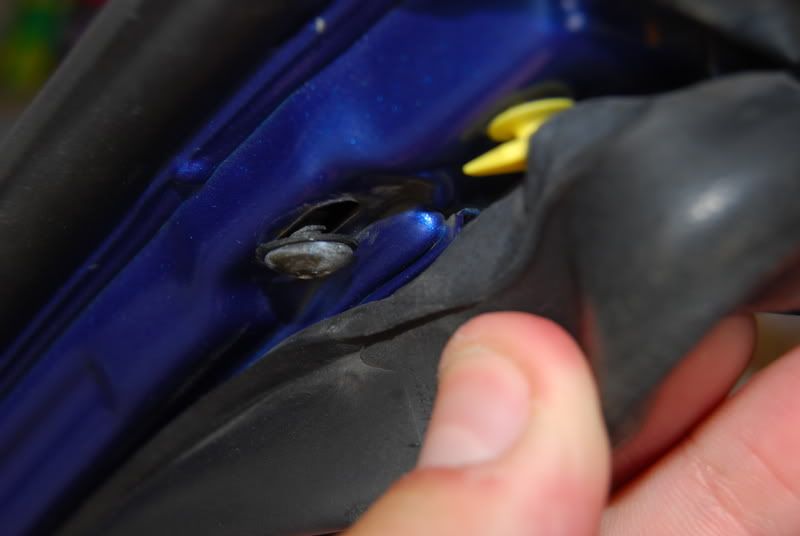
Remove the screw and put it in aside.
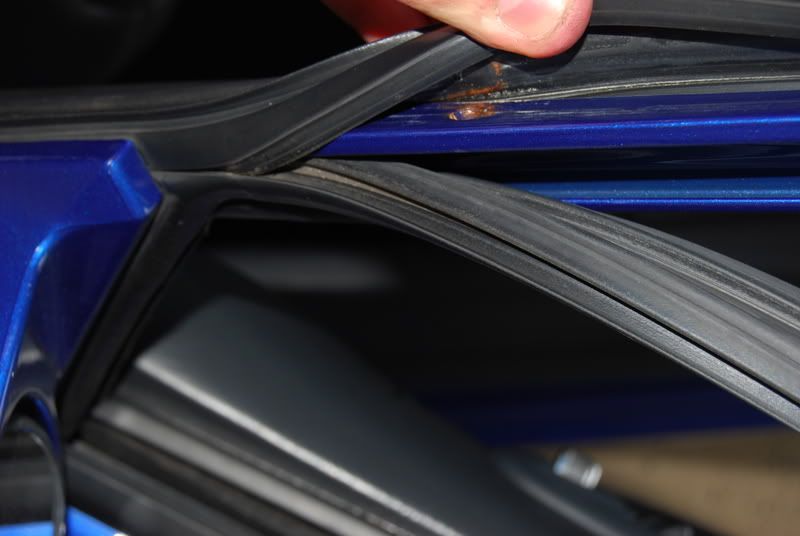
Now you are able pull it out just a bit, in order to access the rubber window seal.
Carefully pull on the bottom seal, but be careful not to rip it.
I pulled out the entire BOTTOM seal, and only pulled back the top seal in the 2 places where the B clips attach to the actual door.
Top B clip hole:
Bottom B clip hole:
The B clips are attached as shown in the following pictures, and are screwed onto the door frame from the TOP.
Top B clip installed:
Bottom B clip installed:

The pre installed clips that I mentioned earlier are to be "slipped" into the side view mirror (on the front) and behind the plastic trim piece (on the rear)
Front:
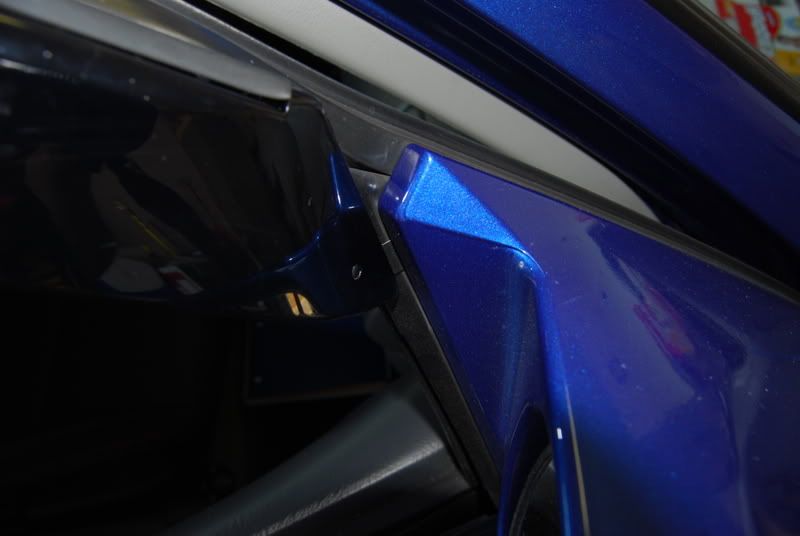
Rear:
Once you slide those 2 clips in, the visor will hold itself in place.
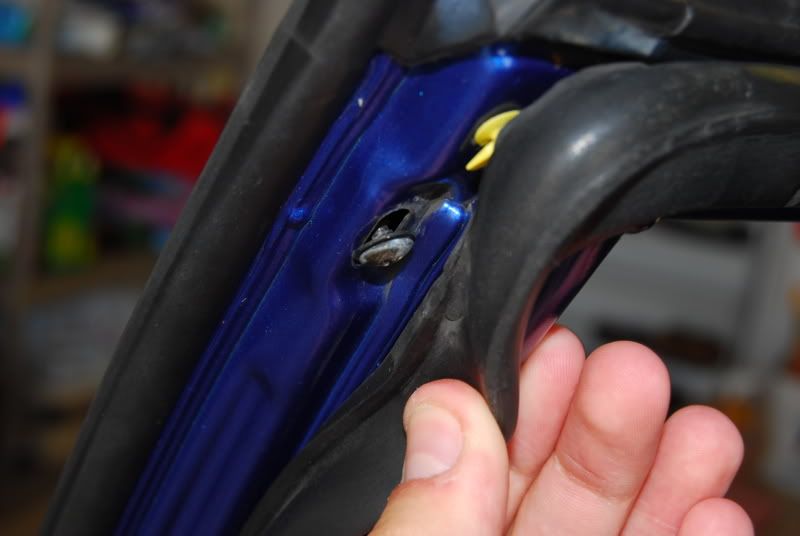
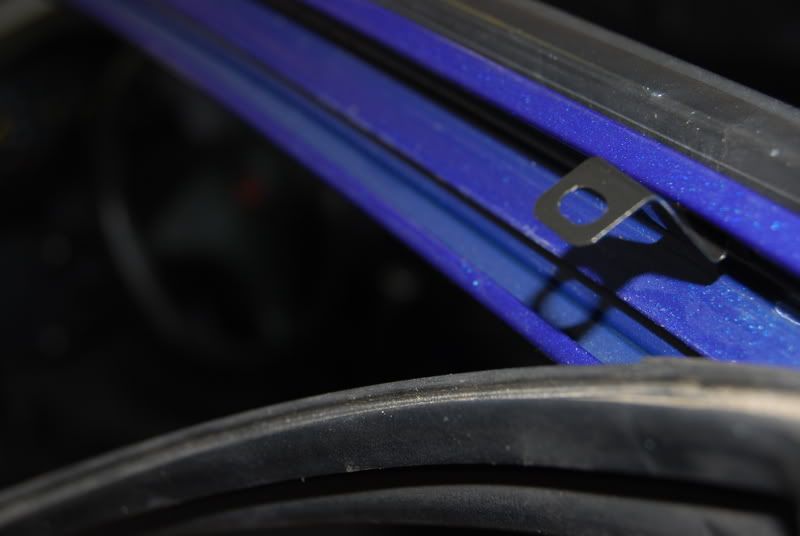
Now you need to remove the little OEM metal clip which "guides" the window, or the visor clip will not be able to attach to the frame.
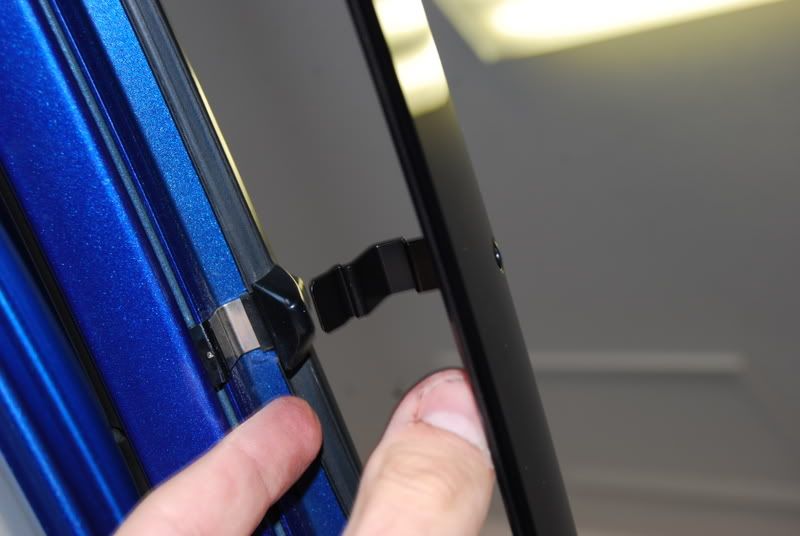
Simply pull down on the top of it, and it will come right off
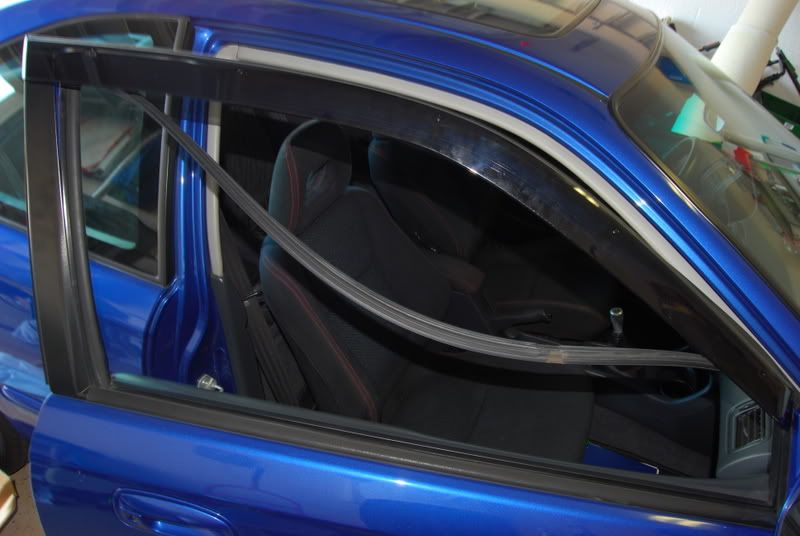
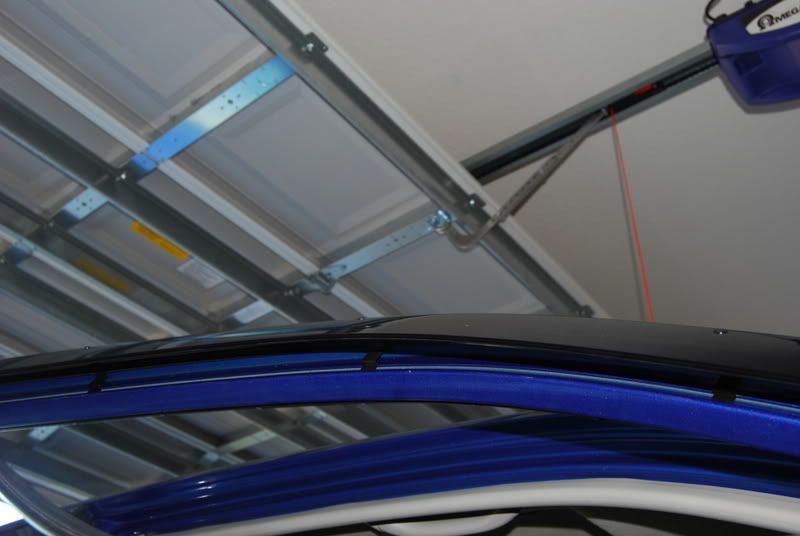
Visor mocked up:
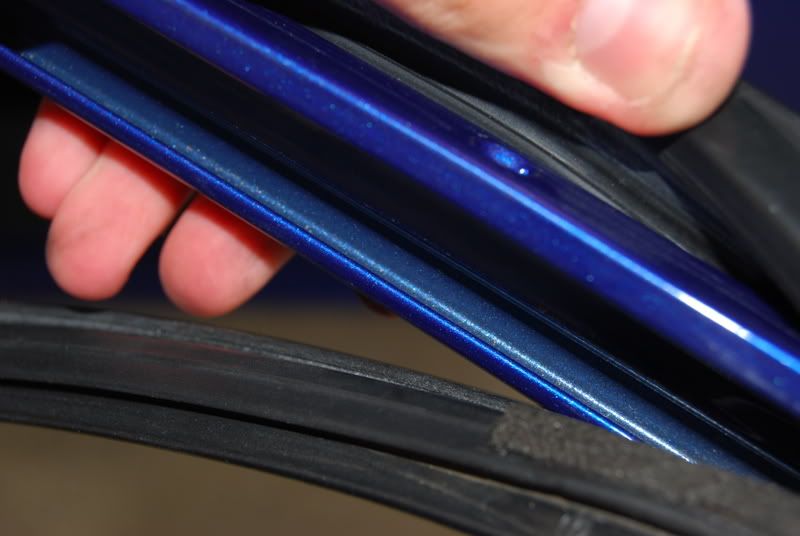
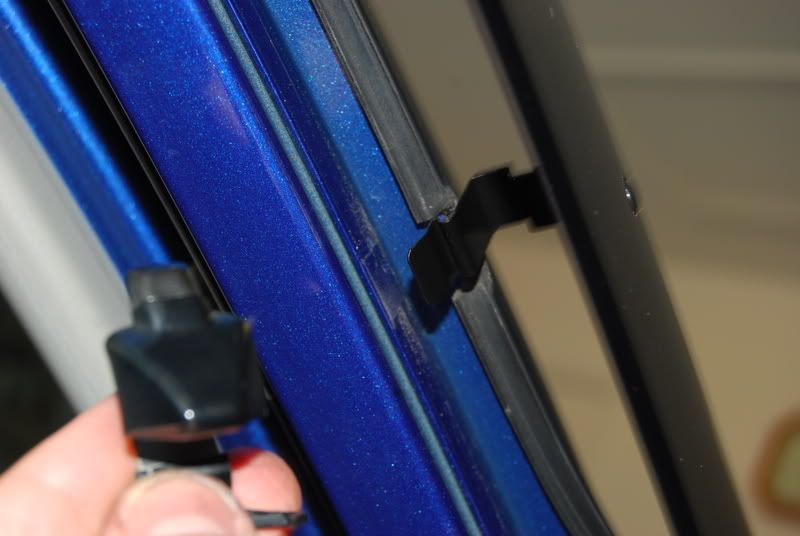
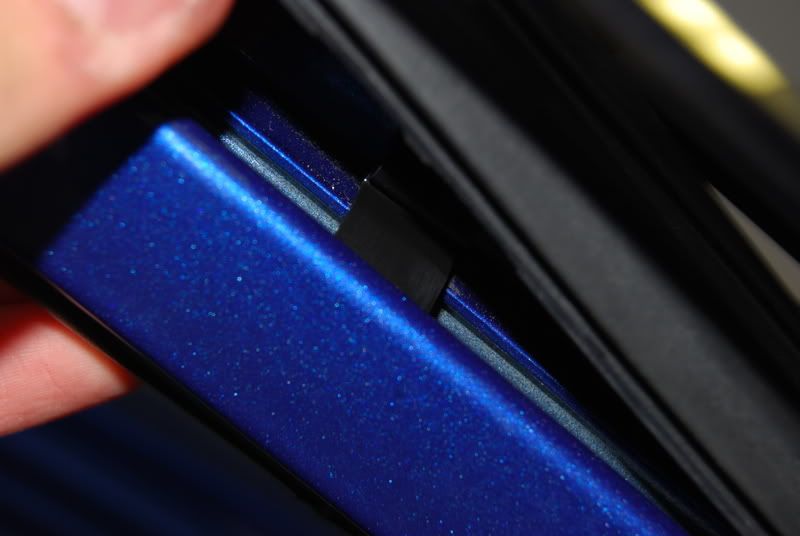
Now begin pressing the visor clips onto the door frame.
Make sure the clip is over the small lip on the frame.
Bad:
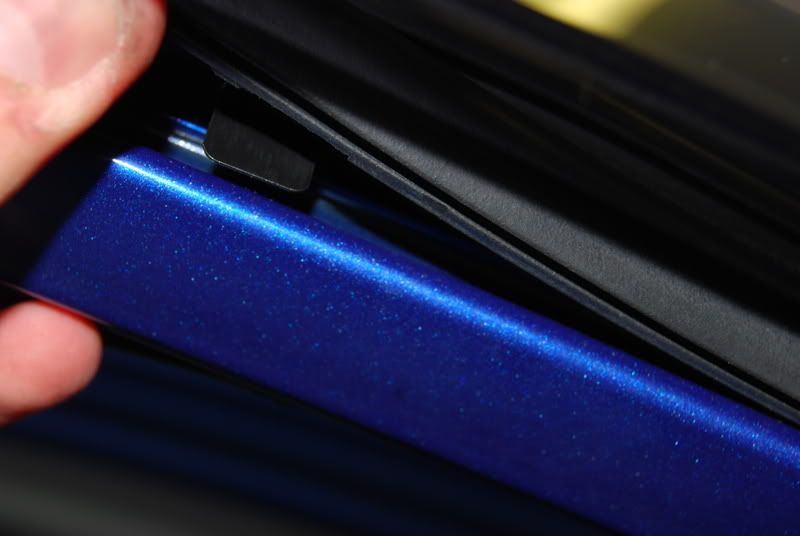
Good:
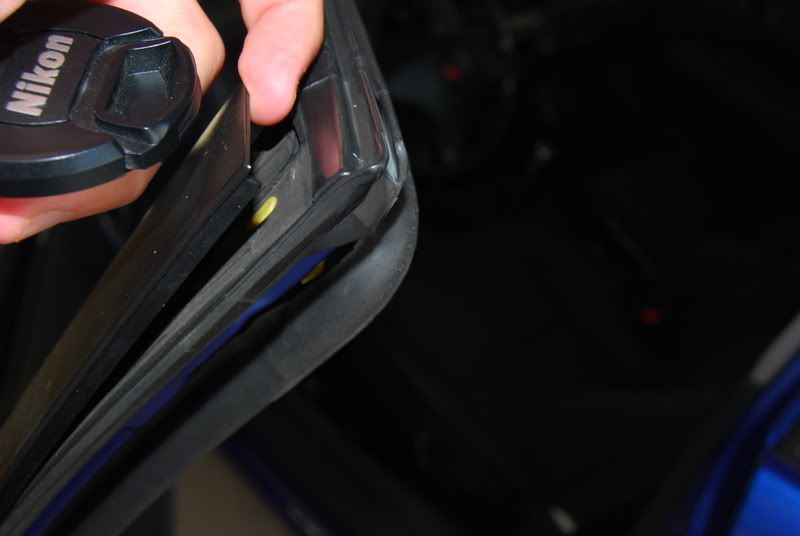
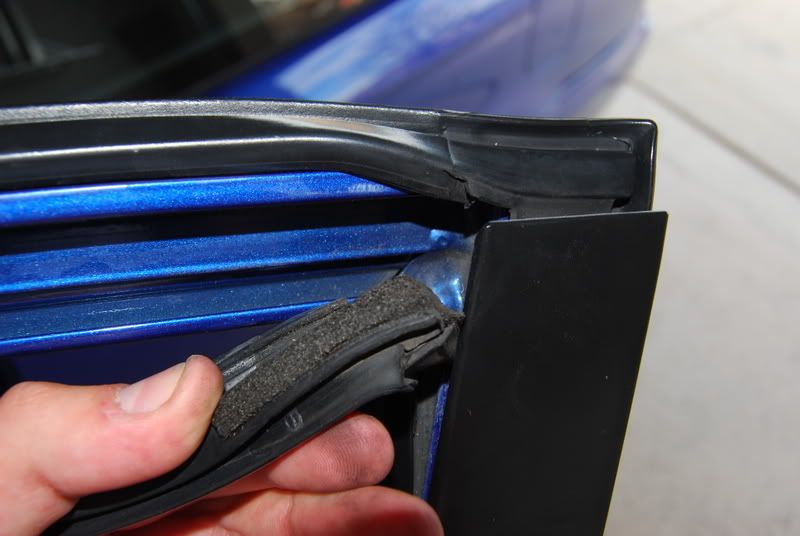
Now comes the hardest part; reinstalling the rubber seals onto the door frame. These seals are a BIG pain in the *** to install, especially with the new addition of the visor clips which are now in the way of the rubber seal from sitting flush. I found it easiest to install the TOP seal into place first. Then, insert the lower seal into its channel with BOTTOM of the lower seal in place first. One the BOTTOM of the lower seal is in place and FLUSH to the frame, you can roll the upper part of it into place. Both the upper and lower seal need to be locked in place with each other. It's almost impossible to explain, but once you are actually doing it, you will easily understand what I am talking about.
In the following pic, the BOTTOM of the lower seal is in place, and I am rolling it into the top seal.
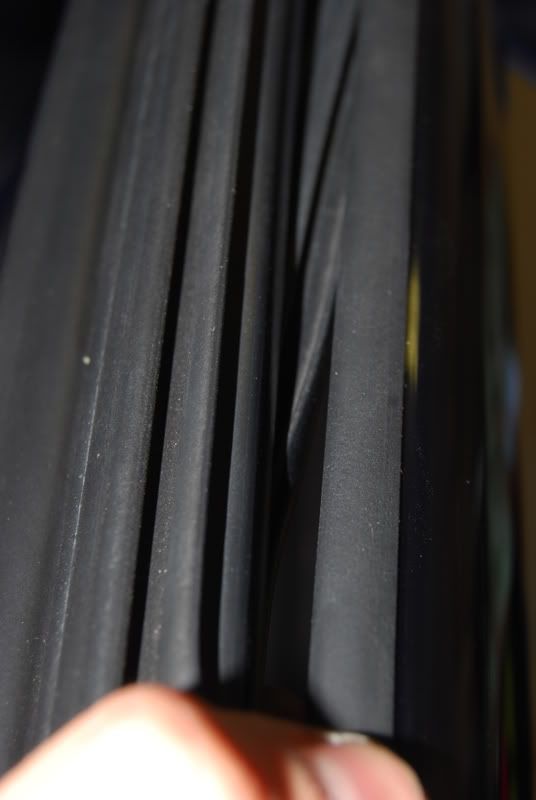
Once again, this process is not exactly easy. I messed with rubber seals on each side for at least 30 minutes. You have to make sure to get it just right, otherwise your window will not roll up into the seal and it will not be able to close all the way. My finger tips are still sore from pressing so hard on the seals.
Once they are installed and nothing is in the way, re install the vertical trim peice that we removed earlier
Remeber the B clips that we installed earlier? Now it's time to attach them to the visor. Supplied in the box are 4 washers. These washers are used to attach the B clips to the visor. The washer goes on the BACK of the B clip, NOT in between the B clip and the visor as some other write ups have said. Once you have the washer aligned with the hole, get one of the "round" press clips and press it into the visor/B clips/washer.
Here's a pic, kinda hard to see.

Do that for all 4 B clips. Once again, make sure the washer is in the back of the B clip, not between the visor and the B clip.
You are now DONE! I like to make sure the window goes up into the seal nice and smooth. Roll up the window and make sure it's not getting snagged on any part of the seal. If it does, roll the window back down and press the seal in until it sits flush. This may take some time to get 100%, but it is very very important.
Once you do that, take some windex or quick detailer and shine them up.
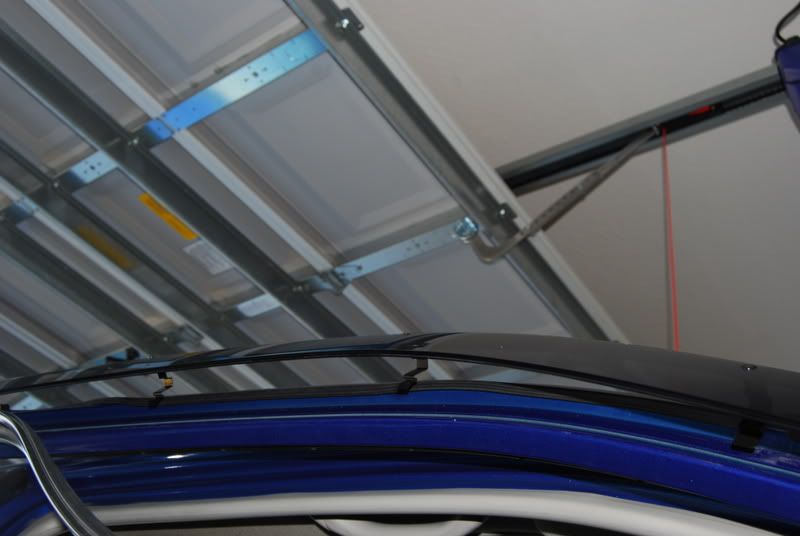
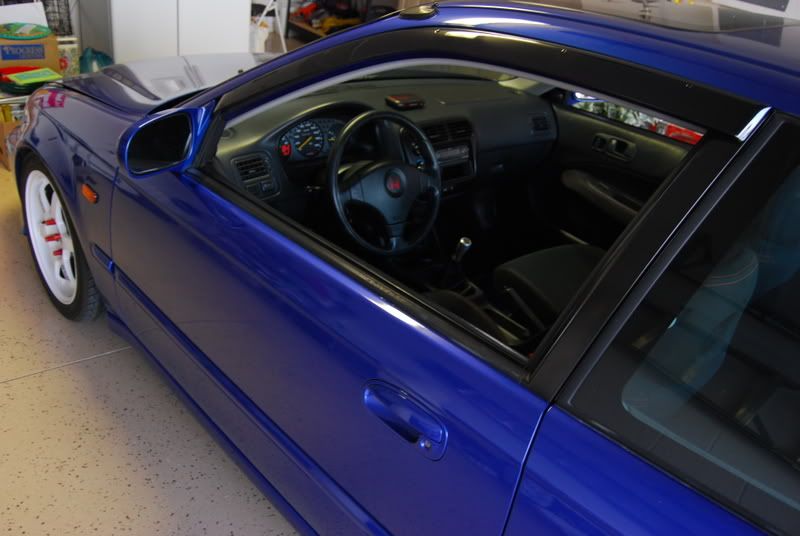
Installation complete:
That's it
Hope this can be of help to someone.
This is my first write up, hope you it helps some of you guys out.
First off, installation of these visors can take some time (more than expected) and a good amount of patience..
-----
First, you need to install the D / F / H clips onto the visors themselves.
The first and last hole on the visor are for the B clips, which I will explain later on. Start off with the second hole from the FRONT of the visor, and install D / F / H clips as so, with the open end of the clip facing downwards. They go in that specific order and simply attach to the visor by pressing in the small round "clips" supplied.
Now there is already 2 other clips installed on the visors from the factory. These clips will slide into the rubber lining behind your side-view mirror, and the rear one will slide in behind the vertical plastic piece on your door.
Here are the pre installed clips:
Front:
Rear:
Now pull back the rubber lining on the backside of the door. Move it just enough so you can access the top screw which holds in the vertical plastic trim piece.
Remove the screw and put it in aside.
Now you are able pull it out just a bit, in order to access the rubber window seal.
Carefully pull on the bottom seal, but be careful not to rip it.
I pulled out the entire BOTTOM seal, and only pulled back the top seal in the 2 places where the B clips attach to the actual door.
Top B clip hole:
Bottom B clip hole:
The B clips are attached as shown in the following pictures, and are screwed onto the door frame from the TOP.
Top B clip installed:
Bottom B clip installed:
The pre installed clips that I mentioned earlier are to be "slipped" into the side view mirror (on the front) and behind the plastic trim piece (on the rear)
Front:
Rear:
Once you slide those 2 clips in, the visor will hold itself in place.
Now you need to remove the little OEM metal clip which "guides" the window, or the visor clip will not be able to attach to the frame.
Simply pull down on the top of it, and it will come right off
Visor mocked up:
Now begin pressing the visor clips onto the door frame.
Make sure the clip is over the small lip on the frame.
Bad:
Good:
Now comes the hardest part; reinstalling the rubber seals onto the door frame. These seals are a BIG pain in the *** to install, especially with the new addition of the visor clips which are now in the way of the rubber seal from sitting flush. I found it easiest to install the TOP seal into place first. Then, insert the lower seal into its channel with BOTTOM of the lower seal in place first. One the BOTTOM of the lower seal is in place and FLUSH to the frame, you can roll the upper part of it into place. Both the upper and lower seal need to be locked in place with each other. It's almost impossible to explain, but once you are actually doing it, you will easily understand what I am talking about.
In the following pic, the BOTTOM of the lower seal is in place, and I am rolling it into the top seal.
Once again, this process is not exactly easy. I messed with rubber seals on each side for at least 30 minutes. You have to make sure to get it just right, otherwise your window will not roll up into the seal and it will not be able to close all the way. My finger tips are still sore from pressing so hard on the seals.
Once they are installed and nothing is in the way, re install the vertical trim peice that we removed earlier
Remeber the B clips that we installed earlier? Now it's time to attach them to the visor. Supplied in the box are 4 washers. These washers are used to attach the B clips to the visor. The washer goes on the BACK of the B clip, NOT in between the B clip and the visor as some other write ups have said. Once you have the washer aligned with the hole, get one of the "round" press clips and press it into the visor/B clips/washer.
Here's a pic, kinda hard to see.
Do that for all 4 B clips. Once again, make sure the washer is in the back of the B clip, not between the visor and the B clip.
You are now DONE! I like to make sure the window goes up into the seal nice and smooth. Roll up the window and make sure it's not getting snagged on any part of the seal. If it does, roll the window back down and press the seal in until it sits flush. This may take some time to get 100%, but it is very very important.
Once you do that, take some windex or quick detailer and shine them up.
Installation complete:
That's it
Hope this can be of help to someone.
Last edited by kaluwa3; 09-27-2009 at 07:03 PM.
 01-24-2009, 04:26 PM
#2
Honda-Tech Member
Join Date: Sep 2004
Location: Morgantown, WV, bewbies
Posts: 4,056
Likes: 0
Received 0 Likes
on
0 Posts
nice man.
when i did mine i found it very very easy to stick a phillips screw driver and just run it along the molding and it went in smooth and evenly.
when i did mine i found it very very easy to stick a phillips screw driver and just run it along the molding and it went in smooth and evenly.
01-24-2009, 06:10 PM
#4
Honda-Tech Member
Join Date: Sep 2008
Location: San Francisco, CA, USA
Posts: 595
Likes: 0
Received 0 Likes
on
0 Posts
Installing the visors for the coupe is easy, imagine installing it on a 4 door... Took me a while.
Nice guide!! By the way, what lens are you using to take these pics? I assume you have a Nikon because of the lens cap in the first pic.
Nice guide!! By the way, what lens are you using to take these pics? I assume you have a Nikon because of the lens cap in the first pic.
01-24-2009, 08:16 PM
#5
Honda-Tech Member
Thread Starter
Join Date: Oct 2006
Location: Tampa, FL
Posts: 887
Likes: 0
Received 0 Likes
on
0 Posts
Nikon D40x, and these were actually shot with my crappy 18-55mm kit lens.
01-24-2009, 08:30 PM
#6
Honda-Tech Member
Join Date: Apr 2006
Location: Exit19 off Rt80 New jersey
Posts: 1,588
Likes: 0
Received 2 Likes
on
2 Posts
Not to intrude, but what did these run you? I thought about gettin them for awhile now.
Im just unsure on the funtion id get out of them.
Anywho: Nice work.
Im just unsure on the funtion id get out of them.
Anywho: Nice work.
01-24-2009, 08:46 PM
#7
Honda-Tech Member
Thread Starter
Join Date: Oct 2006
Location: Tampa, FL
Posts: 887
Likes: 0
Received 0 Likes
on
0 Posts
Got them brand new for $125. I drove around with them a bit tonight.. They are kinda thin once installed, but they do their job of covering the window when it's cracked open. I've always wanted them, and I like how they look, so why not.
Trending Topics
 01-25-2009, 07:58 AM
#10
Honda-Tech Member
Join Date: Sep 2004
Location: Morgantown, WV, bewbies
Posts: 4,056
Likes: 0
Received 0 Likes
on
0 Posts
this are well worth it IMO!
my friends think its too much money so they got the shity advance kind that just stick on.
well these look amazing and way cleaner. they really hug in with the car so from the front they arnt that noticable. From the side it just looks cleaner from the shape and the lack of having to "stick" to something.
these are the wya to go.
05-29-2009, 10:32 AM
#11
Honda-Tech Member
Join Date: May 2004
Location: Glendale,, Az VeRy hOt HeRe
Posts: 423
Likes: 0
Received 0 Likes
on
0 Posts
Anyone know the size of the 4pc washer so I can pick them up at a local hardware store as I misplaced mine.
06-17-2009, 01:06 PM
#12
Honda-Tech Member

Join Date: Apr 2009
Posts: 168
Likes: 0
Received 0 Likes
on
0 Posts
Just installed mine with this DIY, got through it real easy. Once I got the first one done the other one was a peice of cake.
06-17-2009, 03:21 PM
#14
Honda-Tech Member
Join Date: Mar 2009
Location: MiDwEsT
Posts: 1,810
Likes: 0
Received 0 Likes
on
0 Posts
 09-10-2009, 11:53 AM
#17
Honda-Tech Member
Join Date: Apr 2006
Location: Southern CA, CA, USA
Posts: 2,848
Likes: 0
Received 0 Likes
on
0 Posts
bringing back from the dead, but does anybody know where i could possibly buy some hardware for the oem visors?
09-10-2009, 11:58 AM
#18
Junior Member
Join Date: Apr 2008
Location: SOHC CITY, United States
Posts: 202
Likes: 0
Received 0 Likes
on
0 Posts
03-21-2010, 04:15 PM
#20
Honda-Tech Member
Join Date: Sep 2008
Location: The Big Apple
Posts: 879
Likes: 0
Received 0 Likes
on
0 Posts
quick question for anyone who has already done this... im trying to install my visors right now but for some reason the b clips are impossible for me to clip in.. I already have it screwed into place.. but using the clips and washers seem unreasonably hard.. am i doing something wrong?? they won't go in at all.. if you guys have any tips please lmk!
06-07-2010, 11:49 AM
#21
Honda-Tech Member

honestly the hardest part is getting the washers and clipp to get in
my finger tips still hurt from trying to get thos in but i finally did it.
nice write up bro it took my about an hour to get everything straight thanks a bunch ****in honda doesnt think directions are necessary but this thread helped me a bunch thanx
my finger tips still hurt from trying to get thos in but i finally did it.
nice write up bro it took my about an hour to get everything straight thanks a bunch ****in honda doesnt think directions are necessary but this thread helped me a bunch thanx
06-07-2010, 11:57 AM
#22
Honda-Tech Platinum Member
Join Date: Apr 2004
Location: Chicongoland area, IL
Posts: 5,767
Likes: 0
Received 3 Likes
on
2 Posts
yes the small *** "clips" and washers were the hardest part to install. My **** swirled up because of all the bullshit I had to go through
 08-05-2010, 10:21 AM
#23
Honda-Tech Member
Join Date: Jan 2008
Location: sutter, CA, U.S.
Posts: 88
Likes: 0
Received 0 Likes
on
0 Posts
great thread just installed mine, and this diy helped so much.
the lower seal is the hardest part by far to get put back in the right spot
the lower seal is the hardest part by far to get put back in the right spot
12-18-2010, 03:17 PM
#25
Honda-Tech Member
Join Date: Mar 2010
Location: California
Posts: 1,042
Likes: 0
Received 0 Likes
on
0 Posts
i don't think anyone complimented you on your car. sweet ride...
and nice, easy write-up, too.
and nice, easy write-up, too.