
Clipse Resto Project: EF 4 door
 03-27-2008, 07:44 PM
#1
Honda-Tech Member
Thread Starter
iTrader: (2)
Join Date: Nov 2007
Location: Pasadena, CA, USA
Posts: 7,217
Likes: 0
Received 0 Likes
on
0 Posts
TABLE OF CONTENTS! (EDIT-Since Honda-Tech's change a while ago, the TOC will only work for those who have their settings set to 20 posts per page like I do.)
pg.1-The 89 LX, The start of a pain staking project car!
pg.2-Continued from pg.1/talk
pg.3-More Wire tuck/Beginning of the body prep.
pg.4-And so began painting!
pg.5-R.I.P. Bondo, Hello 90 EX MPFI! B18 Rebuild
pg.6-SHE LIVES! Current Pics (12/01/08) DB8 GSR Leather Interior.
pg.7-McDonalds shoot WIRE TUCK! AND New WHEELS!
pg.8-Freshened up the tail lights, painted mouldings, cleaned up interior.
pg.9-Rear seats mounted PROPERLY, new 2.5" custom mandrel bent exhaust, Wheels REFINISHED and MOUNTED!
pg.10-Fresh Door panels, courtesy of my uncles Upholstery shop! THANKS TIO!
pg.11-Exhaust clip, rolling shots!
pg.12-Talk
pg.13-More Talk
pg.14-Excessive Talk
pg.15-Traction bar build, RACE valves , new parts!
pg.16-Pics of continued work, TRACTION BAR SET UP.
pg.17-Talk
pg.18-CURRENT PAGE/PROGRESS
ok so I figured instead of posting my pics everywhere and trying to explain them, why not just make a build thread since I am doing some major work on this car.
This car started life with me already slightly modded. I bought the car for just under a grand with the b18a1 installed, sunroof, original seats wrapped in pleather, shaved center garnish and side mouldings, and a jet Grey primer paint job. The problems with the car were obvious! It had an exhaust leak, a big fart can, sunroof leaked like a ****, front struts were gone, DS wheel bearing was toast made wheel wobble(very dangerous), needed body work, bumpers and fenders were not aligned properly and neither were the lights.
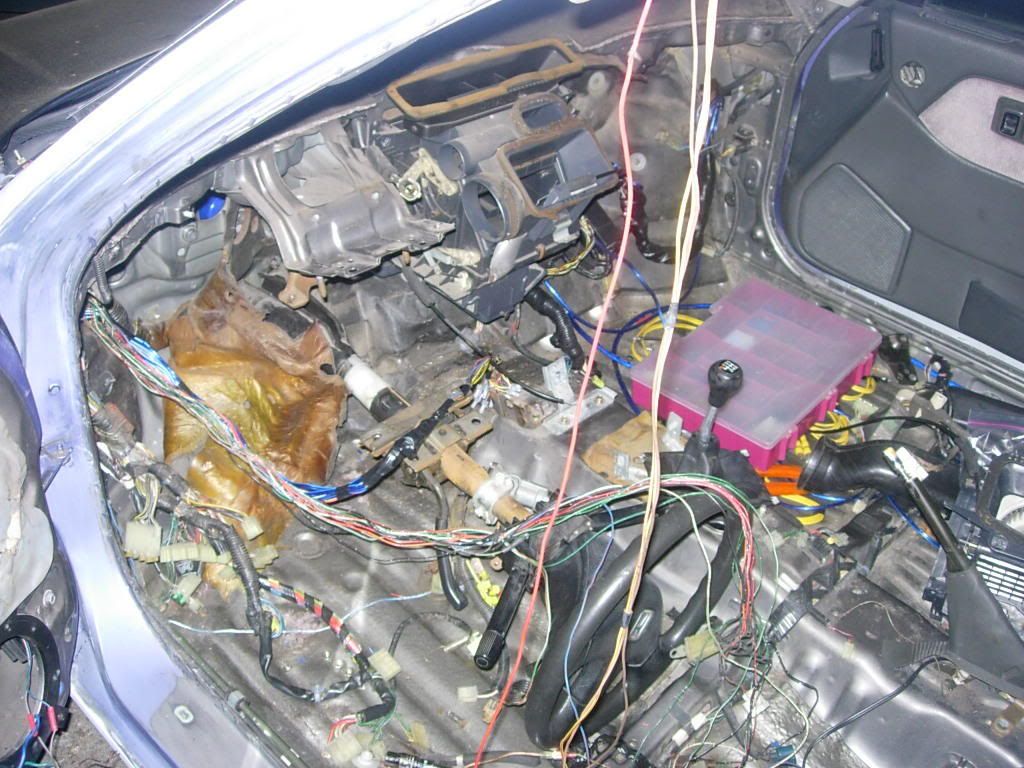
Those were just the basic issues. Atleast the car ran . . . with a wrong ECU. I have recently torn the interior of the car up to do a complete re wire and a battery relocation to the trunk. Now I have to do some MAJOR re wiring and put in the correct ECU.
My plans for this car are to restore it to stockish form, and RHD Si conversion. Later Later I REALLY want to make it an AWD set-up, but we will save that for now.
For now, I have started to re-do the wiring in the cabin and under the hood. Things are coming along slowly but surely, nothing special or fancy, but all wires will get rewrapped and hidden.
At 18 with no funds coming in right now, the project has slowed down, but will get back and booming shortly. The jist of it I hope to have done for the June 14th EF meet at Griffith Park though.
The picture progress thus far, not too many pics, but enough to get an idea ATM.
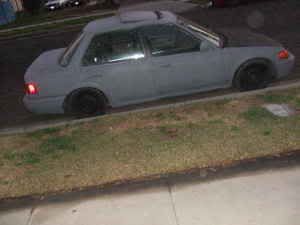
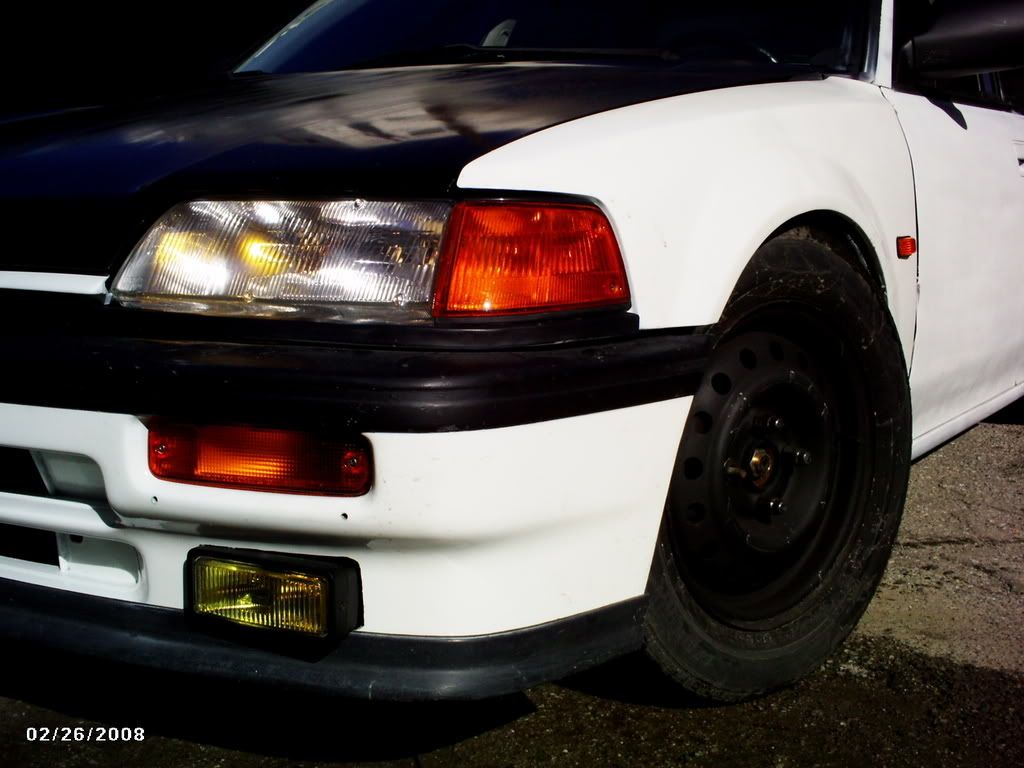
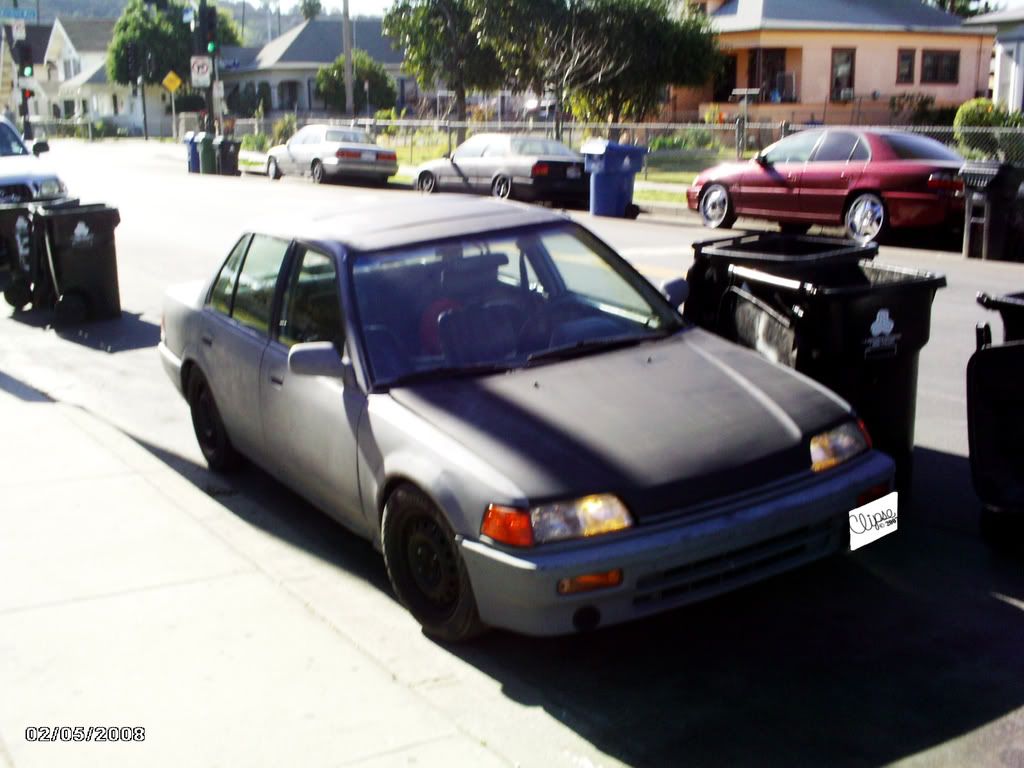
How the car was purchased.
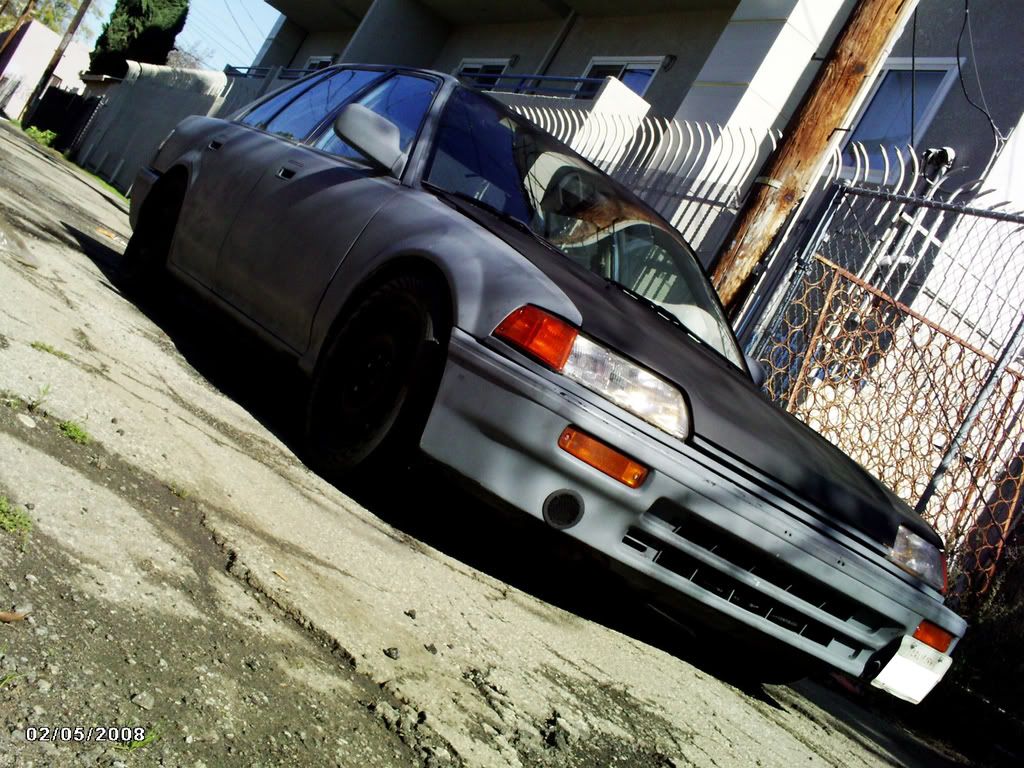
After some minor mods (rattle can, fogs, sidemarkers, and a lip)
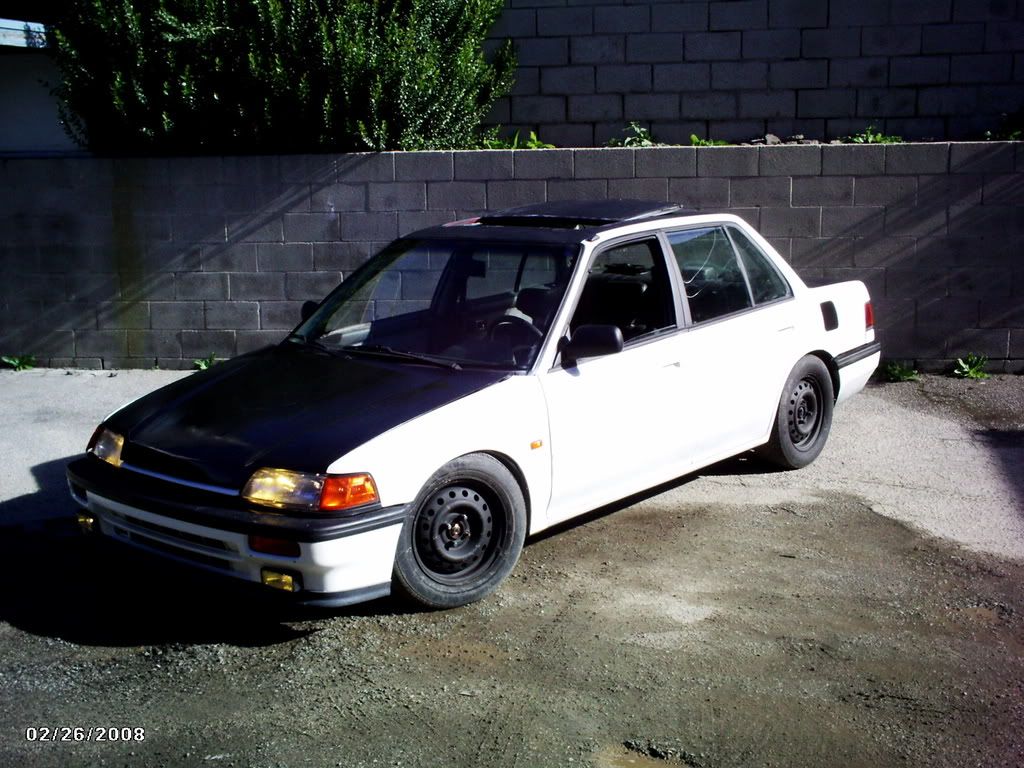
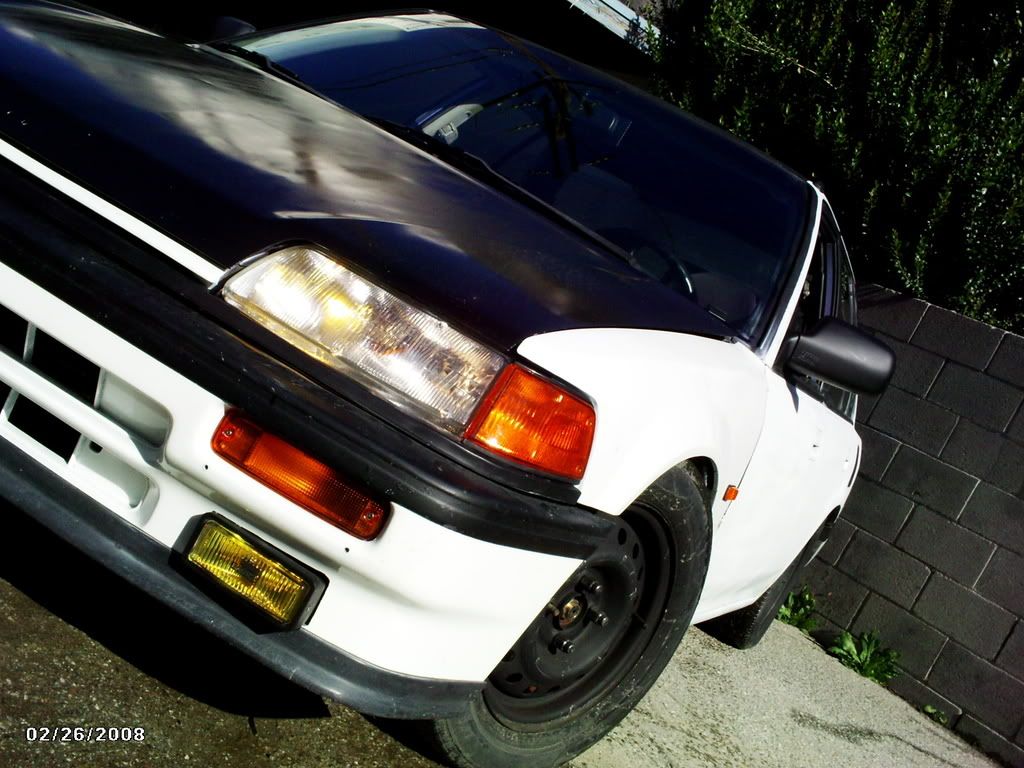
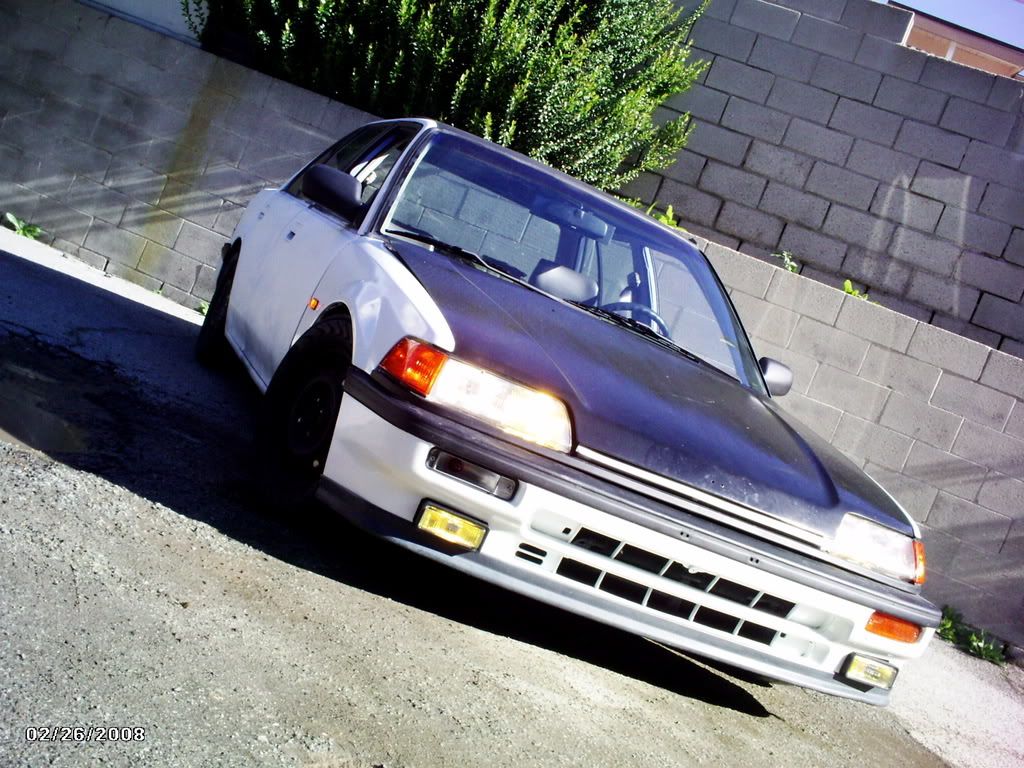
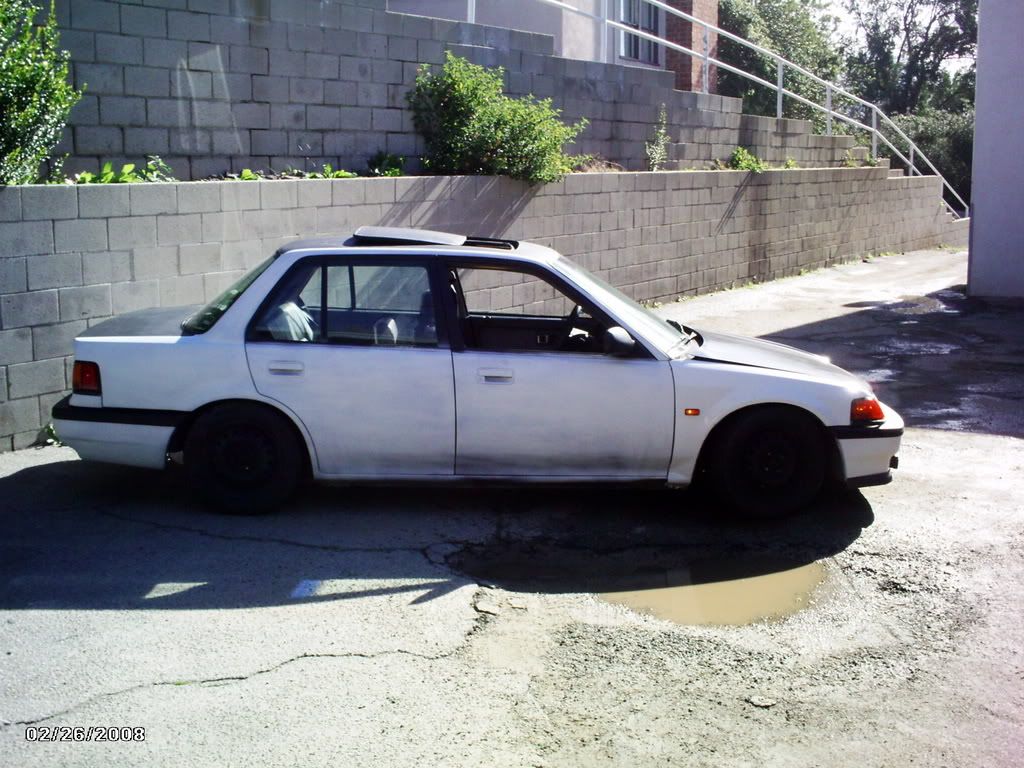
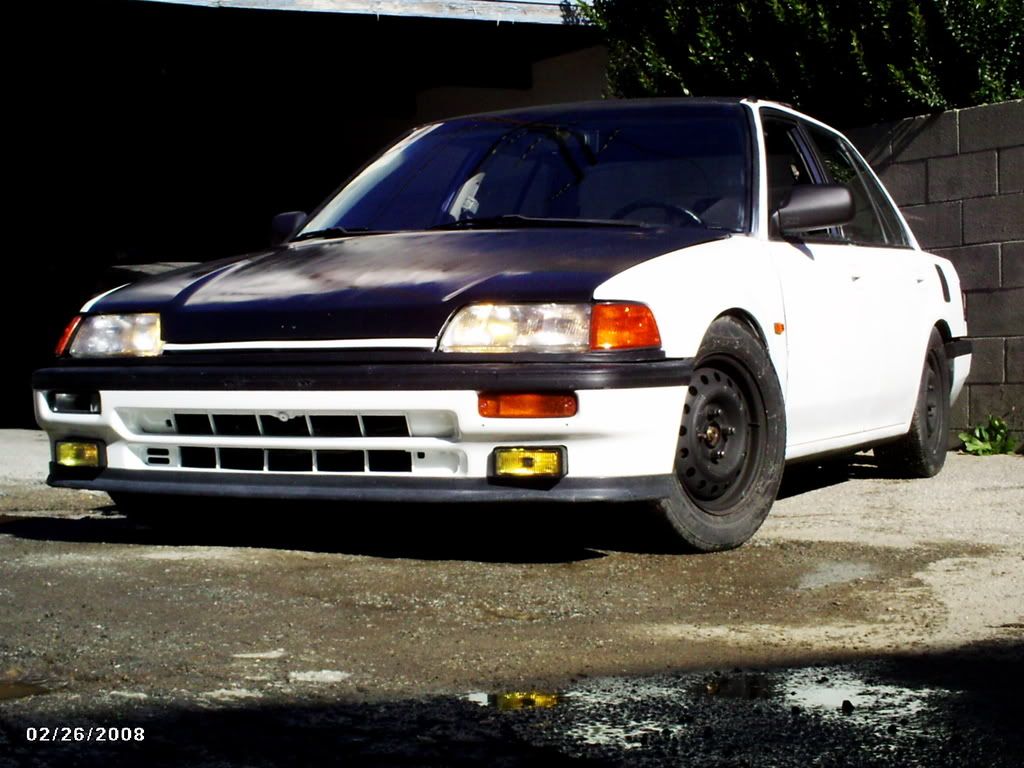
This is where the car sits ATM with the wiring getting completely redone to my specs (not hondas! )
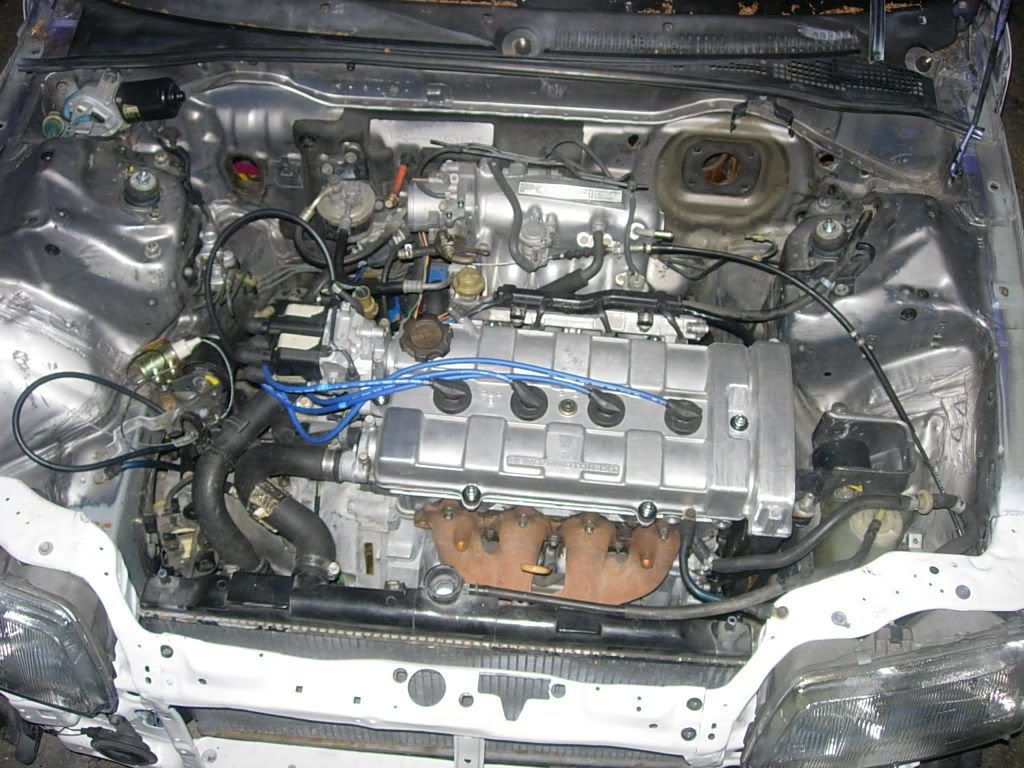
I hope to get the bay cleaned up and rattle canned for the time being, valve cover will get polished, and once the body work is done and ready and I have my JDM goodies on, I will do a REAL paint job.
updates and progress to come.
THANKS FOR LOOKING!
pg.1-The 89 LX, The start of a pain staking project car!
pg.2-Continued from pg.1/talk
pg.3-More Wire tuck/Beginning of the body prep.
pg.4-And so began painting!
pg.5-R.I.P. Bondo, Hello 90 EX MPFI! B18 Rebuild
pg.6-SHE LIVES! Current Pics (12/01/08) DB8 GSR Leather Interior.
pg.7-McDonalds shoot WIRE TUCK! AND New WHEELS!
pg.8-Freshened up the tail lights, painted mouldings, cleaned up interior.
pg.9-Rear seats mounted PROPERLY, new 2.5" custom mandrel bent exhaust, Wheels REFINISHED and MOUNTED!
pg.10-Fresh Door panels, courtesy of my uncles Upholstery shop! THANKS TIO!
pg.11-Exhaust clip, rolling shots!
pg.12-Talk
pg.13-More Talk
pg.14-Excessive Talk
pg.15-Traction bar build, RACE valves
, new parts! pg.16-Pics of continued work, TRACTION BAR SET UP.
pg.17-Talk
pg.18-CURRENT PAGE/PROGRESS
ok so I figured instead of posting my pics everywhere and trying to explain them, why not just make a build thread since I am doing some major work on this car.
This car started life with me already slightly modded. I bought the car for just under a grand with the b18a1 installed, sunroof, original seats wrapped in pleather, shaved center garnish and side mouldings, and a jet Grey primer paint job. The problems with the car were obvious! It had an exhaust leak, a big fart can, sunroof leaked like a ****, front struts were gone, DS wheel bearing was toast made wheel wobble(very dangerous), needed body work, bumpers and fenders were not aligned properly and neither were the lights.
Those were just the basic issues. Atleast the car ran . . . with a wrong ECU. I have recently torn the interior of the car up to do a complete re wire and a battery relocation to the trunk. Now I have to do some MAJOR re wiring and put in the correct ECU.
My plans for this car are to restore it to stockish form, and RHD Si conversion. Later Later I REALLY want to make it an AWD set-up, but we will save that for now.
For now, I have started to re-do the wiring in the cabin and under the hood. Things are coming along slowly but surely, nothing special or fancy, but all wires will get rewrapped and hidden.
At 18 with no funds coming in right now, the project has slowed down, but will get back and booming shortly. The jist of it I hope to have done for the June 14th EF meet at Griffith Park though.
The picture progress thus far, not too many pics, but enough to get an idea ATM.
How the car was purchased.
After some minor mods (rattle can, fogs, sidemarkers, and a lip)
This is where the car sits ATM with the wiring getting completely redone to my specs (not hondas!
)I hope to get the bay cleaned up and rattle canned for the time being, valve cover will get polished, and once the body work is done and ready and I have my JDM goodies on, I will do a REAL paint job.
updates and progress to come.
THANKS FOR LOOKING!
Last edited by Clipsed; 08-23-2009 at 12:27 PM.

 03-28-2008, 09:34 AM
#5
Honda-Tech Member
Thread Starter
iTrader: (2)
Join Date: Nov 2007
Location: Pasadena, CA, USA
Posts: 7,217
Likes: 0
Received 0 Likes
on
0 Posts
<TABLE WIDTH="90%" CELLSPACING=0 CELLPADDING=0 ALIGN=CENTER><TR><TD>Quote, originally posted by ~sp33~ »</TD></TR><TR><TD CLASS="quote">4wd gear ***
Hurry up and get that awd installed so we can start a 4wd 4dr squad </TD></TR></TABLE>
I wish I could buy the setup, the wagon I got it off of at the junkyard was still there this morning, but it looked like it was being taken to see its fate  Soon though, well maybe not as soon as I would like, but as money will allow hehe. What is the SL(ow) gear for/do?
Hurry up and get that awd installed so we can start a 4wd 4dr squad
</TD></TR></TABLE> I wish I could buy the setup, the wagon I got it off of at the junkyard was still there this morning, but it looked like it was being taken to see its fate Soon though, well maybe not as soon as I would like, but as money will allow hehe. What is the SL(ow) gear for/do?
03-28-2008, 08:46 PM
#7
Honda-Tech Member
Thread Starter
iTrader: (2)
Join Date: Nov 2007
Location: Pasadena, CA, USA
Posts: 7,217
Likes: 0
Received 0 Likes
on
0 Posts
<TABLE WIDTH="90%" CELLSPACING=0 CELLPADDING=0 ALIGN=CENTER><TR><TD>Quote, originally posted by ~sp33~ »</TD></TR><TR><TD CLASS="quote">4wd crawling lol. The gear is shorter then reverse. With the car in SL with the clutch out at idle, you can out pace the car by walking easily.</TD></TR></TABLE>
So basically it makes it easier to GHOST RIDE THE WHIP!!! lolz **hides**
So basically it makes it easier to GHOST RIDE THE WHIP!!! lolz
**hides**
Trending Topics
03-31-2008, 12:25 PM
#8
Honda-Tech Member
Thread Starter
iTrader: (2)
Join Date: Nov 2007
Location: Pasadena, CA, USA
Posts: 7,217
Likes: 0
Received 0 Likes
on
0 Posts
UPDATE
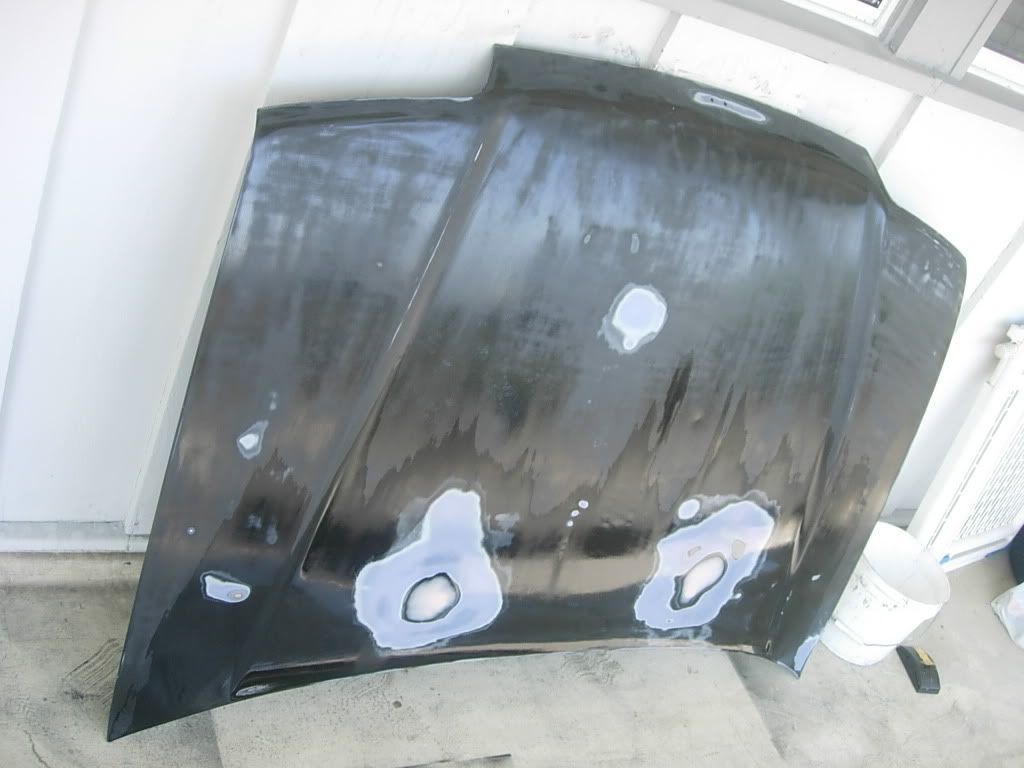
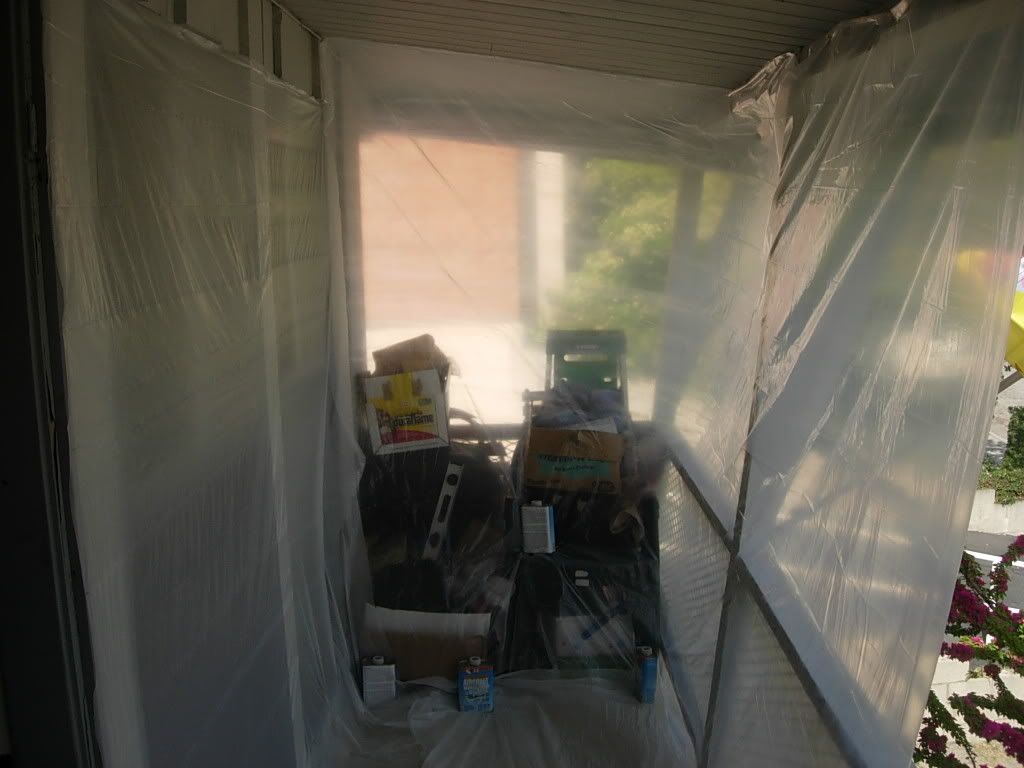
So while I wait for a PR4 to wire everything up, I decided to get with the program and atleast rattle can a decent paint job for meanwhile until I have the extra time and money to do a nice full out inside out paint job. No pics of the car right now, but here is a progress pic of the hood after filling in the WW nozzles and a good sanding. Not too worried about some of the small dents since I need a new hood as this one has seen better days, especially knowing that part of the skeleton was removed.
This will be done and painted today.
03-31-2008, 03:09 PM
#9
Honda-Tech Member
Thread Starter
iTrader: (2)
Join Date: Nov 2007
Location: Pasadena, CA, USA
Posts: 7,217
Likes: 0
Received 0 Likes
on
0 Posts
ok here are some more pics!
Makeshift paint booth!
Primed underside not getting a gloss on the bottom.


Ready to do the top side after I eat because the paint is getting me [freak]ed up, and that is not good on an empty stomach! lolz!
Makeshift paint booth!
Primed underside not getting a gloss on the bottom.
Ready to do the top side after I eat because the paint is getting me [freak]ed up, and that is not good on an empty stomach! lolz!
03-31-2008, 05:00 PM
#10
Honda-Tech Member
Thread Starter
iTrader: (2)
Join Date: Nov 2007
Location: Pasadena, CA, USA
Posts: 7,217
Likes: 0
Received 0 Likes
on
0 Posts
Good to do a quick sanding and throw on some gloss! although it might get darker quicker than I though, I might not be able to have it complete tonight.

 03-31-2008, 07:00 PM
#12
Honda-Tech Member
Thread Starter
iTrader: (2)
Join Date: Nov 2007
Location: Pasadena, CA, USA
Posts: 7,217
Likes: 0
Received 0 Likes
on
0 Posts
got me a couple coats layed down, gonna lay a couple more, and clear tomorrow morning since it got dark and I'm pretty wasted off of fumes! lolz

03-31-2008, 07:48 PM
#13
Honda-Tech Member
Thread Starter
iTrader: (2)
Join Date: Nov 2007
Location: Pasadena, CA, USA
Posts: 7,217
Likes: 0
Received 0 Likes
on
0 Posts
alright, done for the night, clear and color sand tomorrow!


Looks good so far, I hate clear though as it has a tendency to run, you really have to spray on light coats of clear.
Looks good so far, I hate clear though as it has a tendency to run, you really have to spray on light coats of clear.
03-31-2008, 08:11 PM
#14
Honda-Tech Member
Join Date: Mar 2006
Location: 804
Posts: 1,194
Likes: 0
Received 0 Likes
on
0 Posts
ooo this makes me wanna get to working on my 4dr
but i havnt started this job so i have no mula, or anything to fix this damn oil leak v.v but enough of my problems hurry i wanna see more!
but i havnt started this job so i have no mula, or anything to fix this damn oil leak v.v but enough of my problems hurry i wanna see more!
03-31-2008, 08:17 PM
#15
Honda-Tech Member
Thread Starter
iTrader: (2)
Join Date: Nov 2007
Location: Pasadena, CA, USA
Posts: 7,217
Likes: 0
Received 0 Likes
on
0 Posts
haha more to come. Tomorrow I will be doing more bondo work on the body and getting gloss white on the body.
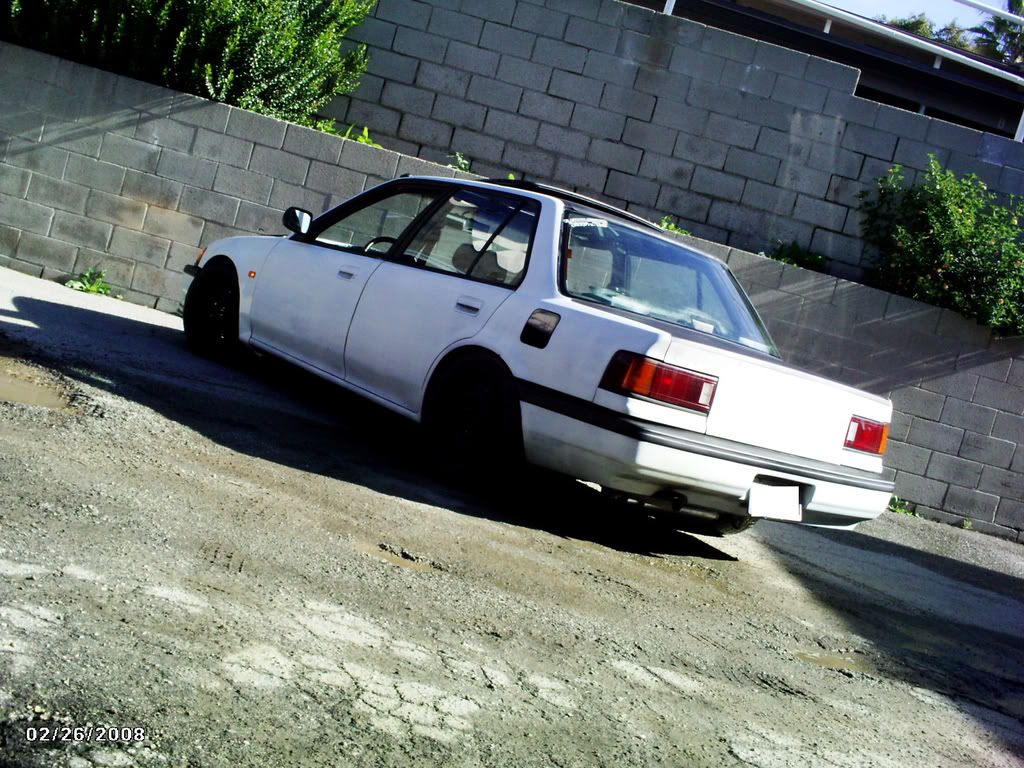
Here is another before pic I found. Please excuse the POS cars in the background! (not mine wouldn't take em even if they were given to me!)
Modified by Clipsed at 9:27 PM 3/31/2008
Here is another before pic I found. Please excuse the POS cars in the background! (not mine wouldn't take em even if they were given to me!)
Modified by Clipsed at 9:27 PM 3/31/2008
03-31-2008, 08:52 PM
#17
Honda-Tech Member
<TABLE WIDTH="90%" CELLSPACING=0 CELLPADDING=0 ALIGN=CENTER><TR><TD>Quote, originally posted by Clipsed »</TD></TR><TR><TD CLASS="quote">
</TD></TR></TABLE>
hahah dude, you use the same cans i use! OSH! no wonder the color of your black and gray is similar to mines, nice progress!
</TD></TR></TABLE>
hahah dude, you use the same cans i use! OSH! no wonder the color of your black and gray is similar to mines, nice progress!
04-01-2008, 01:20 AM
#18
Honda-Tech Member
Thread Starter
iTrader: (2)
Join Date: Nov 2007
Location: Pasadena, CA, USA
Posts: 7,217
Likes: 0
Received 0 Likes
on
0 Posts
<TABLE WIDTH="90%" CELLSPACING=0 CELLPADDING=0 ALIGN=CENTER><TR><TD>Quote, originally posted by ME-B-N-ME »</TD></TR><TR><TD CLASS="quote">so what be that hole on the bumper?</TD></TR></TABLE>
lmfao, the hole was for a ram air effect on a short ram intake . . . don't ask what they were thinking . . .
<TABLE WIDTH="90%" CELLSPACING=0 CELLPADDING=0 ALIGN=CENTER><TR><TD>Quote, originally posted by My_EFsedan »</TD></TR><TR><TD CLASS="quote">hahah dude, you use the same cans i use! OSH! no wonder the color of your black and gray is similar to mines, nice progress!</TD></TR></TABLE>
Osh is a block away from my house. I was working there until a couple weeks ago I quit because they started acting stupid as ***, but the OSH cans were only flat black primer because I ran out, otherwise I use Wal Mart $1 paint with a fat tip to spray the gloss.
04-01-2008, 01:37 PM
#20
Honda-Tech Member
Thread Starter
iTrader: (2)
Join Date: Nov 2007
Location: Pasadena, CA, USA
Posts: 7,217
Likes: 0
Received 0 Likes
on
0 Posts
That's right, there was no point in having that thing, There wasn't a CAI so it did nothing except look like I had a tweeter on my bumper!
 04-01-2008, 05:04 PM
#22
Honda-Tech Member
Thread Starter
iTrader: (2)
Join Date: Nov 2007
Location: Pasadena, CA, USA
Posts: 7,217
Likes: 0
Received 0 Likes
on
0 Posts
OK so due to the fat tip that I use, I have A LOT of wetsanding ahead of me. I used an entire can of clear on the hood due to the fact that I already anticipated a LOT of orange peel because of my fat tip. Had I sprayed with the regular tip, I would have had runs which is a real PITA to fix.
I'm unsure how many people on this forum have any painting experience, but if you plan on doing a rattle can job and wanna make it look good, I will give you a small breakdown.
You can see that I made my own enclosed area. This will help keep contamination of the part being painted to a very minimum, but expect to have a few contaminants here and there just due to the fact that you are not using a real paint booth.
Make sure to prep your piece well, I use a 220 grit wet sand to my surface prior to primer, paint thinner wipe down and tack cloth after. Once the primer dries, a nice 400 grit wetsanding to get those small imperfections is great!
Once the time comes to lay down your color layer, I HIGHLY recommend a fat tip. Here in LA there are places you can buy them due to the fact there are so many taggers so it can be had easily. If you are unable to attain a fat tip, get creative with a tip, WD-40, tire shine, etc. tips can work well, but different cans will not work well with some tips and some will work incredibly well. Trial and error on a spare part or something is your friend to find out what tip will work for your application. ALSO don't forget there are male and female tips out there! So depending on your can you may not be able to use certain tips. A great tip to use if possible is off of duplicolor cans, those are a nice wide HVLP style spray which equals less orange peel which equals less sanding! For small detail areas, you can use your regular tip that came with the can.
After the color dries for an hour it's time to spray on your clear. CAREFUL HERE as a lot of clears like to run easily. Spray on very thin coats to start and get the piece tacky. Once it is tacky, then you can get a little heavier, but watch how you are spraying as this is not where you want to have a run! Make sure if you use a fat tip like me to use a nice thick application of clear, I don't mean a single thick spray, I mean an OVERALL coat. This will give you room to sand your clear off and get a smooth finish!
Depending on your clear and temperatures of where your piece is drying INCLUDING humidity will vary your drying times, read the label of your paints to make sure you are painting in the right ranges, and spraying at the right intervals.
After your piece is allll done and ready to be color sanded, get yourself a sheet of 2000 grit and a sanding block and get to work. You want a nice even smooth finish, this is where some dry washed hands (no oils on hands) come in handy. When wet sanding you want to either use some water with a lil bit of dawn dish liquid soap or a detail mist like you get at an auto parts store or Wal Mart.
I will explain the final steps once I finish my piece, here are some pics after a lil bit of wetsanding.


This is after some wet sanding and rubbing compound to bring out the luster and take away the scratches of the 2000 grit. I know it is not done, but it is to show you an idea of how it should end up starting to look like as you sand. Notice the dimples? You want to smooth them allll out!

Top right portion is the portion I used rubbing compound on, the rest is just sanded. See the difference?

More updates to come, I got a late start today so not much has gotten done.
I'm unsure how many people on this forum have any painting experience, but if you plan on doing a rattle can job and wanna make it look good, I will give you a small breakdown.
You can see that I made my own enclosed area. This will help keep contamination of the part being painted to a very minimum, but expect to have a few contaminants here and there just due to the fact that you are not using a real paint booth.
Make sure to prep your piece well, I use a 220 grit wet sand to my surface prior to primer, paint thinner wipe down and tack cloth after. Once the primer dries, a nice 400 grit wetsanding to get those small imperfections is great!
Once the time comes to lay down your color layer, I HIGHLY recommend a fat tip. Here in LA there are places you can buy them due to the fact there are so many taggers so it can be had easily. If you are unable to attain a fat tip, get creative with a tip, WD-40, tire shine, etc. tips can work well, but different cans will not work well with some tips and some will work incredibly well. Trial and error on a spare part or something is your friend to find out what tip will work for your application. ALSO don't forget there are male and female tips out there! So depending on your can you may not be able to use certain tips. A great tip to use if possible is off of duplicolor cans, those are a nice wide HVLP style spray which equals less orange peel which equals less sanding! For small detail areas, you can use your regular tip that came with the can.
After the color dries for an hour it's time to spray on your clear. CAREFUL HERE as a lot of clears like to run easily. Spray on very thin coats to start and get the piece tacky. Once it is tacky, then you can get a little heavier, but watch how you are spraying as this is not where you want to have a run! Make sure if you use a fat tip like me to use a nice thick application of clear, I don't mean a single thick spray, I mean an OVERALL coat. This will give you room to sand your clear off and get a smooth finish!
Depending on your clear and temperatures of where your piece is drying INCLUDING humidity will vary your drying times, read the label of your paints to make sure you are painting in the right ranges, and spraying at the right intervals.
After your piece is allll done and ready to be color sanded, get yourself a sheet of 2000 grit and a sanding block and get to work. You want a nice even smooth finish, this is where some dry washed hands (no oils on hands) come in handy. When wet sanding you want to either use some water with a lil bit of dawn dish liquid soap or a detail mist like you get at an auto parts store or Wal Mart.
I will explain the final steps once I finish my piece, here are some pics after a lil bit of wetsanding.
This is after some wet sanding and rubbing compound to bring out the luster and take away the scratches of the 2000 grit. I know it is not done, but it is to show you an idea of how it should end up starting to look like as you sand. Notice the dimples? You want to smooth them allll out!
Top right portion is the portion I used rubbing compound on, the rest is just sanded. See the difference?
More updates to come, I got a late start today so not much has gotten done.
04-08-2008, 11:39 AM
#25
Honda-Tech Member
Thread Starter
iTrader: (2)
Join Date: Nov 2007
Location: Pasadena, CA, USA
Posts: 7,217
Likes: 0
Received 0 Likes
on
0 Posts
well somewhat, good news is my ECU came in yesterday while I was out and about at the recruiters office and other places. Bad news is that the clear coat I used went on crappy and left lots of pinholes as you can see for some reason, so I gotta repaint the hood because sanding down those pinholes has revealed a couple high spots since the previous owner pulled off part of the hood skeleton.
Later today if time permits, or tomorrow I will continue working and do an update.
Later today if time permits, or tomorrow I will continue working and do an update.