

[FAQ] How-To: K20 into 92-00 Civic/94-01 Integra
 08-02-2007, 12:58 PM
#1
Senior Member
Thread Starter
Okay, time to get crackin'. First off, as you all know, K series swaps are the new generation hybrids that has been amongst Hondas enthusiasts for the last couple years, and has gotten extremely popular. I've been workin on this build for quite a while. It has been on the back burner for some time due to military duty reasons, wife deployed, all that. Hey, we all have excuses right?
Well, here is my stab at it. If there are any suggestions/concerns/corrections, please let me know and I'll make a change. For others that have more info, feel free to post! We are all here to learn!
<FONT SIZE="3"> Diffculty for task: 6 of 10</FONT>
This is a pretty involved engine swap compared to your normal B series swap. The engine is turned around the opposite way (or correct way we should all say), custom fuel lines need to be installed, wiring is completely different compared to normal 92-00 Civic/Integras. Hybrid harnesses are necessary unless you choose to get involved with wiring the whole thing manually, and of course, some skills in fabricating/cutting such has with a die grinder is necessary. A lot of people who do this swap also end up doing complete rebuilds such as painting, re-doing a lot of other things which I'd suggest since it'll be your favorite toy for a LONG time.
Well, here goes:
<FONT SIZE="3">First off, this is what you will need:</FONT>
[*] A good garage/space to work in[*] Engine hoist/cherry picker[*] Your basic engine swap tools (10mm, 12mm, 14mm, 17mm, 19mm, 32mm) sockets & wrenches[*] Breaker bar (for those tough to break bolts)[*] PB Blaster/WD-40 (incase of bolts wanting to be stubborn)[*] Ball joint separator/Pitman Arm Puller (to break ball joints easily)[*] Friends to help you out of course
<FONT SIZE="3">Parts to do the swap:</FONT>
Keep in mind, these parts I've listed are not merely what's required to do the tasking. There are many other ways and parts to do the swap, this is just the listing I have personally done on my own.
[*] K20 Swap (K20A, K20A2, K20A3) from a reputable engine seller
When you receive your engine swap, do a thorough receiving inspection and ensure all sensors are good to go. Make sure, of course, it's the right engine you have selected as your set up.
<FONT SIZE="3">Axle options:</FONT>
There are probably more combos, and will be more since this How-To was posted, but the best ones as of now are:
[*] RSX Base model axles with inner CV joints swapped. The reason for this is because the axle lengths are better. Otherwise axle being too short/too long will result.
[*] DriveShaftShop axles, HASport axles, Hybrid racing axles. I'm sure there are many others out there, but those are the top dawgs when it comes to measuring and ensuring the right length.
<FONT SIZE="3">Wiring Options:</FONT>
As always, you can do the wiring yourself. Courtesy of user kazino42 of k20a.org, here is what he posted: Thread
http://www.k20a.org/forum/showthread.php?t=11966
- You can do a hybrid harness made by HASport, Hybrid-Racing and other companies/users who also make hybrid harnesses for your K20 swap.
Instructions vary big time. For HASport and Hybrid-Racing, Wiring instructions can be found here:
Hybrid Racing Harness Installation
HASport Hybrid Harness Installation
You can also read Hondata's point of view here:
http://www.hondata.com/techk20wiring.html
Also, to add, you will need to take your coolant sending unit and coolant temp sensor off of your B/D series. The reason for this is the K series cooling fan is activated by a thermo-switch in the radiator. Either use HASports hose insert piece, or you can also tap into a place on the engine you find best. Many find that the sensor located at the top radiator hose inlet is a great spot. A NPT (pipe adapter) is required due to the coolant temp sending unit is too small for the threads.
More info on this can be found here (courtesy of Hondata):
http://www.hondata.com/techk20swapfan.html
ECU note: If you have a US K20 swap (such as Type S or base model K20), you will need to have your ECU K-Pro'ed by Hondata, or use another standalone such as AEM EMS, etc.. Reason for this is due to the immobilizer in the ECU. This will not allow you to run your car. However, if you get a JDM ECU such as the DC5-R or EP3 CTR, you will NOT need to have a standalone. The ECU code for DC5-R is PRC.
Charge harness: For the charging harness, you can find ways to route the harness to your battery/underhood fuse box. There are many different combos such as the TSX charging harness is longer. K20A2 (Type-S) is a decent length. For the R, it may have to be extended. Depending on where your battery is located and underhood/fusebox, you will need to extend the charge harness to reach it regardless. Also ensure you have at LEAST THREE grounds to the chassis from the engine. Check post (below)
More info can be found here: http://www.hondata.com/techk20swapgrounds.html
Pulley options: Usually, people run the 5 pulley set up with an EP3 idler pulley (pictured below). If you run the EP3 Idler 5 pulley set up, you will need a 505K7 belt -- which is a 50.5" 7 rib belt.
Pulley Set up (EP3 idler pulley is the very top pulley):
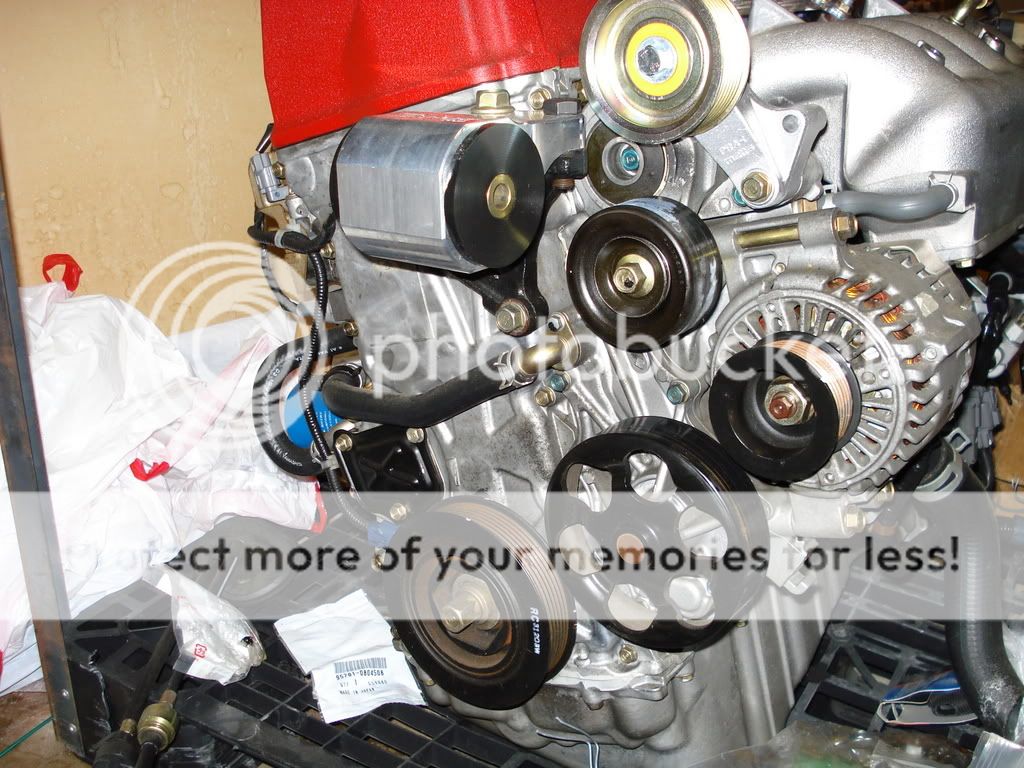
Reason for this, is if you are not running A/C or power steering, the way the serpentine belt runs will not route correctly. However, I'm sure since this post, there are many other options to run such as the 3 pulley set up, and also companies are making brackets and adapters to run 3 pulleys (which would be the crank, water pump and alternator)
Power Steering: More details later!
A/C: Hybrid-Racing has been working on a bracket to allow for A/C.
More details later!
<FONT SIZE="3">Cooling Options:</FONT>
This is one of the bigger things. There are still more products being released to accommodate where the radiator is located. However, most run a half-size dual core radiator from the EG. There are many many options for radiators such as running an RSX radiator, aluminum, etc, you will have to do research on your part if you choose to do this. I'm personally running an aluminum regular half-size dual core radiator.
For mounting of the half-size radiator, you will need to relocate the radiator support brackets by re-welding the mounts. However, ETD racing has also released a traction bar set up that also comes with radiator support brackets to allow for straight bolt-on set up.
Radiator hoses:
For hoses, I have found best that for the TOP hose, part # M248 from AutoZone works best (thanks Karcepts!). More pictures of it will be posted shortly.
For the LOWER hose, I would recommend getting a 94-01 Integra lower radiator hose, and fitting it/cutting it to make it work. (More pics soon)
That concludes this post for K20 Information. If anybody has corrections or more information, please let me know or post away! Thanks.
Step by step instructions will be posted shortly!
Well, here is my stab at it. If there are any suggestions/concerns/corrections, please let me know and I'll make a change. For others that have more info, feel free to post! We are all here to learn!
<FONT SIZE="3"> Diffculty for task: 6 of 10</FONT>
This is a pretty involved engine swap compared to your normal B series swap. The engine is turned around the opposite way (or correct way we should all say), custom fuel lines need to be installed, wiring is completely different compared to normal 92-00 Civic/Integras. Hybrid harnesses are necessary unless you choose to get involved with wiring the whole thing manually, and of course, some skills in fabricating/cutting such has with a die grinder is necessary. A lot of people who do this swap also end up doing complete rebuilds such as painting, re-doing a lot of other things which I'd suggest since it'll be your favorite toy for a LONG time.
Well, here goes:
<FONT SIZE="3">First off, this is what you will need:</FONT>
[*] A good garage/space to work in[*] Engine hoist/cherry picker[*] Your basic engine swap tools (10mm, 12mm, 14mm, 17mm, 19mm, 32mm) sockets & wrenches[*] Breaker bar (for those tough to break bolts)[*] PB Blaster/WD-40 (incase of bolts wanting to be stubborn)[*] Ball joint separator/Pitman Arm Puller (to break ball joints easily)[*] Friends to help you out of course
<FONT SIZE="3">Parts to do the swap:</FONT>
Keep in mind, these parts I've listed are not merely what's required to do the tasking. There are many other ways and parts to do the swap, this is just the listing I have personally done on my own.
[*] K20 Swap (K20A, K20A2, K20A3) from a reputable engine seller
When you receive your engine swap, do a thorough receiving inspection and ensure all sensors are good to go. Make sure, of course, it's the right engine you have selected as your set up.
<FONT SIZE="3">Axle options:</FONT>
There are probably more combos, and will be more since this How-To was posted, but the best ones as of now are:
[*] RSX Base model axles with inner CV joints swapped. The reason for this is because the axle lengths are better. Otherwise axle being too short/too long will result.
[*] DriveShaftShop axles, HASport axles, Hybrid racing axles. I'm sure there are many others out there, but those are the top dawgs when it comes to measuring and ensuring the right length.
<FONT SIZE="3">Wiring Options:</FONT>
As always, you can do the wiring yourself. Courtesy of user kazino42 of k20a.org, here is what he posted: Thread
http://www.k20a.org/forum/showthread.php?t=11966
Originally Posted by kazino42
I got my swap done last week, made my own harness with no engine lights. Didn't want to wait and spent the $350. Decide to do a write-up for those who are willing to do their own. If you can read the Hondata schematic  , you won't have any problem.
If you can get the sub harness from the RSX to use the connectors, C101 and the E-plug. I was able to get a 02 civic sub harness, used the stock relays, but you can use universal relay, but on the civic connector it's was missing some wires that needed to be added.
So, basically you'll need the C101 to connect to the engine harness, 3 relays and E-plug to ecu. The Hondata schematic is really good, just missing the 2nd O2 and DLC which is in the manual.
For the EG
Once you get the harness made up with the 3 relays. Unplug the main relay which you don't need anymore. Jump wires 7 and 8, this will let you tap the output from the Fuel pump relay to A7 at the stock ecu harness. Jump 3 to 5, this will let you tap the Ign signal at A25 on the stock ecu harness.
A7 for fuel pump
A25 for Ign signal
D1 for Batt+ (make sure to change the fuse under the hood from 7.5amps to 30 amps.)
Main relay looks like this.
- - - -
8 6 - 2
- - - -
7 5 3 1
1 Bat+
2 GRN
3 A25
5 IGN
6 St switch
7 Fuel Pump
8 A7
These are the wires I tapped.
E15 - ELD to D10 on stock ecu harness
E22 - Brake Switch D22 on stock ecu harness
E26 - RPM to gauge
E31 - MIL to A13 on stock ecu harness
Engine Harness
3 - VSS - tap it to gauge
7 - FanC -- A12 on stock ecu harness
8 - Alt-L -- A16 on stock ecu harness
16 - Starter -- I solder it to the ignition or tap it to starter wire
18 - Oil pressure -- tap it to gauge
DLC Pin Out
The pinout at the diagnostic port is as follows:
pin 4 (BLK) = chassis ground
pin 5 (BRN/YEL) = LG3 logic ground from ECU pin E3
pin 7 (LT BLU) = "K-Line" (2-way OBDII serial communications line) to ECU
pin E23
pin 9 (BRN) = SCS (Service Check Signal) line to ECU pin E29 <--
pin 12 (RED/WHT) = write-enable signal to ECU pin E30 (for rewriting the ECU)
pin 14 (GRAY) = +5V from immobilizer control unit pin 3 (probably for rewriting immobilizer codes)
pin 16 (WHT/RED) = +12V battery voltage (from #9 BACKUP fuse 7.5A)
so another way to do it would be to ground ECU pin E29, and then you should get the CEL flash code as described in the above article.
2nd O2 Pinout
O2 sensor plug
1 2
3 4
1 -- E2 - (WHT/RED) SHO2S
2 -- E4 - PNK SG3
3 -- To A/R Relay (same as the Primary)
4 -- E6 - BLK/WHT SO2SHTCR
Temp and fan switch needs to be wired.
Good luck and make sure to double check. PM if you have any ?
, you won't have any problem.If you can get the sub harness from the RSX to use the connectors, C101 and the E-plug. I was able to get a 02 civic sub harness, used the stock relays, but you can use universal relay, but on the civic connector it's was missing some wires that needed to be added.
So, basically you'll need the C101 to connect to the engine harness, 3 relays and E-plug to ecu. The Hondata schematic is really good, just missing the 2nd O2 and DLC which is in the manual.
For the EG
Once you get the harness made up with the 3 relays. Unplug the main relay which you don't need anymore. Jump wires 7 and 8, this will let you tap the output from the Fuel pump relay to A7 at the stock ecu harness. Jump 3 to 5, this will let you tap the Ign signal at A25 on the stock ecu harness.
A7 for fuel pump
A25 for Ign signal
D1 for Batt+ (make sure to change the fuse under the hood from 7.5amps to 30 amps.)
Main relay looks like this.
- - - -
8 6 - 2
- - - -
7 5 3 1
1 Bat+
2 GRN
3 A25
5 IGN
6 St switch
7 Fuel Pump
8 A7
These are the wires I tapped.
E15 - ELD to D10 on stock ecu harness
E22 - Brake Switch D22 on stock ecu harness
E26 - RPM to gauge
E31 - MIL to A13 on stock ecu harness
Engine Harness
3 - VSS - tap it to gauge
7 - FanC -- A12 on stock ecu harness
8 - Alt-L -- A16 on stock ecu harness
16 - Starter -- I solder it to the ignition or tap it to starter wire
18 - Oil pressure -- tap it to gauge
DLC Pin Out
The pinout at the diagnostic port is as follows:
pin 4 (BLK) = chassis ground
pin 5 (BRN/YEL) = LG3 logic ground from ECU pin E3
pin 7 (LT BLU) = "K-Line" (2-way OBDII serial communications line) to ECU
pin E23
pin 9 (BRN) = SCS (Service Check Signal) line to ECU pin E29 <--
pin 12 (RED/WHT) = write-enable signal to ECU pin E30 (for rewriting the ECU)
pin 14 (GRAY) = +5V from immobilizer control unit pin 3 (probably for rewriting immobilizer codes)
pin 16 (WHT/RED) = +12V battery voltage (from #9 BACKUP fuse 7.5A)
so another way to do it would be to ground ECU pin E29, and then you should get the CEL flash code as described in the above article.
2nd O2 Pinout
O2 sensor plug
1 2
3 4
1 -- E2 - (WHT/RED) SHO2S
2 -- E4 - PNK SG3
3 -- To A/R Relay (same as the Primary)
4 -- E6 - BLK/WHT SO2SHTCR
Temp and fan switch needs to be wired.
Good luck and make sure to double check. PM if you have any ?
- You can do a hybrid harness made by HASport, Hybrid-Racing and other companies/users who also make hybrid harnesses for your K20 swap.
Instructions vary big time. For HASport and Hybrid-Racing, Wiring instructions can be found here:
Hybrid Racing Harness Installation
HASport Hybrid Harness Installation
You can also read Hondata's point of view here:
http://www.hondata.com/techk20wiring.html
Also, to add, you will need to take your coolant sending unit and coolant temp sensor off of your B/D series. The reason for this is the K series cooling fan is activated by a thermo-switch in the radiator. Either use HASports hose insert piece, or you can also tap into a place on the engine you find best. Many find that the sensor located at the top radiator hose inlet is a great spot. A NPT (pipe adapter) is required due to the coolant temp sending unit is too small for the threads.
More info on this can be found here (courtesy of Hondata):
http://www.hondata.com/techk20swapfan.html
ECU note: If you have a US K20 swap (such as Type S or base model K20), you will need to have your ECU K-Pro'ed by Hondata, or use another standalone such as AEM EMS, etc.. Reason for this is due to the immobilizer in the ECU. This will not allow you to run your car. However, if you get a JDM ECU such as the DC5-R or EP3 CTR, you will NOT need to have a standalone. The ECU code for DC5-R is PRC.
Charge harness: For the charging harness, you can find ways to route the harness to your battery/underhood fuse box. There are many different combos such as the TSX charging harness is longer. K20A2 (Type-S) is a decent length. For the R, it may have to be extended. Depending on where your battery is located and underhood/fusebox, you will need to extend the charge harness to reach it regardless. Also ensure you have at LEAST THREE grounds to the chassis from the engine. Check post (below)
More info can be found here: http://www.hondata.com/techk20swapgrounds.html
Pulley options: Usually, people run the 5 pulley set up with an EP3 idler pulley (pictured below). If you run the EP3 Idler 5 pulley set up, you will need a 505K7 belt -- which is a 50.5" 7 rib belt.
Pulley Set up (EP3 idler pulley is the very top pulley):
Reason for this, is if you are not running A/C or power steering, the way the serpentine belt runs will not route correctly. However, I'm sure since this post, there are many other options to run such as the 3 pulley set up, and also companies are making brackets and adapters to run 3 pulleys (which would be the crank, water pump and alternator)
Power Steering: More details later!
A/C: Hybrid-Racing has been working on a bracket to allow for A/C.
More details later!
<FONT SIZE="3">Cooling Options:</FONT>
This is one of the bigger things. There are still more products being released to accommodate where the radiator is located. However, most run a half-size dual core radiator from the EG. There are many many options for radiators such as running an RSX radiator, aluminum, etc, you will have to do research on your part if you choose to do this. I'm personally running an aluminum regular half-size dual core radiator.
For mounting of the half-size radiator, you will need to relocate the radiator support brackets by re-welding the mounts. However, ETD racing has also released a traction bar set up that also comes with radiator support brackets to allow for straight bolt-on set up.
Radiator hoses:
For hoses, I have found best that for the TOP hose, part # M248 from AutoZone works best (thanks Karcepts!). More pictures of it will be posted shortly.
For the LOWER hose, I would recommend getting a 94-01 Integra lower radiator hose, and fitting it/cutting it to make it work. (More pics soon)
That concludes this post for K20 Information. If anybody has corrections or more information, please let me know or post away! Thanks.
Step by step instructions will be posted shortly!
 08-02-2007, 01:57 PM
#2
Senior Member
Thread Starter
As said before, this is a pretty involved swap, but definitely worth it IMO. Again, this is my stab at it. This is NOT of what's required, there are many other ways to accomplish the swap, especially in the future/since this post.
<FONT SIZE="3">Caution:</FONT>Please take this information in a nut shell, and use it as reference only. I am not responsible for any wrong doings on your part. Make sure you have the proper experience to do this task and do enough research before getting started.
<FONT SIZE="3">Step by step procedures:</FONT>
First thing is first, do a good receiving inspection of your engine. Ensure all sensors are in top notch condition, and direct attention to any discrepancies you have towards the person/company you purchased your swap from. Take the time to clean the engine/tranny up as you will be having a lot of pride in the accomplishment. You don't want it looking raggedy after all that work!
Just as any engine removal, jack up the front end, and place securly on jackstands, with chocks at the rear wheels to ensure safety. Drain all fluids (coolant, power steering, engine oil, transmission oil, etc.).
[*] Disconnect fuel line at the fuel filter and fuel return line going back to the fuel tank[*] Disconnect throttle linkage[*] Disconnect shift linkage at the shifter[*] Disconnect engine harness at the passenger and driver side shocke towers[*] Disconnect the clutch line (also remove the hardline from the clutch master cylinder after engine is removed)[*] Disconnect radiator hoses and remove radiator[*] Disconnect and remove power steering lines (if present)[*] Disconnect and remove cruise control (if present)[*] Disconnect and remove exhaust header[*] Remove intake tube for better clearance
Axle removal:
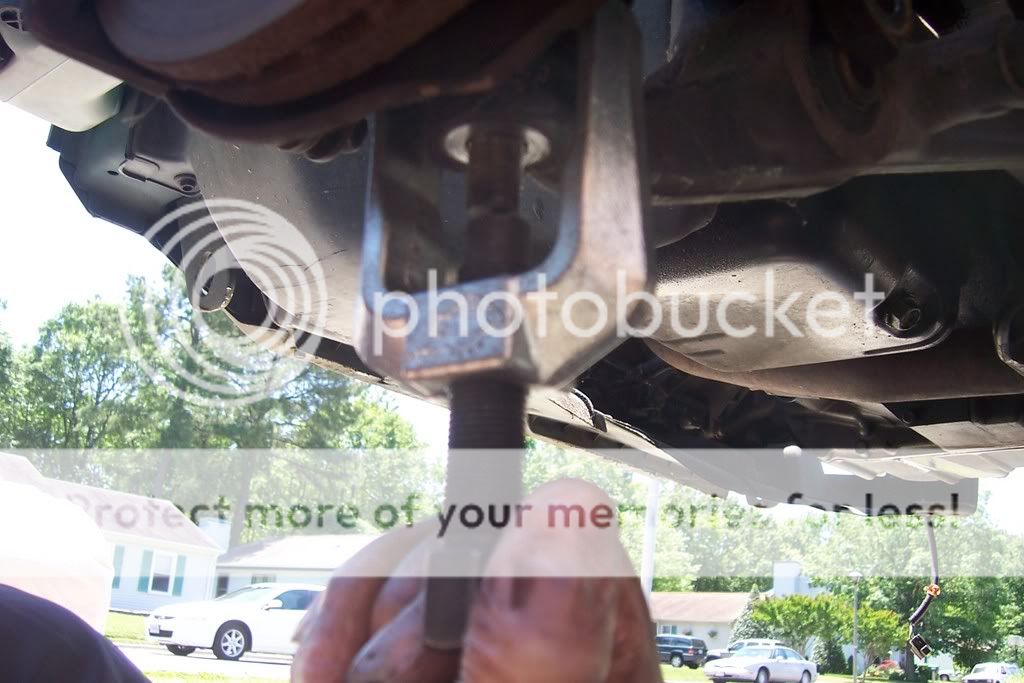
[*] Remove the 32 mm axle nut:

Note: You may need to use an impact gun, breaker bar or other means to remove. If you have problems, I would also recommend placing the car back on the ground with the wheels on and the center hubcap removed to have more loosening torque on the nut.
[*] Remove cotter key/pin from the lower ball joint. Using a ball joint separator/pitman arm puller, or even using the hammer method, pop the lower ball joint. I personally used a pitman arm puller.
Picture:

Once the ball joint is separated, removal axle like so:
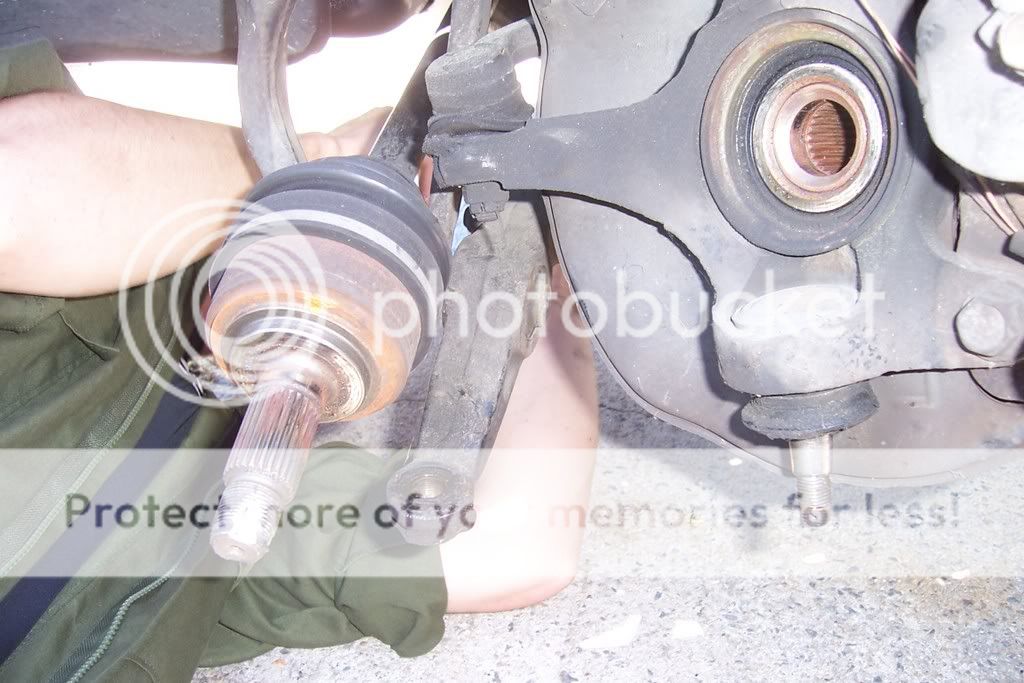
[*] Grab a big flat head screw driver, pry bar, or pickle fork and disconnect axle from transmission.
Once axles are removed, ensure everything is disconnect and engine appears to come out as smooth as possible.
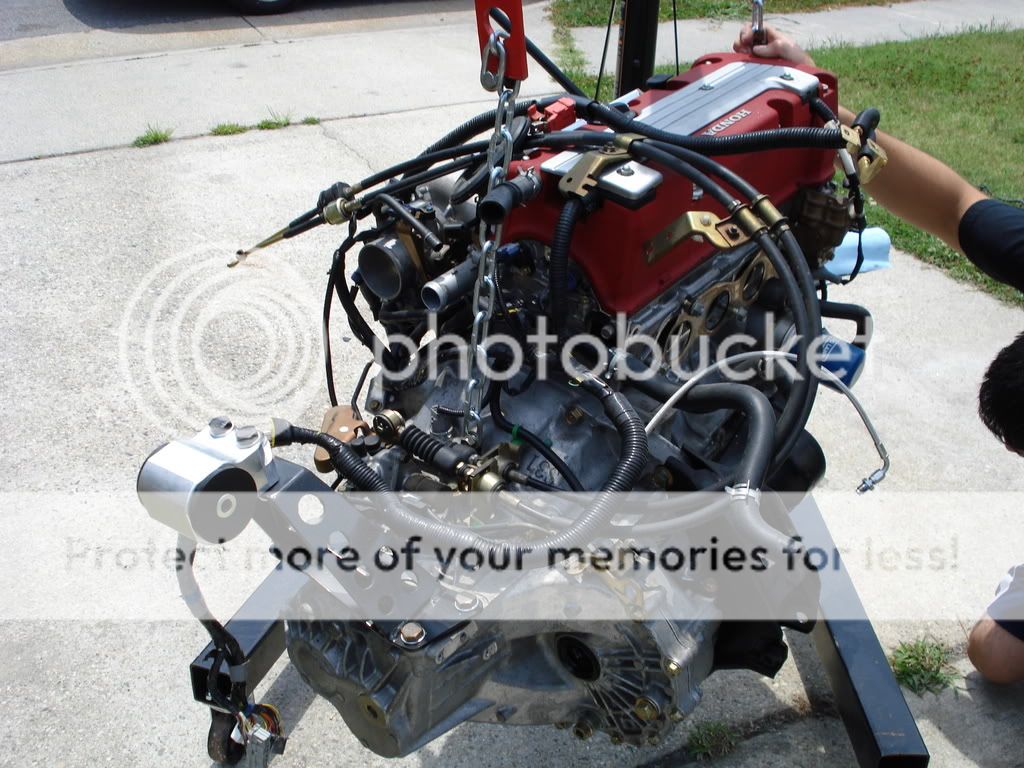
[*]Grab engine hoist/cherry picker, and position it over the engine. Using an engine leveler/chains, place chains on secure points of the engine. There are several points you can place them on. I would recommend placing them on at least 12mm bolt or bigger. Do not brake chains on any 10mm bolt. Ensure you have enough threads threaded into the engine/tranny as well.
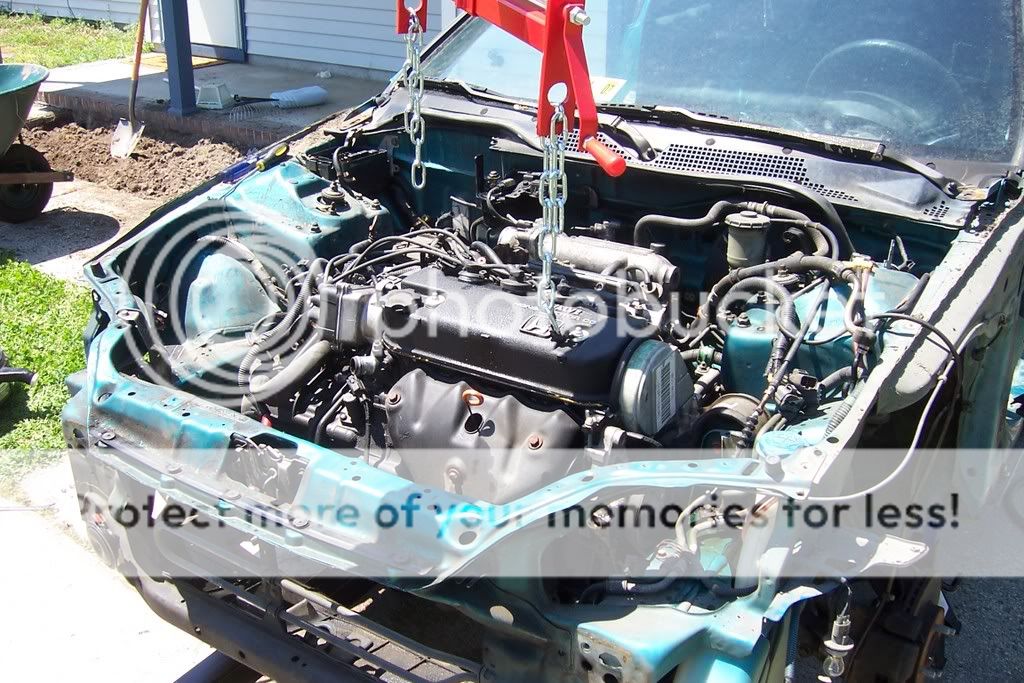
[*] Carefully put up pressure on engine to take the weight off the engine mounts[*] Disconnect and remove all engine mounts[*] Carefully lift engine up and out. Do this very slow and ensure it is clear of anything, along with everything being disconnected. There are a lot of things that can get caught, tied up, not disconnected, etc. Having several set of eyes cannot hurt.
WARNING: Do not ever get underneath car or underneath engine while hydraulic pressure is applied. Doing so may result in severe injury and/or death.
Engine removed:
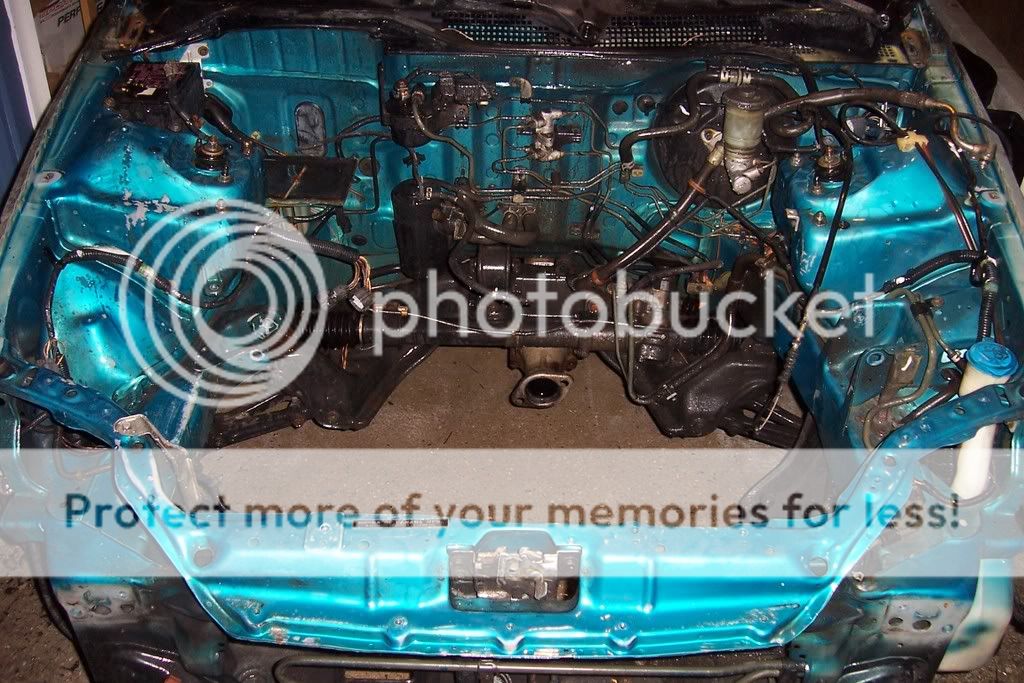
<FONT SIZE="3">Prepping engine bay:</FONT>
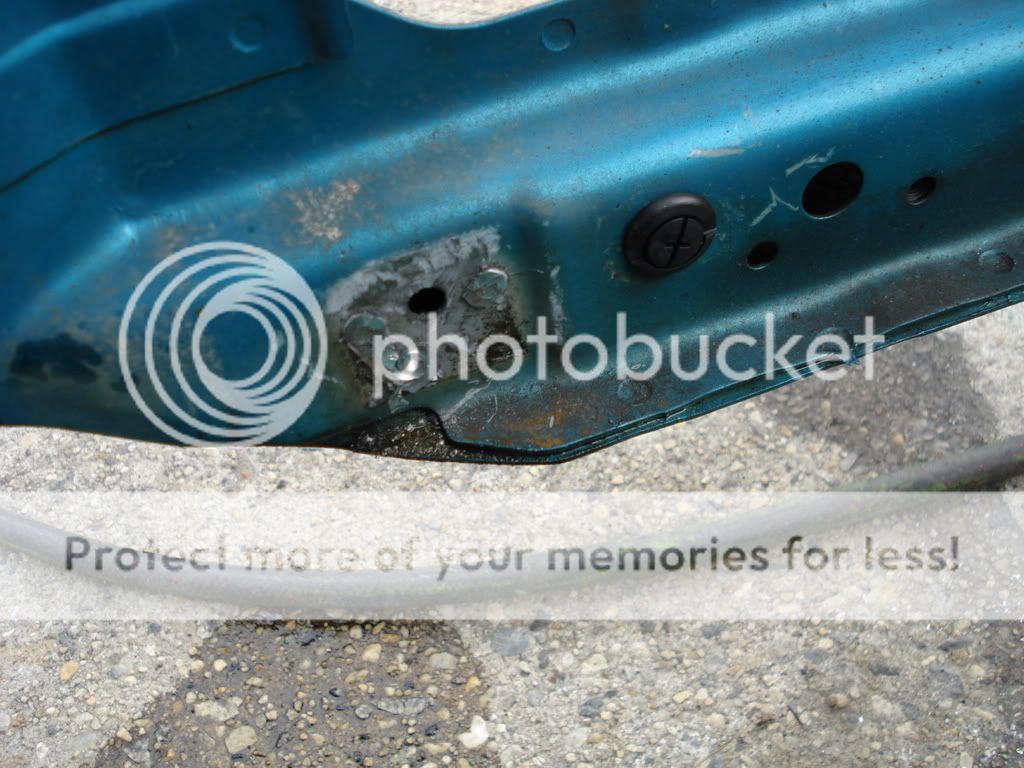
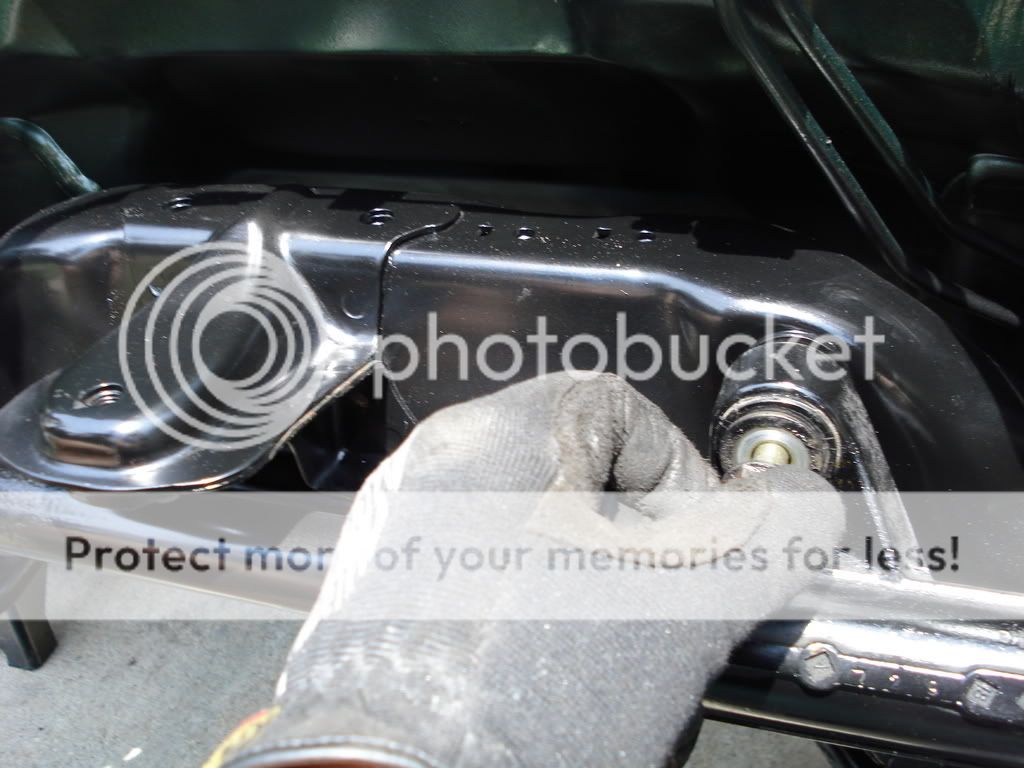
[*] Now is the time to take a good while to clean the engine bay. Clean the engine bay of all grime/dirt/fluids. Take pride in your work![*] Remove the passenger side tranny bracket. You can do this by simply drilling out the spot welds and prying it off, or using an air chissel/hammer.

Removed:

Caution! Ensure you are using safety! I would recommend wearing mechanic gloves and safety glasses, and hearing protection as necessary. Nothing is worth losing fingers, vision or hearing over anything!
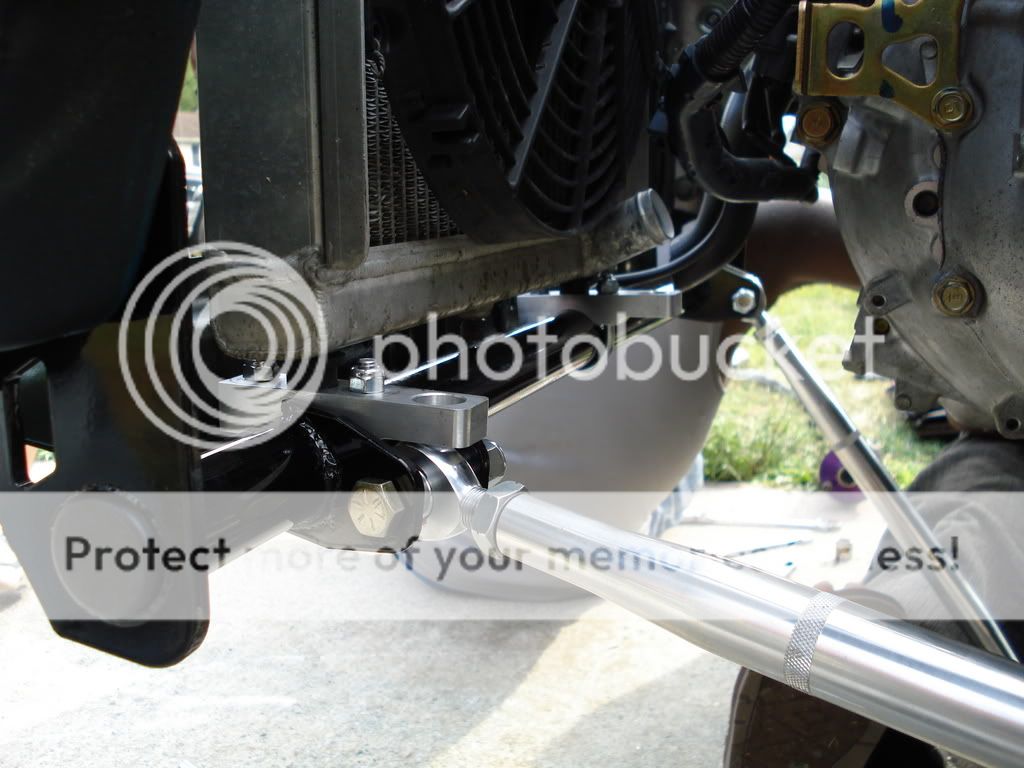
[*] Remove lower radiator mount brackets and A/C lower brackets:
You will need to re-weld the radiator brackets and weld them back on the driver's side of the radiator support. I personally have ETD traction bars with radiator brackets. So I do not have pictures of this process. If anyone has a step-by-step, post up!
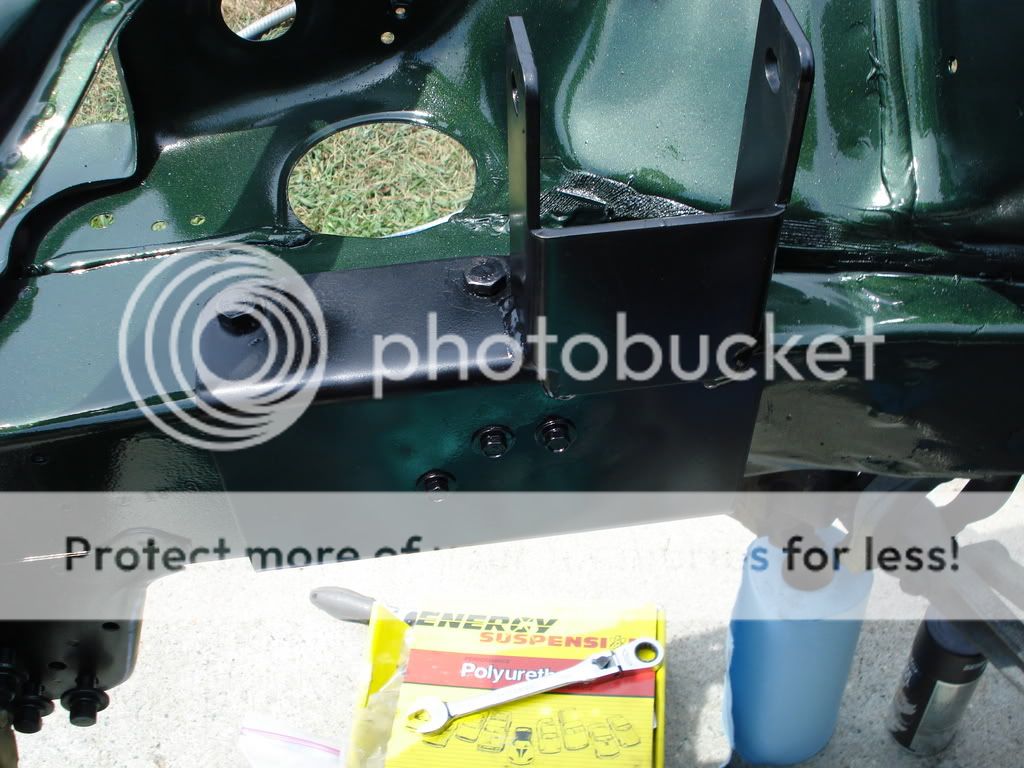
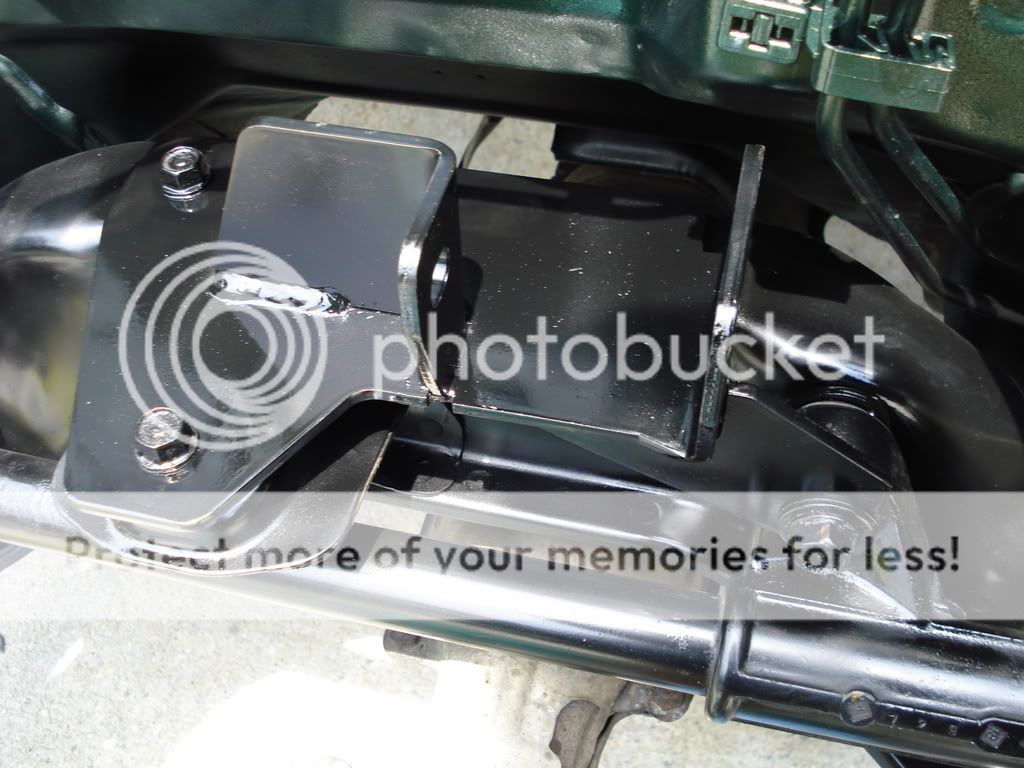
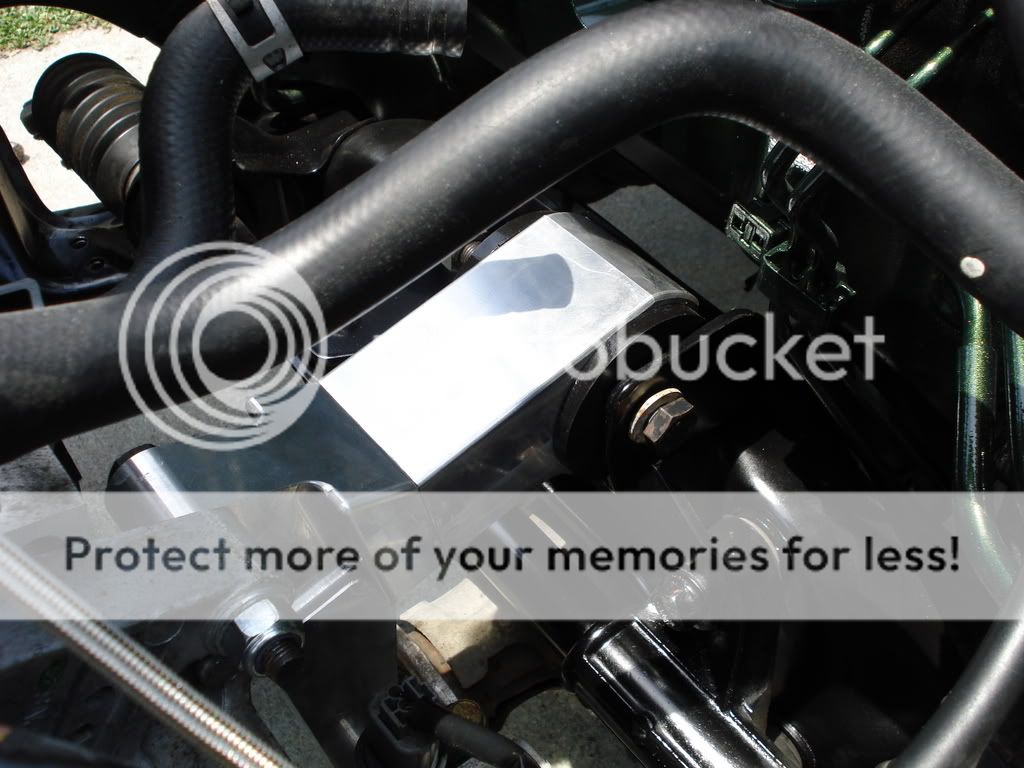
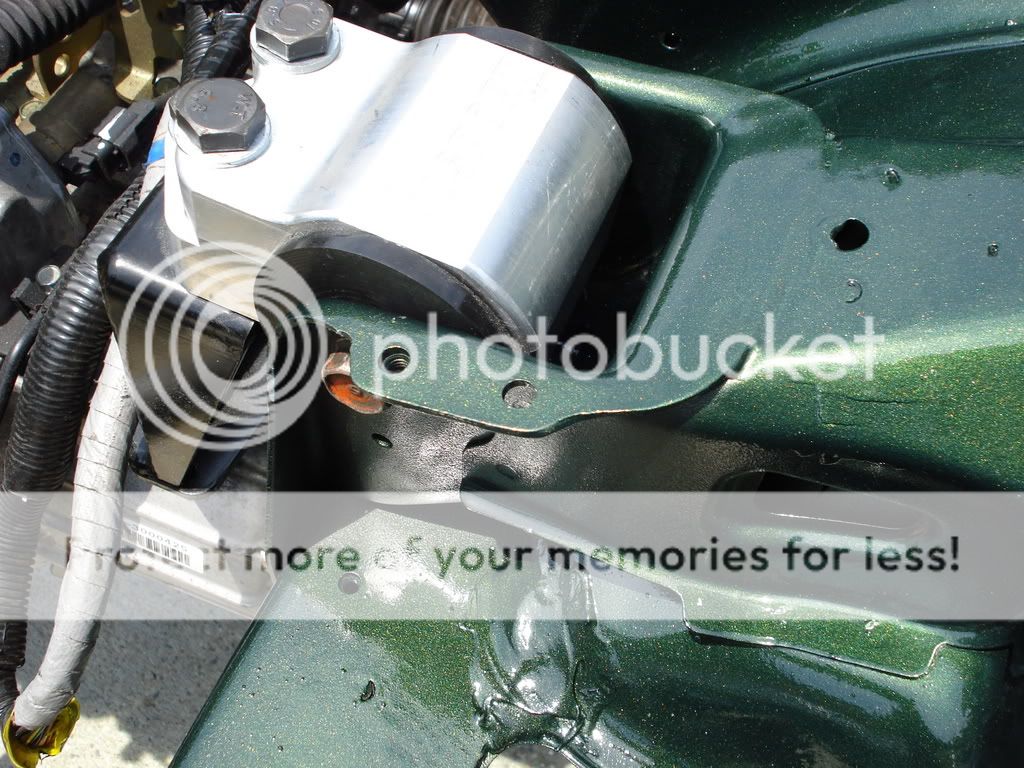
[*] Position the K20 passenger bracket onto the passenger frame rail:
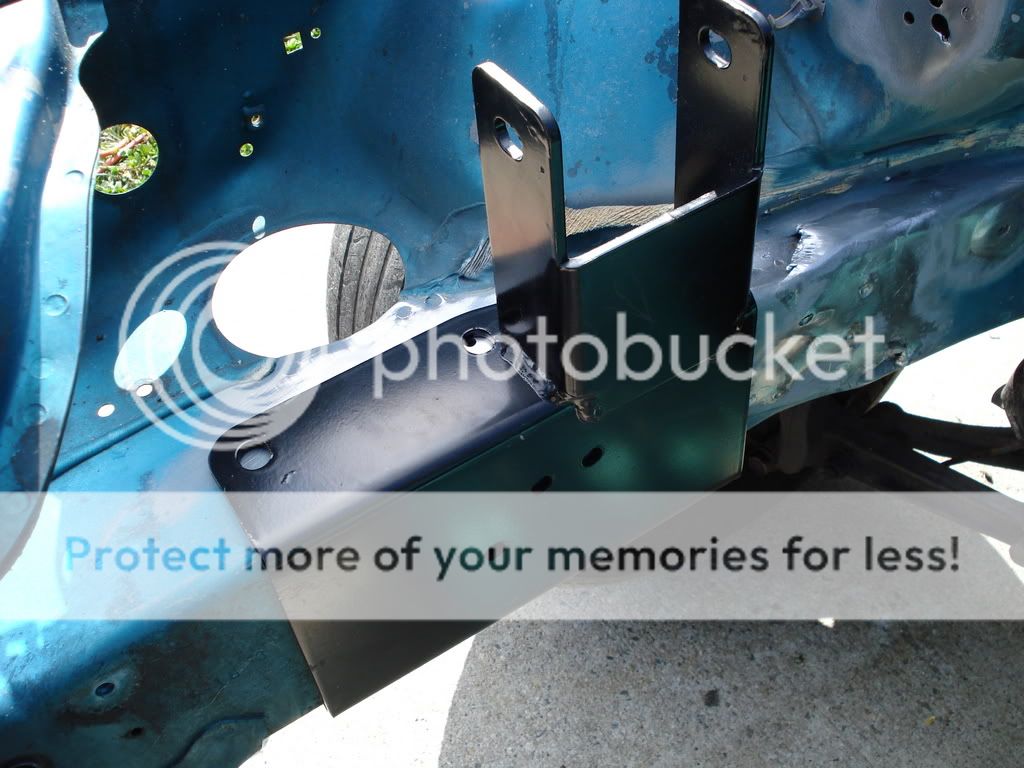
Ensure it is flat up against the frame rail. Line up three side holes (for HASport EGK1 kit) like so:

Drill holes where the holes are located using a drill bit:
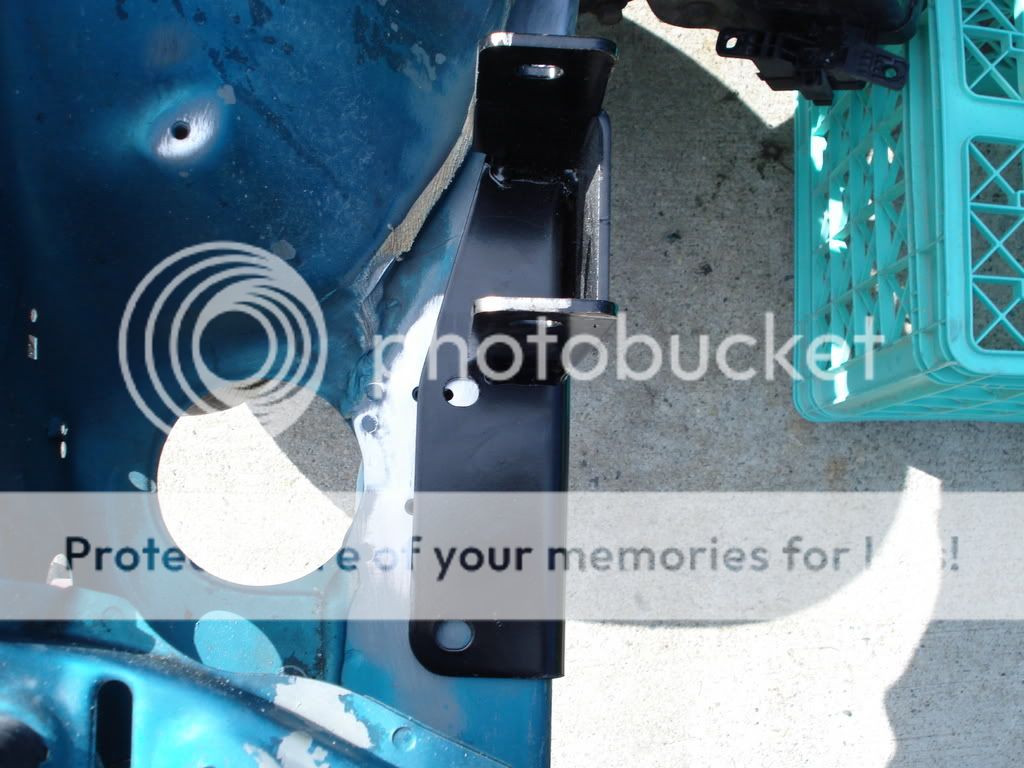
Installed:
[*]Install rear mount bracket. Remove upper steering column bolt (17mm) and remove old engine mount. Position new K20 mount and tighten.
<FONT SIZE="3">Prepping K20:</FONT>
Now is the good time!
As said before, prep the K20 and take pride in your work.
[*] Remove all factory engine mounts. Place your new mounts (whether it's Hybrid-Racing or HASport) onto the K20. [*] Remove the factory exhaust header
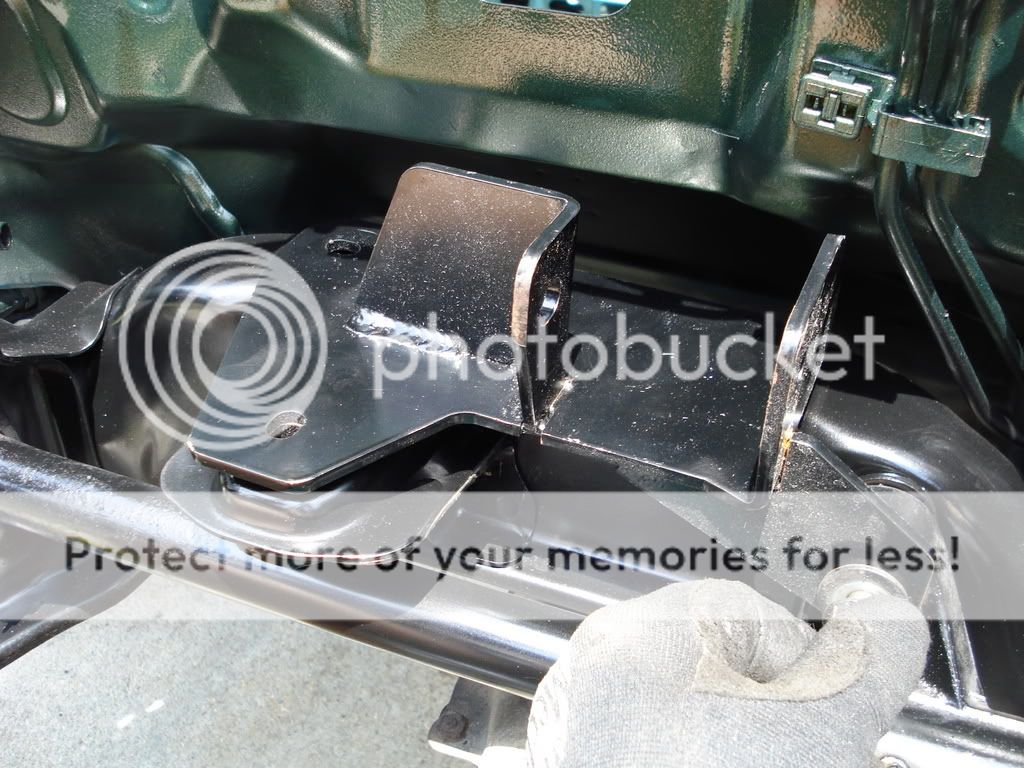
[*] Install driver's side bracket onto transmission:
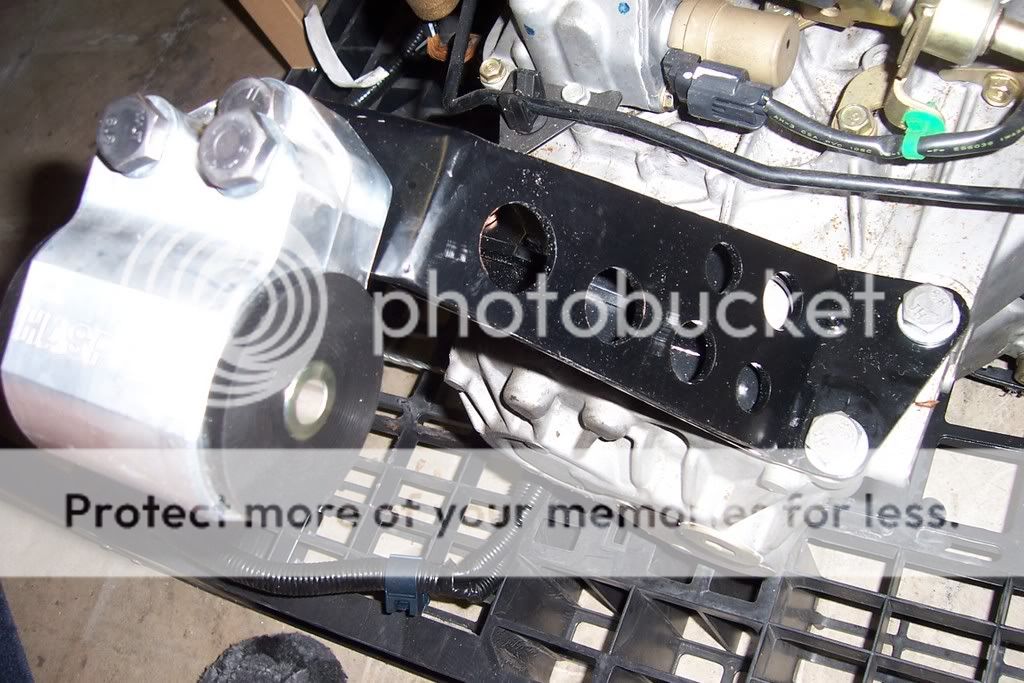
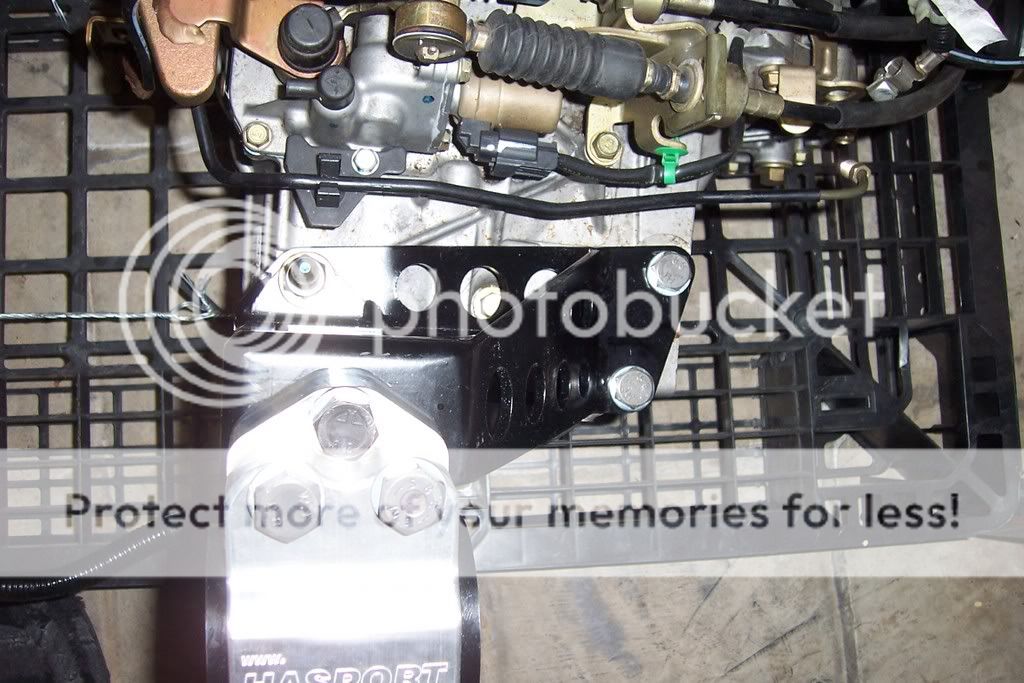
[*] Install rear mount bracket:
[*] Install passenger mount but leave the bolts loose for now. This is for alignment purposes when the engine is installed. It's a lot easier to move around.
[*] Place K20 onto engine hoist and engine leveler:
Note: Ensure it's on good bracing/lifting points. Same as posted above.
[*] Lift K20 and position engine hoist over the engine bay
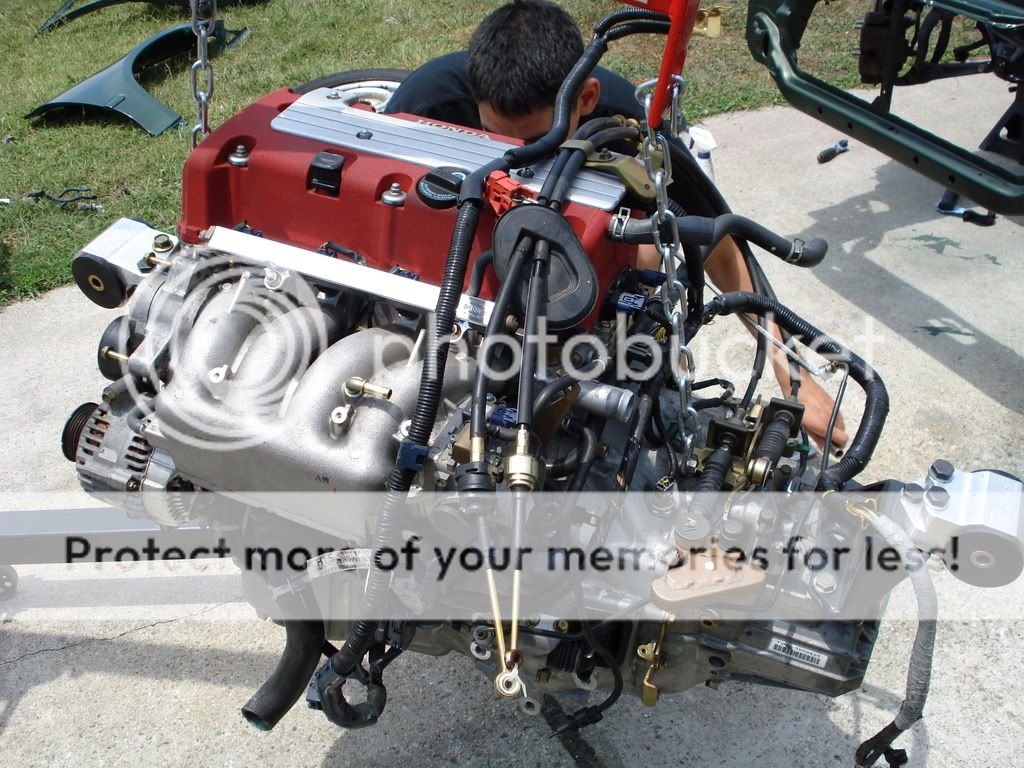
CAUTION: Do not ever go underneath engine or chassis while hydraulic pressure is applied. Injury can result or even death. Ensure you are using safety precautions!
[*] Carefully place K20 into engine bay, and align the mounts. Ensure wiring and shifter cables are out of the way
[*] Position the REAR mount first and place bolt into the bracket
[*] Position the passenger and driver side mounts and tighten all mounts
[*]Ensure everything is connected mount-wise, and disconnect/remove engine leveler and remove engine hoist
Engine mounted:
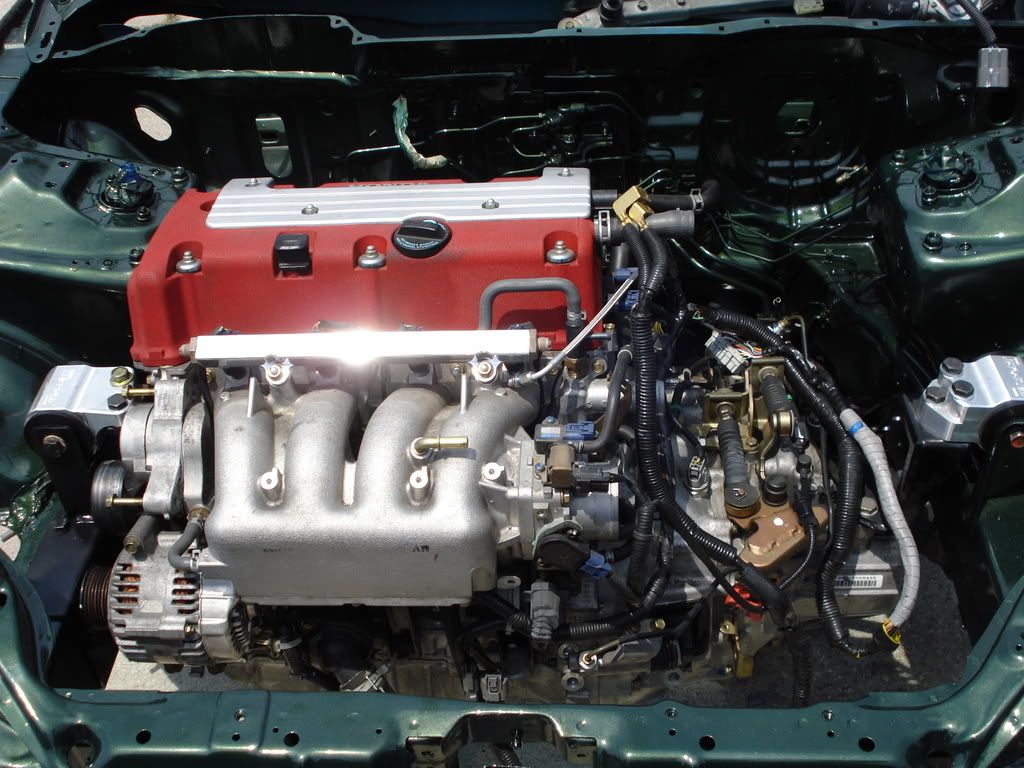
You have now mounted your K20!
Wiring instructions will be posted shortly!
<FONT SIZE="3">Caution:</FONT>Please take this information in a nut shell, and use it as reference only. I am not responsible for any wrong doings on your part. Make sure you have the proper experience to do this task and do enough research before getting started.
<FONT SIZE="3">Step by step procedures:</FONT>
First thing is first, do a good receiving inspection of your engine. Ensure all sensors are in top notch condition, and direct attention to any discrepancies you have towards the person/company you purchased your swap from. Take the time to clean the engine/tranny up as you will be having a lot of pride in the accomplishment. You don't want it looking raggedy after all that work!
Just as any engine removal, jack up the front end, and place securly on jackstands, with chocks at the rear wheels to ensure safety. Drain all fluids (coolant, power steering, engine oil, transmission oil, etc.).
[*] Disconnect fuel line at the fuel filter and fuel return line going back to the fuel tank[*] Disconnect throttle linkage[*] Disconnect shift linkage at the shifter[*] Disconnect engine harness at the passenger and driver side shocke towers[*] Disconnect the clutch line (also remove the hardline from the clutch master cylinder after engine is removed)[*] Disconnect radiator hoses and remove radiator[*] Disconnect and remove power steering lines (if present)[*] Disconnect and remove cruise control (if present)[*] Disconnect and remove exhaust header[*] Remove intake tube for better clearance
Axle removal:
[*] Remove the 32 mm axle nut:
Note: You may need to use an impact gun, breaker bar or other means to remove. If you have problems, I would also recommend placing the car back on the ground with the wheels on and the center hubcap removed to have more loosening torque on the nut.
[*] Remove cotter key/pin from the lower ball joint. Using a ball joint separator/pitman arm puller, or even using the hammer method, pop the lower ball joint. I personally used a pitman arm puller.
Picture:
Once the ball joint is separated, removal axle like so:
[*] Grab a big flat head screw driver, pry bar, or pickle fork and disconnect axle from transmission.
Once axles are removed, ensure everything is disconnect and engine appears to come out as smooth as possible.
[*]Grab engine hoist/cherry picker, and position it over the engine. Using an engine leveler/chains, place chains on secure points of the engine. There are several points you can place them on. I would recommend placing them on at least 12mm bolt or bigger. Do not brake chains on any 10mm bolt. Ensure you have enough threads threaded into the engine/tranny as well.
[*] Carefully put up pressure on engine to take the weight off the engine mounts[*] Disconnect and remove all engine mounts[*] Carefully lift engine up and out. Do this very slow and ensure it is clear of anything, along with everything being disconnected. There are a lot of things that can get caught, tied up, not disconnected, etc. Having several set of eyes cannot hurt.
WARNING: Do not ever get underneath car or underneath engine while hydraulic pressure is applied. Doing so may result in severe injury and/or death.
Engine removed:
<FONT SIZE="3">Prepping engine bay:</FONT>
[*] Now is the time to take a good while to clean the engine bay. Clean the engine bay of all grime/dirt/fluids. Take pride in your work![*] Remove the passenger side tranny bracket. You can do this by simply drilling out the spot welds and prying it off, or using an air chissel/hammer.
Removed:
Caution! Ensure you are using safety! I would recommend wearing mechanic gloves and safety glasses, and hearing protection as necessary. Nothing is worth losing fingers, vision or hearing over anything!
[*] Remove lower radiator mount brackets and A/C lower brackets:
You will need to re-weld the radiator brackets and weld them back on the driver's side of the radiator support. I personally have ETD traction bars with radiator brackets. So I do not have pictures of this process. If anyone has a step-by-step, post up!
[*] Position the K20 passenger bracket onto the passenger frame rail:
Ensure it is flat up against the frame rail. Line up three side holes (for HASport EGK1 kit) like so:
Drill holes where the holes are located using a drill bit:
Installed:
[*]Install rear mount bracket. Remove upper steering column bolt (17mm) and remove old engine mount. Position new K20 mount and tighten.
<FONT SIZE="3">Prepping K20:</FONT>
Now is the good time!
As said before, prep the K20 and take pride in your work.
[*] Remove all factory engine mounts. Place your new mounts (whether it's Hybrid-Racing or HASport) onto the K20. [*] Remove the factory exhaust header
[*] Install driver's side bracket onto transmission:
[*] Install rear mount bracket:
[*] Install passenger mount but leave the bolts loose for now. This is for alignment purposes when the engine is installed. It's a lot easier to move around.
[*] Place K20 onto engine hoist and engine leveler:
Note: Ensure it's on good bracing/lifting points. Same as posted above.
[*] Lift K20 and position engine hoist over the engine bay
CAUTION: Do not ever go underneath engine or chassis while hydraulic pressure is applied. Injury can result or even death. Ensure you are using safety precautions!
[*] Carefully place K20 into engine bay, and align the mounts. Ensure wiring and shifter cables are out of the way
[*] Position the REAR mount first and place bolt into the bracket
[*] Position the passenger and driver side mounts and tighten all mounts
[*]Ensure everything is connected mount-wise, and disconnect/remove engine leveler and remove engine hoist
Engine mounted:
You have now mounted your K20!
Wiring instructions will be posted shortly!
08-02-2007, 04:23 PM
#3
Senior Member
Thread Starter
<FONT SIZE="3">Wiring Information for K20:</FONT>
Keep in mind there is many different ways to do the wiring of this swap. For ways other than what I have done you will have to do research on your part.
I highly recommend you take your time while doing the wiring. While it's a simple task, it involves a lot of time to do it right. Wiring can be a pleasing peaceful task, and it can also be the biggest headache of your life trying to fix where you don't know what went wrong.
I also HIGHLY recommend you solder and heat shrink all of your connections. Using electrical tape or butt connectors isn't the greatest. Over time, it gets pulled, heated, corroded, etc. and it's just not worth it IMO. If you solder and heatshrink, you are eliminating a major headache for wiring years later down the road for yourself.
I personally went with Hybrid-Racing harness. Being that they have released several versions, there is way too many variances for wiring your K20 swap. I recommend following instructions you received with whichever harness you purchased. If you have further questions, please contact the company you purchased the engine harness from.
If you are building your own harness, refer to the first post in this thread for reference. Please read and understand before accomplishing this task.. As said before, this can be a major head ache if not done properly the first time.
Charging Harness Wiring Instructions:
First, you will need to position and decide whether you will leave the same location of the fusebox. I'm going guide you through what's required. Any additional items like relocating and doing wire tucks you will have to do on your own.
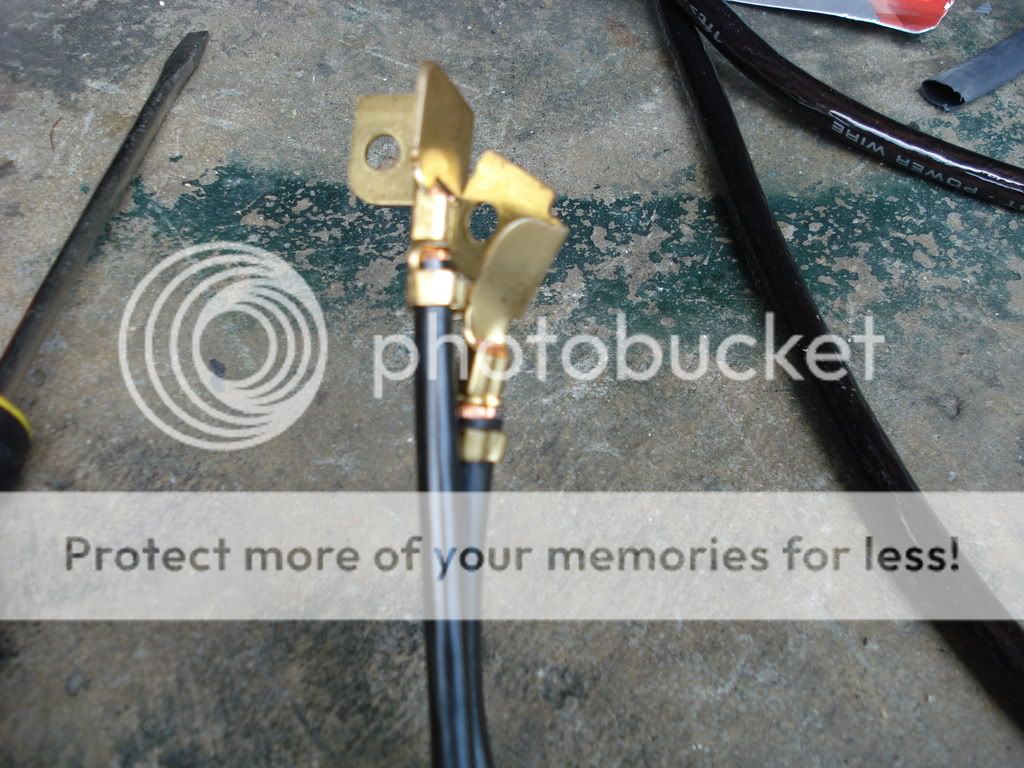
[*] First, the charge harness has the positive terminal on. This has two wires going to it that is BLK/YEL.
Cut off the terminal and peel back the wire:
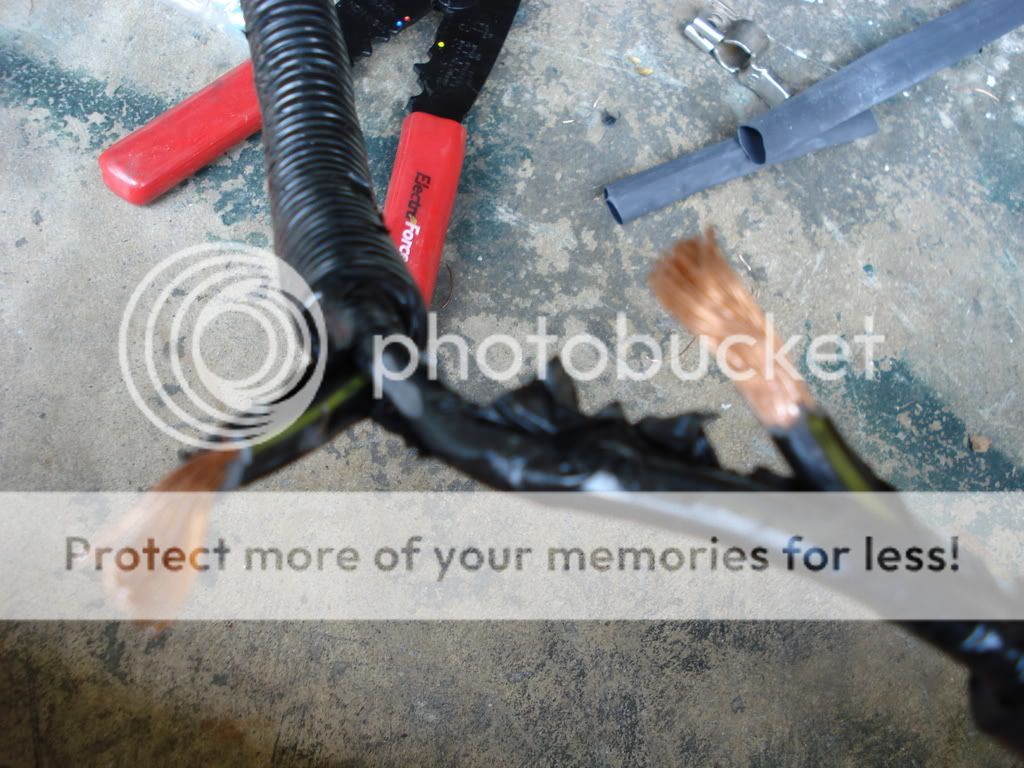
Solder and heatshrink these two wires together. Make sure it's a good connection. I would take the time on this the most since it's a thick gauge. (4 gauge).
Secure the wire with wireloom cover or electrical tape. Connect this to the positive terminal on the battery.
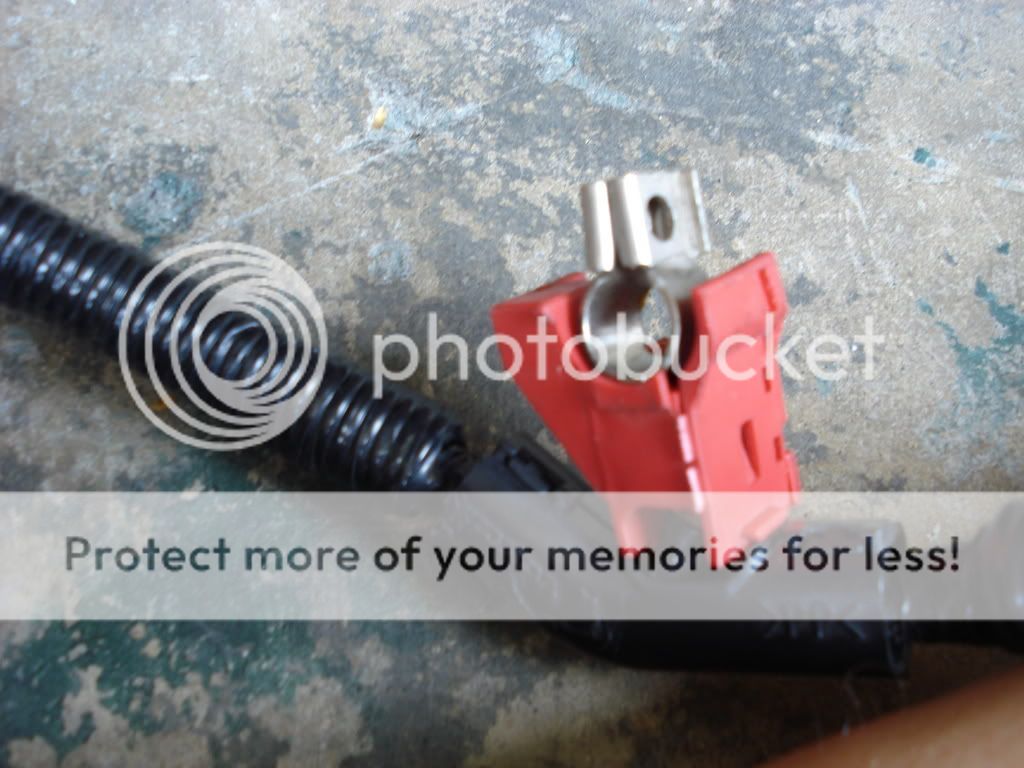
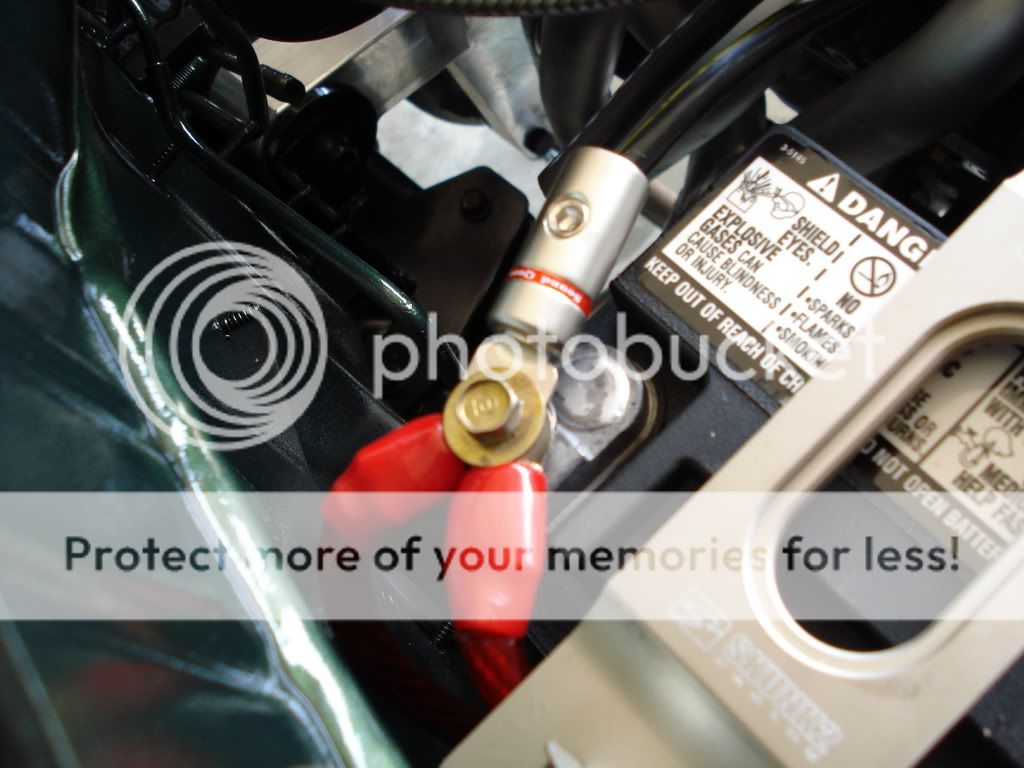
[*] Next is the fuse box terminals.
These do not fit in the factory Civic/Integra fuse boxes. So you will need to extend and put new terminals on it. Either salvage them from the D/B series harness, or put new terminals like so:
Cut off:
New wire, connection:


Place one of the terminals from fusebox to battery. The other is fusebox to charge harness (starter).
Terminal done:
New Grounding cable I made:
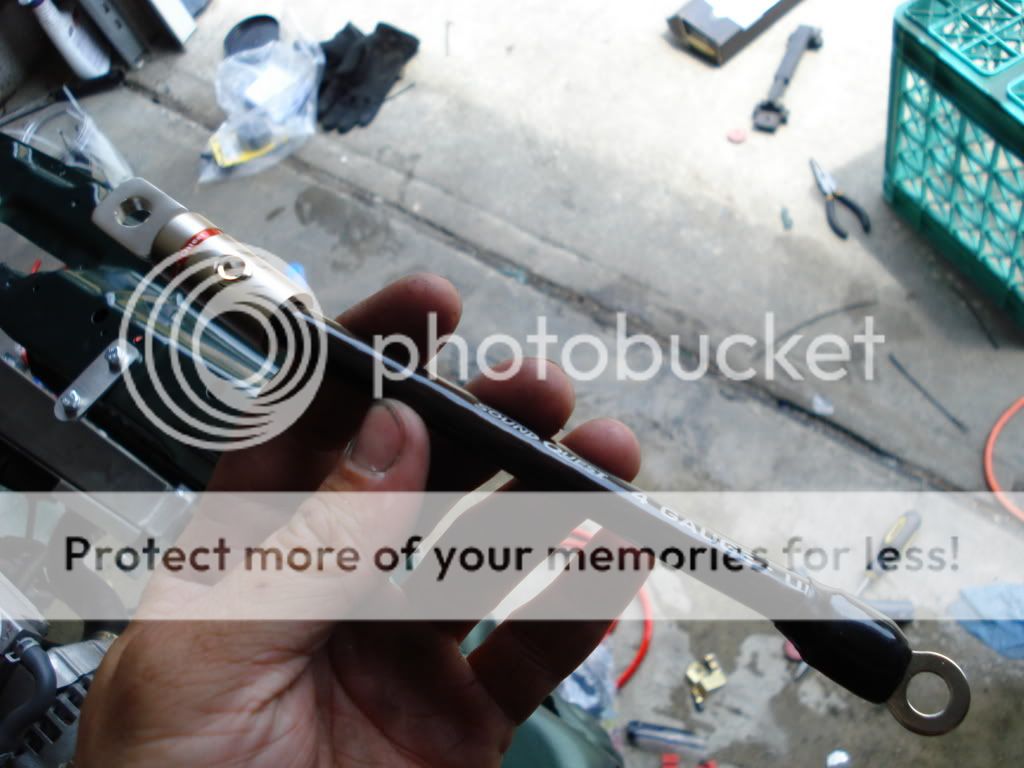
A picture to view:
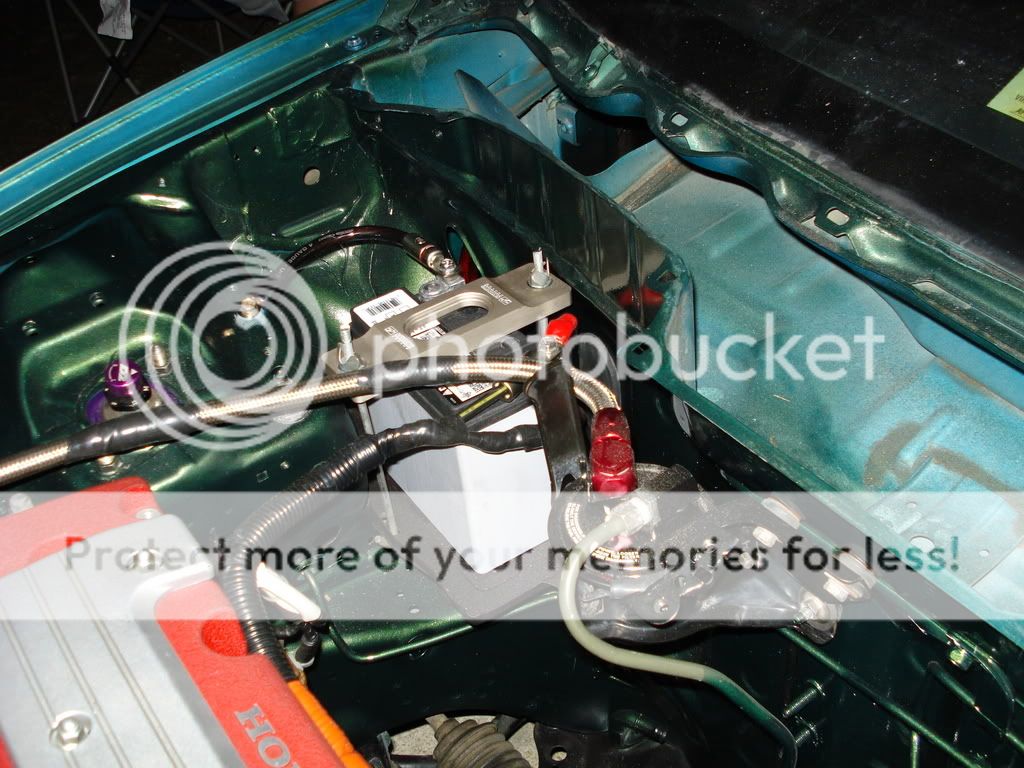

That's all for charge harness!
Stay tuned for cooling, shifter and additional info!
Keep in mind there is many different ways to do the wiring of this swap. For ways other than what I have done you will have to do research on your part.
I highly recommend you take your time while doing the wiring. While it's a simple task, it involves a lot of time to do it right. Wiring can be a pleasing peaceful task, and it can also be the biggest headache of your life trying to fix where you don't know what went wrong.
I also HIGHLY recommend you solder and heat shrink all of your connections. Using electrical tape or butt connectors isn't the greatest. Over time, it gets pulled, heated, corroded, etc. and it's just not worth it IMO. If you solder and heatshrink, you are eliminating a major headache for wiring years later down the road for yourself.
I personally went with Hybrid-Racing harness. Being that they have released several versions, there is way too many variances for wiring your K20 swap. I recommend following instructions you received with whichever harness you purchased. If you have further questions, please contact the company you purchased the engine harness from.
If you are building your own harness, refer to the first post in this thread for reference. Please read and understand before accomplishing this task.. As said before, this can be a major head ache if not done properly the first time.
Charging Harness Wiring Instructions:
First, you will need to position and decide whether you will leave the same location of the fusebox. I'm going guide you through what's required. Any additional items like relocating and doing wire tucks you will have to do on your own.
[*] First, the charge harness has the positive terminal on. This has two wires going to it that is BLK/YEL.
Cut off the terminal and peel back the wire:
Solder and heatshrink these two wires together. Make sure it's a good connection. I would take the time on this the most since it's a thick gauge. (4 gauge).
Secure the wire with wireloom cover or electrical tape. Connect this to the positive terminal on the battery.
[*] Next is the fuse box terminals.
These do not fit in the factory Civic/Integra fuse boxes. So you will need to extend and put new terminals on it. Either salvage them from the D/B series harness, or put new terminals like so:
Cut off:
New wire, connection:
Place one of the terminals from fusebox to battery. The other is fusebox to charge harness (starter).
Terminal done:
New Grounding cable I made:
A picture to view:
That's all for charge harness!
Stay tuned for cooling, shifter and additional info!
08-02-2007, 04:58 PM
#4
Senior Member
Thread Starter
<FONT SIZE="3">Cooling the K20:</FONT>
This is a very easy process, but as always, ensure you have good connections with the clamps, and ensure the hoses are not chaffing on anything. I would recommend using new hose clamps with the bolts on them, rather than the old tension clamps.
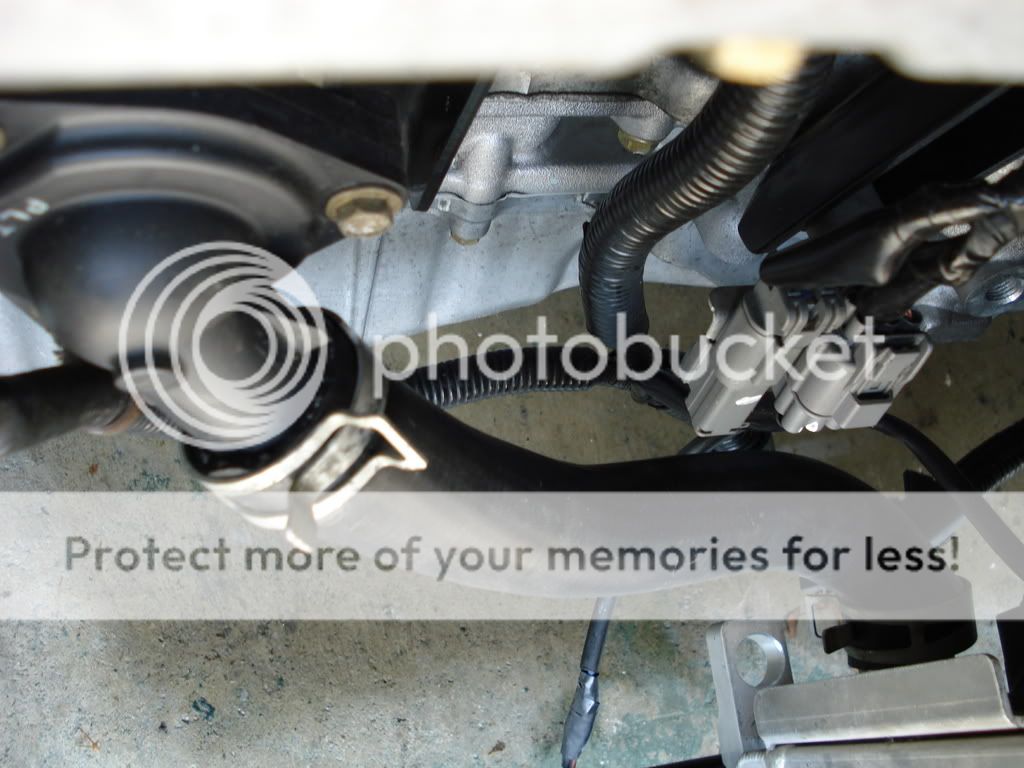
Radiator Installation:
Most K20 hybriders simply re-weld their radiator brackets to the driver's side of the radiator support. If you have done this, and have additional pictures, please post more information! Thanks!
I personally am running the ETD Traction bars with the radiator brackets. But the theory is the same as any radiator installation. Doesn't take much to install a radiator (we all know this)
Since there are so many options, I really can't narrow down what you are doing. But I'll explain the basics.
[*] Standard dual core half-size radiator - Simply place the radiator in, along with your top mount (I personally used a Karcepts radiator bracket):
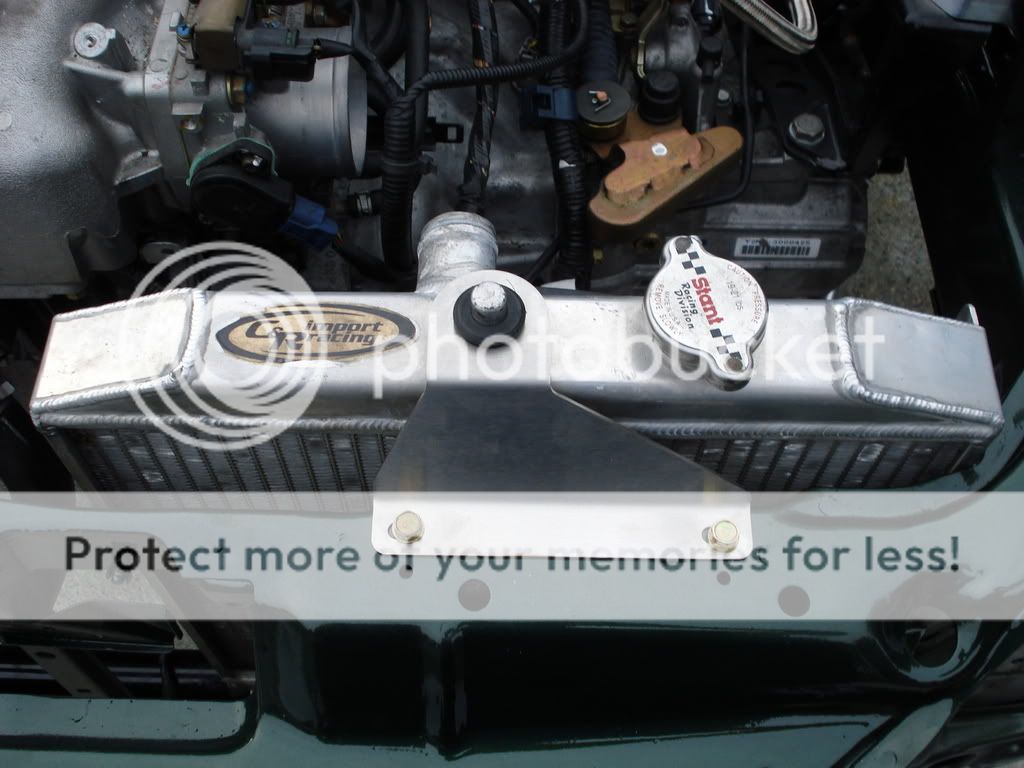
Brackets from below:
Ensure the radiator is secure. Next is to connect or wire your fan. Simply connect the two wires together. One is obviously positive, and other is negative. Secure the wires, and make sure they aren't exposed to any heat or have potential to be stretched/ripped.
Radiator Hose Installation:
[*] TOP HOSE - I personally went with AutoZone hose part # M248 for the TOP HOSE (Thanks Karcepts!)
Thread: http://www.k20a.org/forum/showthread.php?t=12212
Courtesy of Karcepts:
Pic of mine installed:

With very little modification, the hose goes right in!
Another option you have for the upper radiator hose is an RSX Type S TOP hose. (Don't currently have photos for that)
[*] BOTTOM HOSE - I personally went with a 94-01 Integra radiator hose (AutoZone part # XL-588):
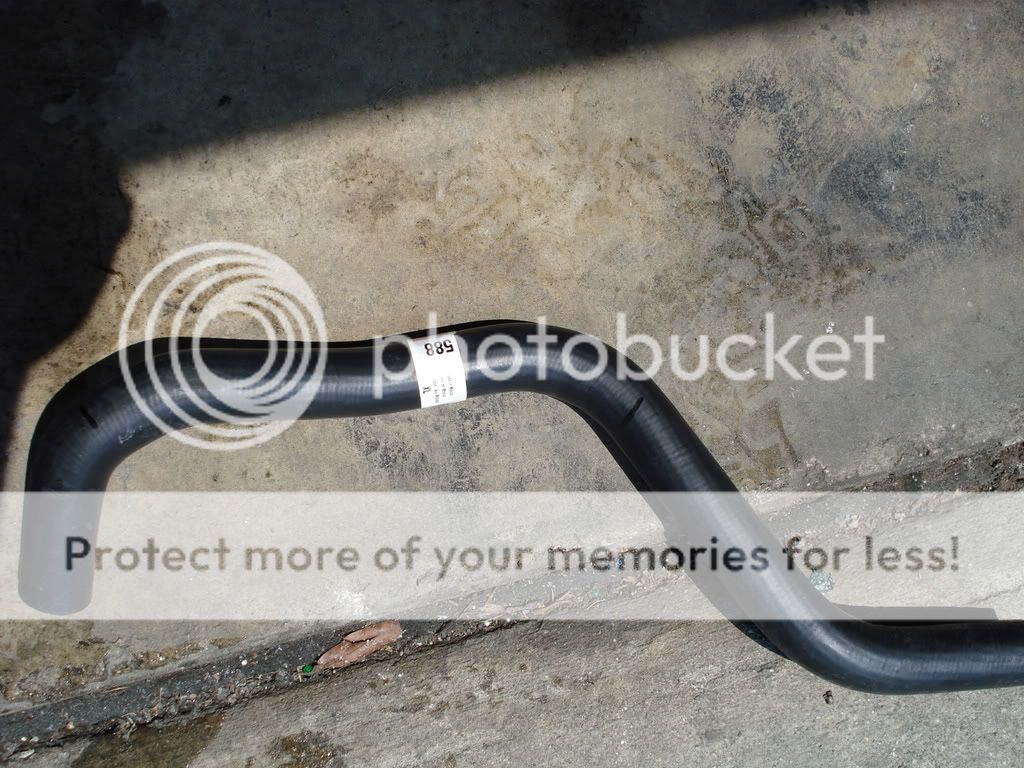
I just simply cut a section out and fit it into place:
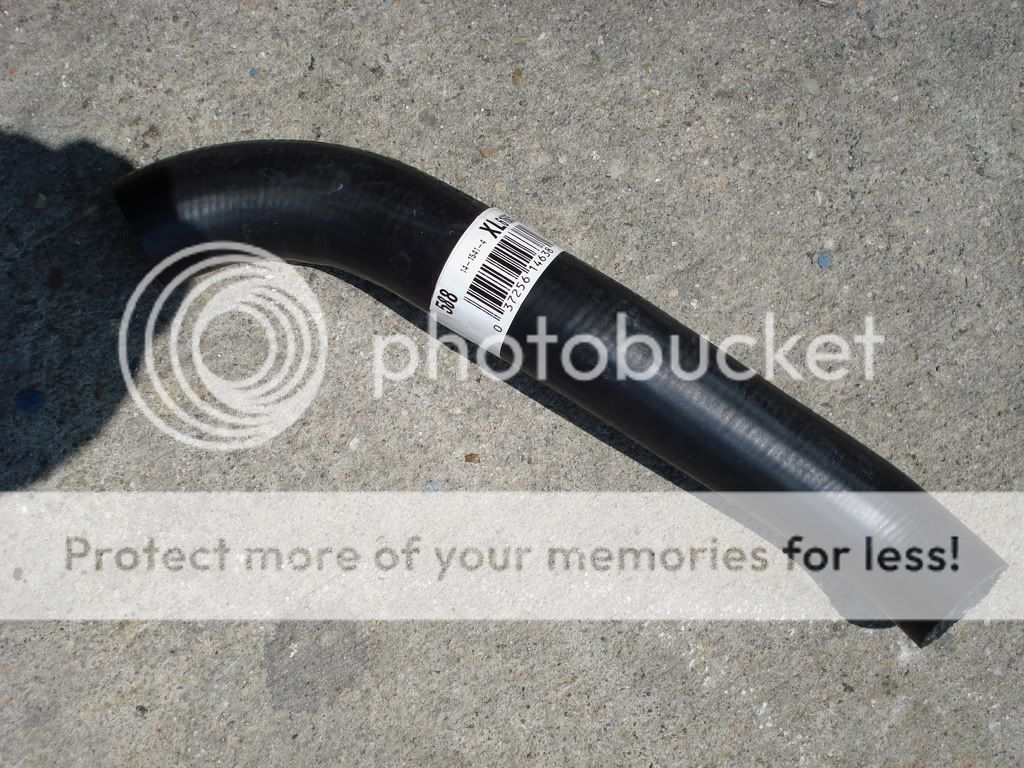
Another option you have for the bottom radiator hose is 99-00 Civic Si TOP hose and use it as the bottom hose.
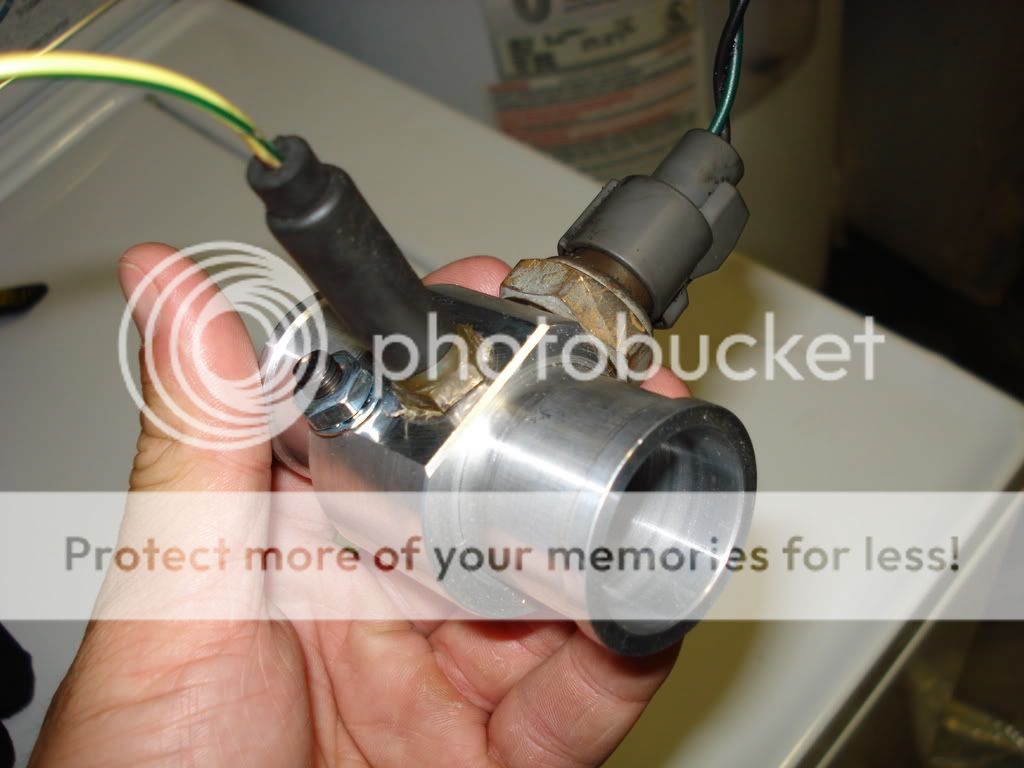
[*] Fan switch (ECT) & Coolant Temp Sending Unit (gauge cluster):
You will have to either salvage the ECT Fan switch sensor and the Coolant Temp sensor from your B/D series engine, or purchase them from Honda.
Here are pictures:
Coolant sending unit:
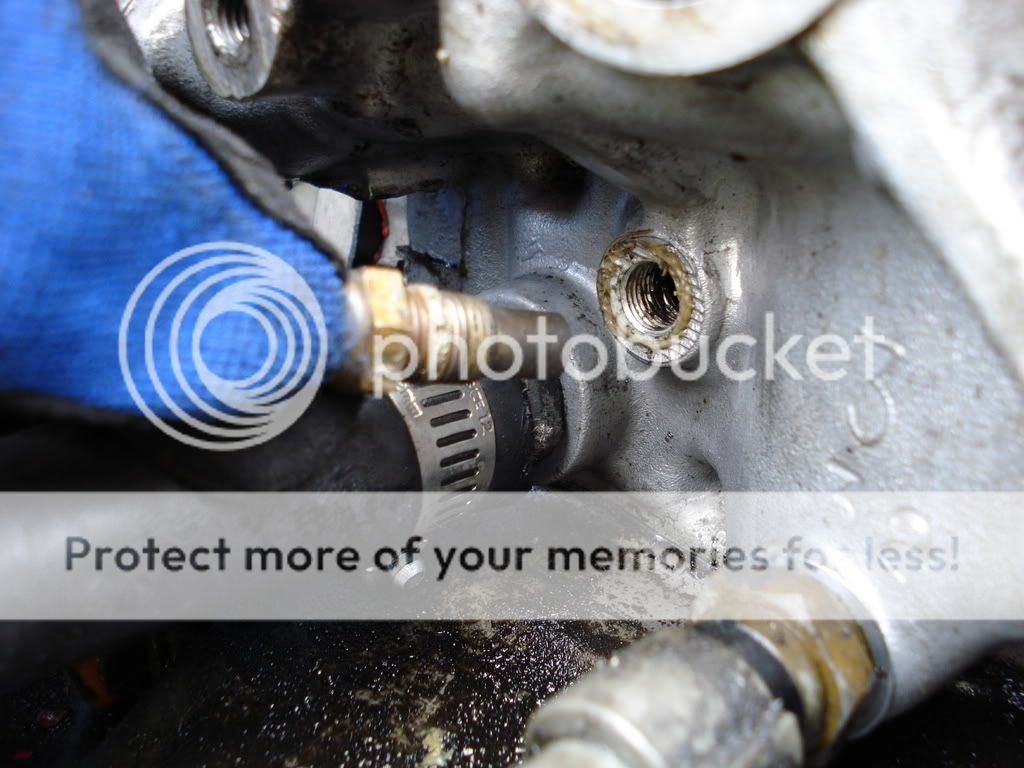
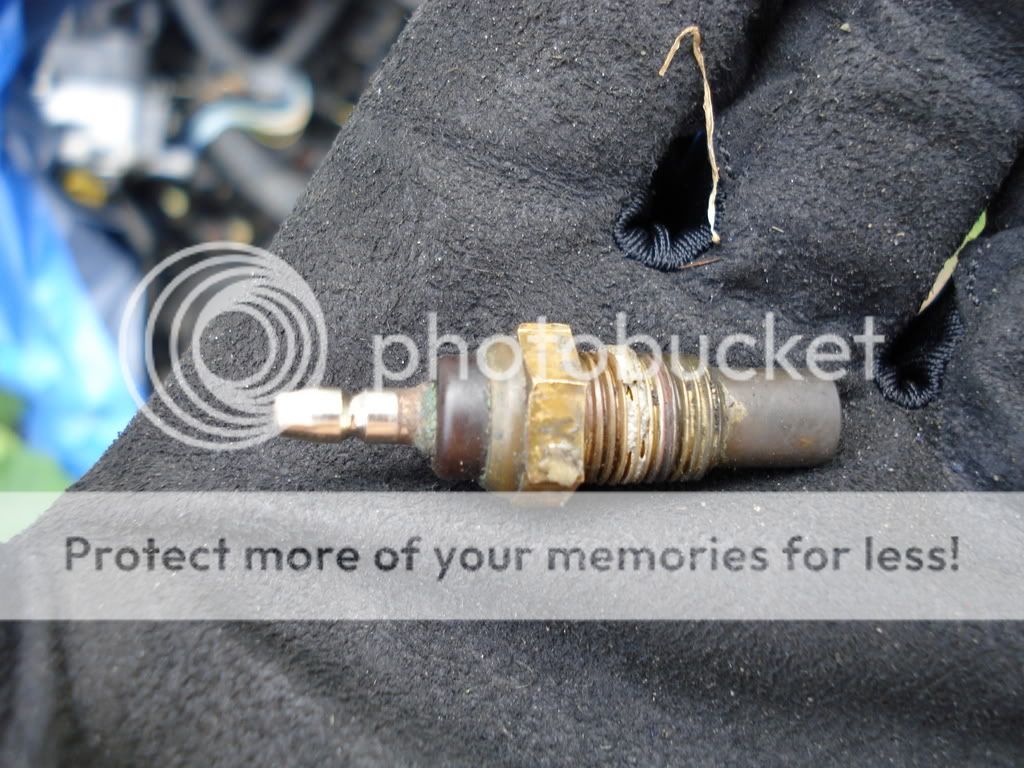
ECT Fan switch:
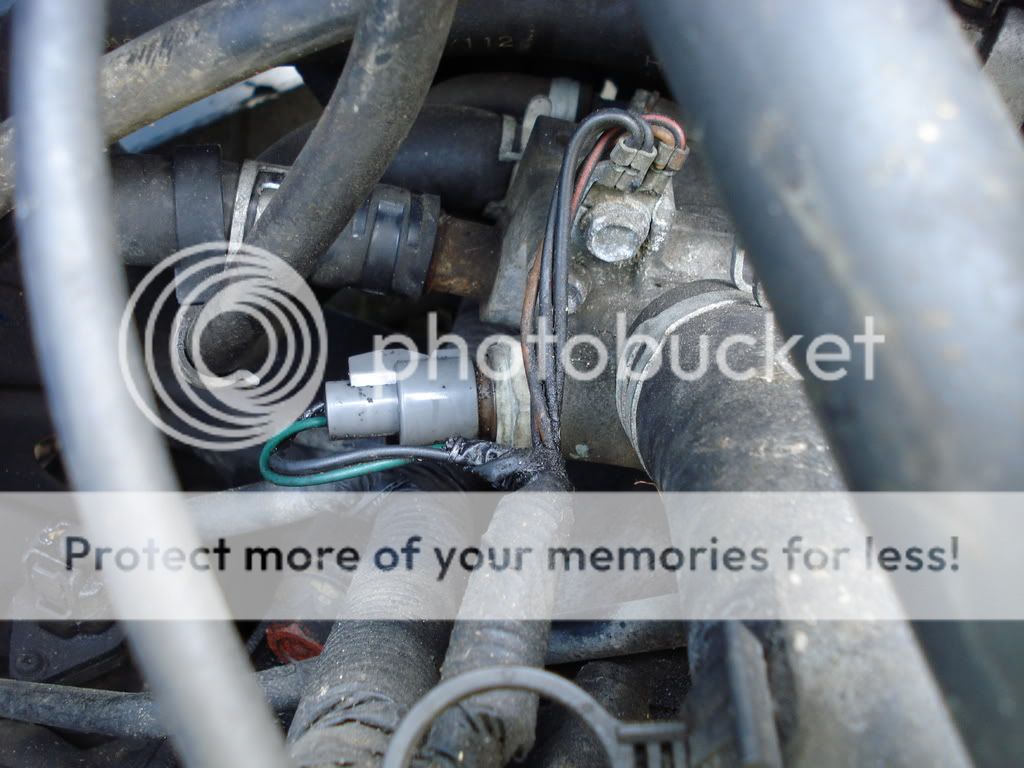
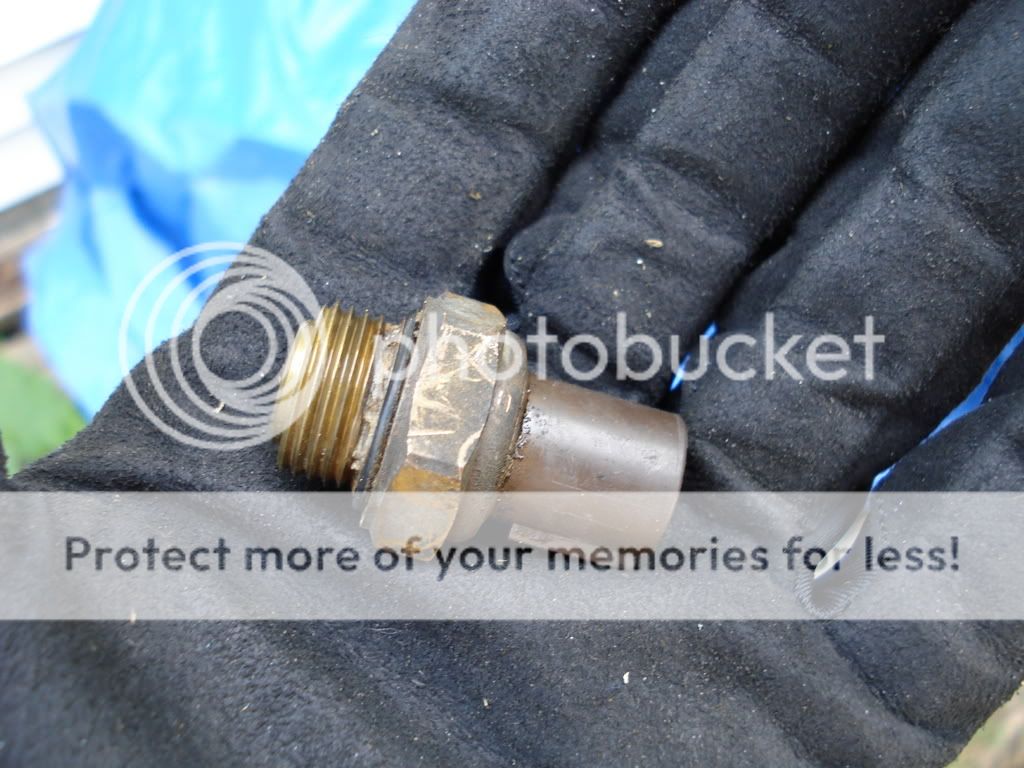
Ensure you also take the plug and leave some wire for it. You will need to use the plug.
There are several options you can do. You can either get the HASport radiator hose insert, or use an NPT fitting, or use other means to install them correctly. There are other hybriders that have used RSX radiators and simply installed them into the radiator like factory RSX's have them. You can also purchase a Hybrid-Racing radiator that allows for the sensors to be installed into them.
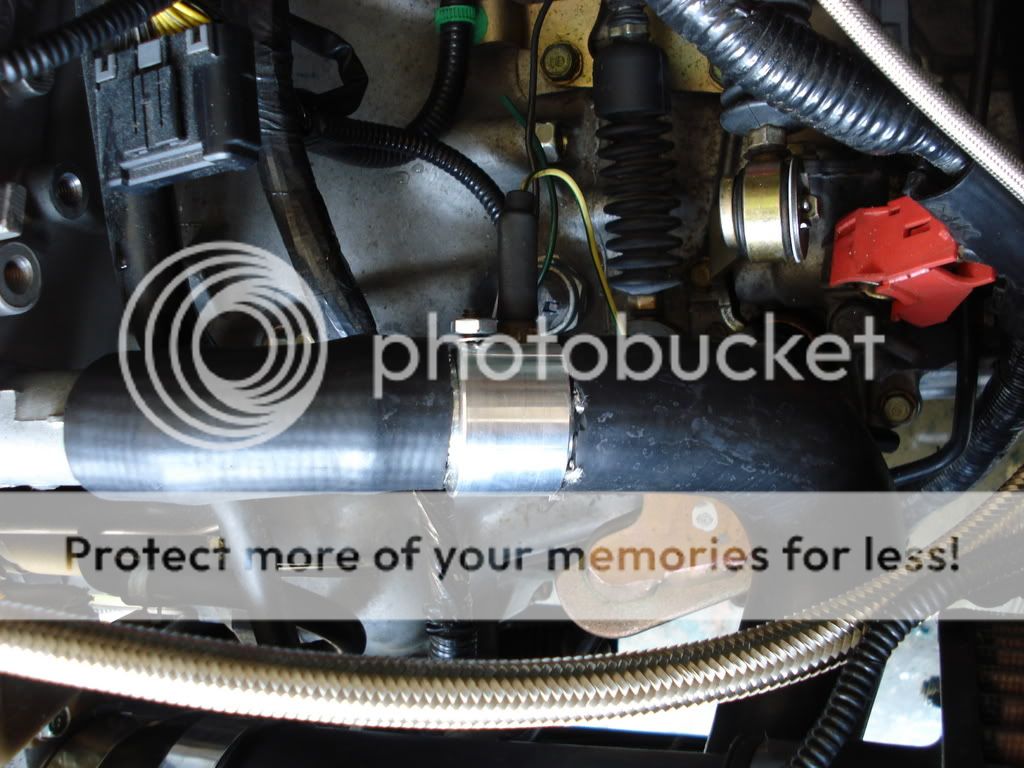
For me, I chose the HASport radiator insert:
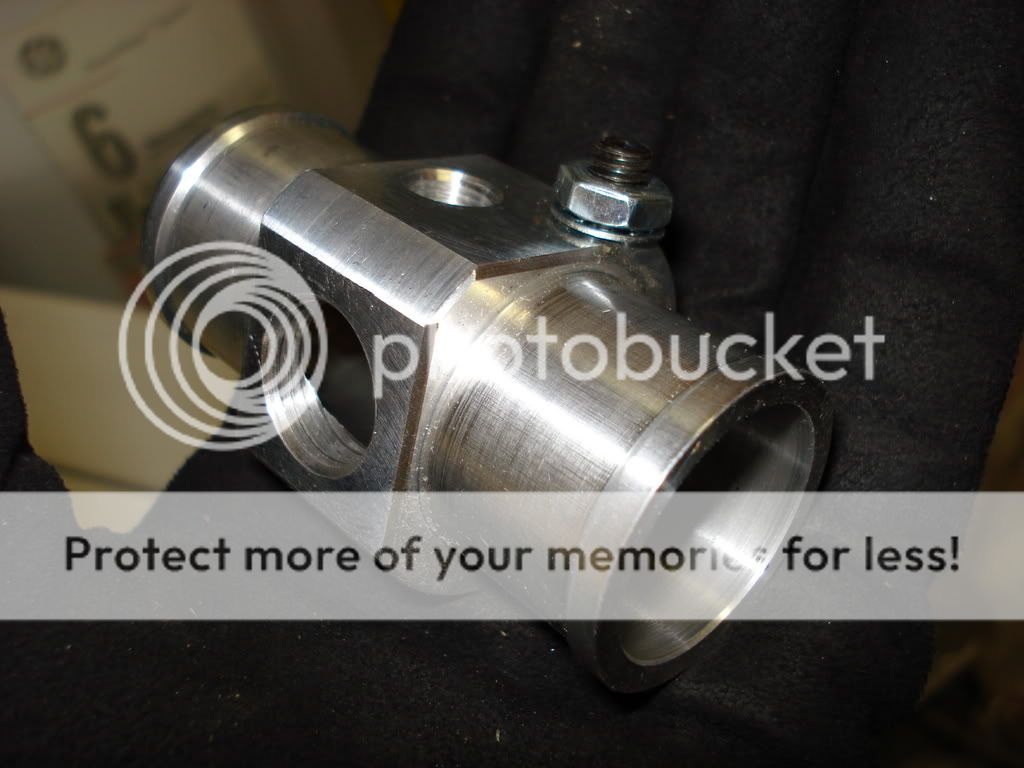
Simply install the two sensors into the hose insert like so:
Install them on either the upper or lower radiator hose. I personally installed it into the top radiator hose since it's the hotter hose of the two, therefore the fan comes on sooner.
Picture of hose insert installed (without clamps yet):
Place clamps on it. Then wire them according to whichever wiring harness you purchased. Do not forget to ground the hose insert to the engine/tranny!
As for heater hoses, I have seen people fit factory Civic hoses to the heater core, and also people have fit RSX hoses. A lot of types will fit and go directly towards the heater core.
You have completed the cooling task!
This is a very easy process, but as always, ensure you have good connections with the clamps, and ensure the hoses are not chaffing on anything. I would recommend using new hose clamps with the bolts on them, rather than the old tension clamps.
Radiator Installation:
Most K20 hybriders simply re-weld their radiator brackets to the driver's side of the radiator support. If you have done this, and have additional pictures, please post more information! Thanks!
I personally am running the ETD Traction bars with the radiator brackets. But the theory is the same as any radiator installation. Doesn't take much to install a radiator (we all know this)
Since there are so many options, I really can't narrow down what you are doing. But I'll explain the basics.
[*] Standard dual core half-size radiator - Simply place the radiator in, along with your top mount (I personally used a Karcepts radiator bracket):
Brackets from below:
Ensure the radiator is secure. Next is to connect or wire your fan. Simply connect the two wires together. One is obviously positive, and other is negative. Secure the wires, and make sure they aren't exposed to any heat or have potential to be stretched/ripped.
Radiator Hose Installation:
[*] TOP HOSE - I personally went with AutoZone hose part # M248 for the TOP HOSE (Thanks Karcepts!)
Thread: http://www.k20a.org/forum/showthread.php?t=12212
Courtesy of Karcepts:
Pic of mine installed:
With very little modification, the hose goes right in!
Another option you have for the upper radiator hose is an RSX Type S TOP hose. (Don't currently have photos for that)
[*] BOTTOM HOSE - I personally went with a 94-01 Integra radiator hose (AutoZone part # XL-588):
I just simply cut a section out and fit it into place:
Another option you have for the bottom radiator hose is 99-00 Civic Si TOP hose and use it as the bottom hose.
[*] Fan switch (ECT) & Coolant Temp Sending Unit (gauge cluster):
You will have to either salvage the ECT Fan switch sensor and the Coolant Temp sensor from your B/D series engine, or purchase them from Honda.
Here are pictures:
Coolant sending unit:
ECT Fan switch:
Ensure you also take the plug and leave some wire for it. You will need to use the plug.
There are several options you can do. You can either get the HASport radiator hose insert, or use an NPT fitting, or use other means to install them correctly. There are other hybriders that have used RSX radiators and simply installed them into the radiator like factory RSX's have them. You can also purchase a Hybrid-Racing radiator that allows for the sensors to be installed into them.
For me, I chose the HASport radiator insert:
Simply install the two sensors into the hose insert like so:
Install them on either the upper or lower radiator hose. I personally installed it into the top radiator hose since it's the hotter hose of the two, therefore the fan comes on sooner.
Picture of hose insert installed (without clamps yet):
Place clamps on it. Then wire them according to whichever wiring harness you purchased. Do not forget to ground the hose insert to the engine/tranny!
As for heater hoses, I have seen people fit factory Civic hoses to the heater core, and also people have fit RSX hoses. A lot of types will fit and go directly towards the heater core.
You have completed the cooling task!
08-02-2007, 05:29 PM
#5
Senior Member
Thread Starter
<FONT SIZE="3">K20 Shifting & Clutch Linkage Installation:</FONT>
For this section, I chose to go with the Karcepts shifter. The Karcepts shifter allows you to retain your factory Civic/Integra center console. Great work Karcepts and thanks!
This product is not required for installation, but definitely makes it a lot easier, and cleaner!
[*] Prepping the car:
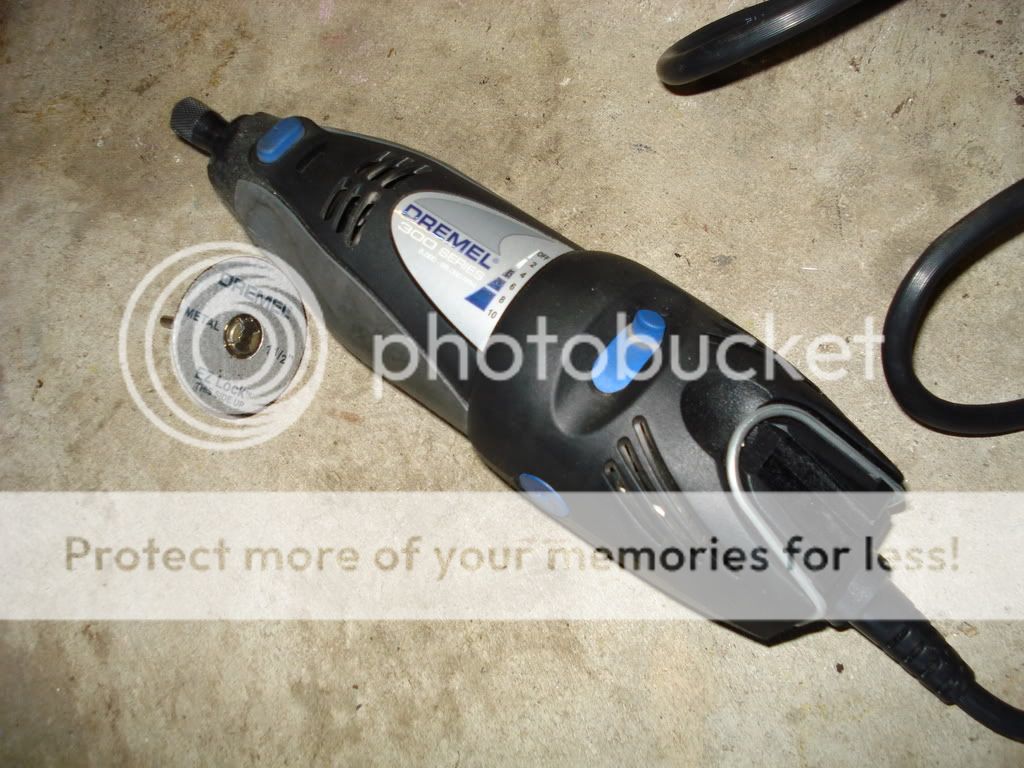
With the Karcepts shifter kit, it requires you to have a die grinder, dremel and drill with drill bits for installation. Ensure you have the correct tools for installation.
CAUTION: Ensure you are wearing hearing protection and eye protection. Not wearing hearing protection may cause hearing loss. And obviously, if you do not wear eye protection, you may get anything in your eye. You know it's not worth it. Just wear the protective stuff. I would also recommend wearing mechanic gloves to protect you from sharp objects.
First, ensure you have a clean area. Take the template supplied to you. Cut out the lines like so:

Picture of area to work on:
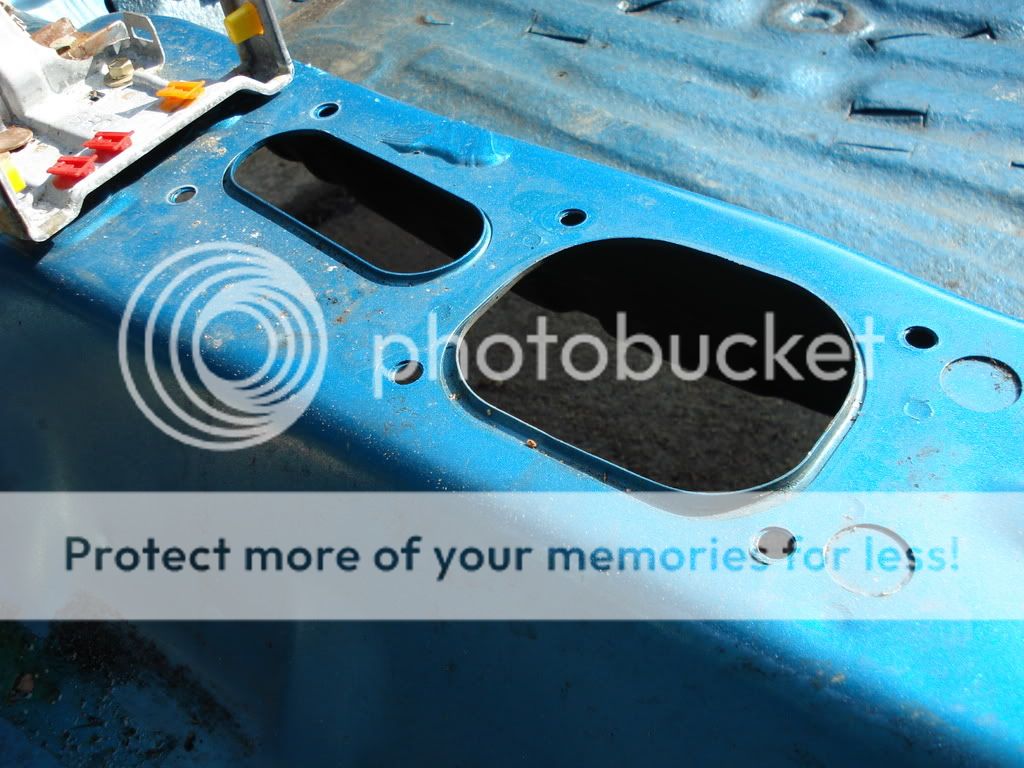
Next, place the template over the car as instructed:
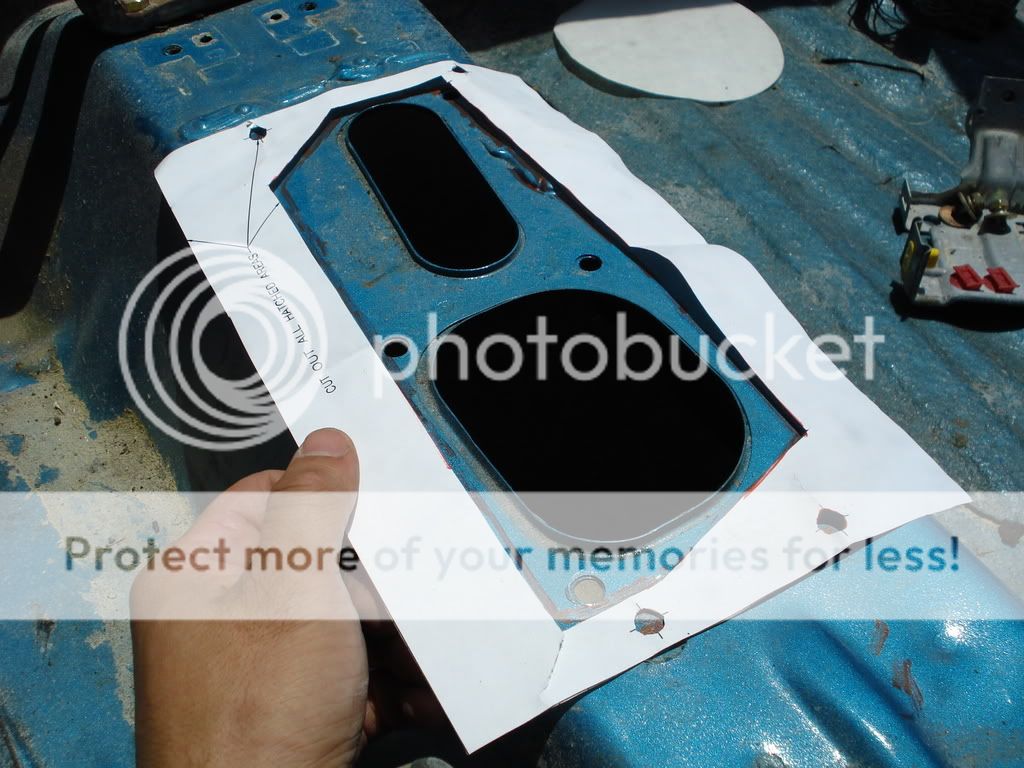
Mark the lines so you know where to cut. Also mark where to drill the mount holes:
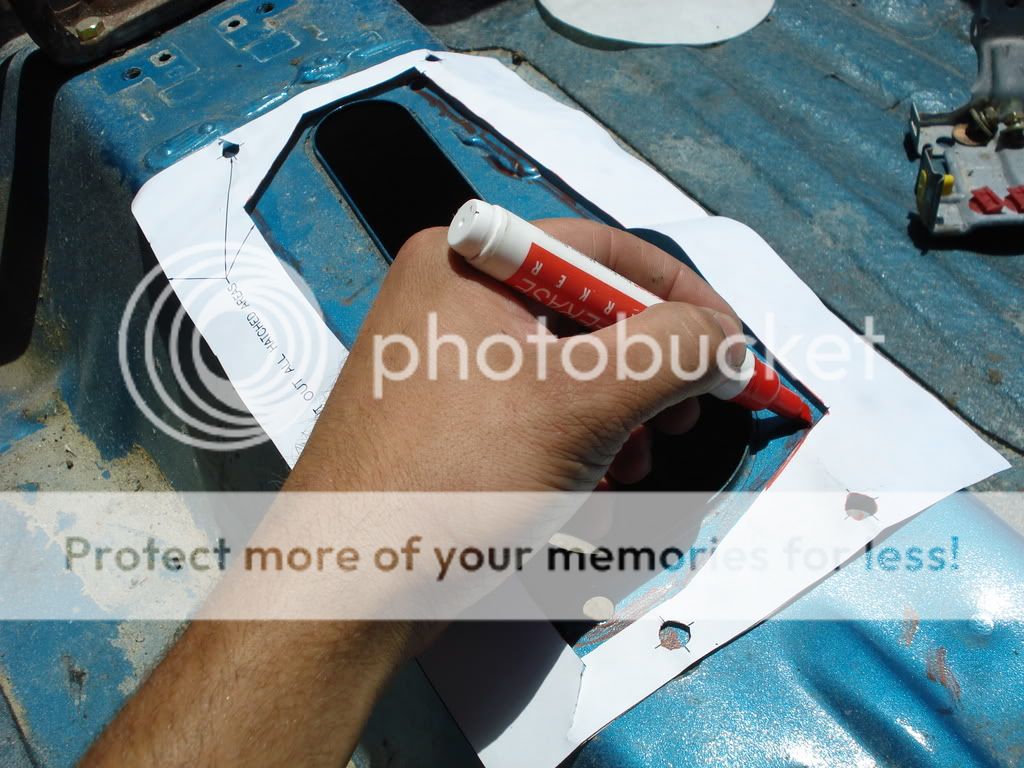

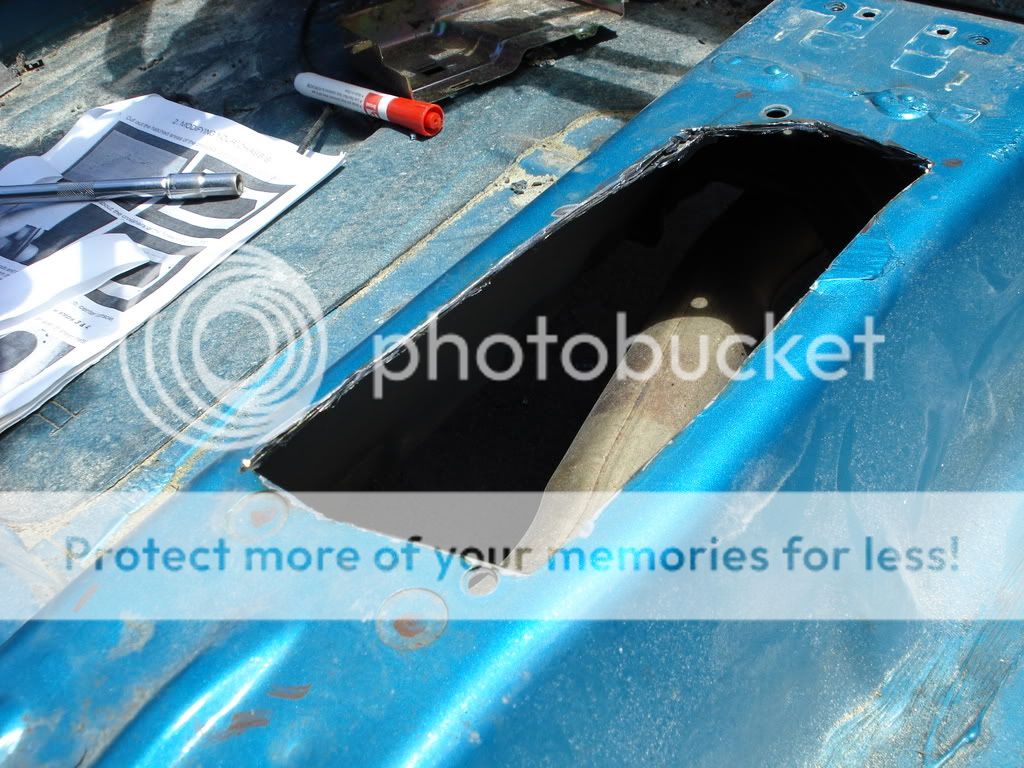
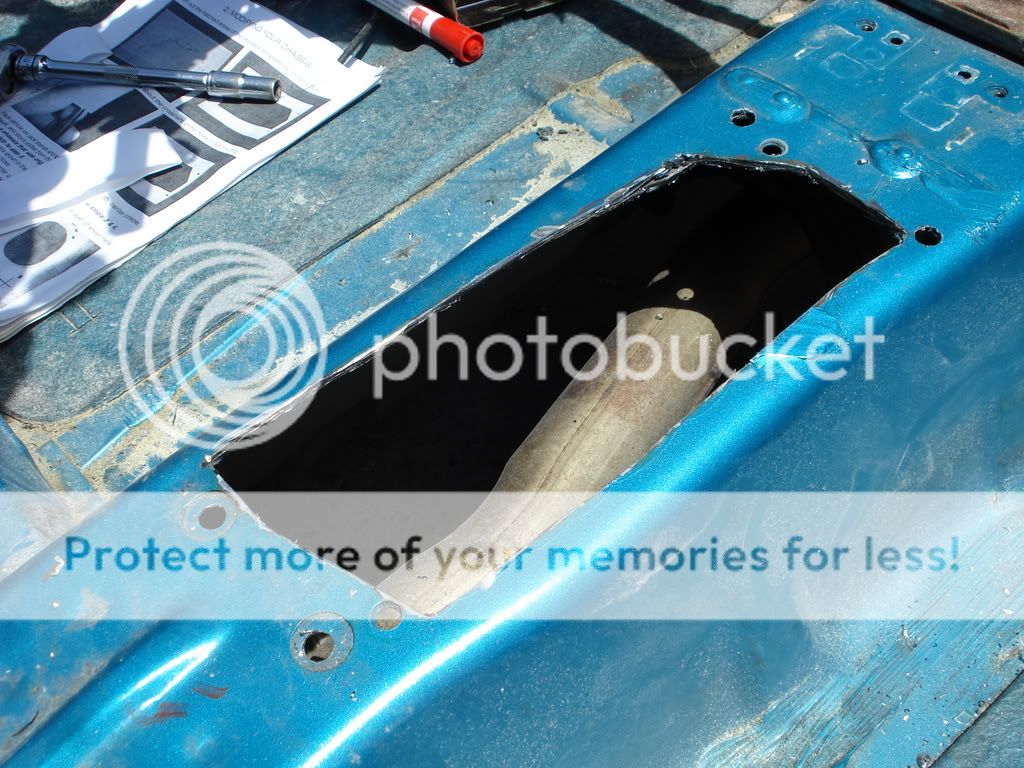
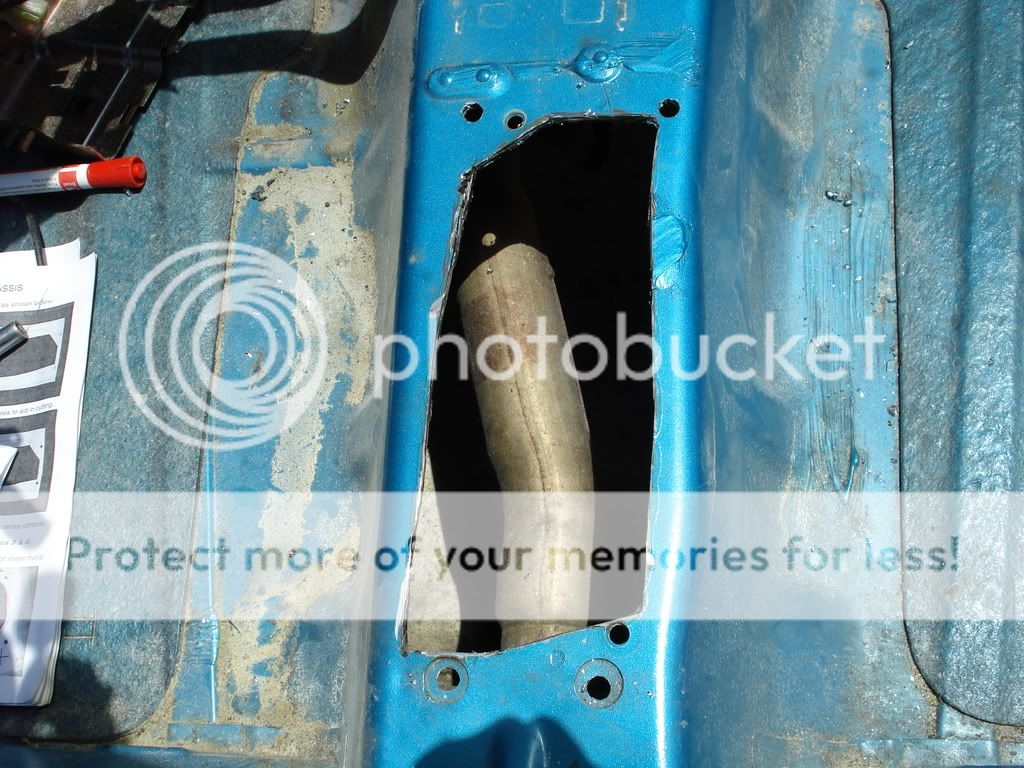
Cut away and ensure you match the template:
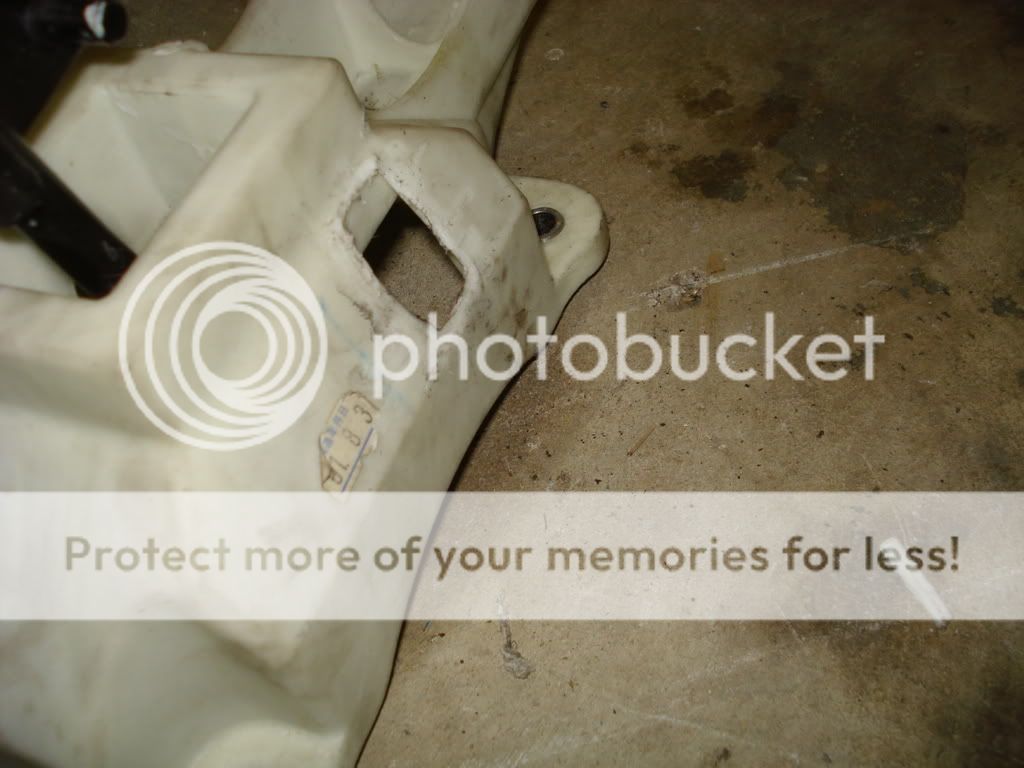
[*] Prepping the K20 Shifter Assembly:
Several things need to be done in order for the K20 shifter can fit through the center of the chassis.
K20 shifter:
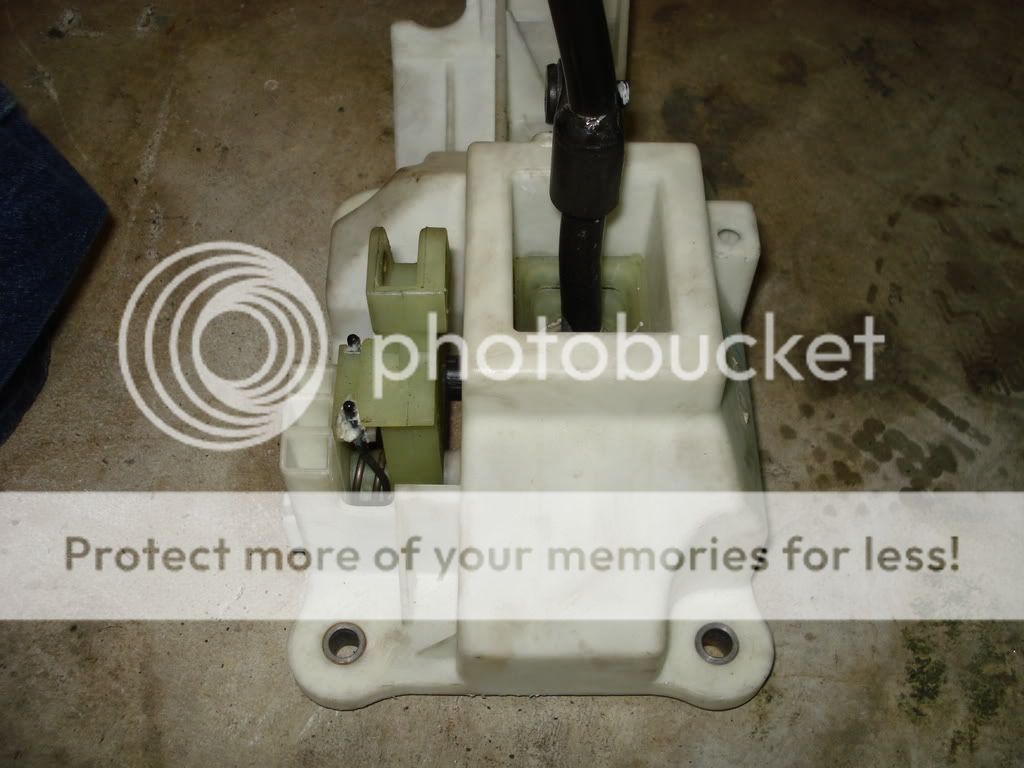
Two sides to be trimmed:
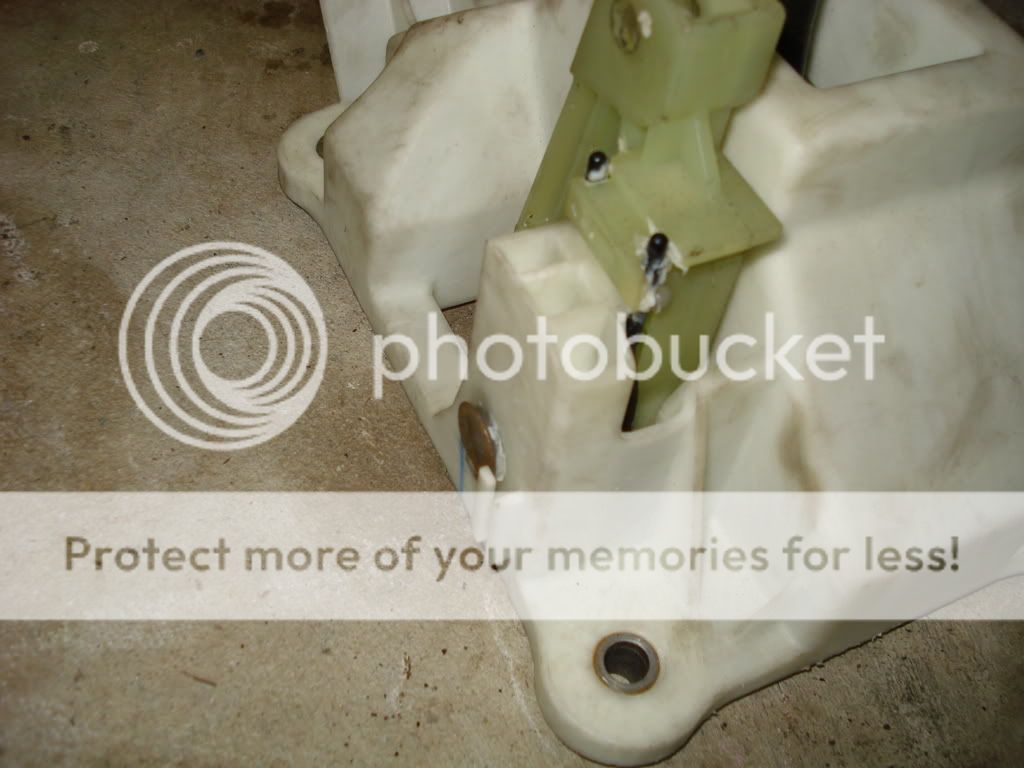
Mr. Dremel:
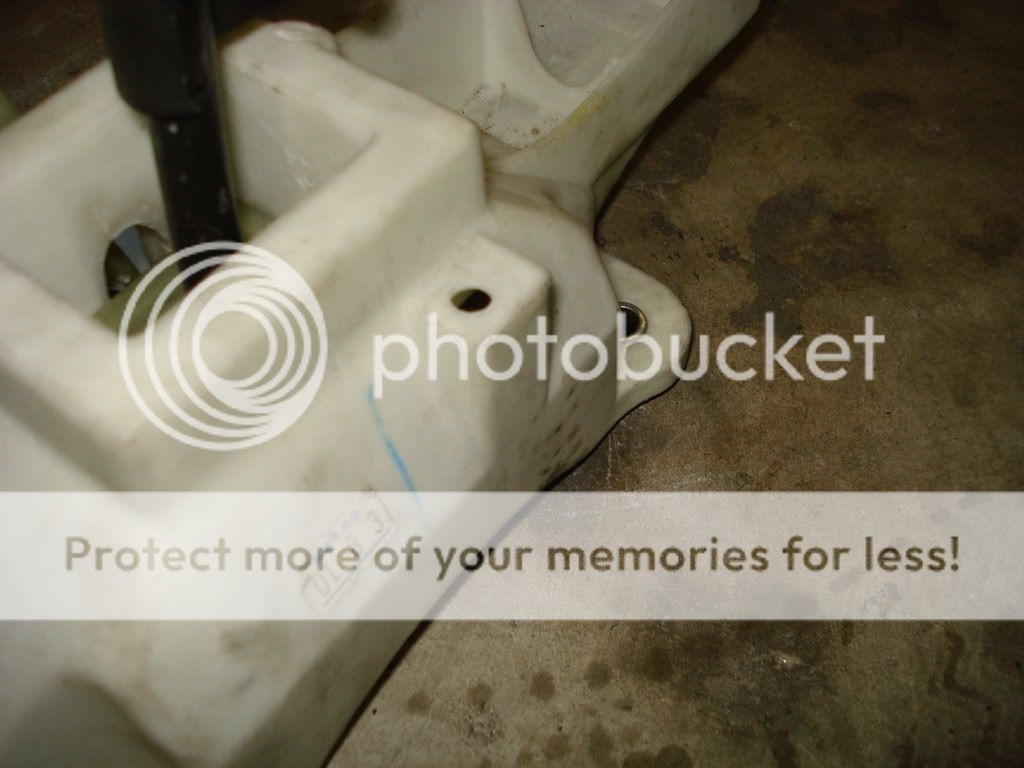
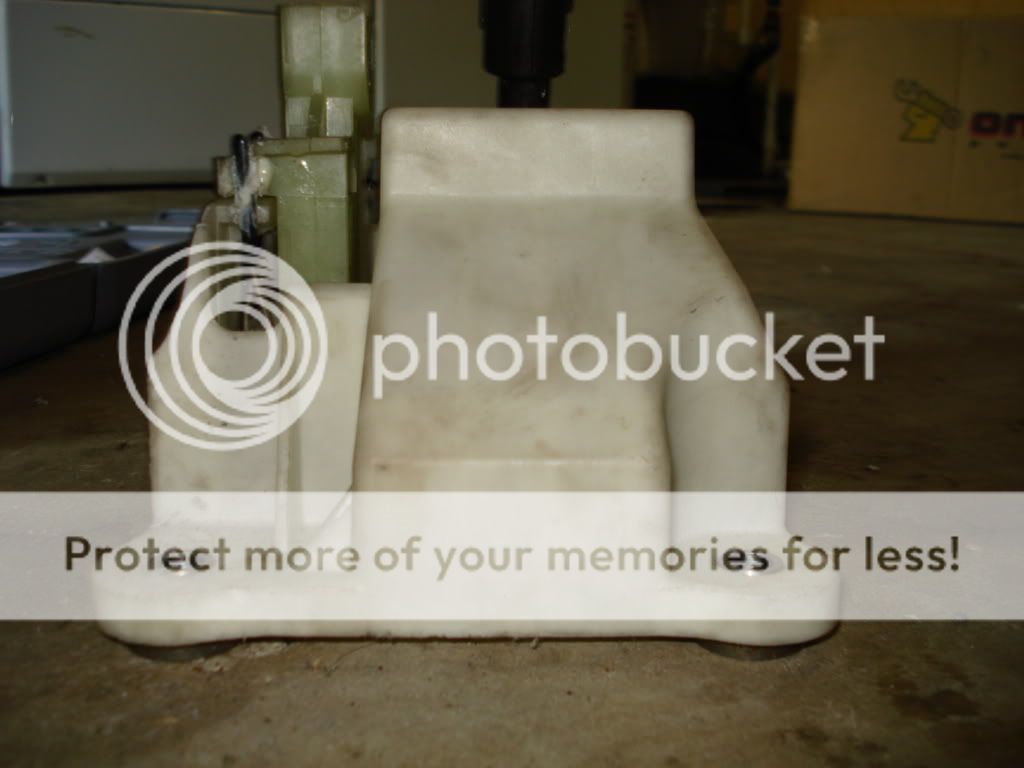
After trimming and modification:

Picture of the rear:
[*] Installing shifter assembly onto Karcepts shifter plate:
The karcepts kit requires you to remove the mount metal shim/brackets inside there. Simply take vice-grips and remove them:
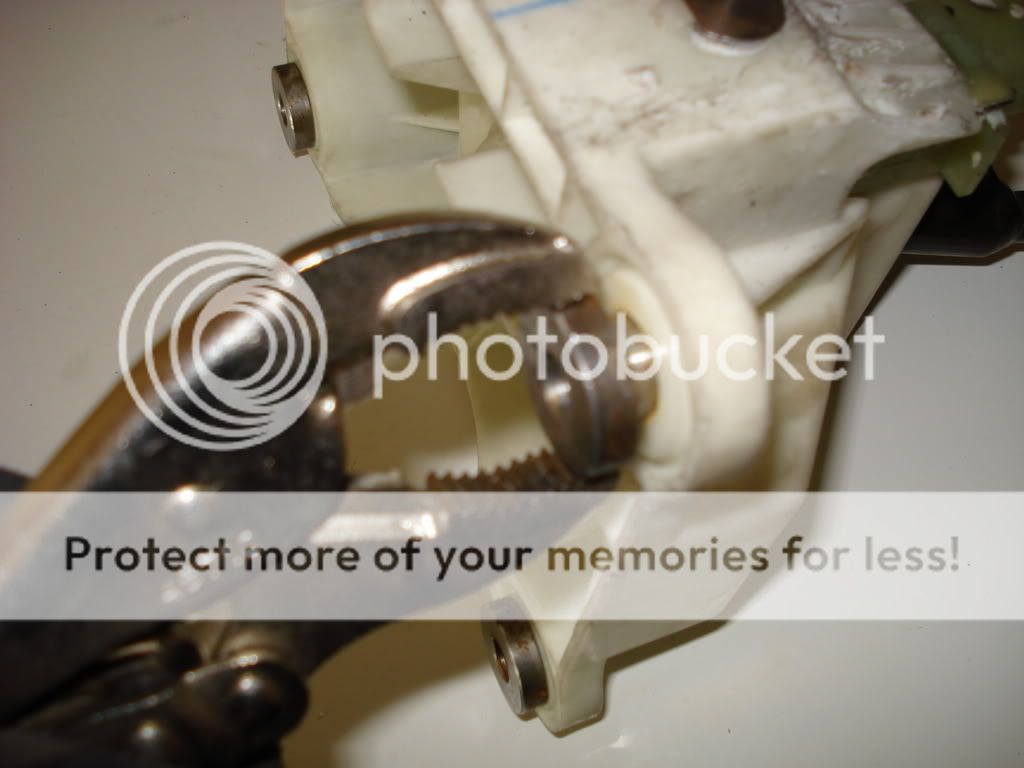
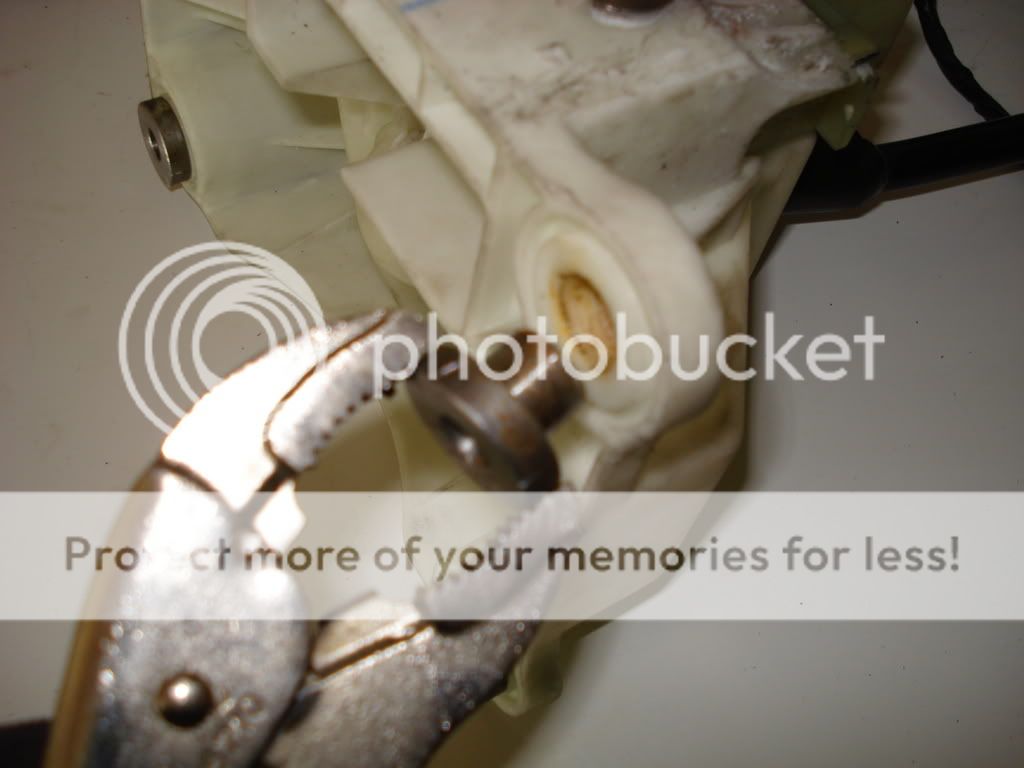
Install shifter assembly onto plate:

Next is install the brackets for the rear:

Next, install the shifter cables onto shifter assembly. Be sure to place cotter pins in to secure the cables, as well as the clip.
Install shifter assembly into car, ensure the shifter cables do not touch or come close to the exhaust.
Install the 4 mount bolts, and secure the shifter to the chassis:
After that, use the supplied RTV and line the RTV along the under carriage part of the shifter plate to seal the shifter assembly to the chassis. I forgot to take pictures while doing this - if you have pics, please supply them! Thanks
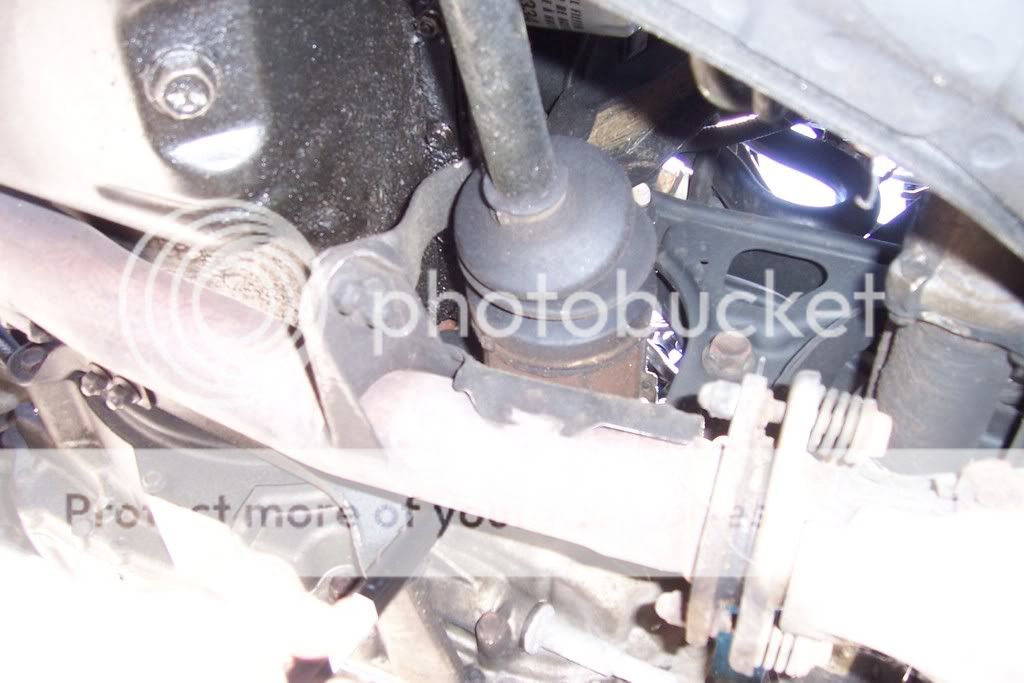
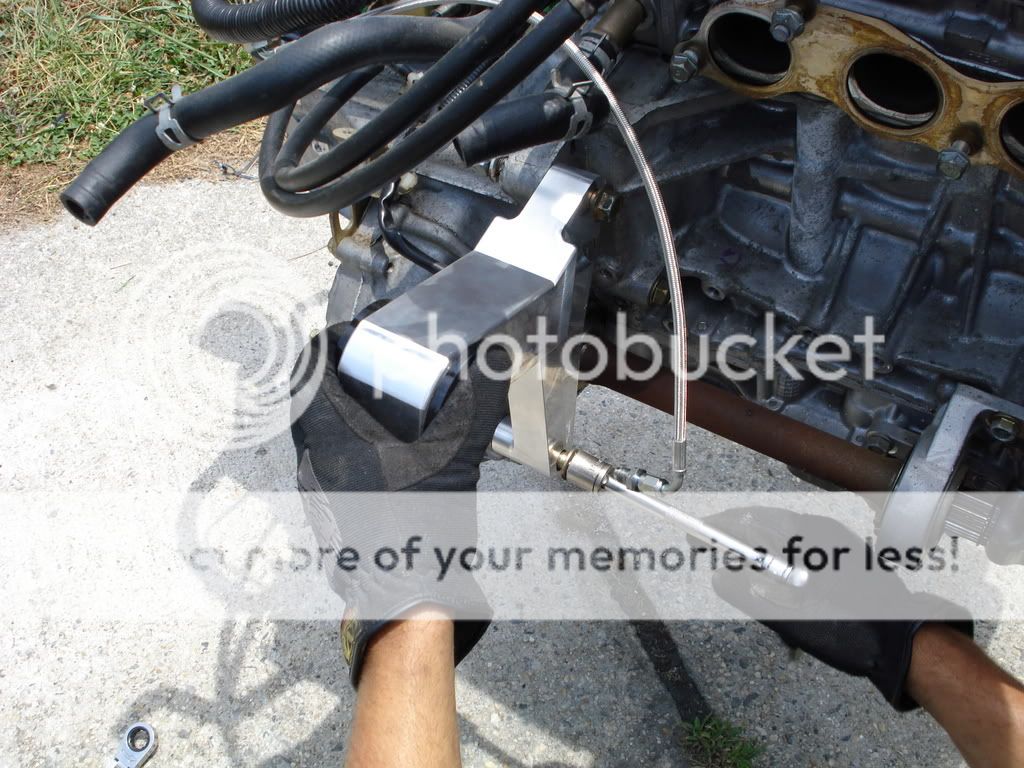
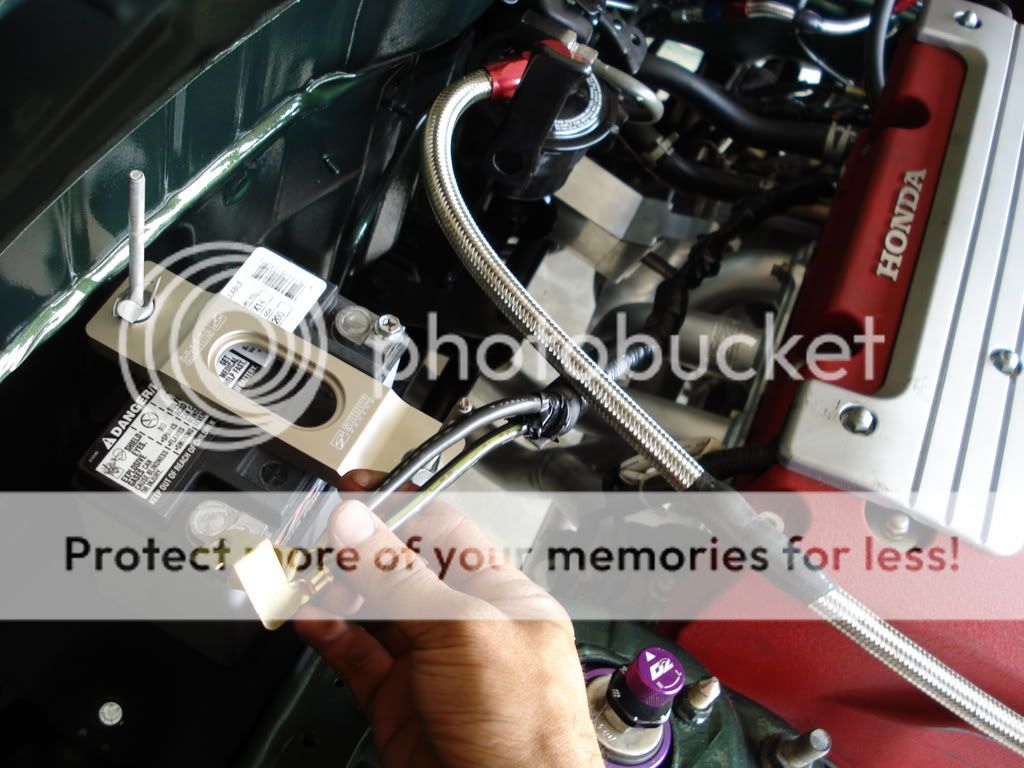
[*]Clutch linkage hydraulic line installation:
There are many things you can do to, but it basically boils down to putting a steel braided line from the clutch master cylinder to the slave cylinder hardline on the K20 tranny.
I personally went with a Suja1 clutch line from K20A.org. It's already pre length'ed, and has the propper AN fitting to just simply install and you're done.
Picture:
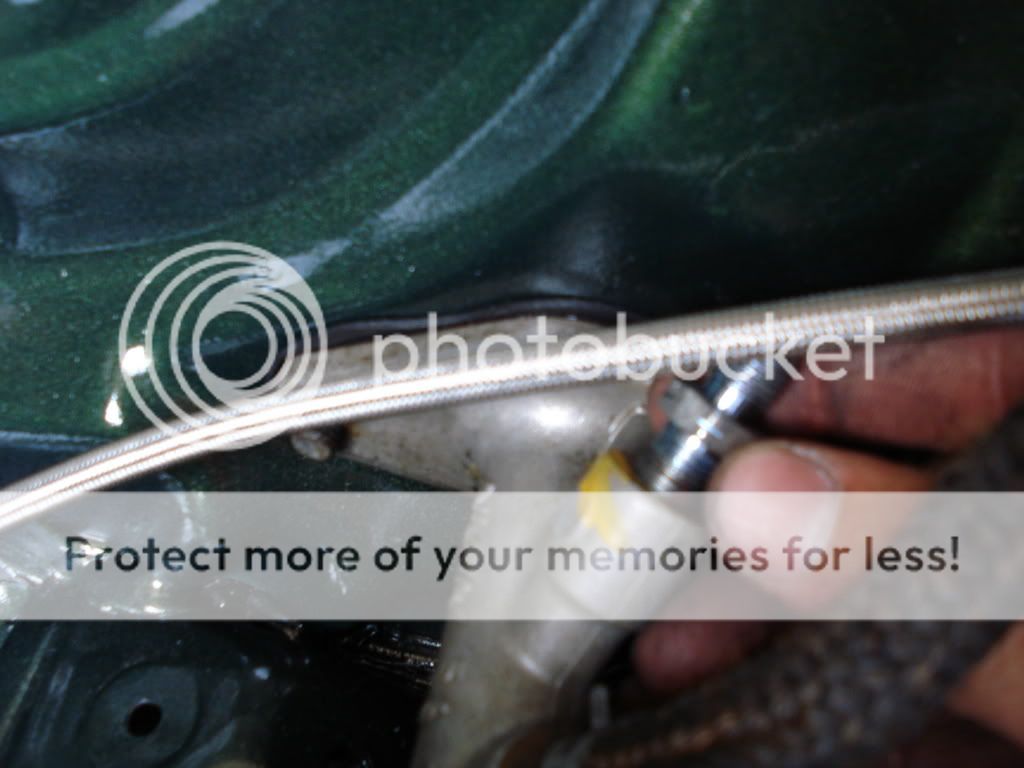
Connect the other end of the line to the hardline on the K20 tranny.
Next is bleed the line with DOT 3/4 brake fluid, and you're done!
You've completed the shifter and clutch linkage!
For this section, I chose to go with the Karcepts shifter. The Karcepts shifter allows you to retain your factory Civic/Integra center console. Great work Karcepts and thanks!
This product is not required for installation, but definitely makes it a lot easier, and cleaner!
[*] Prepping the car:
With the Karcepts shifter kit, it requires you to have a die grinder, dremel and drill with drill bits for installation. Ensure you have the correct tools for installation.
CAUTION: Ensure you are wearing hearing protection and eye protection. Not wearing hearing protection may cause hearing loss. And obviously, if you do not wear eye protection, you may get anything in your eye. You know it's not worth it. Just wear the protective stuff. I would also recommend wearing mechanic gloves to protect you from sharp objects.
First, ensure you have a clean area. Take the template supplied to you. Cut out the lines like so:
Picture of area to work on:
Next, place the template over the car as instructed:
Mark the lines so you know where to cut. Also mark where to drill the mount holes:
Cut away and ensure you match the template:
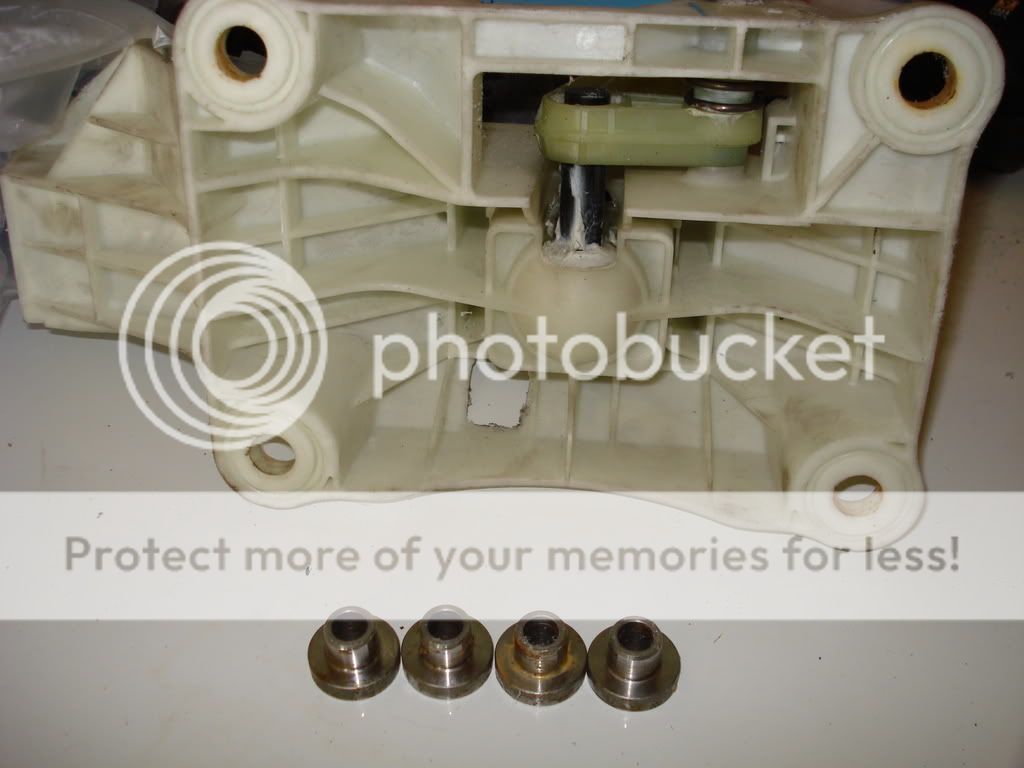
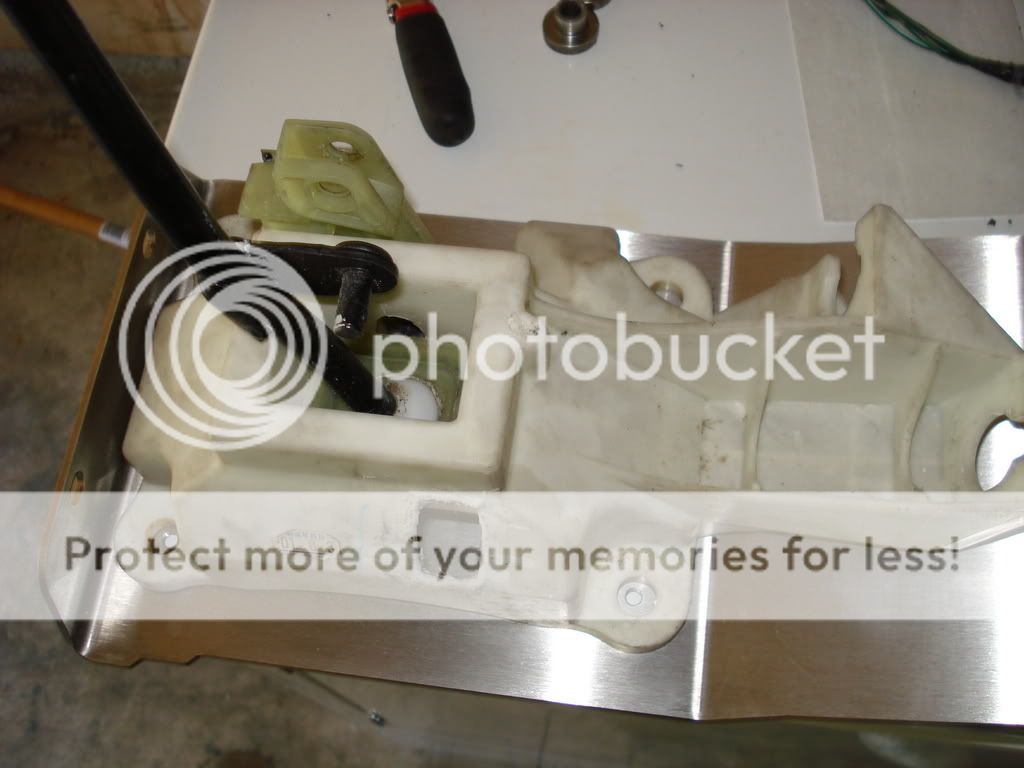
[*] Prepping the K20 Shifter Assembly:
Several things need to be done in order for the K20 shifter can fit through the center of the chassis.
K20 shifter:
Two sides to be trimmed:
Mr. Dremel:
After trimming and modification:
Picture of the rear:
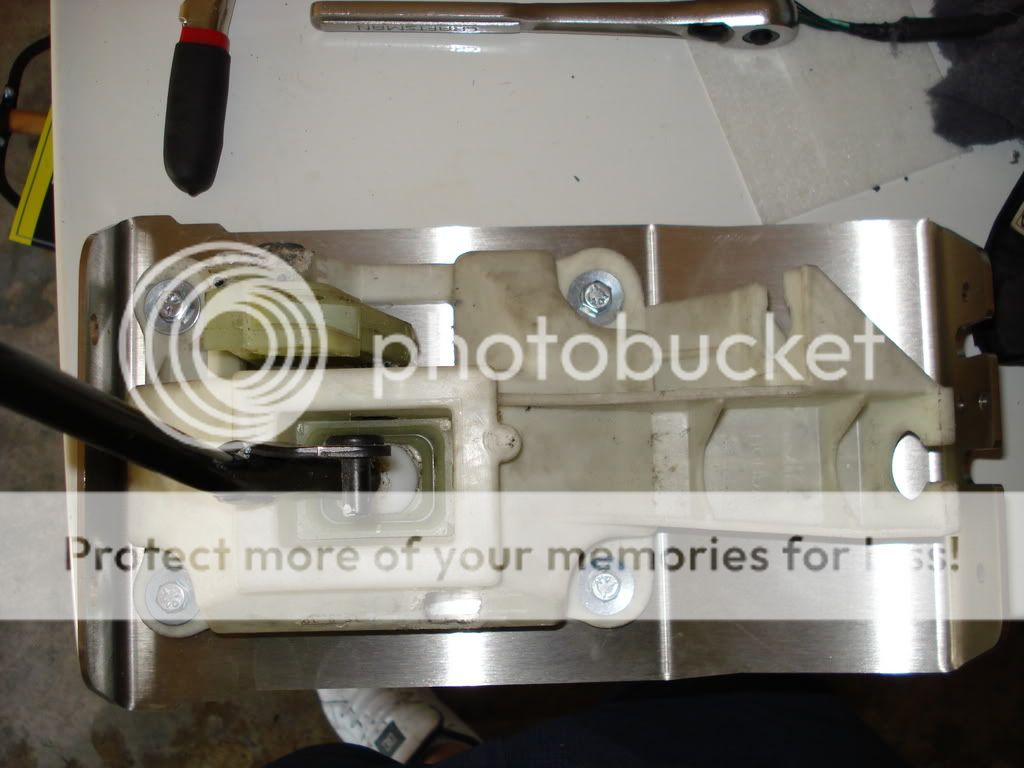
[*] Installing shifter assembly onto Karcepts shifter plate:
The karcepts kit requires you to remove the mount metal shim/brackets inside there. Simply take vice-grips and remove them:
Install shifter assembly onto plate:
Next is install the brackets for the rear:
Next, install the shifter cables onto shifter assembly. Be sure to place cotter pins in to secure the cables, as well as the clip.
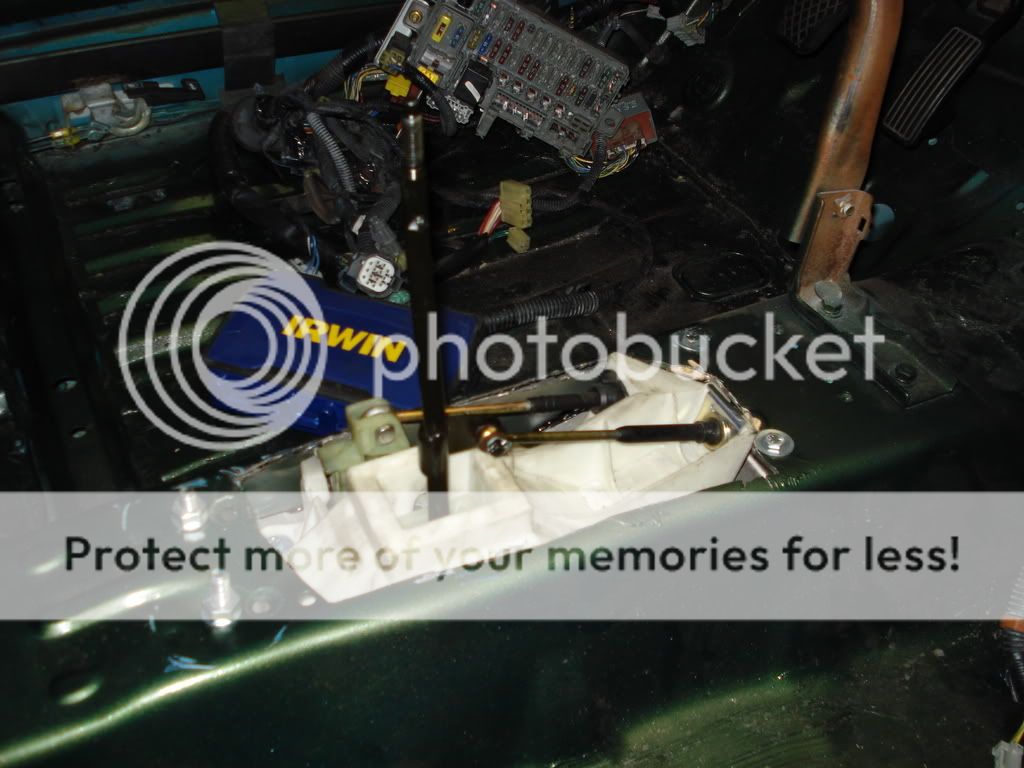
Install shifter assembly into car, ensure the shifter cables do not touch or come close to the exhaust.
Install the 4 mount bolts, and secure the shifter to the chassis:
After that, use the supplied RTV and line the RTV along the under carriage part of the shifter plate to seal the shifter assembly to the chassis. I forgot to take pictures while doing this - if you have pics, please supply them! Thanks
[*]Clutch linkage hydraulic line installation:
There are many things you can do to, but it basically boils down to putting a steel braided line from the clutch master cylinder to the slave cylinder hardline on the K20 tranny.
I personally went with a Suja1 clutch line from K20A.org. It's already pre length'ed, and has the propper AN fitting to just simply install and you're done.
Picture:
Connect the other end of the line to the hardline on the K20 tranny.
Next is bleed the line with DOT 3/4 brake fluid, and you're done!
You've completed the shifter and clutch linkage!
08-02-2007, 05:40 PM
#6
Senior Member
Thread Starter
<FONT SIZE="3">Additional Information:</FONT>
Just some miscellaneous information regarding your K20 swap.
[*] Additional Wiring:
Regarding wiring, do not forget to install IAT (intake air temp) into your intake tube. Some intakes already have a hole fabbed up for you. Simply place it in.
Picture:
Hole drilled:
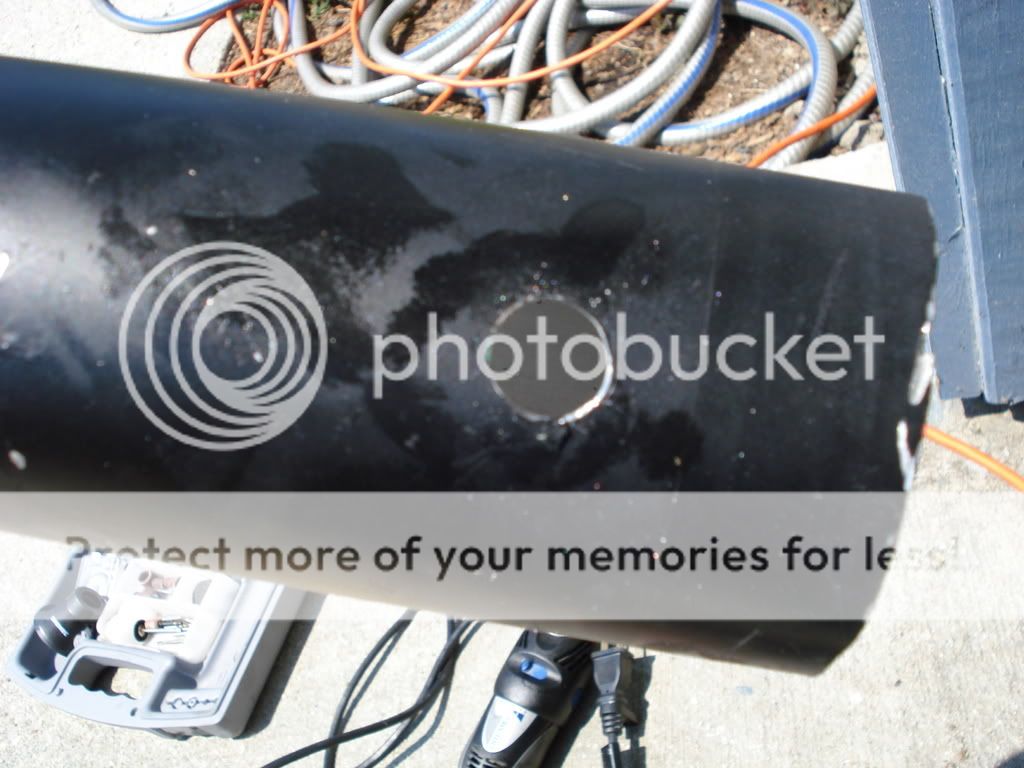
I placed a rubber piece around the IAT sensor to secure it.
Pic of it installed:

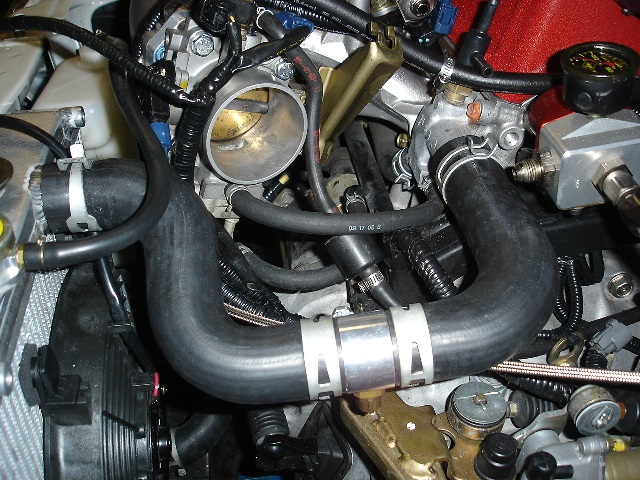
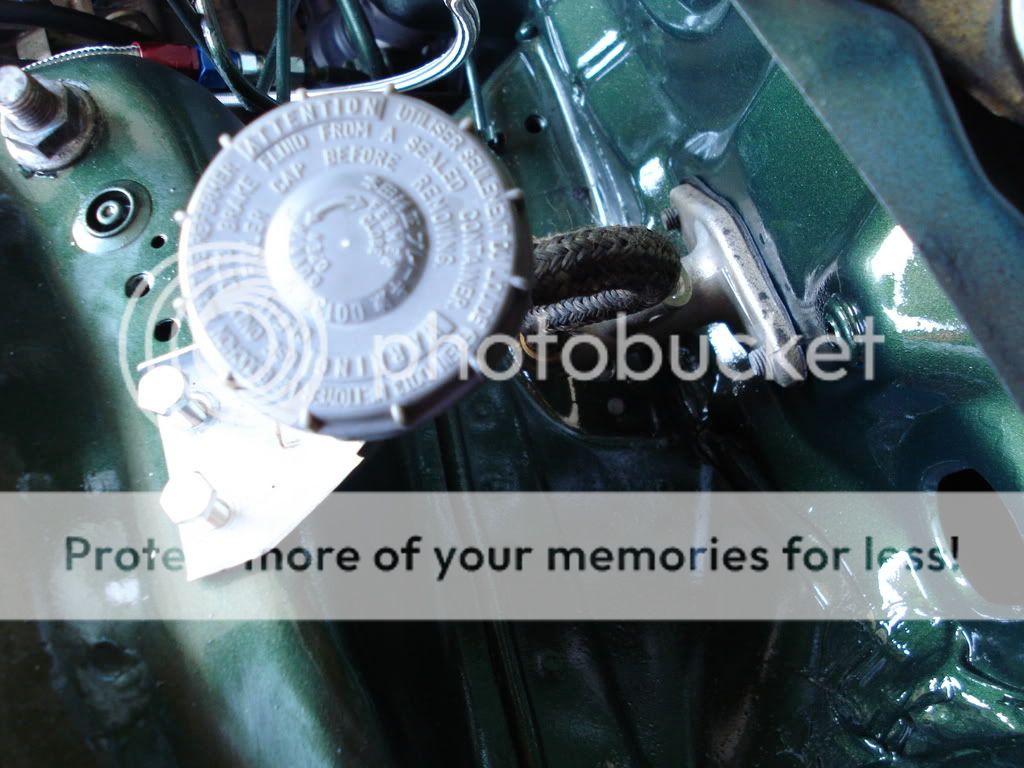
[*] Brake booster hose:
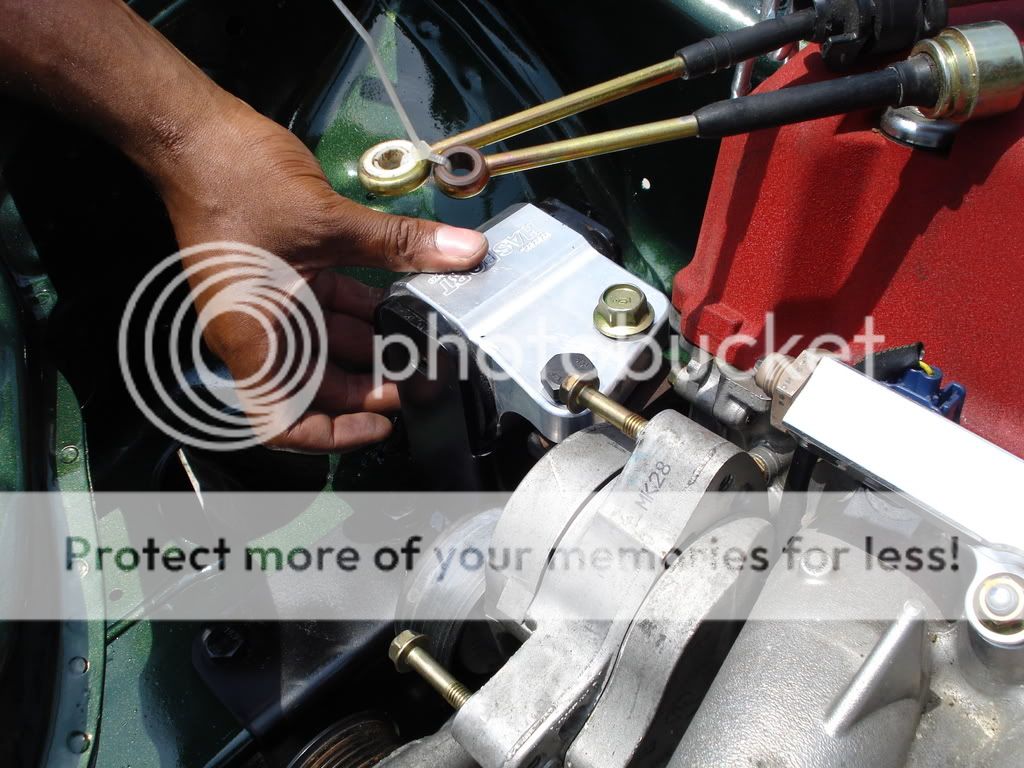
Regarding brake booster, it's very simple. You will need to get a longer hose and just connect it from the intake manifold to the brake booster. Ensure you have the check valve installed as well. Be also sure the E -> is facing towards the engine and not the booster.
[*] Emissions sensor
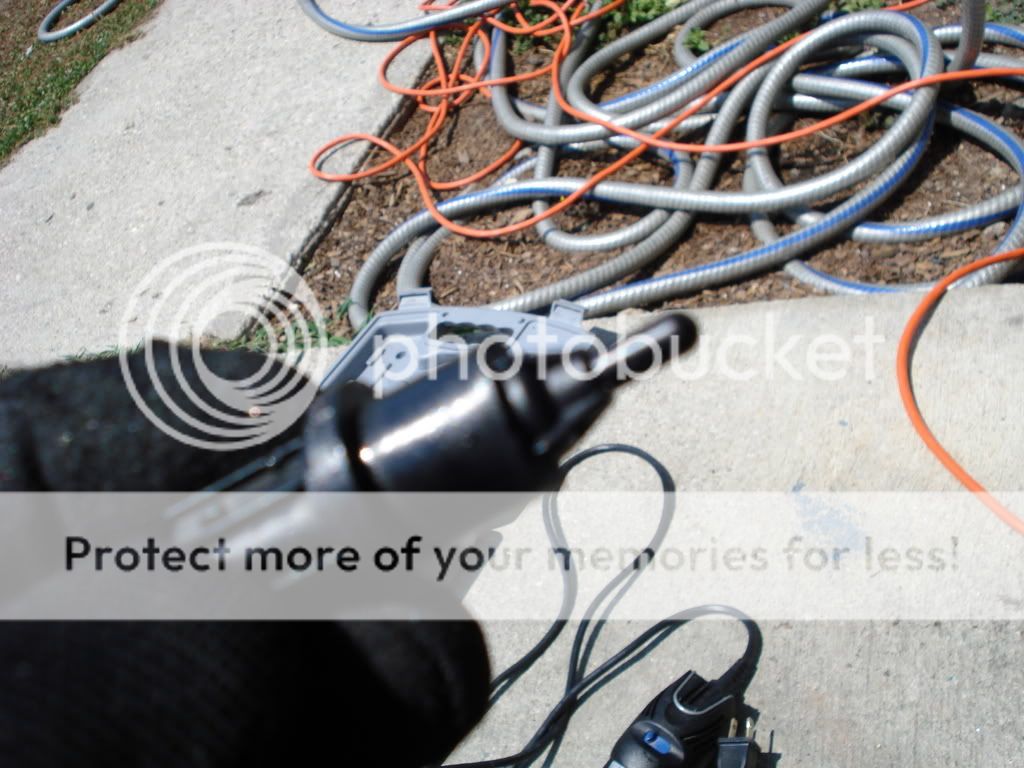
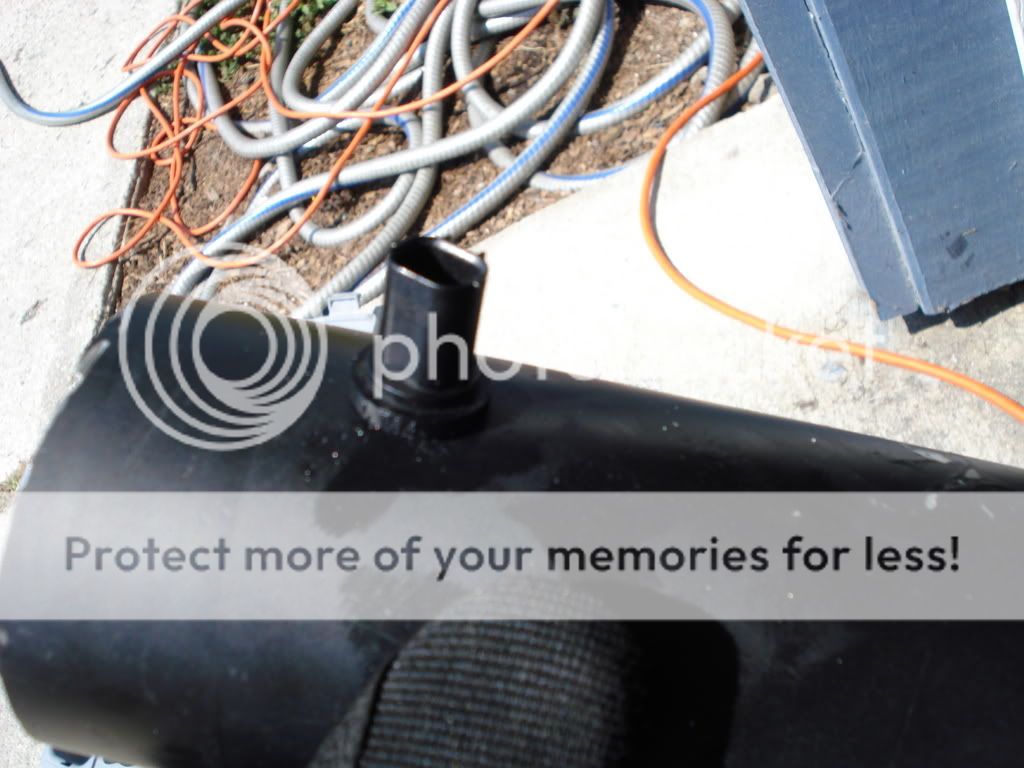
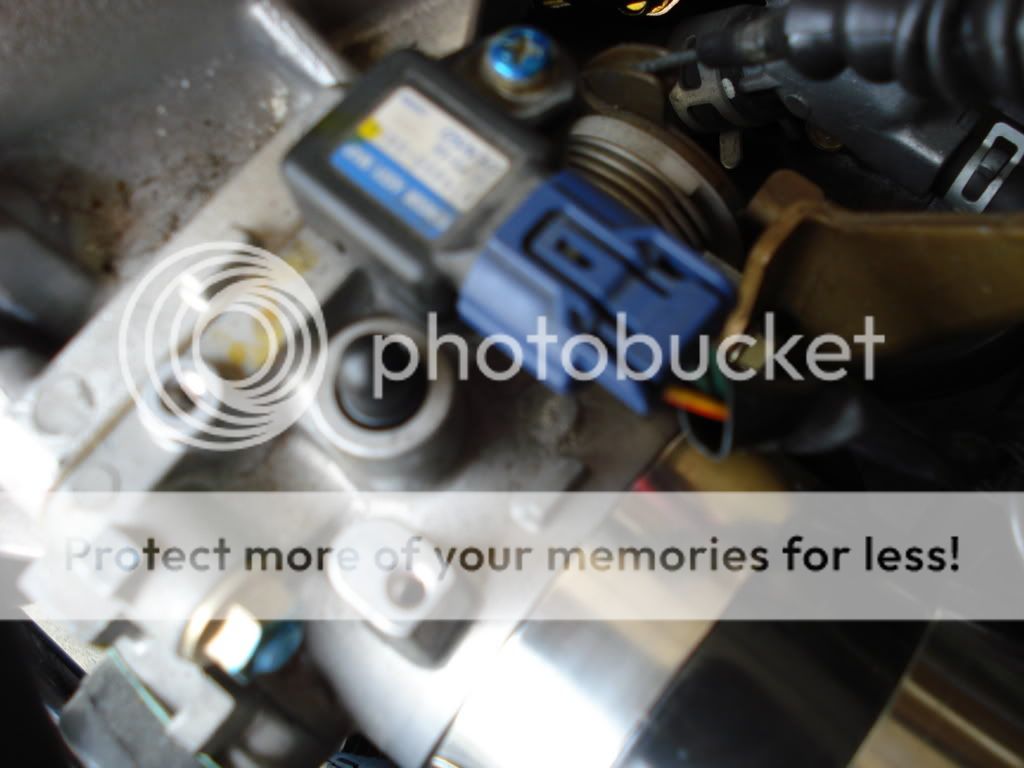
If you do not have strict emissions laws. There is a sensor on your throttle body that is not required. Here is what I did:
I took the emissions sensor located on top of the throttle body, and simply cut off the tip of it:

Pic of piece with rubber cap placed on it:

Throttle body:

Pic of it installed:
You can get caps from Advance/Checker, AutoZone, Pepboys. Just ensure you have the packing on the tube, and the cap you use fits securely on it. I have no vacuum leaks and no CEL's regarding this sensor.
Any other additional info, please post away! Stay tuned for fuel installation and auto-to-manual conversion!
Just some miscellaneous information regarding your K20 swap.
[*] Additional Wiring:
Regarding wiring, do not forget to install IAT (intake air temp) into your intake tube. Some intakes already have a hole fabbed up for you. Simply place it in.
Picture:
Hole drilled:
I placed a rubber piece around the IAT sensor to secure it.
Pic of it installed:
[*] Brake booster hose:
Regarding brake booster, it's very simple. You will need to get a longer hose and just connect it from the intake manifold to the brake booster. Ensure you have the check valve installed as well. Be also sure the E -> is facing towards the engine and not the booster.
[*] Emissions sensor
If you do not have strict emissions laws. There is a sensor on your throttle body that is not required. Here is what I did:
I took the emissions sensor located on top of the throttle body, and simply cut off the tip of it:
Pic of piece with rubber cap placed on it:
Throttle body:
Pic of it installed:
You can get caps from Advance/Checker, AutoZone, Pepboys. Just ensure you have the packing on the tube, and the cap you use fits securely on it. I have no vacuum leaks and no CEL's regarding this sensor.
Any other additional info, please post away! Stay tuned for fuel installation and auto-to-manual conversion!
08-02-2007, 07:00 PM
#7
Senior Member
Thread Starter
<FONT SIZE="3">Fuel Set Up Installation:</FONT>
Some information to know:
The fuel system on the RSX is a return-less system. It runs directly from gas tank to fuel rail and to injectors. With our older Civic/Integras, we still run the fuel return system. What you will need to do is get a universal fuel pressure regulator such as a BDL Industries FPR, Aeromotive, etc. There are many others out there, that is just to name a few.
I personally got the BDL Industries FPR:
Courtesy of Hybrid-Performance

What you will need to do, is either get a fuel system kit from Hybrid-Racing, you can also compile all of your AN fittings from Summit Racing or any place selling steel braided fuel lines.
Thanks to Karcepts, here is a list he has compiled on his website @
You can also make your own fuel lines Courtesy of blue92da of k20a.org, link: http://www.k20a.org/forum/showthread.php?t=28599
Since there are so many ways of hooking it up, I will just brief you on the basics.
You will need to run from the fuel tank, to a fuel filter (either factory or in-line), to fuel rail, then from fuel rail to the FPR, and FPR back to the return fuel line.
Ensure all fittings are tight, and ran correctly, and you should be set!
This completes the fuel installation!
Stay tuned for auto-manual wiring!
Some information to know:
The fuel system on the RSX is a return-less system. It runs directly from gas tank to fuel rail and to injectors. With our older Civic/Integras, we still run the fuel return system. What you will need to do is get a universal fuel pressure regulator such as a BDL Industries FPR, Aeromotive, etc. There are many others out there, that is just to name a few.
I personally got the BDL Industries FPR:
Courtesy of Hybrid-Performance
What you will need to do, is either get a fuel system kit from Hybrid-Racing, you can also compile all of your AN fittings from Summit Racing or any place selling steel braided fuel lines.
Thanks to Karcepts, here is a list he has compiled on his website @
Originally Posted by Karcepts.com
Below are quantities and part numbers from Summit Racing that provide everything needed for the above fuel line setup. All of these fittings are the Eudora Finish (basically a shinny plated finish) except for part number EAR-991945ERL which is anodized blue (it is not available in a plated finish). The blue anodizing was removed on the setup shown to match the other fittings. You could additionally substitute all of the below fittings with the blue/red ones if desired.
This list includes everything needed for the fuel line setup except for a FPR gauge and fuel rail. You can use any 0-100 PSI gauge with a 1/8" NPT male connection, and you can go with a Golden Eagle, AEM, or whatever brand fuel rail you wish; however, the above RUS-661771 reducer fittings assume the rail has -8an female ports.
Additionally, all of the above part numbers assume that you are just clamping down the -6an hose onto the return hard line. It might not be considered a completely safe method, but it is done because the return line pressure is fairly low. If you want the correct (safe) method of attaching the hose to the car�s return hard line, you will need the following additional parts from Summit Racing.
Qty = 1 RUS-632060 -Hose; -6an SS Proflex; 6ft.
Qty = 2 RUS-610021 -Hose End; Straight; -AN Hose to -6an Female
Qty = 2 RUS-613161 -Hose End; 90 Deg; -6an Hose to -6an Female
Qty = 1 RUS-613091 -Hose End; 45 Deg; -6an Hose to -6an Female
Qty = 1 RUS-660271 -Plug; -6an
Qty = 2 RUS-660351 -Coupler; -6an Male to -6an Male
Qty = 2 RUS-661771 -Reducer; -8an Male to -6an Male
Qty = 1 RUS-651040 -O Rings; -6an
Qty = 1 RUS-651050 -O Rings; -8an
Qty = 1 EAR-991945ERL -Adapter for top of Honda Fuel Filter to -6an Male
Qty = 1 AEI-13109 -Aeromotive A1000-6 FPR
Qty = 1 RUS-671570 -Assembly Lube and Thread Sealant Kit (optional)
Qty = 1 RUS-610021 -Hose End; Straight; -6an Hose to -6an Female
Qty = 1 RUS-660561 -Tube Nut; -4an
Qty = 1 RUS-660641 -Tube Sleeve; -4an
Qty = 1 RUS-661761 -Reducer; -6an Male to -4an Male
You would also need a 37 Degree Flare Tool to make this happen. Summit Racing part number: SUM-900311
Since there are so many ways of hooking it up, I will just brief you on the basics.
You will need to run from the fuel tank, to a fuel filter (either factory or in-line), to fuel rail, then from fuel rail to the FPR, and FPR back to the return fuel line.
Ensure all fittings are tight, and ran correctly, and you should be set!
This completes the fuel installation!
Stay tuned for auto-manual wiring!
Trending Topics
08-02-2007, 07:22 PM
#8
Senior Member
Thread Starter
<FONT SIZE="3">Auto To Manual Wiring</FONT>
First off, I want to thank nikos for referring me to a great guy who helped me 100% through this process. User on K20A.org "Toda Racing RSX" has sat down, and let me do exactly what I needed to do to get the K20 to start. For a good 8 hours, I was checking over EVERYTHING to try and get the K20 to fire up. And all I had to mention was the fact that it was an automatic.
100% credit goes to Toda Racing RSX. I can't thank you enough man!
Now it's my duty to help everyone else out! If you have an automatic, this one is for YOU!
[*] Getting the K20 fired up
So you've done everything you need to do, shift linkage, fuel, oil change, transmission oil, spark plugs, everything is good to go. But the starter doesn't kick over. This is due to the automatic is wired slightly different than the manual.
Very simple process. You need to cut the plugs off of your automatic shifter console:
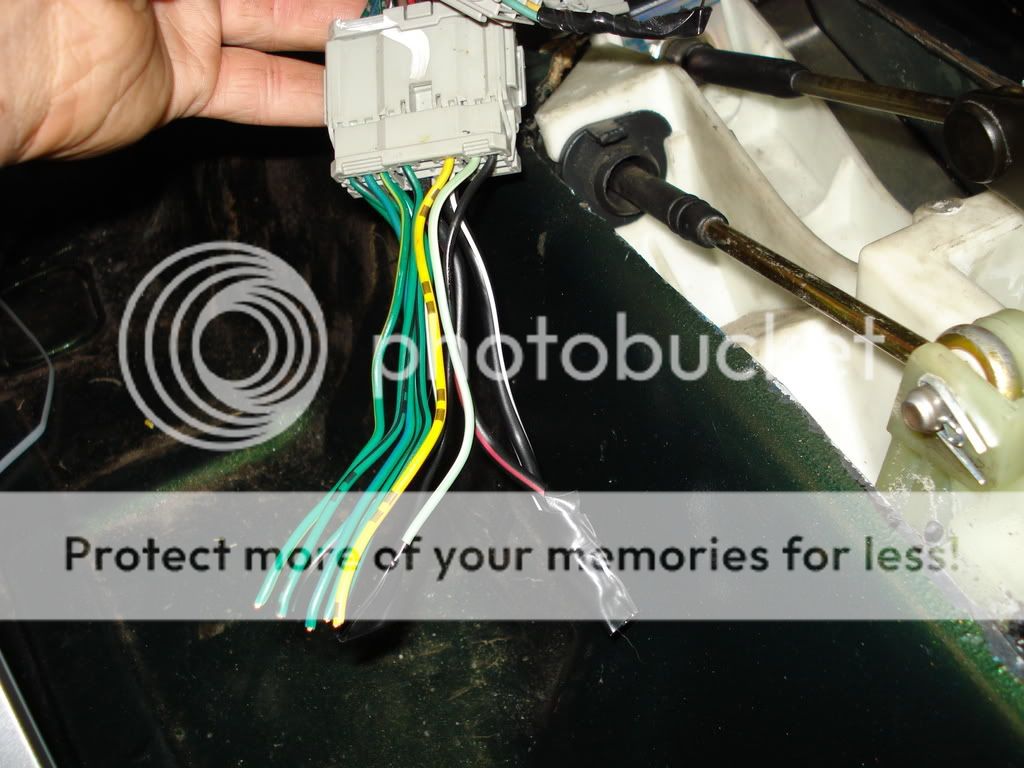
Two wires need to be jumped in order for the engine to start. This is for the shifter solenoid. They are the YEL and GRN wires:
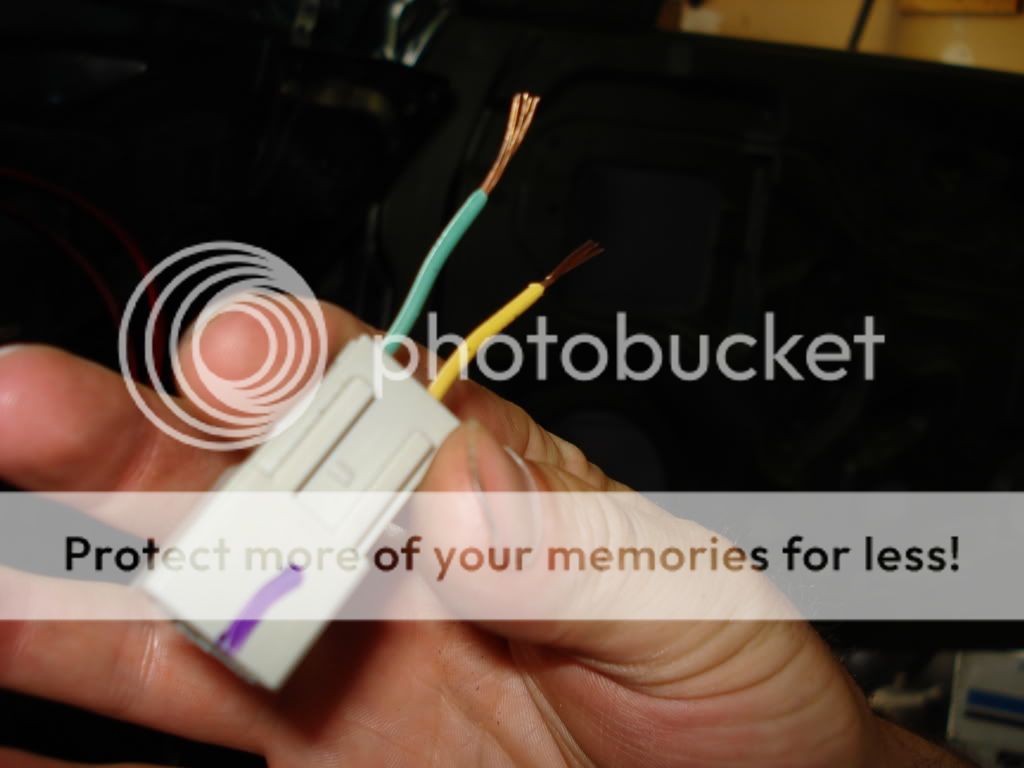
Splies those two together, solder and heat shrink and clip the plug into the factory harness.
Then you need to splice the GRN/WHT and small BLK wire together:
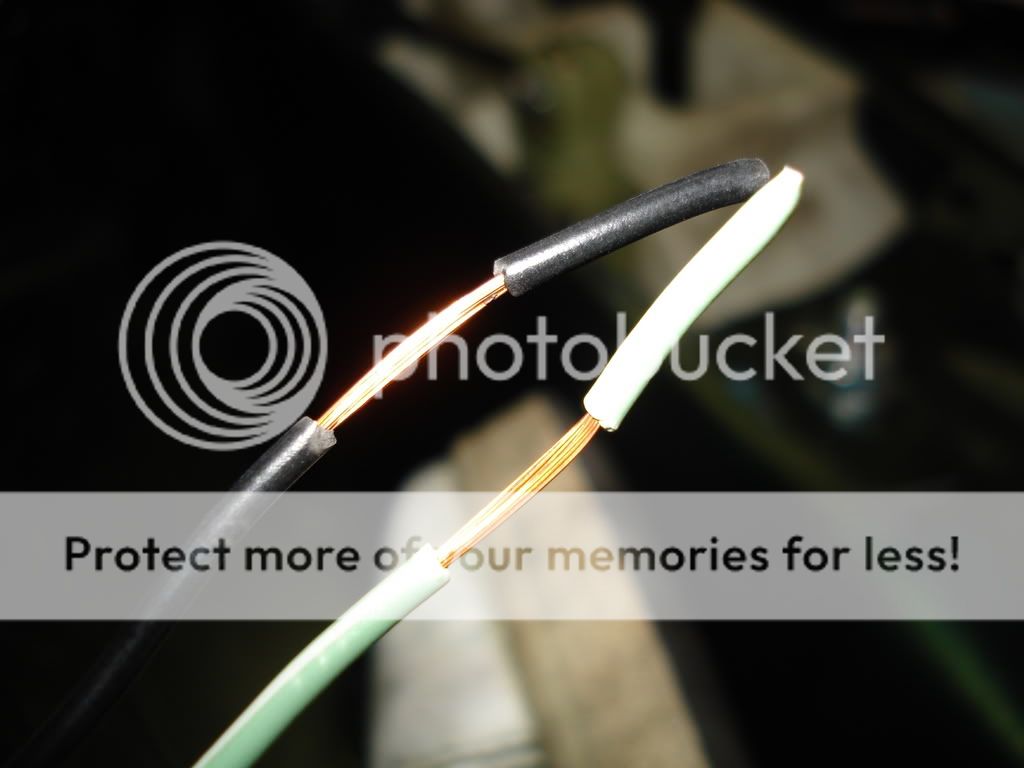
Next is the large BLK/WHT wire and the large BLK/RED wire. Splice those together:
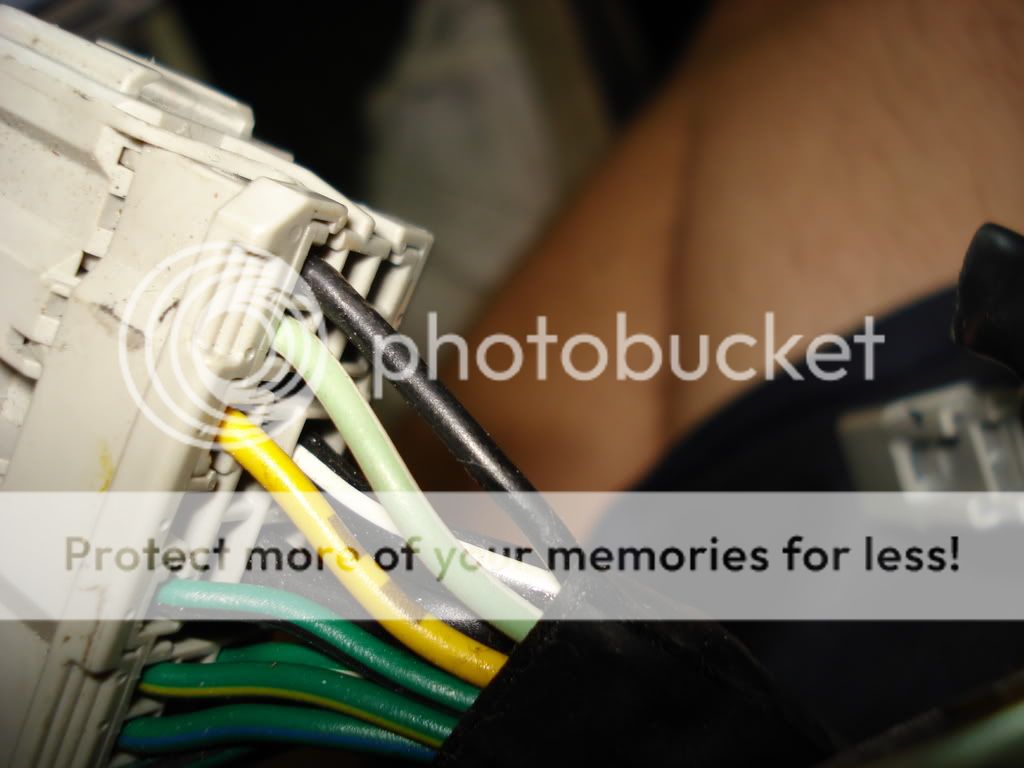
That's it! Start up the engine and make sure everything is secure..
Stay tuned for reverse light installation!
First off, I want to thank nikos for referring me to a great guy who helped me 100% through this process. User on K20A.org "Toda Racing RSX" has sat down, and let me do exactly what I needed to do to get the K20 to start. For a good 8 hours, I was checking over EVERYTHING to try and get the K20 to fire up. And all I had to mention was the fact that it was an automatic.
100% credit goes to Toda Racing RSX. I can't thank you enough man!
Now it's my duty to help everyone else out! If you have an automatic, this one is for YOU!
[*] Getting the K20 fired up
So you've done everything you need to do, shift linkage, fuel, oil change, transmission oil, spark plugs, everything is good to go. But the starter doesn't kick over. This is due to the automatic is wired slightly different than the manual.
Very simple process. You need to cut the plugs off of your automatic shifter console:
Two wires need to be jumped in order for the engine to start. This is for the shifter solenoid. They are the YEL and GRN wires:
Splies those two together, solder and heat shrink and clip the plug into the factory harness.
Then you need to splice the GRN/WHT and small BLK wire together:
Next is the large BLK/WHT wire and the large BLK/RED wire. Splice those together:
That's it! Start up the engine and make sure everything is secure..
Stay tuned for reverse light installation!
08-02-2007, 07:34 PM
#9
Senior Member
Thread Starter
Will post tomorrow:
[*] More header information [*]Throttle Linkage info
Night!
[*] More header information [*]Throttle Linkage info
Night!
08-03-2007, 06:03 AM
#10
Honda-Tech Member
Join Date: Mar 2002
Location: ATL to SAV to ORL, USA
Posts: 7,506
Likes: 0
Received 0 Likes
on
0 Posts
Awesome job!!! You are covering everything and going to make this next month so much easier 

Will be saving / reading this over again and again........
You da man
Will be saving / reading this over again and again........
You da man
08-03-2007, 12:20 PM
#12
Senior Member
Thread Starter
Thank you guys for the feedback!!
Hybrid93Hatch - I'd like to link your thread to this FAQ just to keep them for reference in the future:
Dissecting the k20 motor (Identifying ALL parts): https://honda-tech.com/zerothread/2058216
Hybrid93Hatch - I'd like to link your thread to this FAQ just to keep them for reference in the future:
Dissecting the k20 motor (Identifying ALL parts): https://honda-tech.com/zerothread/2058216
08-04-2007, 07:09 AM
#14
Honda-Tech Member
Join Date: Mar 2002
Location: ATL to SAV to ORL, USA
Posts: 7,506
Likes: 0
Received 0 Likes
on
0 Posts
<TABLE WIDTH="90%" CELLSPACING=0 CELLPADDING=0 ALIGN=CENTER><TR><TD>Quote, originally posted by poison »</TD></TR><TR><TD CLASS="quote">Fan switch (ECT) & Coolant Temp Sending Unit (gauge cluster):</TD></TR></TABLE>
Any chance you have the part #'s for these so i can order from Honda? If not, I'll gather them and post them up.
<TABLE WIDTH="90%" CELLSPACING=0 CELLPADDING=0 ALIGN=CENTER><TR><TD>Quote, originally posted by poison »</TD></TR><TR><TD CLASS="quote">Then wire them according to whichever wiring harness you purchased. Do not forget to ground the hose insert to the engine/tranny!</TD></TR></TABLE>
I read on K20a.org that you went with the HybridRacing harness. I will be ordering the same on Tuesday. Do you have pics of the wiring of these sensors to the Hybrid harness?
Also, is that a JDM shifterbox? I didn't see it in the ikarcepts instructions to cut the box. But, me and a buddy tried for like 15 minutes to get the shifter box mounted with no luck. Went back and cut more away too


I can't stop looking at this thread
I'll be back.......
Any chance you have the part #'s for these so i can order from Honda? If not, I'll gather them and post them up.
<TABLE WIDTH="90%" CELLSPACING=0 CELLPADDING=0 ALIGN=CENTER><TR><TD>Quote, originally posted by poison »</TD></TR><TR><TD CLASS="quote">Then wire them according to whichever wiring harness you purchased. Do not forget to ground the hose insert to the engine/tranny!</TD></TR></TABLE>
I read on K20a.org that you went with the HybridRacing harness. I will be ordering the same on Tuesday. Do you have pics of the wiring of these sensors to the Hybrid harness?
Also, is that a JDM shifterbox? I didn't see it in the ikarcepts instructions to cut the box. But, me and a buddy tried for like 15 minutes to get the shifter box mounted with no luck. Went back and cut more away too
I can't stop looking at this thread
I'll be back.......

 08-04-2007, 11:23 AM
#16
Senior Member
Thread Starter
Originally Posted by BlueIntegraBoy
Very extensive writeup. Any pics of the hybrid racing harness wired to the ECU harness?
Originally Posted by Hybrid93Hatch
Any chance you have the part #'s for these so i can order from Honda? If not, I'll gather them and post them up.
Originally Posted by Hybrid93Hatch
I read on K20a.org that you went with the HybridRacing harness. I will be ordering the same on Tuesday. Do you have pics of the wiring of these sensors to the Hybrid harness?
<FONT SIZE="3">Additional Wiring Info 2:</FONT>
I used Hybrid Racing's harness. I will post up the diagram I wrote down based off their website and applied it in my own terms. Hopefully everyone gets a better understanding. I'm sure we all like to just get to the point. Thanks again Dave of Hybrid-Racing for the assistance.
For reference: I used factory ITR PRC ECU. I do not currently have info on hooking up Hondata K-Pro. Information is on their website.
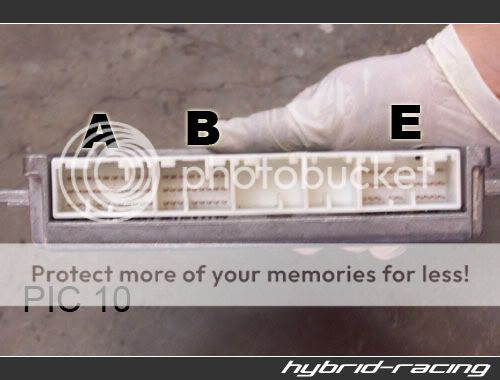
OBD1:
Ground A7 & A8 (GRN/YEL), and YEL wire from Hybrid Racing harness to chassis.
A13 (GRN/ORG) to GRN wire on Hybrid Racing Harness
D10 (GRN/RED) to RED wire on Hybyrid Racing Harness
For O2 sensor:
Courtesy of Hybrid-Racing
Hybrid Racing Harness Primary O2 Sensor
GRN > WHT
RED > Light GRN
WHT > BLK
BLK > BLK
Hybrid Racing Harness Secondary O2 Sensor
WHT > GREY
RED > BLK
GRN > WHT
BLK > WHT
Picture of K20 connectors Courtesy of Hybrid-Racing
Fan Switch:
Yellow Wire to Fan Switch
Other wire simply ground it.
To test the wiring, jump the two wires together and the fan should turn on.
Temp gauge:
BLUE Wire to Temp gauge
Ensure if you are using HASports hose insert that you ground the insert!
White wire from the driver's side plug goes to Red/Green on Brake Master Cylinder
BLUE Wire from E Plug goes to GRN/WHT on the Brake Pedal switch.
Originally Posted by Hybrid93Hatch
Also, is that a JDM shifterbox? I didn't see it in the karcepts instructions to cut the box. But, me and a buddy tried for like 15 minutes to get the shifter box mounted with no luck. Went back and cut more away too
Thanks again for the feedback!
08-04-2007, 11:12 PM
#17
Honda-Tech Member

Join Date: Feb 2006
Location: Hella North, Toronto
Posts: 2,069
Likes: 0
Received 0 Likes
on
0 Posts
wow, this thread HAS to become a sticky. Absolutely the best K20-to 92-00 civic FAQ there there ever was. x999999999
x999999999
08-06-2007, 04:49 PM
#19
Senior Member
Thread Starter
<TABLE WIDTH="90%" CELLSPACING=0 CELLPADDING=0 ALIGN=CENTER><TR><TD>Quote, originally posted by Hybrid93Hatch »</TD></TR><TR><TD CLASS="quote">Any close up pics of the parts and how to connect the shifter cables to the tranny? I just have the cables, so I may need to get some more parts to connect them 
</TD></TR></TABLE>
Yes, I apologize for not posting this earlier. I did go to Acura and order these parts to connect the shifter cables properly. Since most swaps do not come with them, here is info:

Index 9 and index 3 is what I had to order. The cotter pin (index 17) can be obtained anywhere.
I was looking for my receipt to get the part numbers, but I don't have them anymore.
If someone can get the part numbers of those index, and post 'em up, it would be great.
Hope that helps!
I will also post up more info about shifter, header and throttle cable info later on. Apologizes for the delay.
</TD></TR></TABLE>
Yes, I apologize for not posting this earlier. I did go to Acura and order these parts to connect the shifter cables properly. Since most swaps do not come with them, here is info:
Index 9 and index 3 is what I had to order. The cotter pin (index 17) can be obtained anywhere.
I was looking for my receipt to get the part numbers, but I don't have them anymore.
If someone can get the part numbers of those index, and post 'em up, it would be great.
Hope that helps!
I will also post up more info about shifter, header and throttle cable info later on. Apologizes for the delay.