
B16 Bottom End Assembly - Complete Walk through - Maybe Sticky
 03-16-2007, 09:43 AM
#1
Honda-Tech Member
Thread Starter
Join Date: Aug 2003
Location: Greensburg, PA, USA
Posts: 1,873
Likes: 0
Received 0 Likes
on
0 Posts
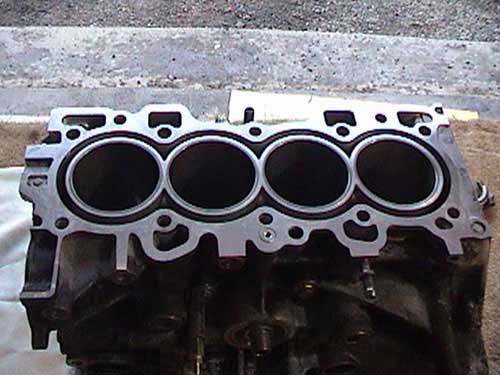
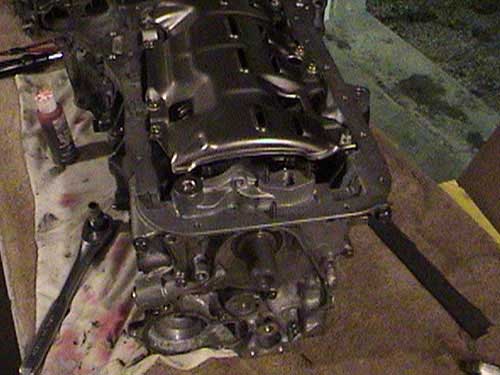
With the engine back from getting machined and cleaned, set the motor on a clean area.
Many motor shops will tell you which piston to use in which cylinder even though all cylinders and pistons should be the same size.
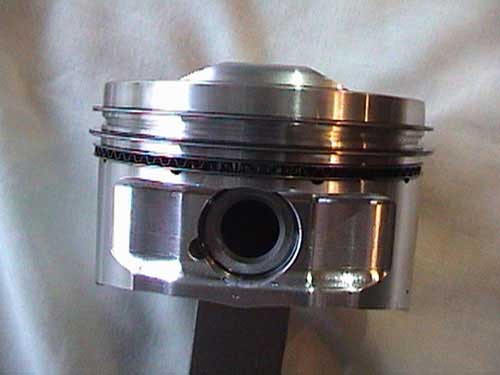
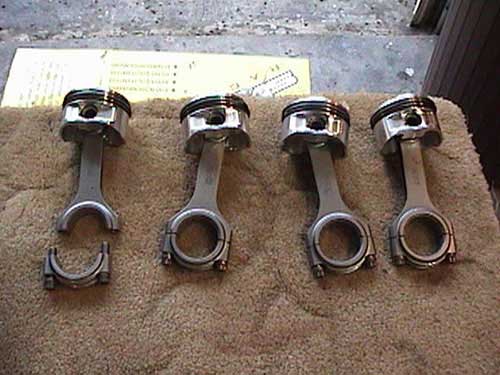
Make sure the wrist-pin is lubed and the gaps are placed correctly. Never put a cap inline with the pin or in a thrust area.
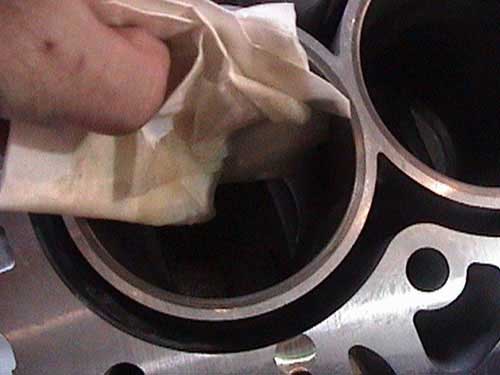
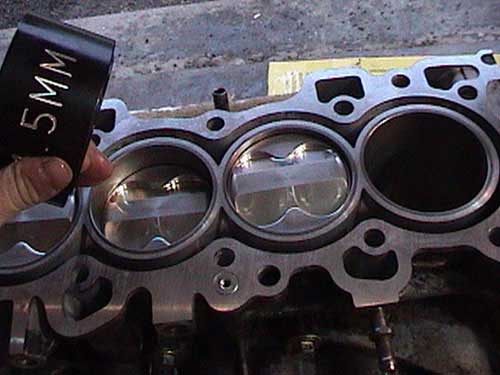
Get a rag and oil the cylinders heavily prior installing the pistons.
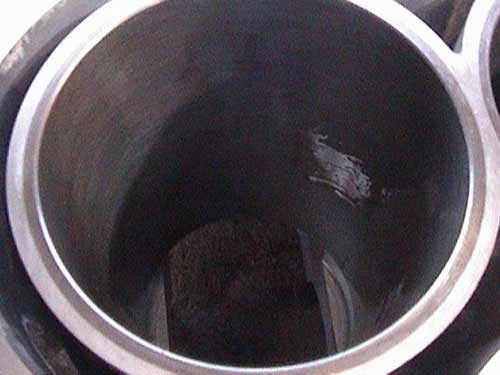
There should be plenty of oil on the cylinder walls.
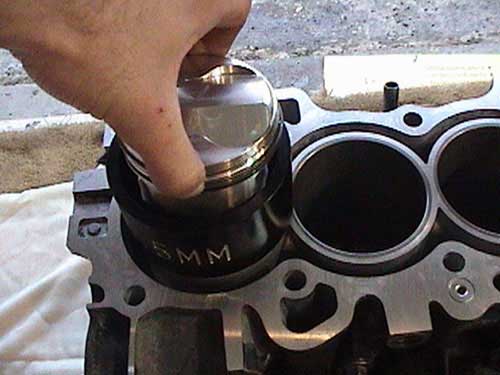
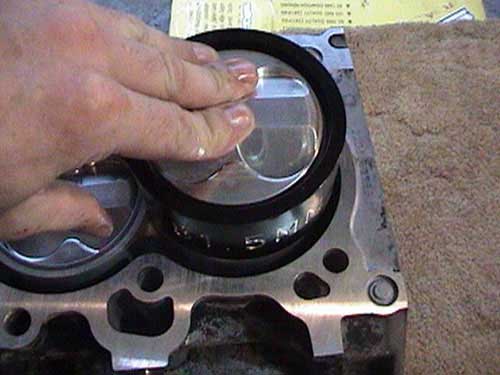
Take your ring compressor (I love my ARP one), oil the inside heavily and compress the rings on the piston.
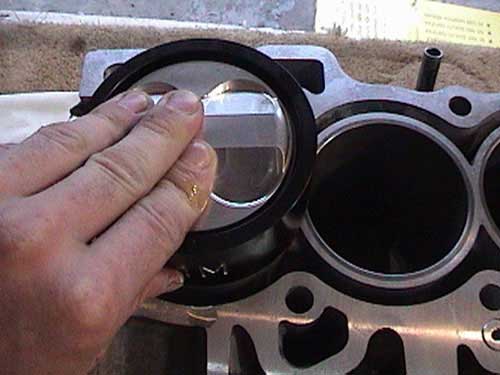
Push the piston into the cylinder gently, if a ring gets caught on the cylinder wiggle it around a little while pushing. Do not force it, it does not take much to break a ring.
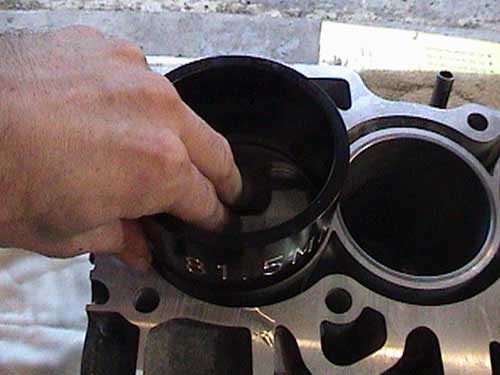
There she goes.
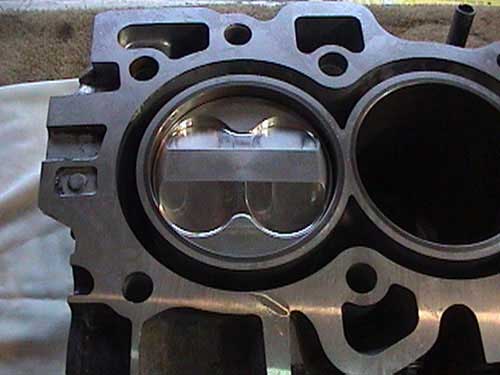
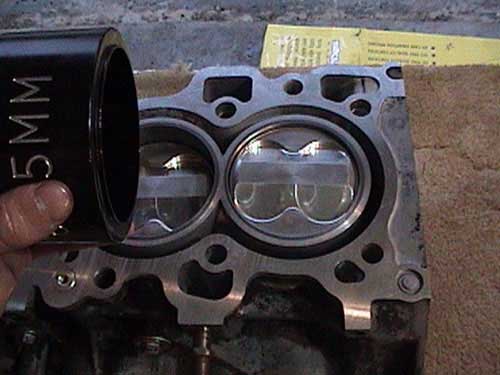
That is one done.
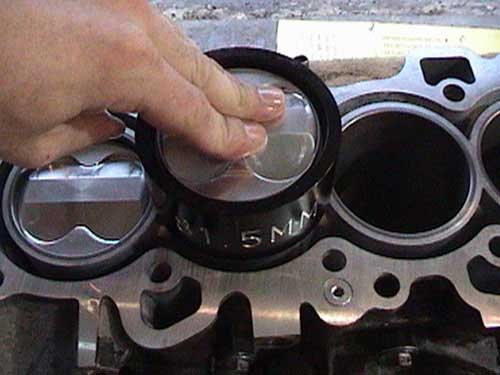
Repeat the process for the other 3, making sure that each cylinder and piston is well oiled, along with the ring compressor.
That is two done
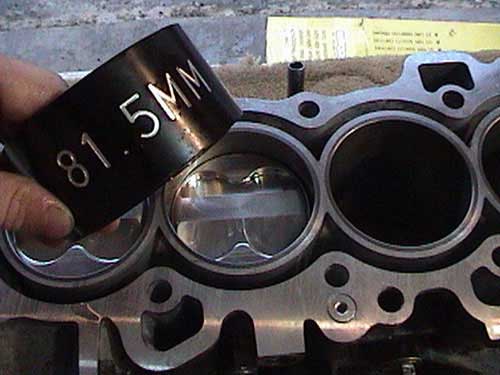
Pushing in the 3rd one
That is three done.
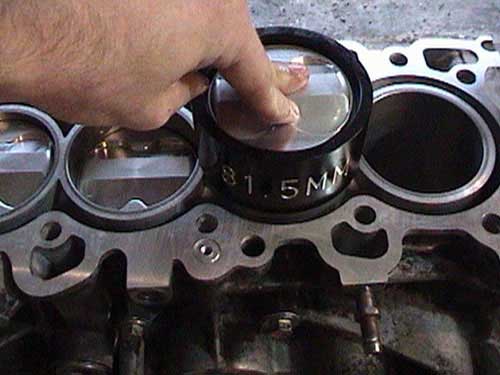
Pushing in the last one.
That is four done.
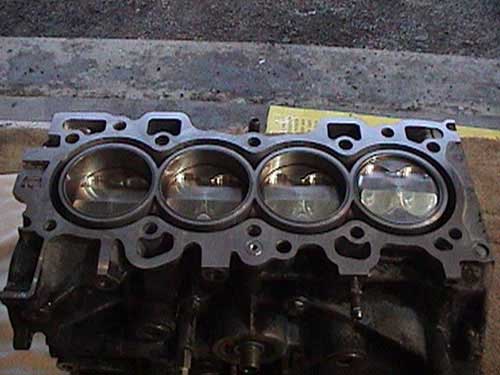
Well theres a half way built bottom end
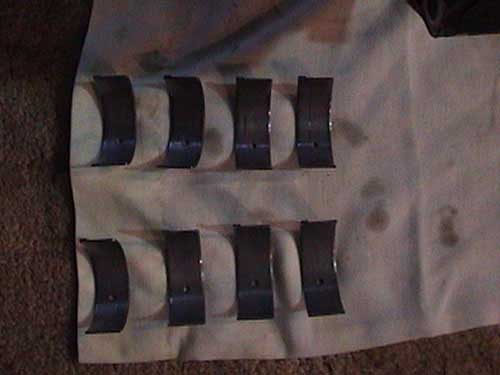
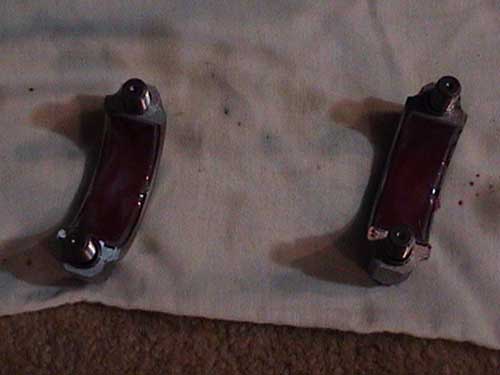
Laying out the rod bearings. There is not a difference between the upper or lower ones.

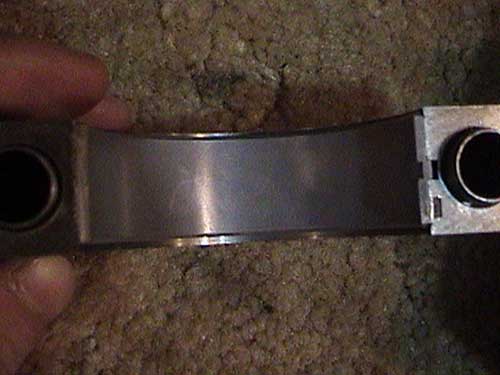
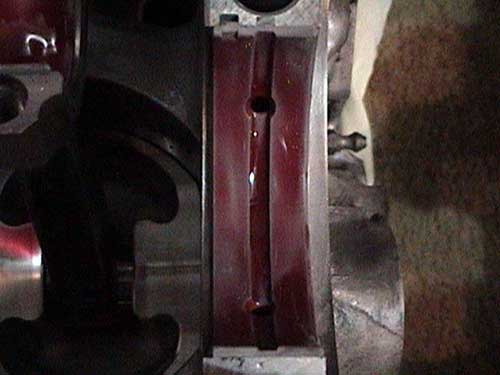
Here is a rod cap.
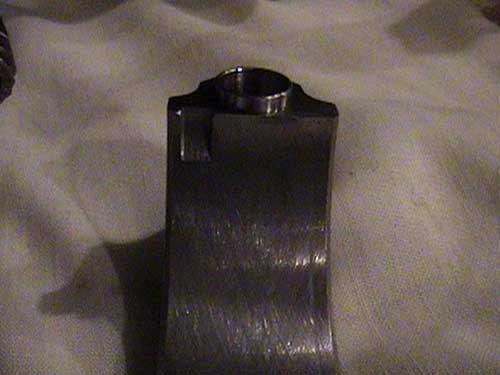
Notice the notch in the corner.
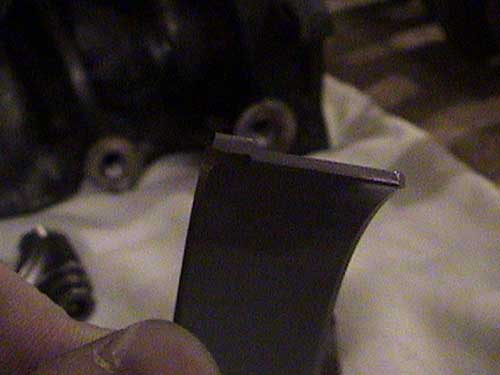
Notice the notch in the corner of the rod bearing.
Match the notches up and push the bearing into the rod cap.
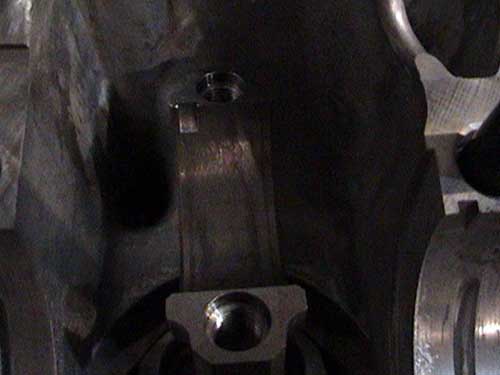
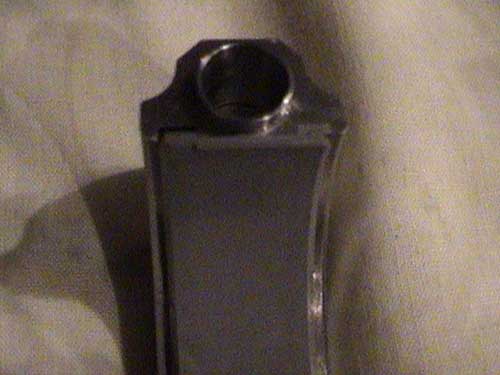
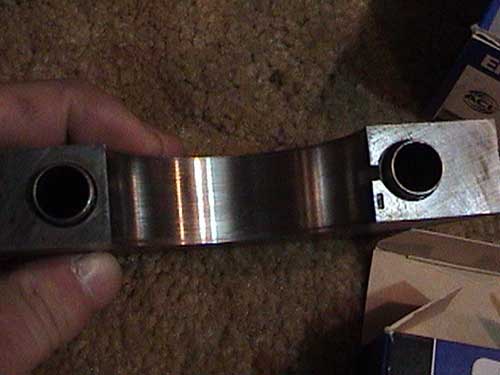
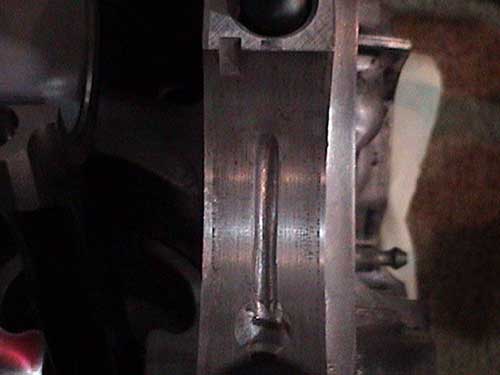
Here is the bottom of the rod. Once again, notice the notch.
Match the notches up and push the bearing into the rod
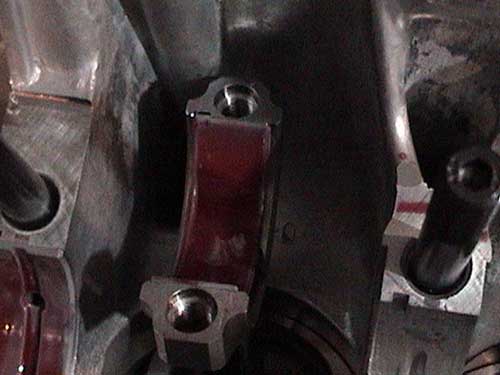
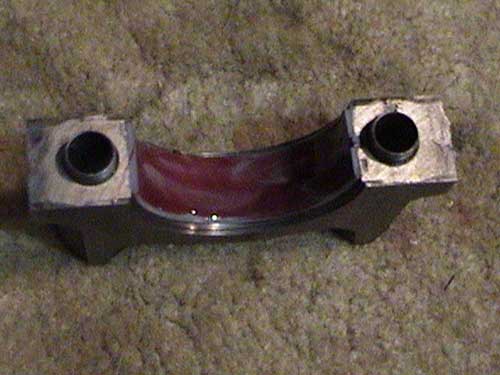
Lube up the rod bearings on the rods.
Lube up the rod bearings on the rod caps.

Here is the main bearing. On ACL bearings that have a U or an L to distinguish the upper and lower bearings. This is an upper bearing, meaning that it goes into the block.
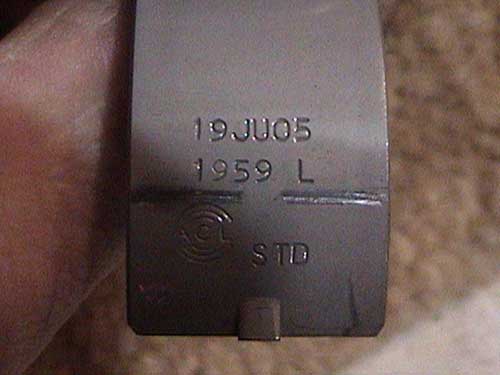
This is the lower bearing, meaning it goes on the main cap.
Here is a main cap. Once again there is that notch.
Line up the notches and push the bearing into the main cap.
Lube the bearing in the main cap.
On to the block. yep, there is that notch.
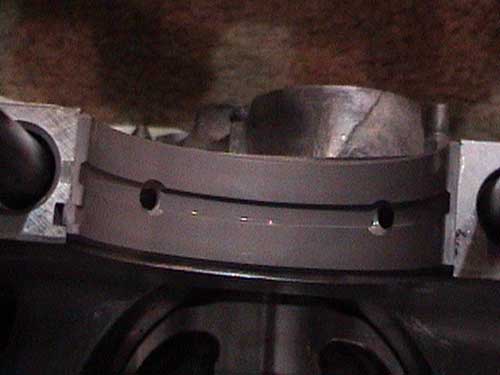
Match the notches up and push the bearing into the block.
Lube it up.
I also like putting more assembly lube on the wrist pin.
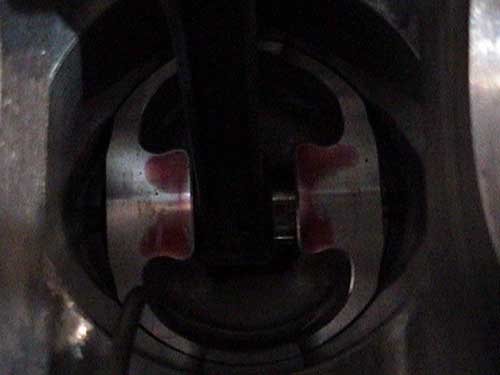
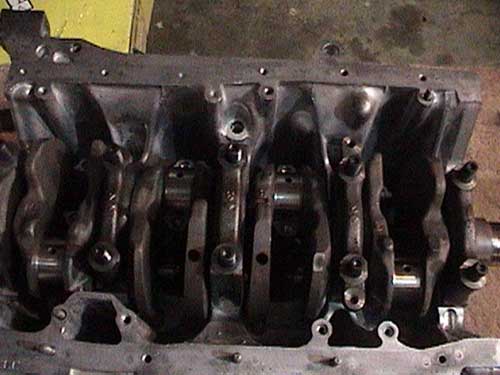
The thrust washers are inserted. If you put assembly lube on the back of them, they will stay in place while you get the crank in.
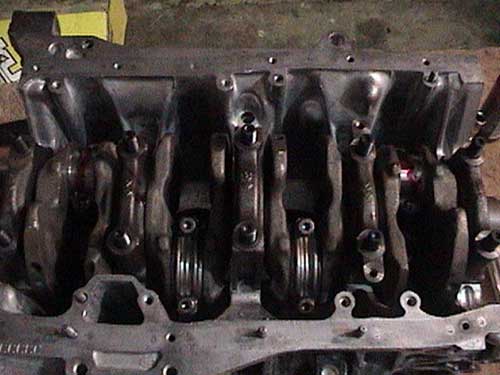
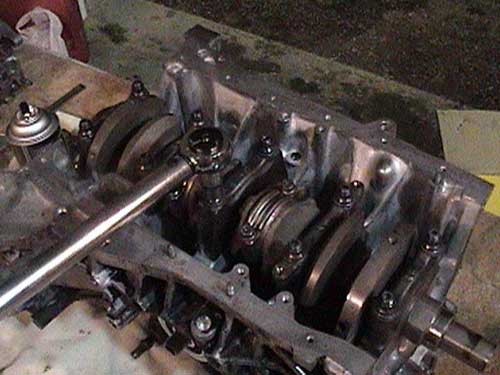
With everything lubed, its time to drop the crank in.
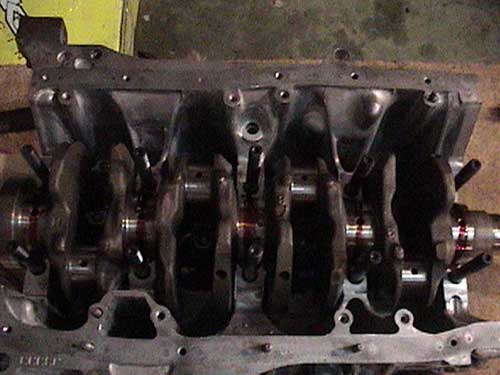
Looks good lets start bolting up things
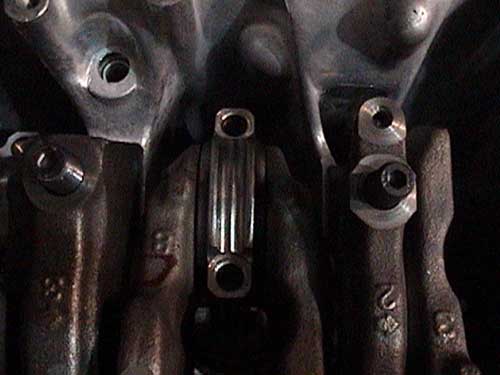
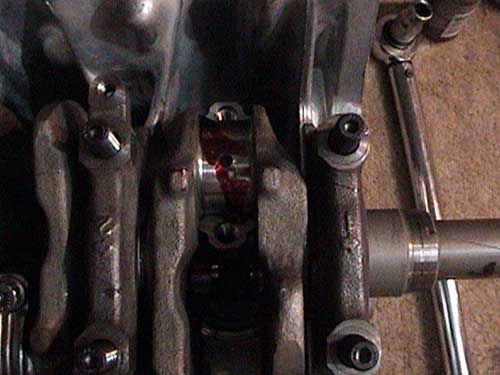
Rotate the crank until the 2 middle rods or 2 end rods line up.
In my case the middle rods lined up first.
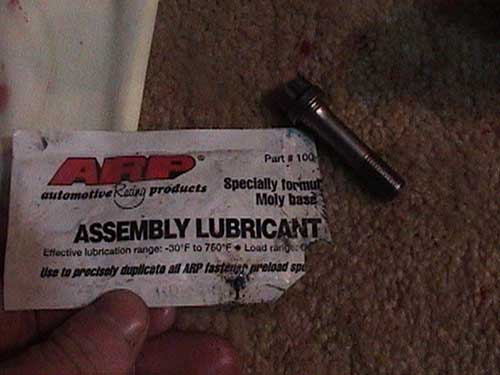
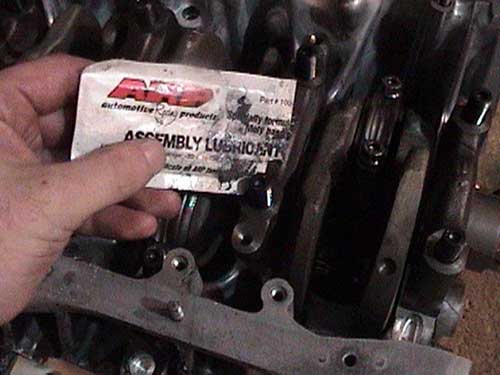
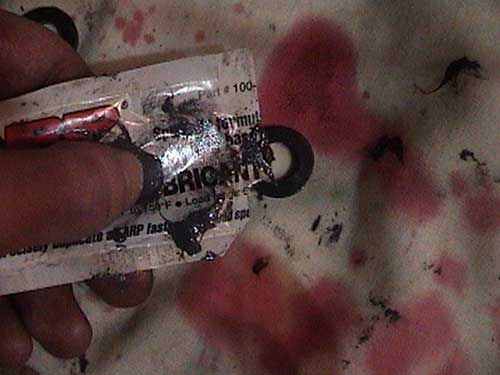
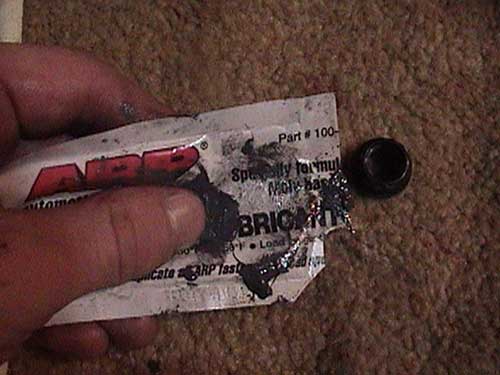
Lube the ARP bolt with ARP lube.
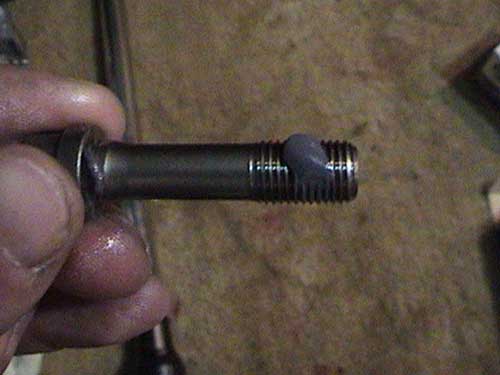
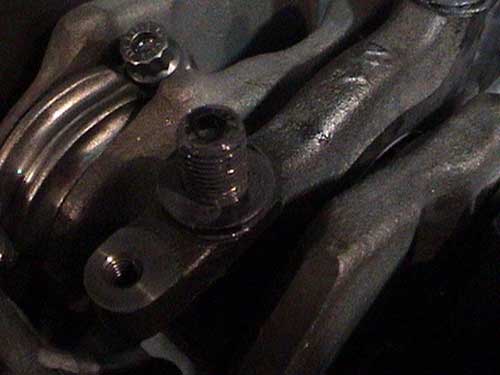
Looks good... now smear it on the threads
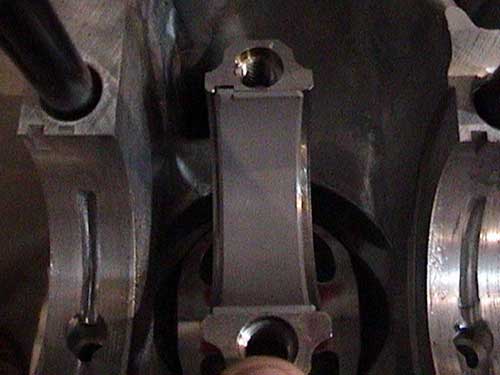
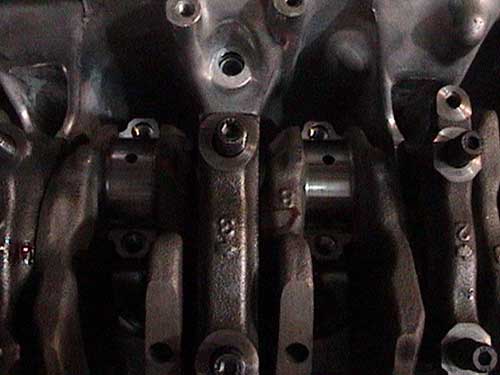
Place the rod cap on
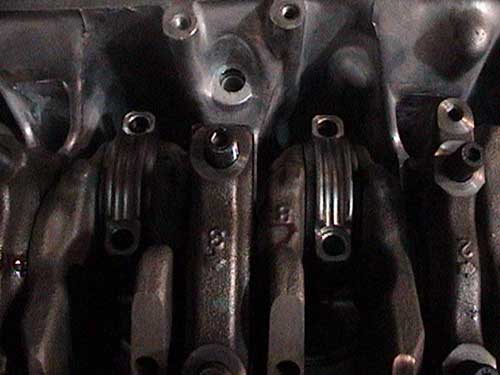
Well place both rod caps on
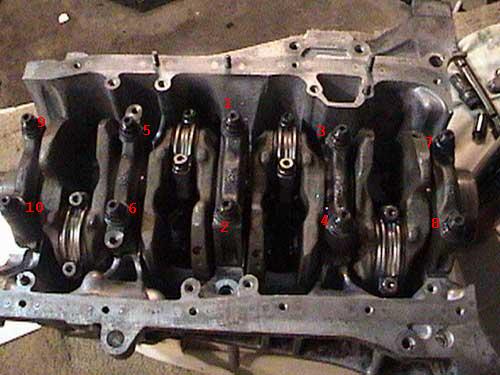
The correct order is labeled above
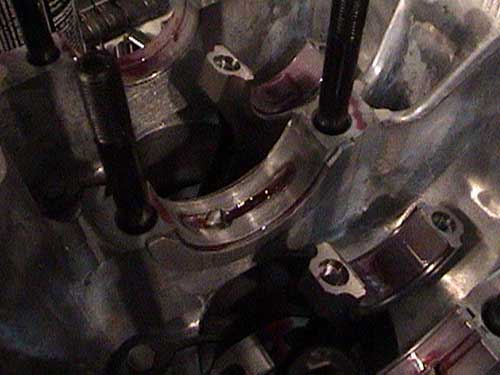
Torque them down according to specs. I always torque them first to half the final torque specs. then increase in increments of 10 until the specified torque is reached.
Still tightening.
Rotate the crank until the end rods line up.
Forgot to mention on the middle two, I like putting assembly lube on the crank too.
Tighten those rod caps up too.
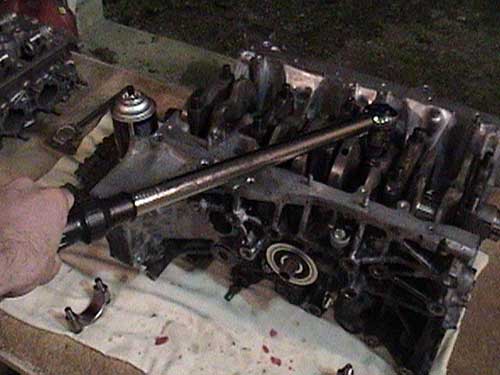
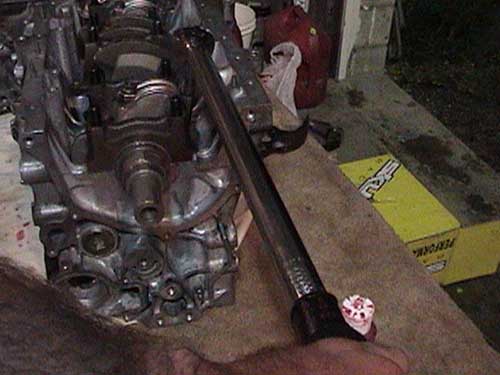
Well the rods are done, moving onto the mains.
Lube the ARP main bolts with ARP lube.
Lube the ARP main bolt washers with ARP lube. This will lessen the friction between the block and head of the bolt.
Lube the ARP main bolt nuts with ARP lube. Just put a little lube on the bottom side of the nut, to lessen friction.
Looks lubed to me.
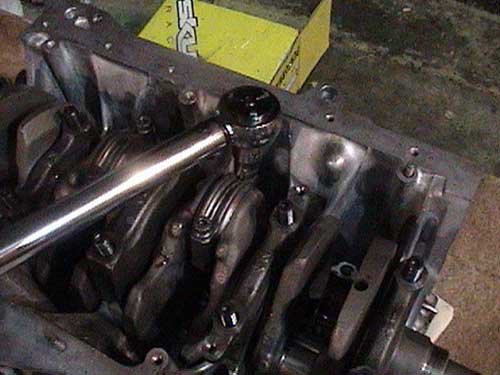
Start tightening the main bolts. I always torque them first to half the final torque specs. then increase in increments of 10 until the specified torque is reached. For example torque specs were 70. I started at 30 tightening all of them then 40 then 50 then 60 then 70. Then doubling checking them.
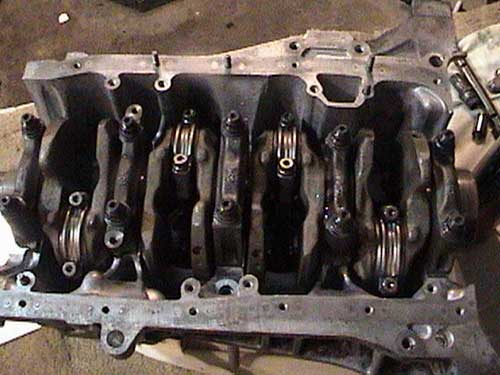
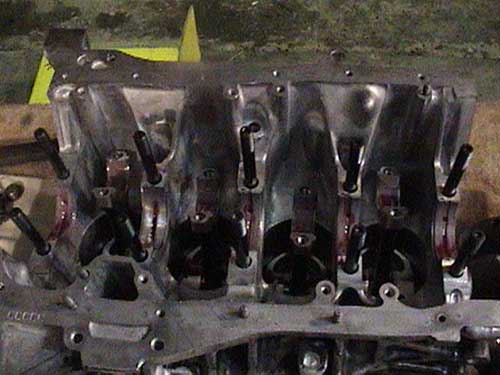
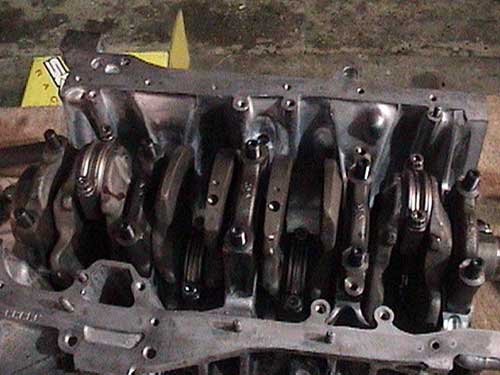
Well the crank and rods are bolted in.
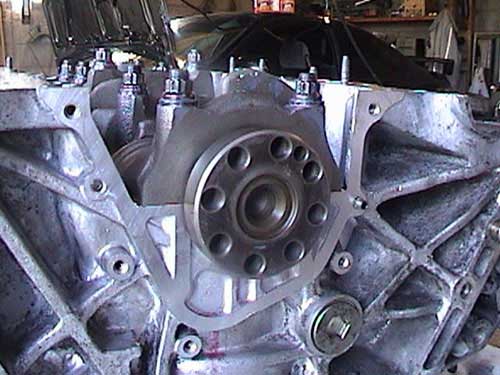
Rear main.
Rear main seal.
This stuff is pricey but well worth it.
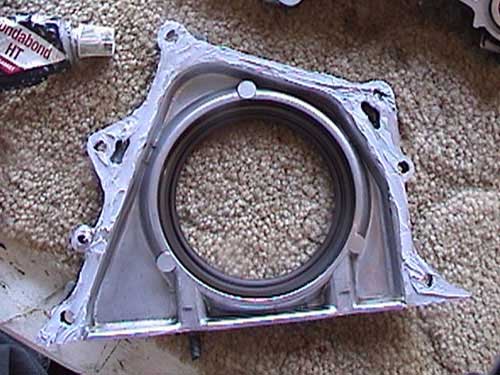
Rear main seal all Hondabond-ed up and ready.
Well the rear main is ready to roll.
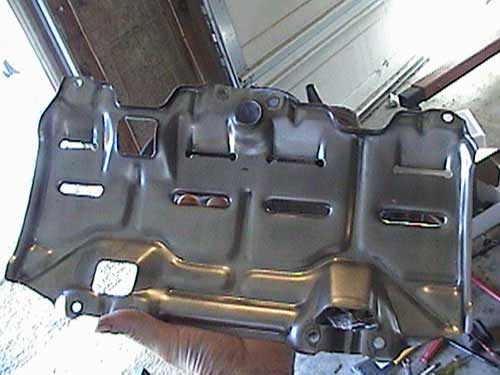
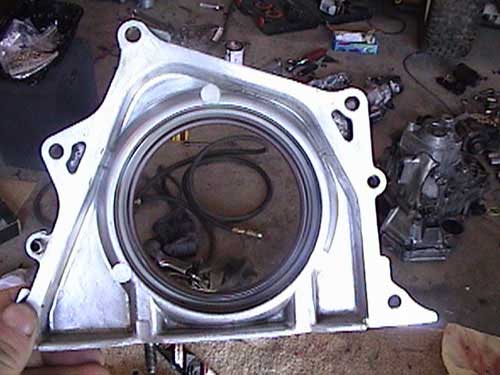
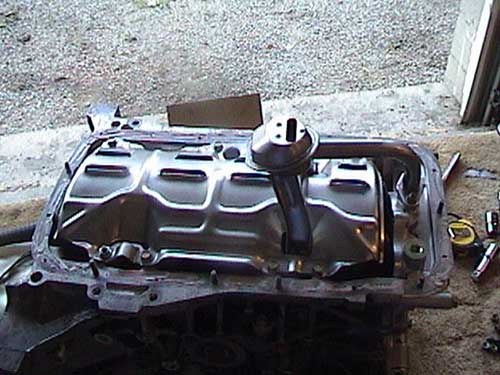
Scatter shield.

It goes here.
I like to Hondabond these bolts, since lock tight would be a bad idea.
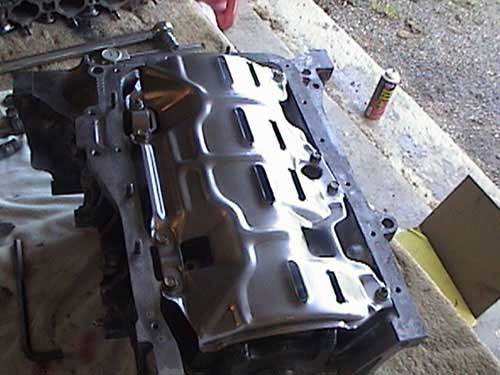
Well the scattershield is on.
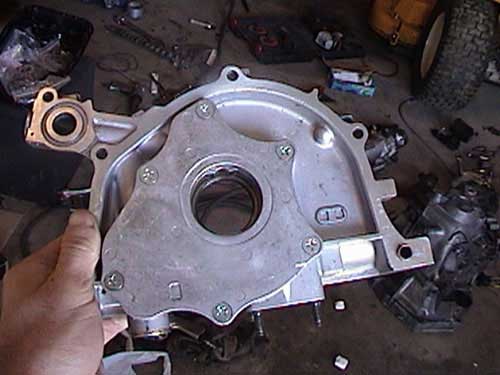
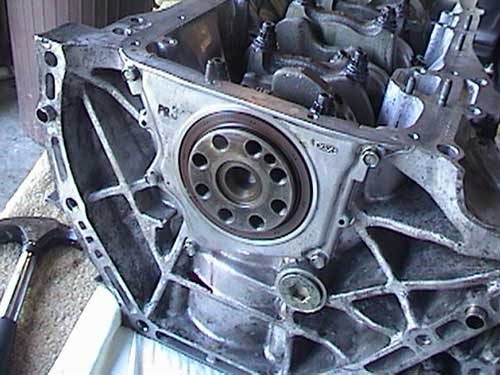
The oil pump all cleaned with brakekleen and ready to go.
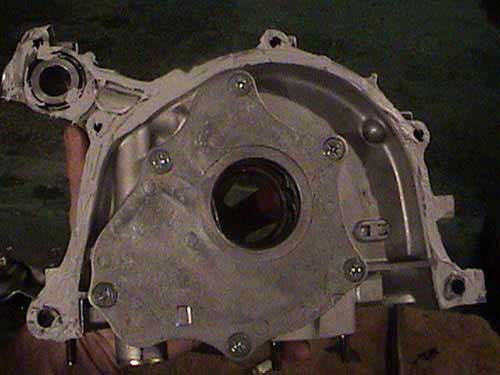
Hondabond-ed and ready to roll.

Yea that's where the oil pump is going... make sure the meeting surface is oil free.
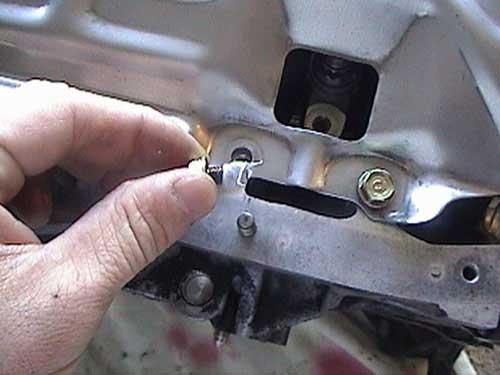
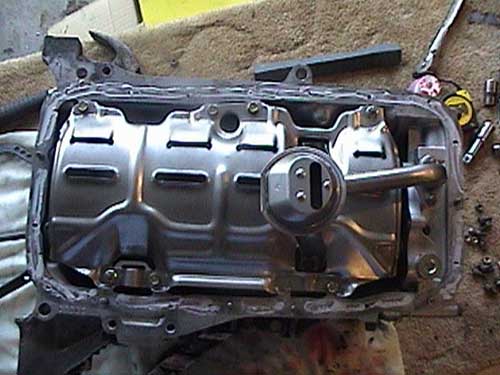
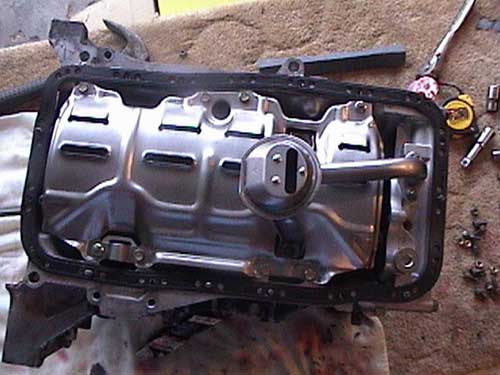
Now its time for the oil pick up.
Put the oil pick-up on.
I like to put some Hondabond on the block and oil pan.
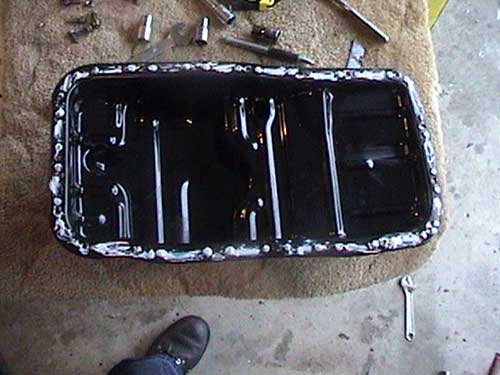
Just like that. It will push the gasket out some when tightening since it'll be slippy, so don't over tighten the bolts.
Line up the oil pan gasket on the block.
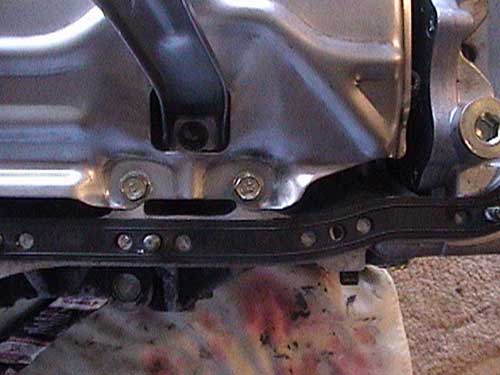
Like this.
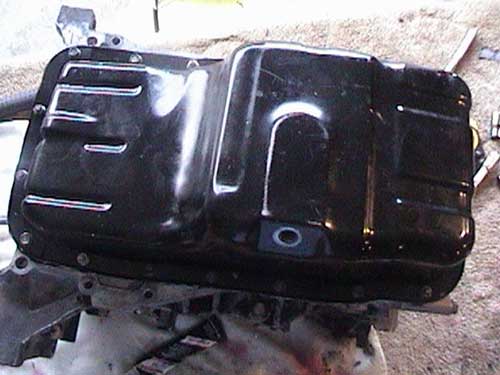
Then finish up by bolting the oil pan on. The bottom end is now done.
Last edited by doublejz; 11-20-2022 at 06:52 PM.
 03-16-2007, 09:57 AM
#2
Honda-Tech Member
Thread Starter
Join Date: Aug 2003
Location: Greensburg, PA, USA
Posts: 1,873
Likes: 0
Received 0 Likes
on
0 Posts
Note this is after everything has been plastiguaged and checked for clearances.

Trending Topics
03-16-2007, 10:39 AM
#8
Honda-Tech Member
iTrader: (2)
Join Date: Nov 2002
Location: Sin City, NV, usa
Posts: 5,166
Likes: 0
Received 0 Likes
on
0 Posts
nice write up! I think if you posted up the plastic gauging and how you came up with what bearings would help just a little bit more. But still a great write up non the less!! 
03-16-2007, 10:54 AM
#10
Join Date: May 2006
Location: in yo fridge eatin yo foodz
Posts: 1,567
Likes: 0
Received 0 Likes
on
0 Posts
Awesome Writeup dude! PM a mod, this should def go in the FAQ's! Awesome work!
03-16-2007, 10:57 AM
#11
Honda-Tech Member
<TABLE WIDTH="90%" CELLSPACING=0 CELLPADDING=0 ALIGN=CENTER><TR><TD>Quote, originally posted by doublejz »</TD></TR><TR><TD CLASS="quote">Note this is after everything has been plastiguaged and checked for clearances.</TD></TR></TABLE>
Seriously along with the ring gap and such. Those are the most important in building a motor. Also the machine shop wanted you to use which piston in which cylinder because they used that piston for that cylinder when they bored it.
Other then missing a few things this is a good write up
Seriously along with the ring gap and such. Those are the most important in building a motor. Also the machine shop wanted you to use which piston in which cylinder because they used that piston for that cylinder when they bored it.
Other then missing a few things this is a good write up
03-16-2007, 11:32 AM
#13
Member
Join Date: Apr 2006
Location: Relocating, usa
Posts: 1,620
Likes: 0
Received 0 Likes
on
0 Posts
<TABLE WIDTH="90%" CELLSPACING=0 CELLPADDING=0 ALIGN=CENTER><TR><TD>Quote, originally posted by RICE POLICE SIP »</TD></TR><TR><TD CLASS="quote">nice write up! I think if you posted up the plastic gauging and how you came up with what bearings would help just a little bit more. But still a great write up non the less!! </TD></TR></TABLE>
x2
</TD></TR></TABLE>x2
03-16-2007, 12:27 PM
#15
* B A N N E D *

Join Date: Oct 2006
Location: murr town, ca
Posts: 2,117
Likes: 0
Received 0 Likes
on
0 Posts
check for cleances with a feeler guage, also torque specs could be found under a del sol vtec trim or 99-00 civic em1 scatter tray= windage tray
03-16-2007, 02:21 PM
#16
Honda-Tech Member
Thread Starter
Join Date: Aug 2003
Location: Greensburg, PA, USA
Posts: 1,873
Likes: 0
Received 0 Likes
on
0 Posts
plastiguage > feeler guage
Specs vary depending on parts.
As shown in the pictures, I used ARP bolts. The del sol vtec trim torq is different then the ARP. Use the specs for the parts that you purchase.
Also, to be a real PIA you can do bolt stretches using a Rod-Bolt Stretch Gauge to be 100% perfect http://www.chevyhiperformance....info/
03-16-2007, 04:32 PM
#17
Honda-Tech Member
Thread Starter
Join Date: Aug 2003
Location: Greensburg, PA, USA
Posts: 1,873
Likes: 0
Received 0 Likes
on
0 Posts
move to FAQ...
Modified by doublejz at 8:51 PM 3/16/2007
Modified by doublejz at 8:51 PM 3/16/2007
03-16-2007, 04:46 PM
#18
Honda-Tech Member
<TABLE WIDTH="90%" CELLSPACING=0 CELLPADDING=0 ALIGN=CENTER><TR><TD>Quote, originally posted by doublejz »</TD></TR><TR><TD CLASS="quote">sticky me</TD></TR></TABLE>
No offense but i dont think there going to sticky this. If you PM Bense hell update the first page list of FAQs but it wont be sticky. Theres alot of good write ups out there that other people have done that if we stickied them all we wouldnt have a first page. Nothing personal.
No offense but i dont think there going to sticky this. If you PM Bense hell update the first page list of FAQs but it wont be sticky. Theres alot of good write ups out there that other people have done that if we stickied them all we wouldnt have a first page. Nothing personal.
03-16-2007, 04:48 PM
#19

Join Date: Oct 2006
Location: USA
Posts: 1,745
Likes: 0
Received 0 Likes
on
0 Posts
<TABLE WIDTH="90%" CELLSPACING=0 CELLPADDING=0 ALIGN=CENTER><TR><TD>Quote, originally posted by Luserkid »</TD></TR><TR><TD CLASS="quote">
No offense but i dont think there going to sticky this. If you PM Bense hell update the first page list of FAQs but it wont be sticky. Theres alot of good write ups out there that other people have done that if we stickied them all we wouldnt have a first page. Nothing personal. </TD></TR></TABLE>
Yea true that,he wont sticky it,but im sure hell put it on the FAQs
03-17-2007, 07:15 PM
#22
Honda-Tech Member
Join Date: Jan 2006
Location: KillahKallih, Ca
Posts: 2,564
Likes: 0
Received 0 Likes
on
0 Posts
nice write up man....if anyone wants another one with more details....check this GSR BLOCK ASSEMBLE
http://www.evans-tuning.com/tech1.html
http://www.evans-tuning.com/tech1.html
03-17-2007, 08:47 PM
#23
Join Date: May 2006
Location: in yo fridge eatin yo foodz
Posts: 1,567
Likes: 0
Received 0 Likes
on
0 Posts
<TABLE WIDTH="90%" CELLSPACING=0 CELLPADDING=0 ALIGN=CENTER><TR><TD>Quote, originally posted by B18CivicEH2 »</TD></TR><TR><TD CLASS="quote">nice write up man....if anyone wants another one with more details....check this GSR BLOCK ASSEMBLE
http://www.evans-tuning.com/tech1.html</TD></TR></TABLE>
Wow, that was really nice! Awesome write up by those guys. The guys at Evans-tuning are amazing.
http://www.evans-tuning.com/tech1.html</TD></TR></TABLE>
Wow, that was really nice! Awesome write up by those guys. The guys at Evans-tuning are amazing.
03-18-2007, 08:58 AM
#25

Join Date: Jan 2006
Location: Fakeville, USA, USA
Posts: 838
Likes: 0
Received 0 Likes
on
0 Posts
One major problem here.
Torquing down in 5 ft-lbs increments is a very bad and unsafe practice. The break-away torque on the bolt/nut is in most cases more than 5 ft-lbs.
Also, never put hondabond over the entire oil pan gasket. You are gonna get leaks for sure. The steel pan will flex hondabond doesn't make for a good fit when it does flex. It should only be put in the corners of the oil pump and rear cover.
Other than that, good job.