
4th gen brake swap: How To
 12-01-2008, 10:34 AM
#1
Junior Member
Thread Starter
Join Date: Oct 2007
Location: grand rapids, mi, us
Posts: 335
Likes: 0
Received 0 Likes
on
0 Posts
a few months ago i did this and i finally have the time to do a write up, i know there are other write-up's on brake swaps, bu a lot of them lacked specific information and pictures. so ill do one here.
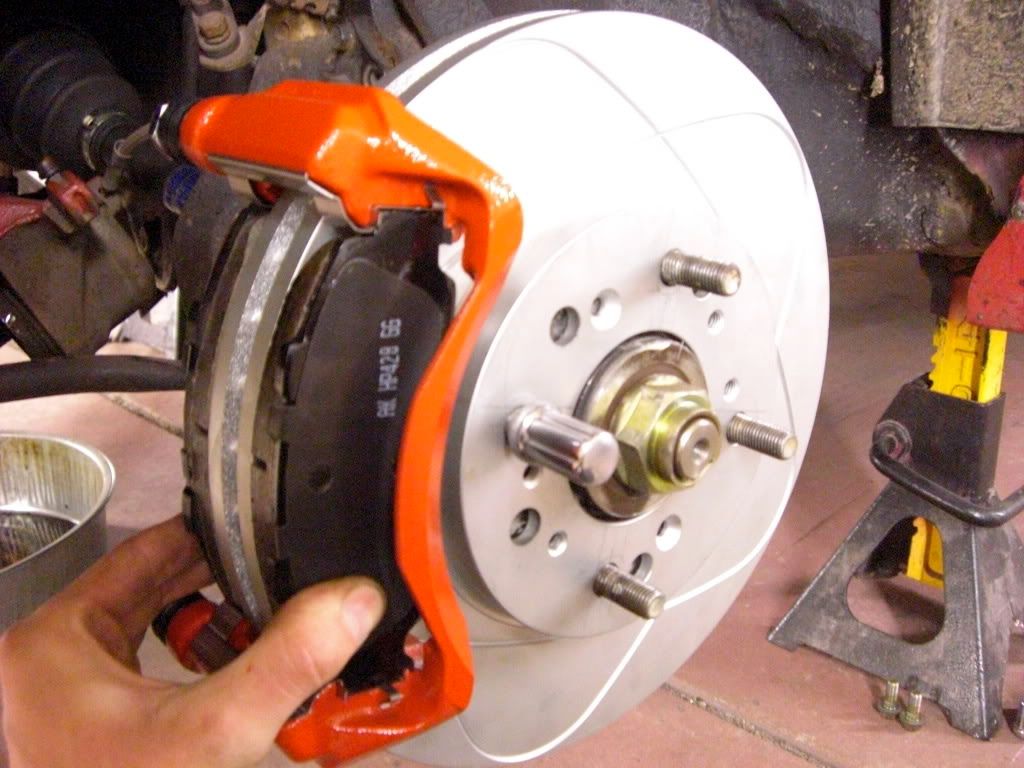
one of my factory calipers was sticking so i decided to swap to larger rotors and dual piston calipers from a 1995 Acura Legend
these are the parts you need to order (all of them are from a 1995 Acura Legend GS)
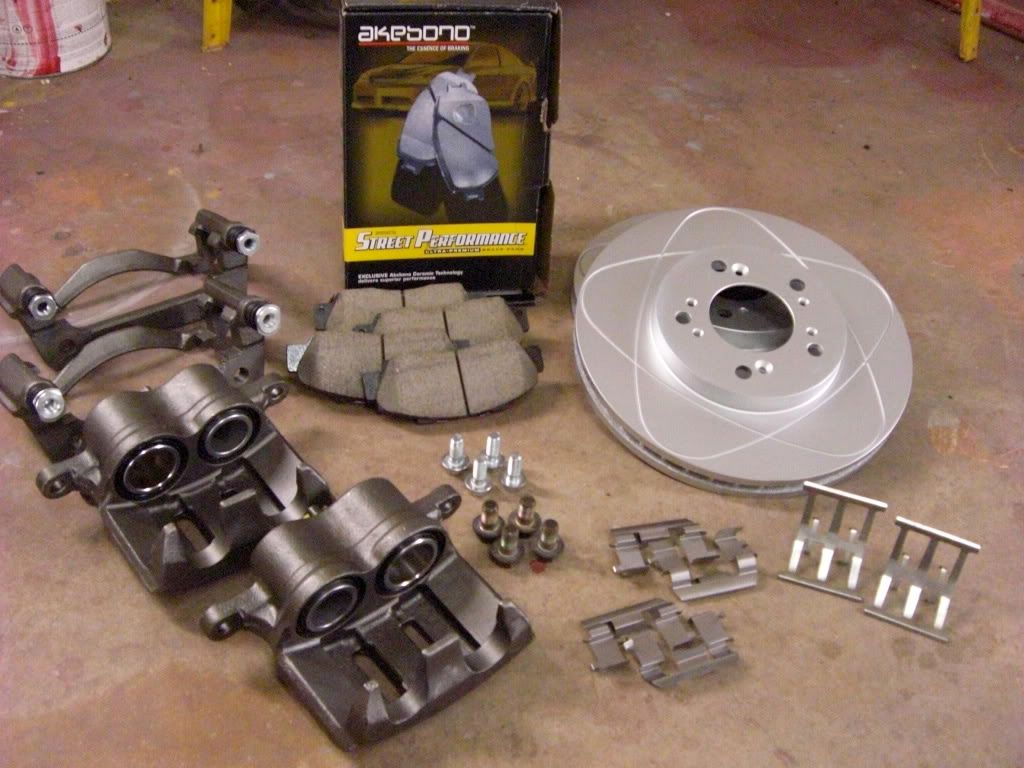
-Calipers, semi loaded with pad shims springs and brackets (rock auto- $87 each with 30 core refund)
-brake pads Akebono street ($78 tire rack)
-Rotors ATE slotted rotors ($44 each)
total cost-$340 (without core refund, $280 with core refund)
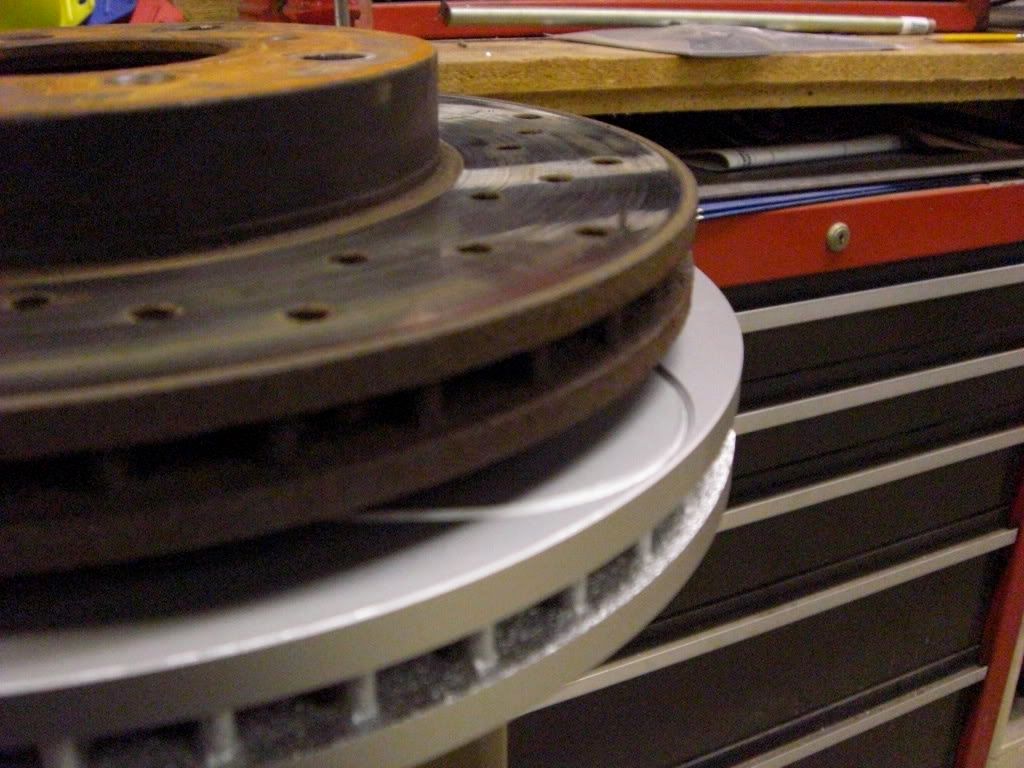
the rotors are larger in diameter and in thickness too, the diameter is the same as the VTEC rotors, but they are about 5mm thicker
step 1: remove your old caliper, rotor, and pads
step 2: clean all mating surfaces and be sure all surfaces are free from debris.
step 3: either you can do this, or take it to a local machine shop and they will do it for you for cheap.
the legend rotors are 5 bolt and need to have three more holes drilled to make them fit the 4X114 hubs of our prelude's.
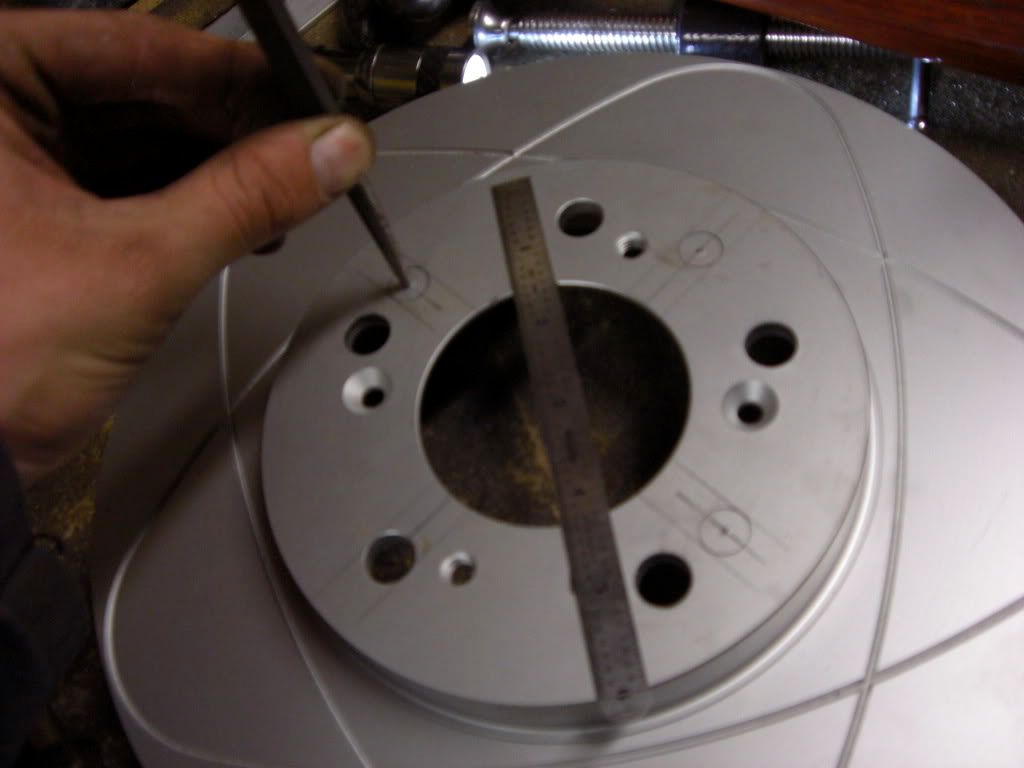
i did this by carefully measuring with a metric ruler and using my old 4 bolt rotor as a guide.
center-punch each center once you are sure thats where the hole needs to be drilled.
use a 1/8" drill bit and a drill press to start drilling, the step it up until you get the hole opened up to 1/2"
test fit the rotor and it should go on the hub with relative ease, if its too tight use a round rat-tail file to open the holes up a bit.
this step sounds difficult but if you have a drill press and patience it will turn out great.
step 4: install caliper brackets on knuckles with factory prelude bolts
step 5: install pad shims, and brake pads
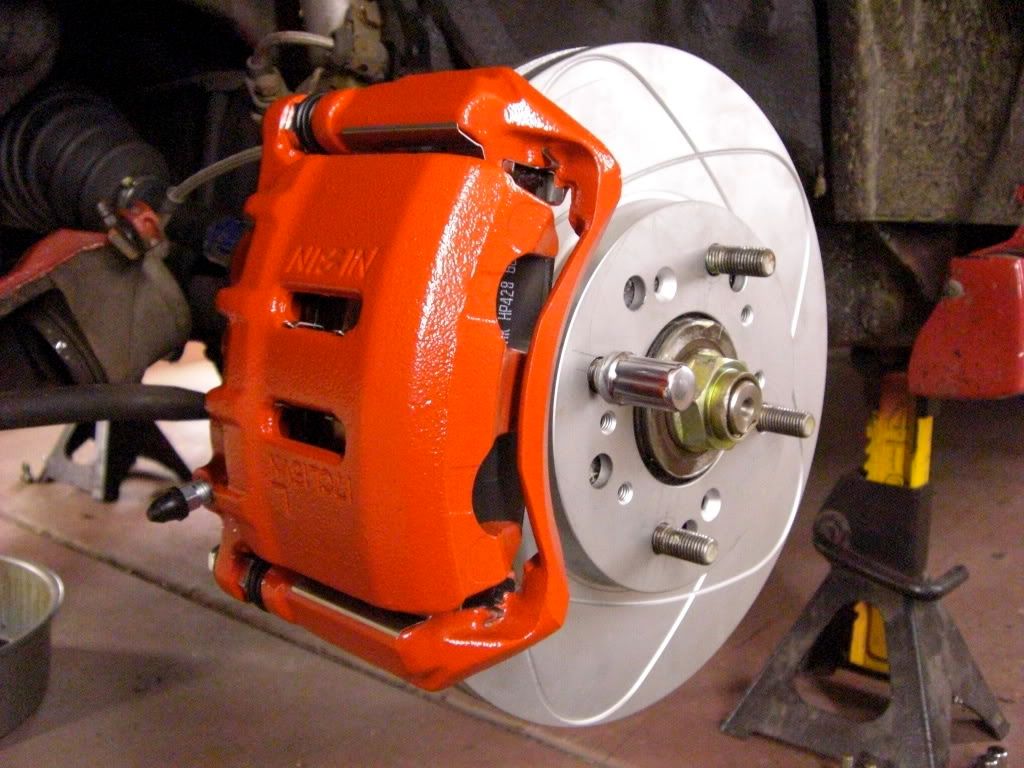
step 6: install calipers on OPPOSITE sides, if you did this correctly the bleeder screw will be on the bottom.
step 7: re-install brake line with NEW crush washers
step 8: remove bottom caliper bolt and swing the passenger side caliper so the bleeder screw is on top.
place a 2X4 piece of wood so the pistons have something to push
proceed to bleed brakes as normal. the reason for flipping the caliper up is so all air can br properly bled from the calipers.
repeat the process for the driver side.
NOTE: this is a good time to up-grade your brake fluid too, just flush your rear calipers too, this is optional
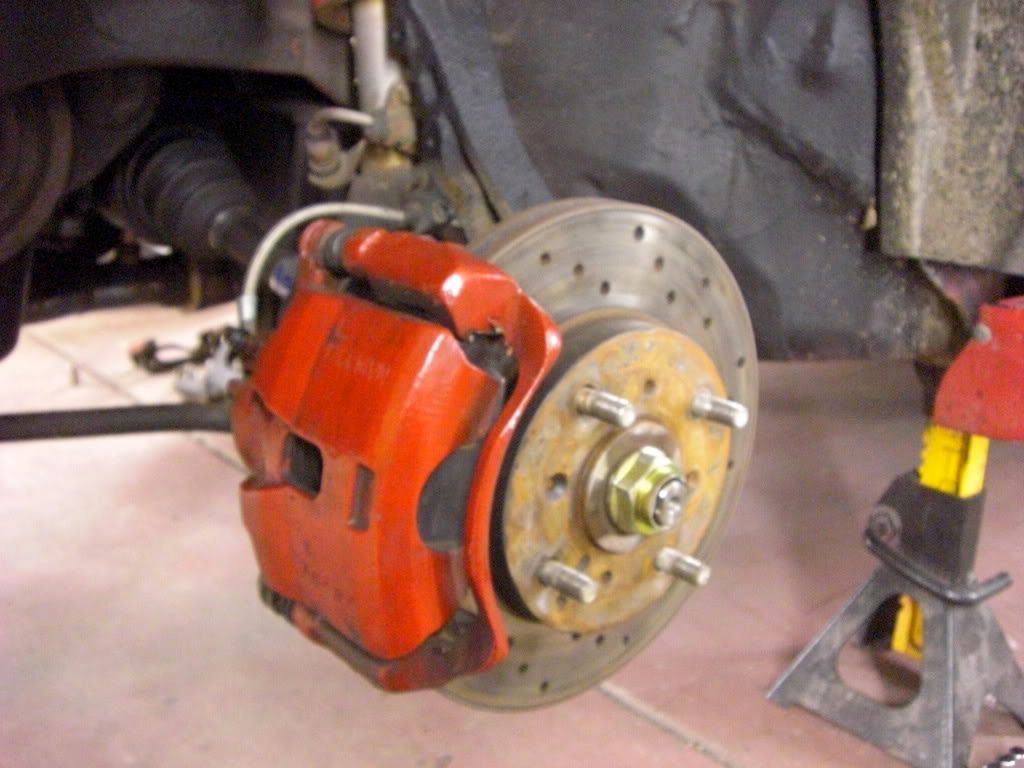
step 9: re-install both calipers and re-check all bolts, check for any leaks
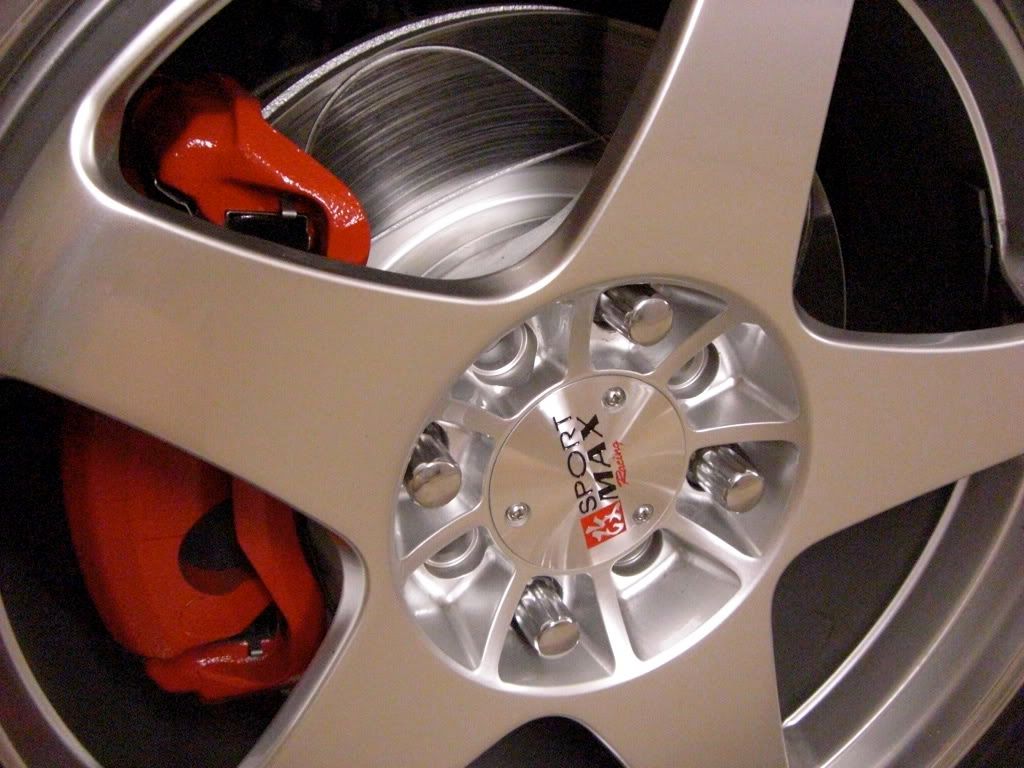
step 10: install wheels and follow the proper break-in procedure for your new pads/rotors
if i missed anything please let me know and i will edit it.
and after driving on it for about 2 months the brakes are substantially better in every way, the "Akebono street" brake pads are amazing, great street performance with allmost NO dust! the rotors are quiet and absolutely no vibrations. this swap is completely worth the money and the performance is great.
one of my factory calipers was sticking so i decided to swap to larger rotors and dual piston calipers from a 1995 Acura Legend
these are the parts you need to order (all of them are from a 1995 Acura Legend GS)
-Calipers, semi loaded with pad shims springs and brackets (rock auto- $87 each with 30 core refund)
-brake pads Akebono street ($78 tire rack)
-Rotors ATE slotted rotors ($44 each)
total cost-$340 (without core refund, $280 with core refund)
the rotors are larger in diameter and in thickness too, the diameter is the same as the VTEC rotors, but they are about 5mm thicker
step 1: remove your old caliper, rotor, and pads
step 2: clean all mating surfaces and be sure all surfaces are free from debris.
step 3: either you can do this, or take it to a local machine shop and they will do it for you for cheap.
the legend rotors are 5 bolt and need to have three more holes drilled to make them fit the 4X114 hubs of our prelude's.
i did this by carefully measuring with a metric ruler and using my old 4 bolt rotor as a guide.
center-punch each center once you are sure thats where the hole needs to be drilled.
use a 1/8" drill bit and a drill press to start drilling, the step it up until you get the hole opened up to 1/2"
test fit the rotor and it should go on the hub with relative ease, if its too tight use a round rat-tail file to open the holes up a bit.
this step sounds difficult but if you have a drill press and patience it will turn out great.
step 4: install caliper brackets on knuckles with factory prelude bolts
step 5: install pad shims, and brake pads
step 6: install calipers on OPPOSITE sides, if you did this correctly the bleeder screw will be on the bottom.
step 7: re-install brake line with NEW crush washers
step 8: remove bottom caliper bolt and swing the passenger side caliper so the bleeder screw is on top.
place a 2X4 piece of wood so the pistons have something to push
proceed to bleed brakes as normal. the reason for flipping the caliper up is so all air can br properly bled from the calipers.
repeat the process for the driver side.
NOTE: this is a good time to up-grade your brake fluid too, just flush your rear calipers too, this is optional
step 9: re-install both calipers and re-check all bolts, check for any leaks
step 10: install wheels and follow the proper break-in procedure for your new pads/rotors
if i missed anything please let me know and i will edit it.
and after driving on it for about 2 months the brakes are substantially better in every way, the "Akebono street" brake pads are amazing, great street performance with allmost NO dust! the rotors are quiet and absolutely no vibrations. this swap is completely worth the money and the performance is great.
Last edited by h23prelude; 12-01-2008 at 11:38 AM.
 12-01-2008, 12:07 PM
#5
Honda-Tech Member
Join Date: Aug 2006
Location: ok, usa
Posts: 314
Likes: 0
Received 0 Likes
on
0 Posts
12-01-2008, 12:50 PM
#6
Honda-Tech Member
wow, that's a lot cheaper than i was expecting... for everything. i'm sure there are a million pad choices from $20 to $100+ so that can fluctuate the price a bit. Someone should FAQ this and make sure the pics get hosted so years down the line we can see them
Trending Topics
12-01-2008, 08:43 PM
#8
Honda-Tech Member
iTrader: (6)
Join Date: Jul 2005
Location: Southaven, MS
Posts: 3,776
Likes: 0
Received 0 Likes
on
0 Posts
No Prelude has 12" Rotors stock..
The Prelude (4thGen) S and Si have 10.2" Rotors and are 23mm thick.
The Prelude (4thGen) VTEC have 11.1" Rotors and are also 23mm thick.
The Prelude 5thGen has 11.1" Rotors are are 25mm thick.
The Legend GS Rotors are 11.1" and are 28mm thick.
I have the info posted here in my S2k/RSX Brake Swap thread.
https://honda-tech.com/forums/honda-prelude-4/new-oem-brake-upgrade-option-s2000-rsx-type-s-installed-tested-reviewed-2248376/
OP, did you happen to weigh the Pistons before installing them? And also, did you happen to measure the size of the pistons?
12-01-2008, 09:35 PM
#9
Junior Member
Thread Starter
Join Date: Oct 2007
Location: grand rapids, mi, us
Posts: 335
Likes: 0
Received 0 Likes
on
0 Posts
the piston measurements are 42mm and 38mm, i was planning on weighing the difference but it didn't feel like much of a difference between the single piston and dual piston, and i don't have a very accurate scale therefore the numbers would be inaccurate.
i'd be suprised if its more then 5-8 lbs more then stock, perhaps more with the brake fluid.
i'd be suprised if its more then 5-8 lbs more then stock, perhaps more with the brake fluid.
12-02-2008, 08:19 PM
#10
Honda-Tech Member
iTrader: (6)
Join Date: Jul 2005
Location: Southaven, MS
Posts: 3,776
Likes: 0
Received 0 Likes
on
0 Posts
Oh really? I had read that they were 36mm and 38mm where the NSX Pistons were 34mm and 36mm.
You're sure they are 38mm and 42mm?? I'll have to change it in my thread then. Thanks for the info.
You're sure they are 38mm and 42mm?? I'll have to change it in my thread then. Thanks for the info.
12-03-2008, 03:47 AM
#13
Honda-Tech Member
it is a bit misleading in the write-up he says install on opposite sides, but clearly it shows the caliper marked L on the left side of the car..
12-03-2008, 09:58 AM
#14
Honda-Tech Member
iTrader: (6)
Join Date: Jul 2005
Location: Southaven, MS
Posts: 3,776
Likes: 0
Received 0 Likes
on
0 Posts
The Legend Calipers have to be installed different on the Prelude.. The orientation of how the Calipers sits is different.
On the Legend, the Caliper sits on the back side of the Rotor, closer to the door.
On the Prelude, the Caliper sits in front of the Rotor, closer to the nose of the car.
So for the Legend Caliper to work on the Prelude how it was designed to, we have to swap sides they were intended to be on. This ends up putting the bleeder screws on the bottom on the Prelude, where they're on the top on the Legend.
Also the Smaller Piston should hit the Rotor first, then the Larger Piston. So the Smaller Piston sits on top when oriented on the Prelude.
12-03-2008, 05:45 PM
#15
Junior Member
Thread Starter
Join Date: Oct 2007
Location: grand rapids, mi, us
Posts: 335
Likes: 0
Received 0 Likes
on
0 Posts
the rear brakes on our preludes are properly sized and oriented for the E-brake cables, so a modified or different caliper would complicate things even more.
if you wanted an auto-X or track prelude and needed every advantage possible then it might be worth swapping the rear brakes to a larger, better size.
for all us street drivers, throw some quality pads and fresh rotors and they'll work great
12-03-2008, 07:34 PM
#16
Honda-Tech Member
iTrader: (6)
Join Date: Jul 2005
Location: Southaven, MS
Posts: 3,776
Likes: 0
Received 0 Likes
on
0 Posts
I've looked and discussed a larger rear brake setup before with someone, but there's nothing that would directly swap from another car onto the Prelude without some custom work..
There might be aftermarket setups, but I'm not sure..
There might be aftermarket setups, but I'm not sure..
12-03-2008, 08:52 PM
#17
Honda-Tech Member
Join Date: Sep 2007
Location: Evansville, IN, USA
Posts: 429
Likes: 0
Received 0 Likes
on
0 Posts
The Legend Calipers have to be installed different on the Prelude.. The orientation of how the Calipers sits is different.
On the Legend, the Caliper sits on the back side of the Rotor, closer to the door.
On the Prelude, the Caliper sits in front of the Rotor, closer to the nose of the car.
So for the Legend Caliper to work on the Prelude how it was designed to, we have to swap sides they were intended to be on. This ends up putting the bleeder screws on the bottom on the Prelude, where they're on the top on the Legend.
Also the Smaller Piston should hit the Rotor first, then the Larger Piston. So the Smaller Piston sits on top when oriented on the Prelude.
On the Legend, the Caliper sits on the back side of the Rotor, closer to the door.
On the Prelude, the Caliper sits in front of the Rotor, closer to the nose of the car.
So for the Legend Caliper to work on the Prelude how it was designed to, we have to swap sides they were intended to be on. This ends up putting the bleeder screws on the bottom on the Prelude, where they're on the top on the Legend.
Also the Smaller Piston should hit the Rotor first, then the Larger Piston. So the Smaller Piston sits on top when oriented on the Prelude.
12-04-2008, 04:48 AM
#19
Honda-Tech Member
Join Date: Sep 2007
Location: Evansville, IN, USA
Posts: 429
Likes: 0
Received 0 Likes
on
0 Posts
12-04-2008, 05:26 AM
#20
Honda-Tech Member
Nice write up, H23Prelude. I wanted to do this years ago but I never could find a GS in the bone yard.
Now I have a firend that has some big *** Willwood aluminum calipers I might be able to grab. If that's the case I'll install some S2000 rotors after redrilling them to 4x100.
BTW MLBZ521, thanks for your other brake install thread. I'll probably use it later on when I upgrade.
Pirate
Now I have a firend that has some big *** Willwood aluminum calipers I might be able to grab. If that's the case I'll install some S2000 rotors after redrilling them to 4x100.
BTW MLBZ521, thanks for your other brake install thread. I'll probably use it later on when I upgrade.
Pirate
12-04-2008, 07:17 AM
#21
Honda-Tech Member
Join Date: Feb 2006
Location: A.T.L., Ga.
Posts: 245
Likes: 0
Received 0 Likes
on
0 Posts
Powerslot makes a rear brake upgrade, but in my opinion the cost isn't worth it. I've seen people use the NSX rear brake setup before but that's just as costly. Like it was previously said, a great set of pads, and a good rotor with some SS lines and new Dot 4 fluid will be more than enough.
12-04-2008, 10:35 AM
#23
Honda-Tech Member
iTrader: (6)
Join Date: Jul 2005
Location: Southaven, MS
Posts: 3,776
Likes: 0
Received 0 Likes
on
0 Posts
The Legend Knuckle has the Mounting points on the Door Side.. The Prelude on the Nose Side. So you install the Brackets on the Nose side of the Prelude.. You install the Brackets where the mounting points are available.
Did I answer you question yet?

And welcome, hope it helps.. I've heard of one other person doing the S2k + RSX-S Setup, so I'm glad someone got some use out of it.
I'm pretty sure the stock 15" wheels will clear on the Legend GS Setup.. On my brake setup, before mentioned S2k Calipers and RSX Type-S 11.8" Rotors, only a few 15" wheels will fit.. Otherwise 16" will be needed.
12-04-2008, 10:17 PM
#24
Honda-Tech Member
Join Date: Mar 2007
Location: Fort Worth, Texas, usa
Posts: 56
Likes: 0
Received 0 Likes
on
0 Posts
About drilling new holes, how did you make sure it was accurate and such? I know you said a ruler but it seems like there would be some error. So is the 114.3 the distance apart from the center of the holes i presume?
Ive been slowly piecing the s2k.rsx s setup but its just been sitting in my garage lol
Ive been slowly piecing the s2k.rsx s setup but its just been sitting in my garage lol