Honda Civic: How to Replace Crankshaft Bolt, Pulley and Seal
This step-by-step article will guide you through the process of replacing the crankshaft's bolt, pulley and seal from your Honda Civic. Continue reading to learn how to do just that.
This article applies to the Honda Civic (1991-2000).
The crankshaft pulley bolt is one of the most stubborn bolts on this era of Honda. Unfortunately, they also need to come off in order to remove the crankshaft pulley and the crankshaft seal behind it. Typically this is done in order to change the timing belt, but the crankshaft pulley itself will fail on its own as well. Most of the time you can tell it's dying by a constant squeal from the front of the motor that rises and drops with engine's rpm. Also, the front crankshaft seal can be prone to leaking if it's old or if it has been reused at any point. As much as a hassle this might be, the truth is it can be done at home as long as the right tools are used.
This is a required as part of changing the timing belt; however, this is one of the first steps, which is why it can be a challenge. This article will not go over the entire timing belt replacement process, but it's a good place to start. Removing the bolt isn't particularly time consuming as much as it is difficult.

Materials Needed
- Jack stands
- Two-post lift (optional)
- 17mm Socket
- Two breaker bars
- 12" or longer socket extension
- Crankshaft bolt removal tool
- Crankshaft seal removal tool or paint lid opener
- Impact gun or crankshaft pulley tool
Step 1 – Lift the car
The first step is to lift the front end of the car. You'll want to get it as high as possible. Use a two-post lift if that's an option. If it's not and you're doing this in the driveway, just set the car up on jack stands. Remove the passenger's side wheel. The crankshaft pulley is the single, large pulley at the bottom of the engine.

(Related Article: How to Jack Up Your Civic - Honda-Tech.com)
Step 2 – Unbolt pulley
If you're lucky, you'll be able to remove the bolt on this pulley by using just an impact gun. Attach a 17mm socket and attempt to unbolt the crank pulley bolt. In order for this to work, you'll need an impact gun with more than 600 lb/ft of breakaway torque. If you have one handy, try it out. If it doesn't work, then use a crank bolt removal tool.
If the impact gun didn't work, the next step is to use the crank bolt removal tool. This little tool can be picked up at most auto stores or for even less money on Amazon.
Attach a long breaker bar to the "handle" end of the tool. It should be angled downward against the ground as a brace.
Next, attach a 17mm socket to a long extension, and attach it to the crank pulley bolt through the center of the tool. Then, using another large breaker bar, crank on the pulley bolt counterclockwise. It will be stubborn, but it will let go once it's free.

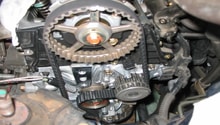
Figure 2. The crank pulley at the front of the engine. 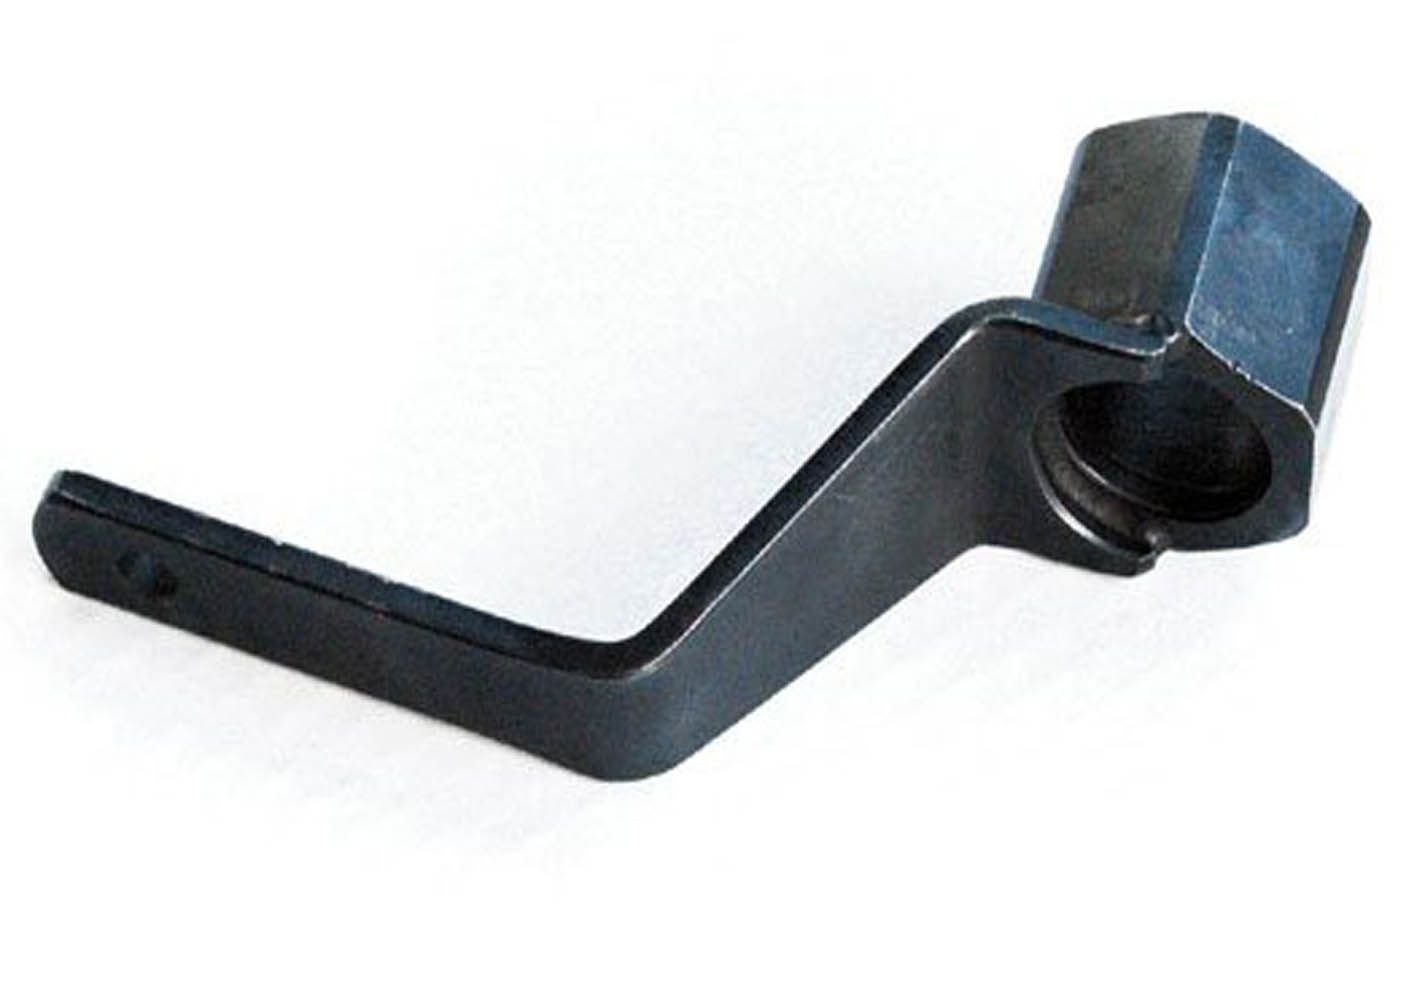
Figure 3. Crank pulley removal tool.
Pro Tip
If you intend on changing the crankshaft seal after this, go ahead and heat the bolt with a torch for a bit before attacking it with the impact gun. It should come off more easily at the risk of potentially damaging the crankshaft seal.
Featured Video: How to use a Honda Crank Pulley Tool
Step 3 – Remove crankshaft pulley
With the bolt removed, you should be able to just pull off the crankshaft pulley. If your Civic has the drive belt still attached, you'll need to remove it before pulling off the crankshaft pulley. You'll need to loosen the alternator retaining bolt in order to relieve tension on the belt. This is pretty easy comparatively, so just follow the video below.
Featured Video: How to Replace Drive Belt on a Honda Civic
Step 4 – Accessing the crankshaft seal
Getting to the crank shaft seal requires a considerable amount of effort as you'll need to remove the timing belt. Once the timing belt cover has been removed, you'll need to pull off the timing gear, timing belt and timing plate for access to the crankshaft seal.

Figure 4. Front crankshaft seal highlighted.
Step 5 – Remove the seal
Getting the seal off is tricky, but can be done with a flat head screwdriver. This is not recommended, however, the screwdriver might mar the metal where the surface seals, causing a permanent leak. Use a paint can opener tool (Figure 5) if you have it. Slip the hook end of the tool into gap between the seal and the block. Then yank it out.
When installing a new seal, make sure it is flush with the block the way the old one was.

Figure 5. Use this paint can opener tool to remove the seal. 
Figure 6. The orange-red rubber ring is the crankshaft seal.
Step 6 – Re-install crank pulley
When you're done with the crankshaft seal, finish installing the timing belt. After that, re-install the crankshaft pulley. Make sure to re-tighten the bolt to the specifications in the manual. The correct way to do this is to tighten the bolt to 14 lb/ft first. Then, turn the bolt an additional 90 degrees. That ends up being about 130 lb/ft.
After the crankshaft pulley has been re-installed, re-install the drive belt and re-adjust the alternator.
Related Discussions
- Honda Service Manual Crankshaft Pulley Removal - Honda-Tech.com
- How to Use a Paint Can Opener to Remove Your Crankshaft and Seals - Honda-Tech.com
- Tips for Removing the Crankshaft Pulley Bolt - Honda-Tech.com
- Hand Crank Pulley Bolt Tool - Honda-Tech.com
- Tips for Replacing Crank Seal - Honda-Tech.com
- How to Remove Crank Pulley - Honda-Tech.com