A blown head gasket can lead to a severely damaged engine, not to mention a blown wallet. Replacing the head gasket itself may not be has hard as you imagine, so read on to learn how.
This article applies to the Honda Civic (1992-2000).
The head gasket sits on top of the engine block below the head and functions to keep the three liquids that run through your engine – fuel, coolant, and oil – separate. If the gasket is blown, you are in danger of doing real damage to your engine. Replacing the head gasket on any engine is a difficult challenge, even for those with a mechanical automotive background. The amount of time and the volume of work can be overwhelming, but it doesn't necessarily have to be. Provided you take your time and keep a detailed eye, you can pull off this DIY and save yourself a lot of money. Follow the directions below to gain a leg up on the few necessary details for replacing your Honda Civic's head gasket.
Materials Needed
Socket wrench set
Container for waste oil
Razor blade
Degreaser or other non-abrasive cleaning solution
Toothbrush or soft bristle brush
Isopropyl alcohol (optional)
Engine oil
Rags
This how to assumes you have already removed the head and rockers, revealing the head gasket. These steps will only describe how to remove, properly clean the surface, and replace the head gasket.
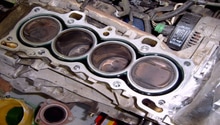
Step 1 – Remove the gasket
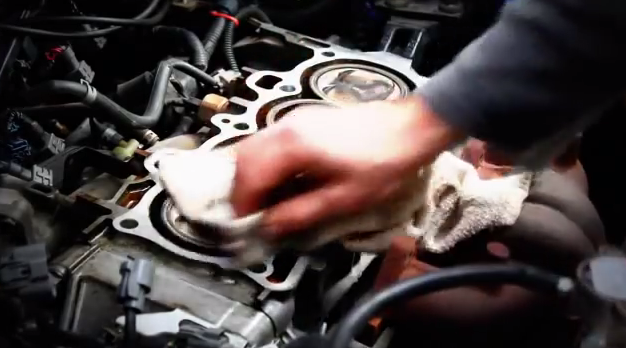
Peel the head gasket up to remove it. If the gasket it sticking in some areas, run the razor blade underneath the gasket as leveled to the surface as possible. Be careful not to gouge or nick the engine block and mounting surface of the cylinder head.
Figure 1. Remove the old head gasket.
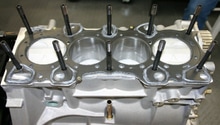
Step 2 – Clean and prep engine block
Thoroughly clean the entire deck of the engine block and surface of the cylinder head with enamel cleaner applied to a rag. You can also use water followed by isopropyl alcohol to clean the surface. For areas that are difficult to reach or where oil buildup, carbon, and dirt are present, use a soft bristle brush to further clean the area.
Figure 2. Clean the deck of the engine block.
Pro Tip
After cleaning, it's recommended to use a level ruler to check if the surfaces of the engine block and the cylinder head are even. If the head is warped in any way, it may need to be machined or even replaced. The new gasket won't mean much if the head is warped.
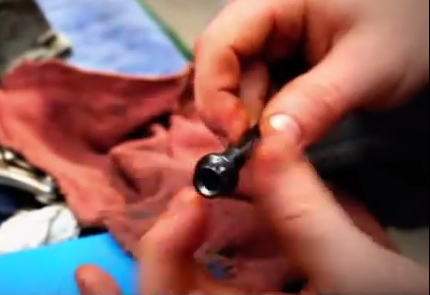
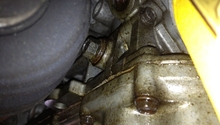
Step 3 – Clean head bolts and stud threads
Thoroughly clean the head bolts and stud threads that secure the cylinder head. Then, lightly lubricate with engine oil prior to re-installation. This will reduce strain on the cylinder head and engine block. It will also make it easier to tighten them to the proper torque during reassembly.
Figure 3. Clean the stud threads.
Pro Tip
It's recommended that you install new bolts and studs when replacing the head gasket. They are inexpensive, and also give your engine added support.
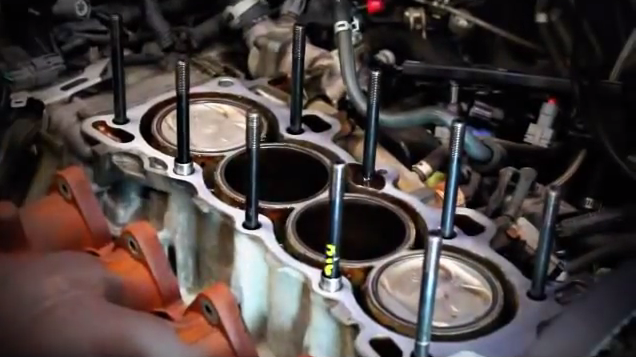
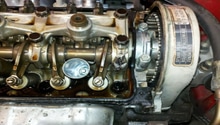
Step 4 – Install the gasket
Re-install the threads to their respective locations. The threads should be hand-tightened to a snug fit. Use the threads as a guide to fit the new gasket onto the engine block. It should fit properly into place, and now the cylinder head is ready to be installed.
Figure 4. Use stud threads as a guide for the new gasket.
Featured Video: Head Gasket Repair and Installation on a Honda Civic
How to Replace the Head Gasket
Maybe not now, but you may need to in the future. Learn how to replace the head gasket here.
This article applies to the Honda Accord (1990-2002).
Replacing the head gasket on your ...
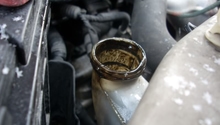
Why Does My Engine Oil Flow Into the Coolant Reservoir?
Oil in the coolant reservoir can give you a royal sinking feeling, and there is good reason for that. Find out why with this helpful article.
This article ...
Honda Accord Oil Leak
Why is My Accord Leaking Oil?
Diagnose and fix the five common reasons why you car leaks oil.
This article applies to the Honda Accord (1990-2002).
If you own a car, then you've already ...
How to Install Valve Cover Gasket
Bad valve cover gasket?
This article applies to the Honda Accord (1990-2002).
The valve cover is bolted to the top of the cylinder head and is sealed with a gasket to keep oil ...
Why Are My Cylinders Misfiring?
Autotap, Honda-Tech, 2carpros
Is your car misfiring? There are a number of reasons why your Honda Civic could be misfiring, but you need to get to the bottom of it. Here is how!
This ...
Why is My VTEC Solenoid Leaking Oil?
What happens when VTEC doesn't kick in?
This article applies to the Honda Accord (1990-2002).
Oil leaks are often hard to pinpoint because the causes are varied. On many Honda ...