Honda Civic: How to Repair Heater That is Slow to Warm Up
Freezing in your Honda Civic is easy, but why do it? Must be that there are no just-as-easy instructions to repair the problem. Well, not until now. This article will guide you through the steps of repairing the heater in your Honda Civic.
This article applies to the Honda Civic (1992-2000).
Have you noticed a delay in the time it takes to heat up your car? Is the heater at a point where it doesn't even work? If so, there's a good chance that your car's coolant system has air bubbles. And to add to that, if the radiator hose is always cool, the thermostat may be faulty. Both of these issues may cause your car's heater to warm up slowly. This article will demonstrate how to properly replace the thermostat, and bleed the coolant system in your Honda Civic to get the heating function working again. The steps are outlined below.

Materials Needed
- Hydraulic jack and jack stands
- Replacement thermostat
- Ratchet and extension
- 10mm and 12mm socket
- 50/50 antifreeze coolant
- Drain pan
Step 1 – Replace the thermostat
- Disconnect the negative (black) terminal of the battery.
- Use the hydraulic jacks to lift the front end of your car, and set it down on jack stands.
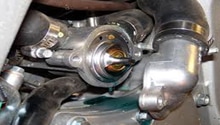
- Locate the thermostat housing. It is attached to the lower radiator hose behind the distributor.
- Place a drain pan under the engine where the thermostat housing is located.
- With a ratchet, extension, and socket, remove two 10mm bolts on each end of the thermostat housing.
- Let the coolant drain from the lower radiator hose.
- Pull the hose off with the attached housing cover.
- Remove the old thermostat, and set it aside.
- Attach a new gasket to the new thermostat before installing.
- Insert the new thermostat into the housing. Make sure to align the bumps of the gasket with the housing grooves.
- Bolt the thermostat housing cover back on.
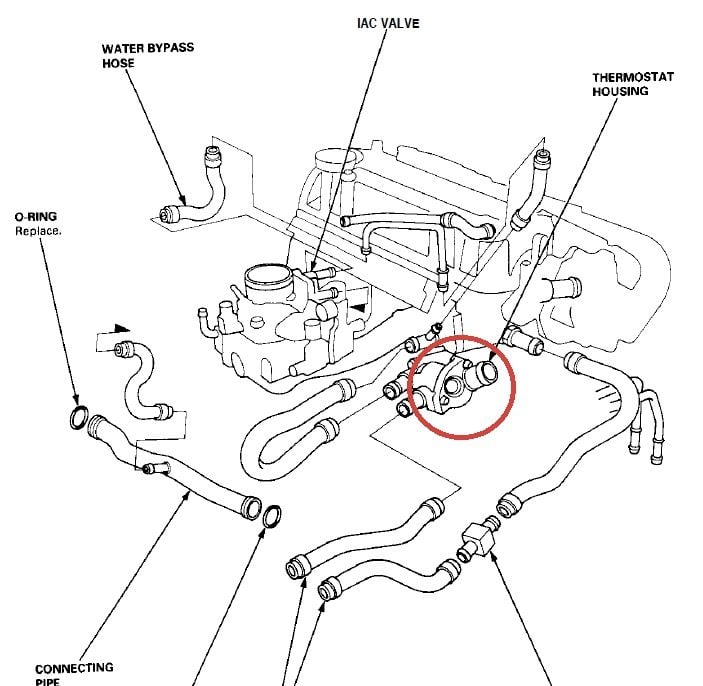
Figure 1. Rear view of Civic engine with thermostat housing location (circled in red). 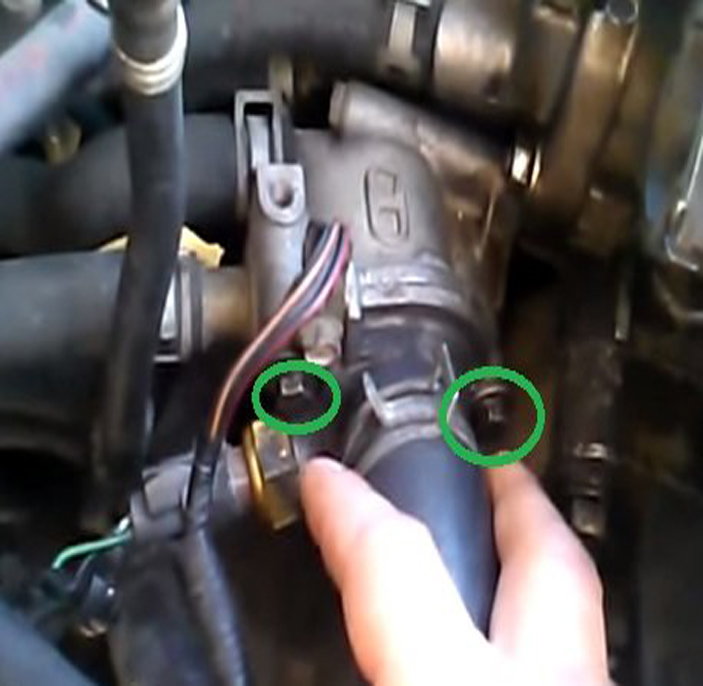
Figure 2. Remove two 10mm bolts (circled in green). 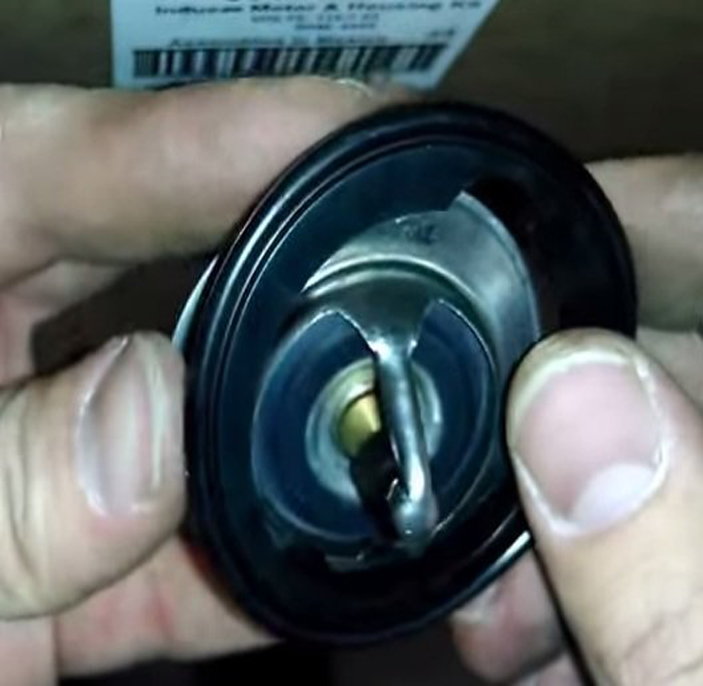
Figure 3. Seal new thermostat with a gasket before installing.
Step 2 – Bleed the coolant system
- Lower your car, and reconnect the battery.
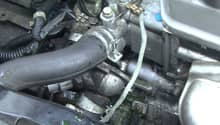
- Use a 12mm socket to loosen the coolant system bleeder valve. It is located in front of the distributor, at the end of the upper radiator hose.
- Remove the radiator cap from the pressure valve.
- Fill the radiator with 50/50 antifreeze coolant until you see coolant spouting from the bleeder valve.
- Fasten the bleeder valve, and top off the radiator with coolant.
- With the radiator cap off, start the engine and set the heater to its maximum setting.
- Alternating between each one, squeeze the upper and lower radiators hoses as well as the two hoses that run through the firewall. You should see air bubbles come up to the pressure valve.
- Top off the radiator with more coolant as needed.
- When the engine is completely warmed up (approximately 10 to 15 minutes), turn the car off.
- Fill the overflow tank with coolant, and replace the radiator cap.
- Start the engine again, and test the heater.
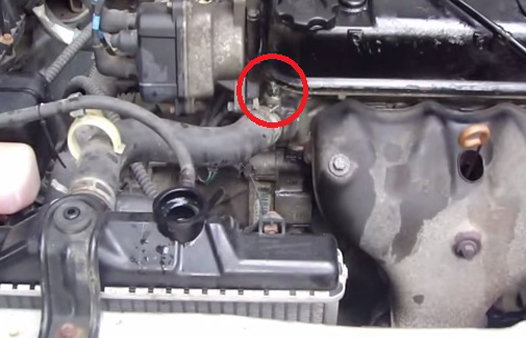
Figure 4. Coolant system bleeder valve location (circled in red). 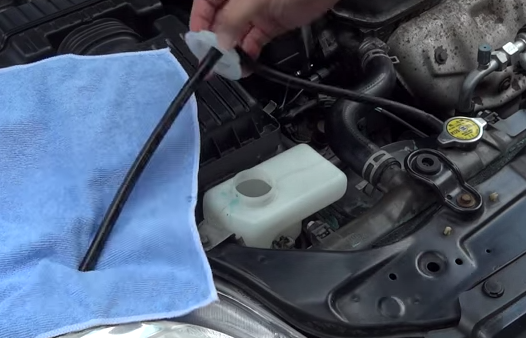
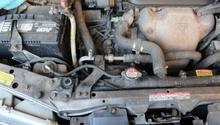
Figure 5. Top off the overflow tank with coolant.
Featured Video: How to Bleed a Cooling System
Related Discussion
- How to Fix a Dead Heater - Honda-Tech.com