Honda Civic: How to Install Air Suspension
Car enthusiasts love to modify their suspension, and many would long for the ability to change their ride's height at the push of a button. This article will help you to install an air suspension on your Honda Civic.
This article applies to the Honda Civic/Del Sol (1992-2000).
Modifying a vehicle's suspension is nothing new. Car enthusiasts have been lowering and raising their vehicles with the typical upgrades for decades, which involve a combination of various springs as well as shock combinations or coilover systems. Then, there are more advanced suspension systems such as those using a complex system of hydraulics. And as of late, air ride suspension has made a huge breakthrough in the "lower" department of passenger automotive modifications, which had only been incorporated into big rigs as well as freight trucks for their braking systems and air horns. Today, these suspension setups allow you to lower and raise the vehicle's overall height, which also doubles up as "luxury" suspension system. Although the price tag on these systems is nearly three times that of lowering springs and coilovers, they do come with the added bonus of being able to adjust your ride height quickly and effectively for enhance performance.
This article will provide you with the general overview of how to install air suspension into your Honda Civic or Del Sol. Depending on which air suspension brand and model you purchase, the process of installation may be slightly different. However, this modification still requires extensive automotive experience. If you don't feel comfortable installing it yourself, it is recommended that you have it done at an auto shop.

Materials Needed
- Air suspension kit
- Metric as well as standard sockets and ratchets
- Wire cutters/crimps
- Flat head screwdrivers (various sizes)
- Hydraulic jack and jack stands
- Teflon tape
- Zip ties/wire looms
The Components
- Compressor: This device converts power (usually electric) into stored energy by forcing air into a smaller volume, and therefore increases its pressure.
- Air Tank: A cylindrical canister used to store the pressurized air built up by the compressor.
- Valves: This is used to regulate the air forced into each "air bag" via the air lines.
- Air lines: This is used to connect the three components. This should be DOT approved air lines made from plastic, copper, or braided stainless steel.
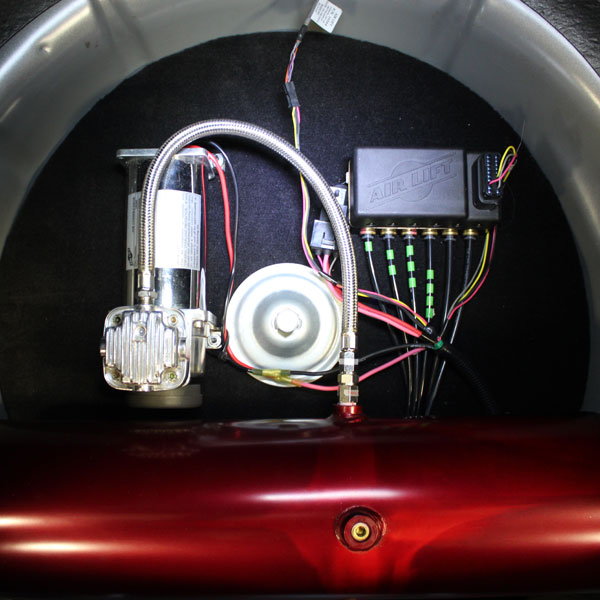
Step 1 – Mount the compressor and tank
The main component of an airbag suspension system is the compressor, which allows your car's ride height to be adjusted. It should be installed before all other suspension components are put in, and before the air lines are ran. When you plan out this upgrade, first determine where you are going to mount the compressor, air tank, where the lines will run, and where the valves will be mounted.
- Mount the tank in your preferred location, and make sure it's secure.
- Mount and secure the compressor.
- Connect the pressure switch.

Pro Tip
For a better mounting "surface," a false floor can be built out of thin wood at your local home depot. This allows you to measure the surface area in which your final mounting position may be. It's been recommended that the valves be mounted behind rear bumper cover, and in the engine bay for the front.
Step 2 – Connect the lines and wiring
Once you have the tank, compressor, and valves mounted, the system needs to plumbed as well as wired.
- Connect the compressor to the tank with a braided stainless steel line.
- Run the lines from the tank to the valves.
- Use Teflon tape when connecting the lines to the ports.
- Ground the valves and the compressor.
- Run the wiring from the power source to the pressure switch.
- Run the wiring from the pressure switch to the compressor.
- Mount and wire the switch box.
Pro Tip
There is no need to connect the power wire supply at this time. You only need to route it. When wiring the electrical components, make sure to use the provided wiring or recommended gauge wiring for consistent power.
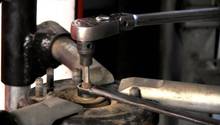
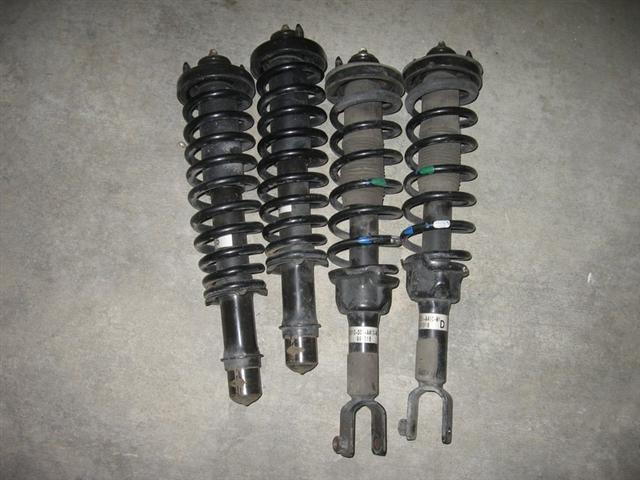
Step 3 – Remove the shock/strut assemblies
Now that the main components have been mounted, plumbed, and wired, the old suspension can be removed.
- Loosen the front and rear lug nuts.
- Use hydraulic jacks to lift the front of the car, and support it with jack stands.
- Lift the rear of the car, and support it with jack stands as well.
- Remove the wheels.
- Unbolt and free up the bottom struts.
- Unbolt the strut towers, and remove the shock/strut assemblies.
(Related Article: How to Replace Shocks - Honda-Tech.com)
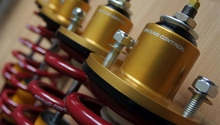
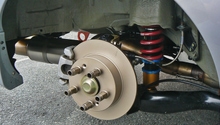
Step 4 – Install the airbag suspension
- Install the front air shock assemblies, and bolt them in.
- Install the rear air shock assemblies, and bolt them in.
- Once secured, connect the air lines to the upper ports on the cylinders of each air shock.

Step 5 – Test the air suspension system
Make sure the air suspension components are properly installed, the switch box is wired, and the the air lines as well as valves are connected.
- Re-install the wheels, and lower the vehicle.
- Connect the power supply wire.
- Raise the front end of the car using the switch box, and inspect for any air leaks. Do the same with the front end lowered.
- Raise and lower the rear end of the car to inspect for any air leaks.
- Ensuring that the wheels are torqued down and properly secured, take the car for a drive to learn or tweak the different ride height settings.
Pro Tip
While the car is parked and you're testing the air suspension system, ensure that nothing is getting in the way that could cause other components of the vehicle to fail or be compromised.
Related Discussions, and Site
- Basic Air Suspension Install - Honda-Tech.com
- Del Sol Air System Installation - Honda-Tech.com
- Airlift Performance Civic/Del Sol Installation Manual - AirliftPerformance.com