Honda Civic: How to Install a New Gauge Cluster
All you need to do is unscrew a few screws to free the gauge cluster from your Civic. Continue reading to do just that.
This article applies to the Honda Civic (1991-2000).
Do you have a reliable car, but an unreliable gauge? Replacing a failing gauge cluster with a new one will help to provide vital information about your car. The best part is, this is an easy installation.

Materials Needed
- 10 mm socket
- Phillips head screwdriver
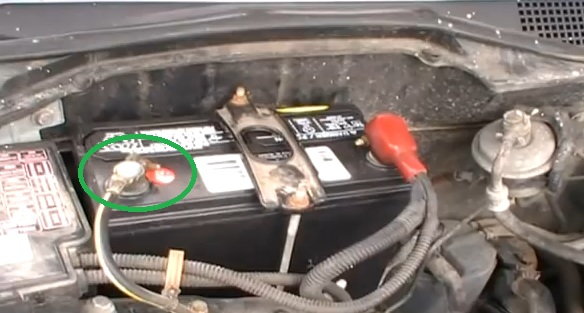
Step 1 – Disconnect battery
Remove the negative (black) cable from the battery first. This is the battery grounding wire. Removing this will prevent you from accidentally shorting out any other components, while you work on the electrical system.
Step 2 – Remove the trim around the cluster
Lower the steering wheel. Using a Phillips head screwdriver, remove the top two screws securing the trim. Then, you will need to disconnect the two plastic clips at bottom.

Figure 2. Location of the two gauge trim screws. 
Figure 3. Location of the two plastic trim clips.
Step 3 – Remove gauge cluster
Continue using the Phillips head screwdriver to remove the top two screws on the gauge cluster, and then the bottom two screws. Tilt the gauge towards you, and begin to wiggle it forward. Disconnect the five wire connections. Then lift the cluster completely out.

Figure 4. Location of the gauge cluster screws. 
Figure 5. Removing the gauge.
Step 4 – Install new cluster
Connect the plugs to the new cluster. Installation is the reversal of removal. Slide in the new cluster close enough to plug in the five connections. Screw the gauge cluster back into place. Replace the trim and secure it with the top two screws.
Pro Tip
Use the exact same instrument cluster to avoid re-wiring the new one.
Featured Video: Removing a Honda Civic Instrument Cluster
Related Discussion
- 94-97/98-01 Integra Cluster Into 92-95/96-00 Civic Wiring Diagram - Honda-Tech.com