Honda Accord: Fuse Box Diagram
If you've ever blown a fuse, then you know how lost you feel trying to make sense of it all. Check out this fuse box guide for your Honda Accord to help you figure out what fuse does what.
This article applies to the Honda Accord (1990-2002).
Opening a fuse box can be bewildering. There are often dozens of multicolored fuses, which are all different sizes and all serve a different purpose. Fuses will inevitably blow out at some point, so they will need to be replaced. While replacing a fuse is an easy task, the challenge is determining which fuse is bad or why it blew out. Whether your dash lights are out or your stereo stopped working, blown fuses can cause all sorts of problems. This guide will help you determine which fuse is causing the problem.
Fuse Box Diagrams
The first thing you will need to do is find the fuse box diagram for your particular year, make, and model. These are located in your owner's manual or online. You can also download a copy—after you have registered—from Honda's website if you don't have the owner's manual anymore. Alternatively, the owner's manuals have been uploaded to ManualOwl.com. The diagram will list each fuse and what it does, which will help you find the culprit.
It always helps to keep a variety of fuses handy in case one blows out. Fuse packs that contain a variety of sizes and shapes are available for a few dollars at most big box stores or automotive repair shops.
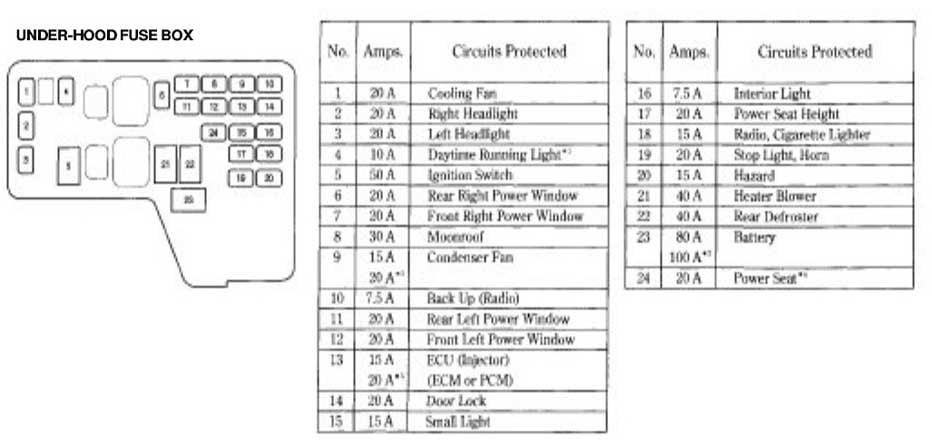
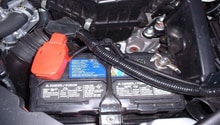
Figure 1. Under the hood fuse box diagram for the 1997 and below Accords. 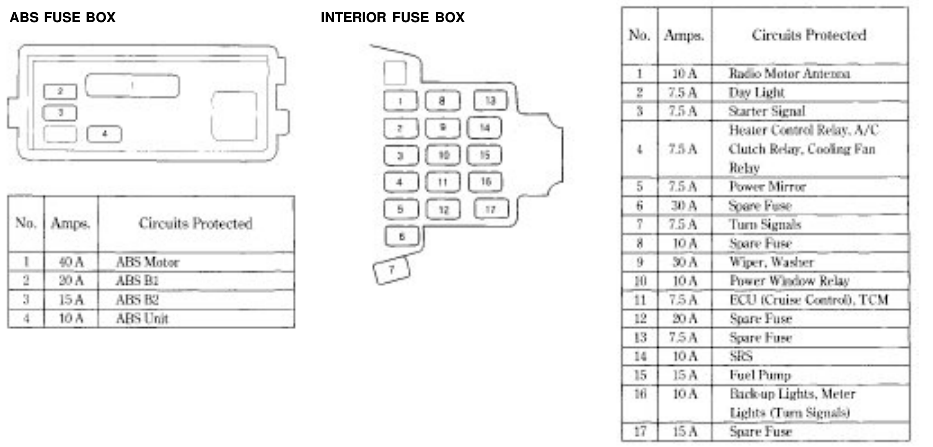
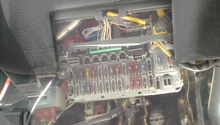
Figure 2. ABS and interior fuse box diagram for the 1997 and below Accords. 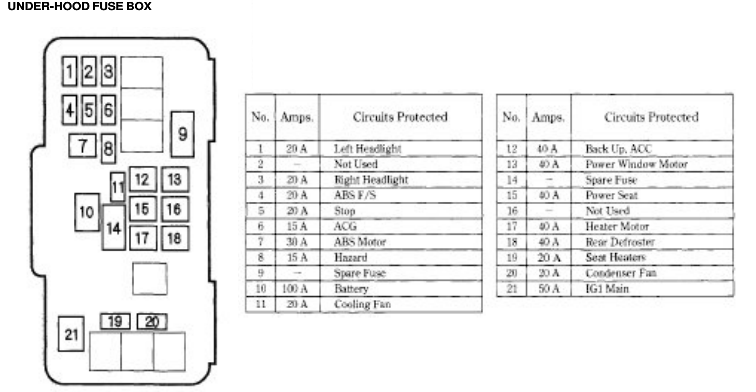
Figure 3. Under the hood fuse box diagram for the 1998 and above Accords. 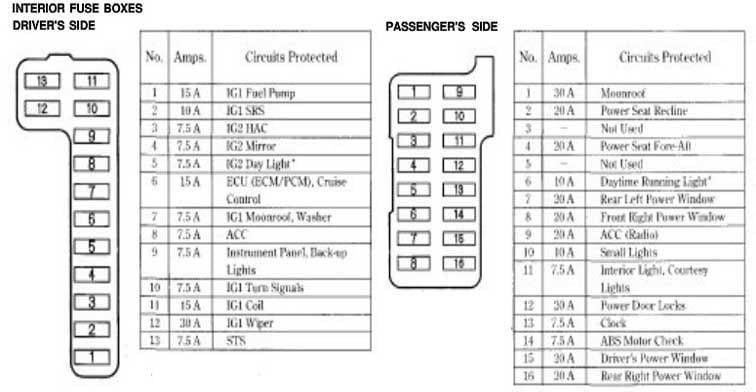
Figure 4. Driver's and passenger's interior fuse box diagram for the 1998 and above Accords.
Testing Fuses
Once you have located the fuse that may be faulty, pull it out and inspect the center. If the metal piece connecting the two ends is broken or visibly burnt, the fuse is probably bad. If it passes the visual test, proceed to test the fuse with the multimeter or a test light. First, set the meter to measure DC voltage. With the fuse installed in the fuse box, insert the positive (red) meter probe in the left side of the test tab. Then, place the negative (black) probe from the meter on a metal chassis. Finally, test the right side of the test tab in the same manner.
If the reading is around 12.5 volts on both test tabs, then the fuse is receiving voltage from the battery and it is not blown. If the voltage is not identical on both sides, the fuse is blown and will need to be replaced. If you are getting around 12.5 volts on only one test tab, then the fuse is blown and should be replaced. If you aren't getting around 12.5 volts on either of the test tabs, then the fuse is not getting voltage from the battery. Further testing will be needed to determine why the fuse is not getting power from the battery.
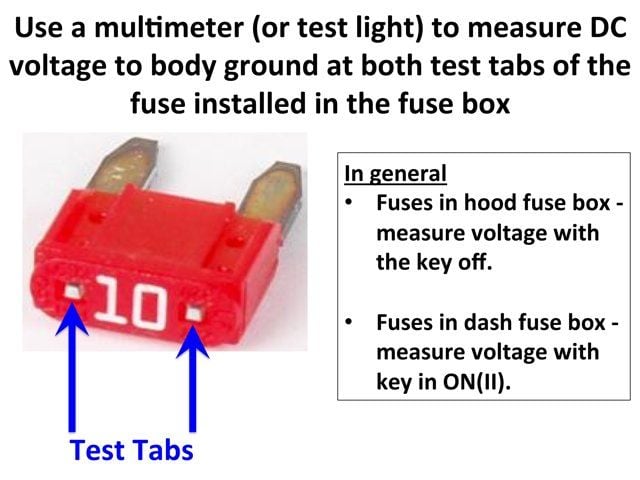
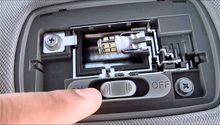
Figure 5. Location of the test tabs. 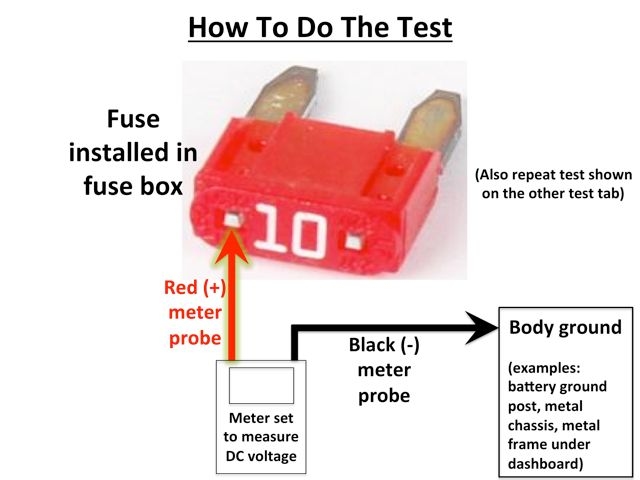
Figure 6. This diagram details how to test a fuse. 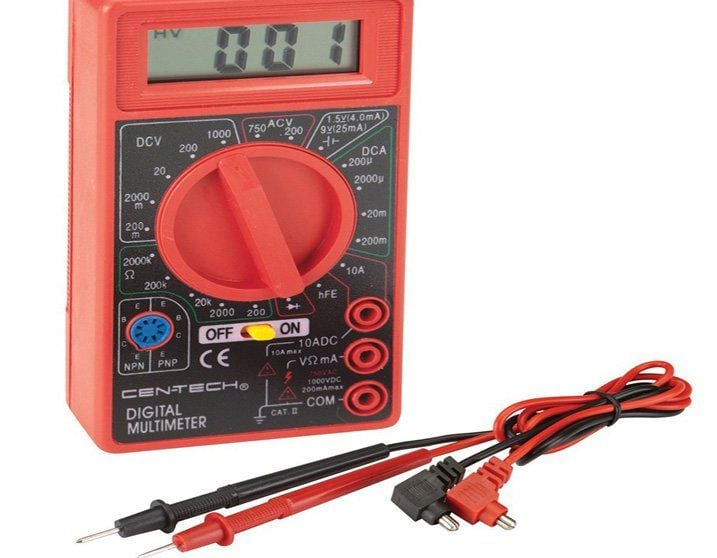
Figure 7. Multimeters are an inexpensive security when dealing with fuses.
Related Discussions
- Fuse box diagram for 94-97 Honda Accord - Honda-Tech.com
- Most Informative and Reliable Method to Test Fuses - Honda-Tech.com
- Troubleshooting Honda Accord fuses - Honda-Tech.com
- Basic Electrical Troubleshooting - Honda-Tech.com