
HOW TO: My auto to manual swap PICS! 56k no no.
 09-05-2007, 08:54 PM
#1
Junior Member
Thread Starter
Join Date: Aug 2007
Location: Funky 600block Norcal
Posts: 592
Likes: 0
Received 0 Likes
on
0 Posts
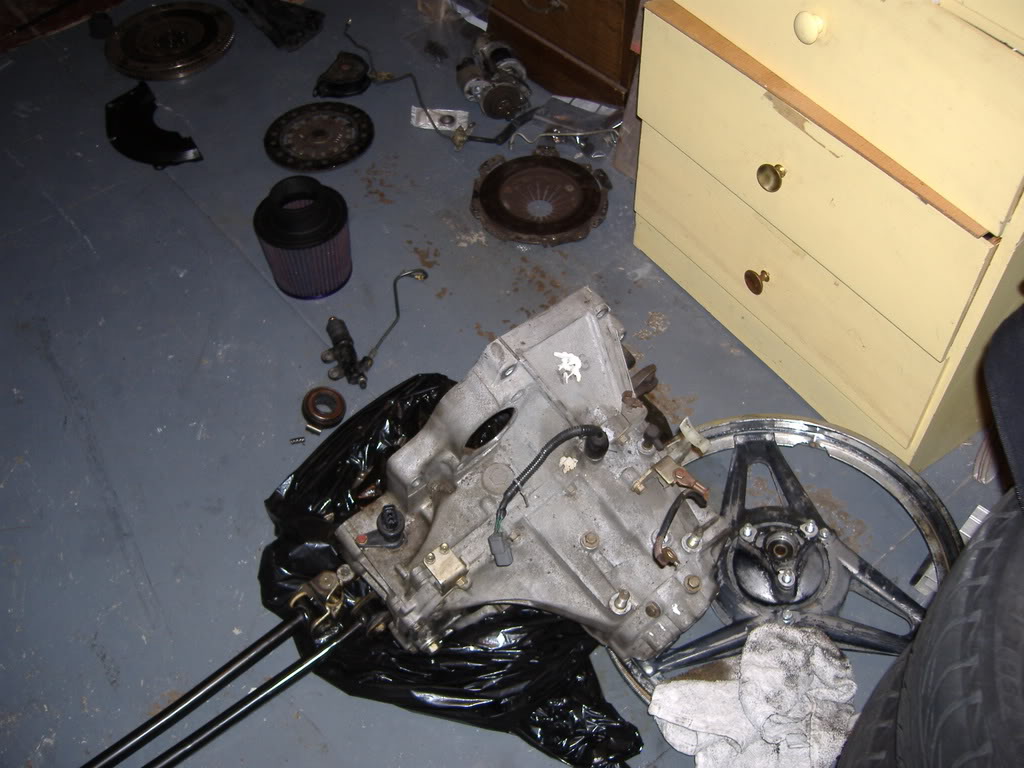
Im going to convert my 95 civic ej1 coupe. Im making a diy for all the people who wonder how to do this and all the parts you need.
The 95 civic ex/si tranny.
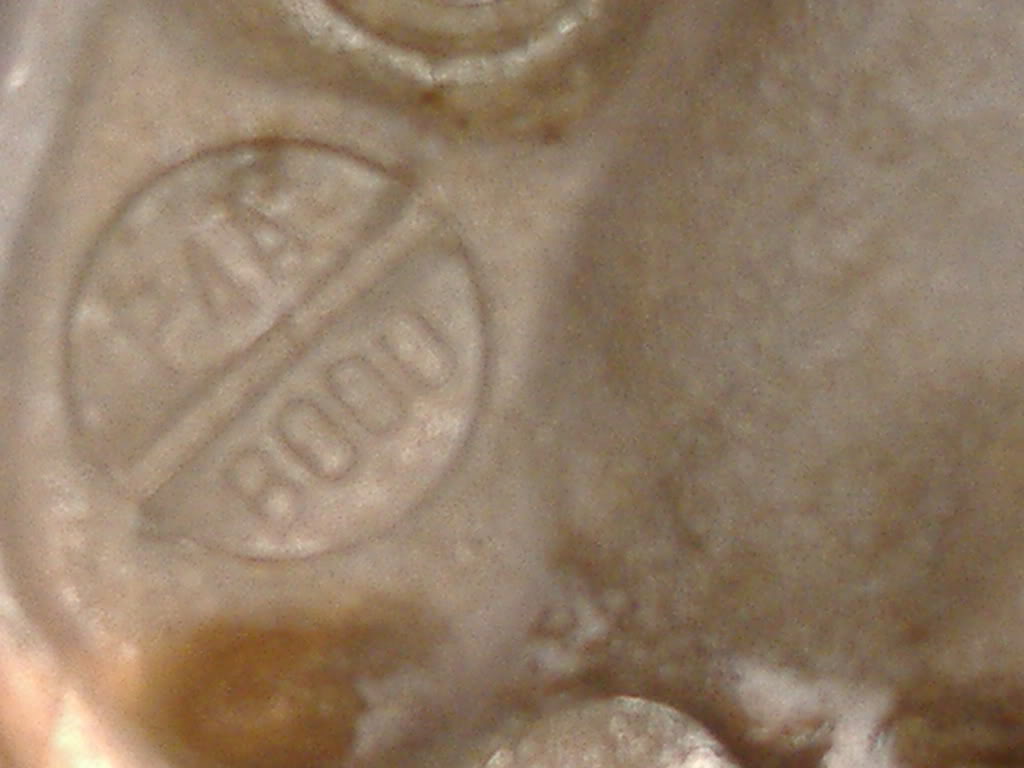
The way you can identify your tranny to tell wether its a dx,hx,vx,si,ex. There is a stamp on it if it says B000 then its a large bearing short gear ex/si =good tranny. A000 =bad tranny.
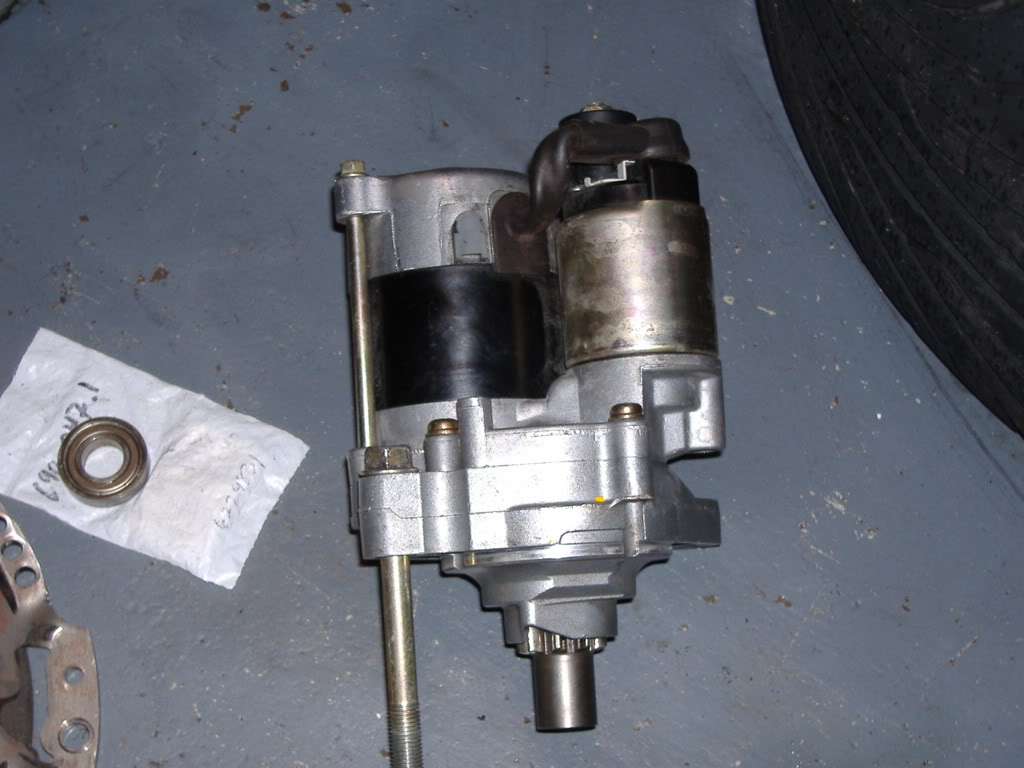
Your going to need a manual transmission starter as the auto 1 will not line up make sure to also get the bolts as the auto ones are shorter.
You need the flywheel, If your getting all your stuff from a donor car and are on a budjet just inspect your flywheel for cracks if none found just scuff the surface up a little and your good.
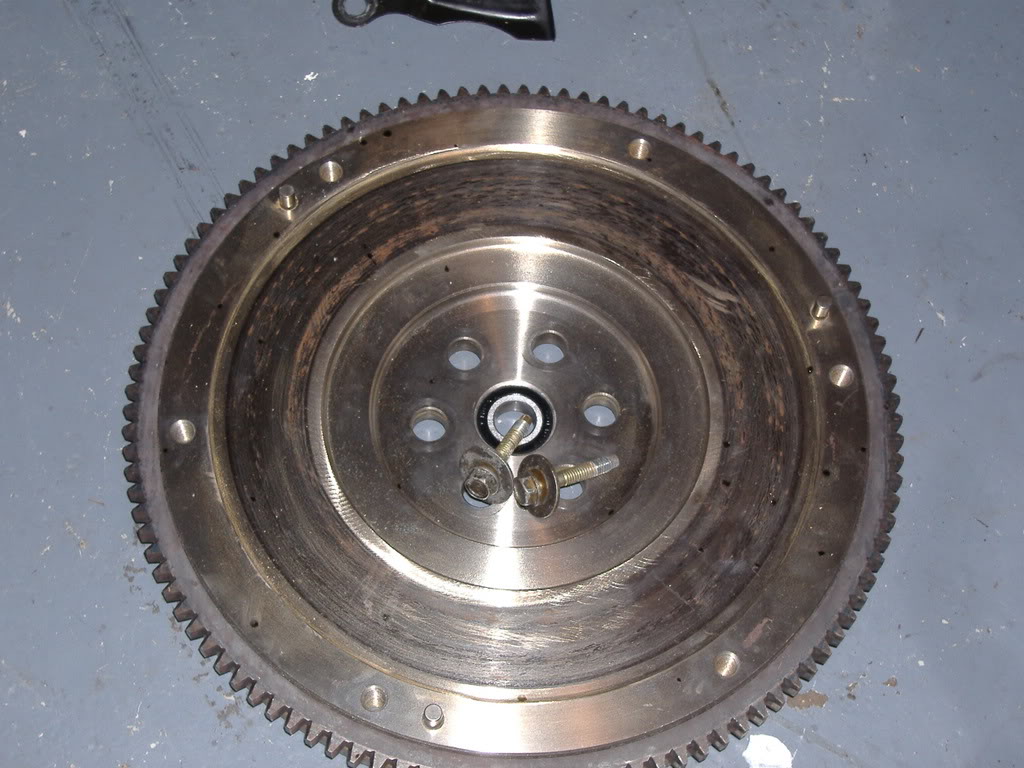
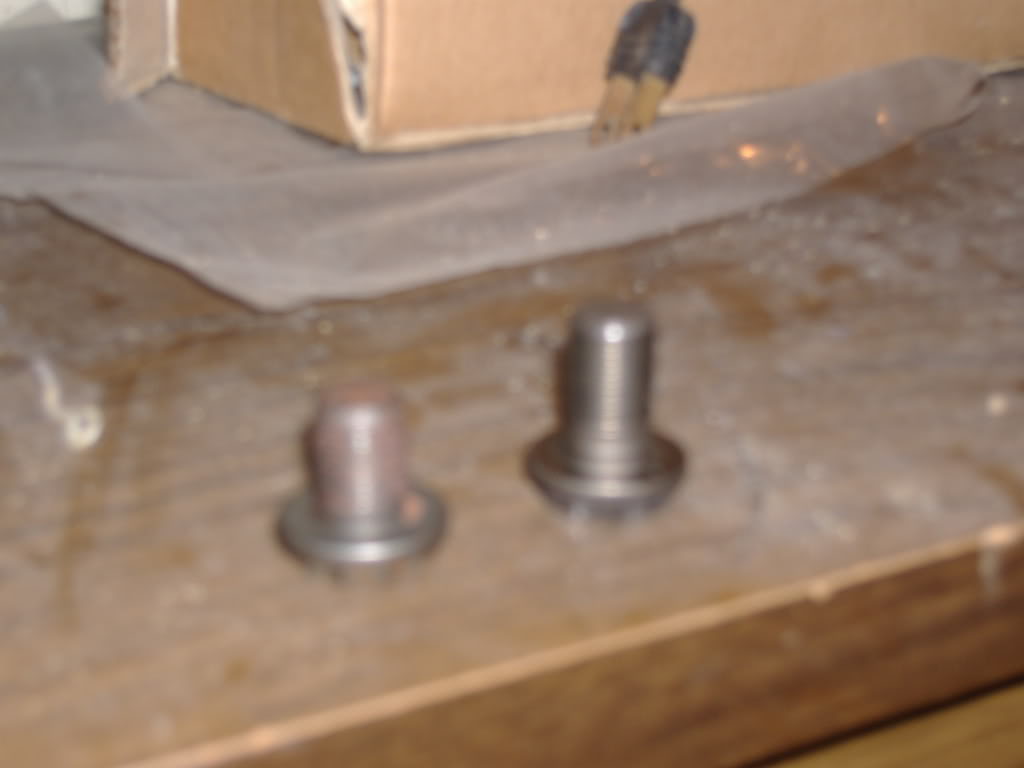
You also need the manual transmission flywheel bolts as they are longer. Auto on left manual on right.
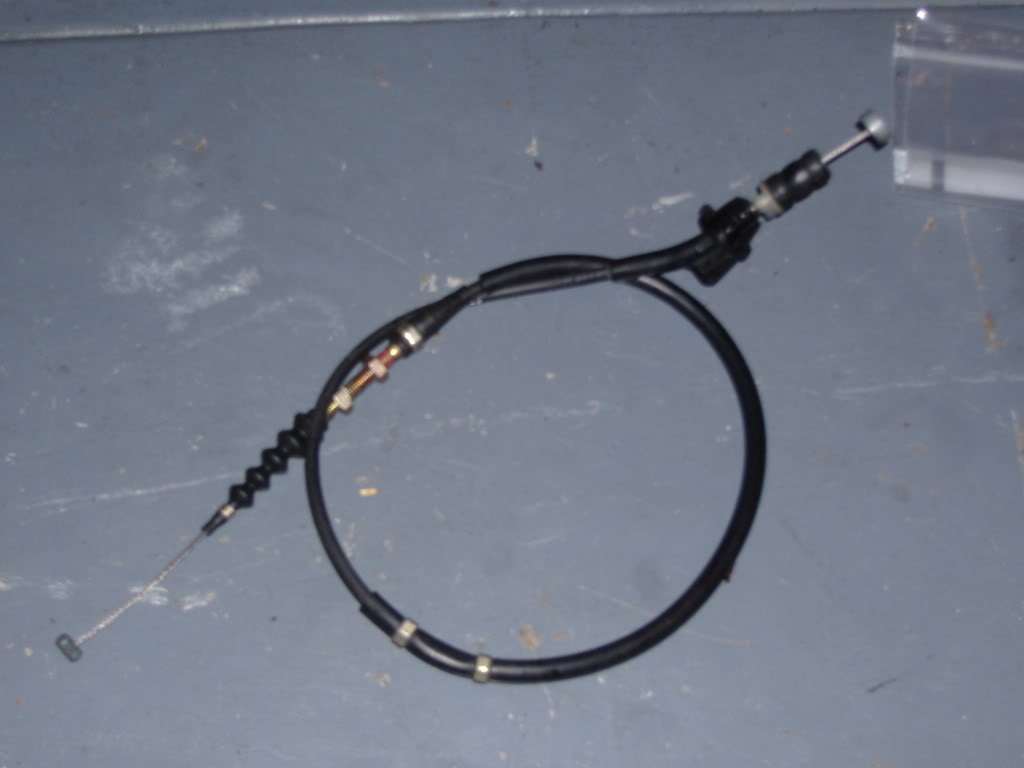
You will need the manual throttle cable as the nub on one end is bigger then the auto one (pedal side is bigger)
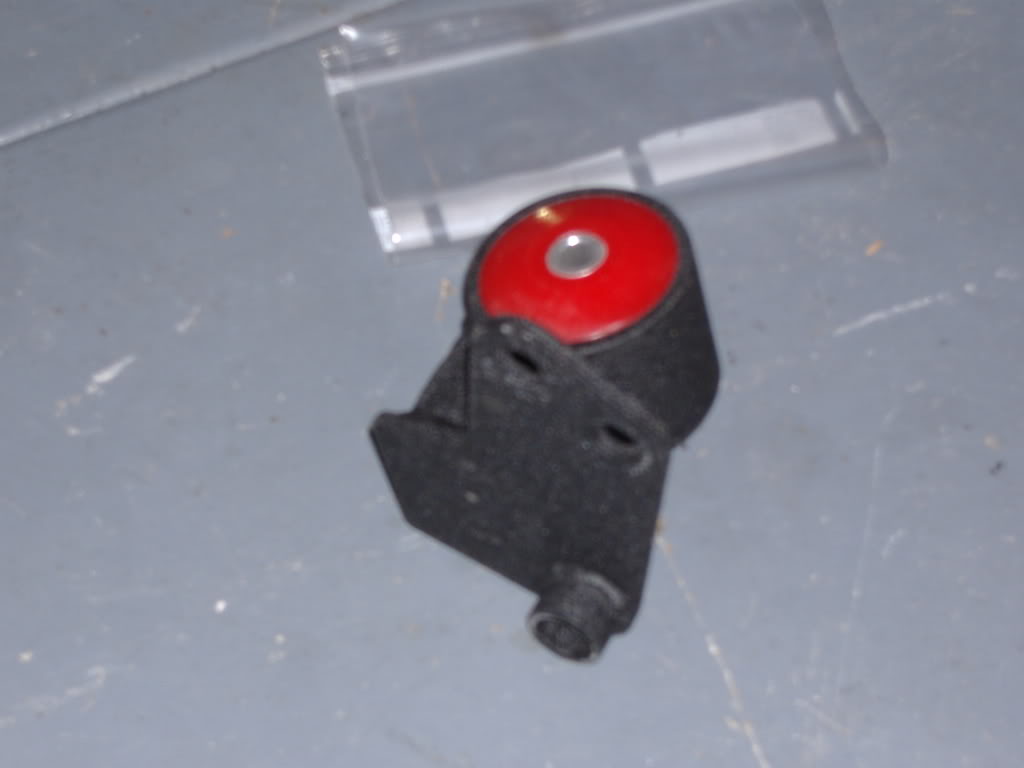
You will need the auto to manual conversion mount unless you wanna weld, I found that the innovative mount is alot easier and it wasnt expensive at all. 115shipped from spoolinperformancefab.
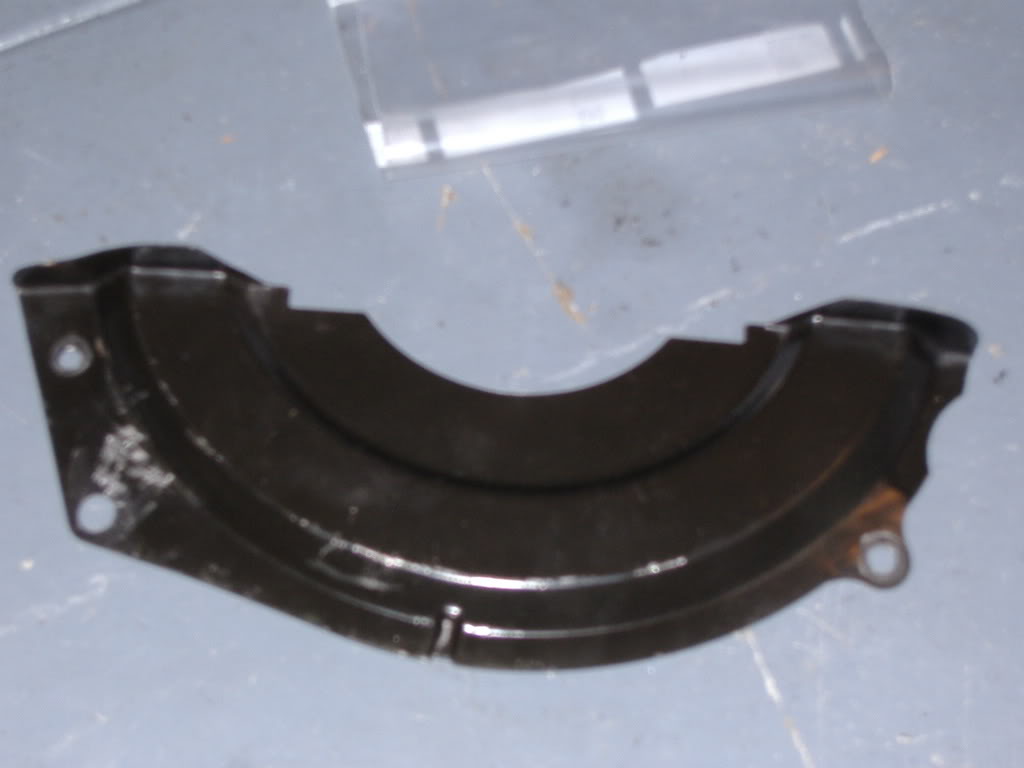
You will need what is called the inspection plate it covers the flywheel.
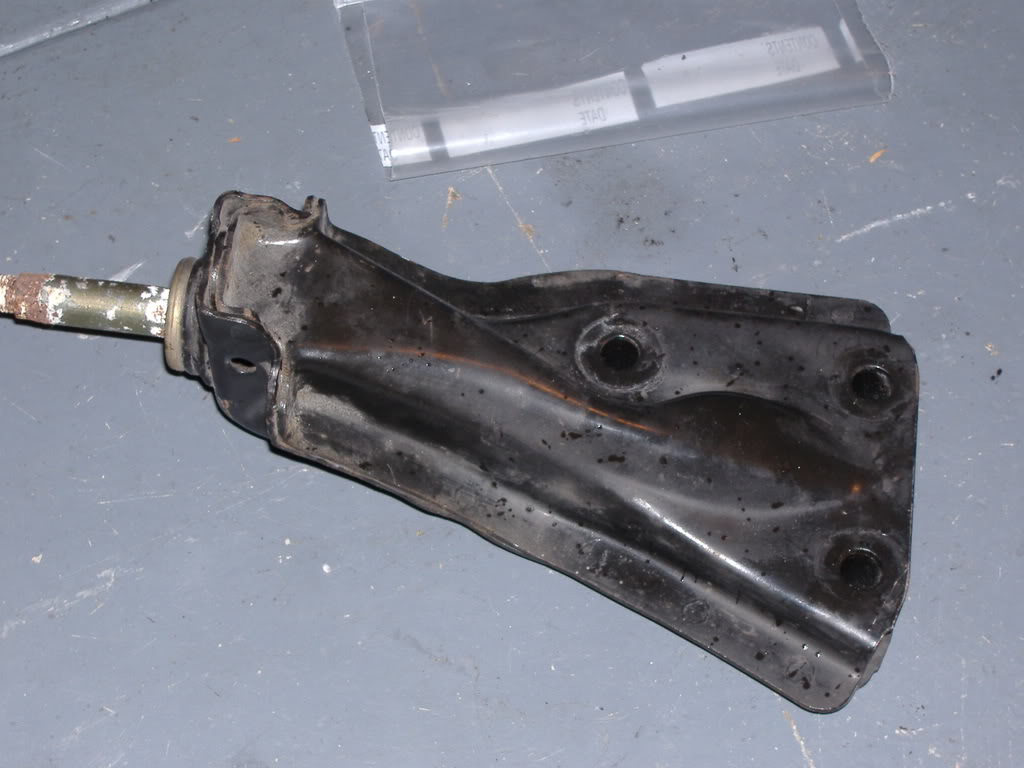
You will need the front manual transmission mount. Im not sure if you need the actual rubber mount but I got mine anyway Il let u guys know when it goes in.
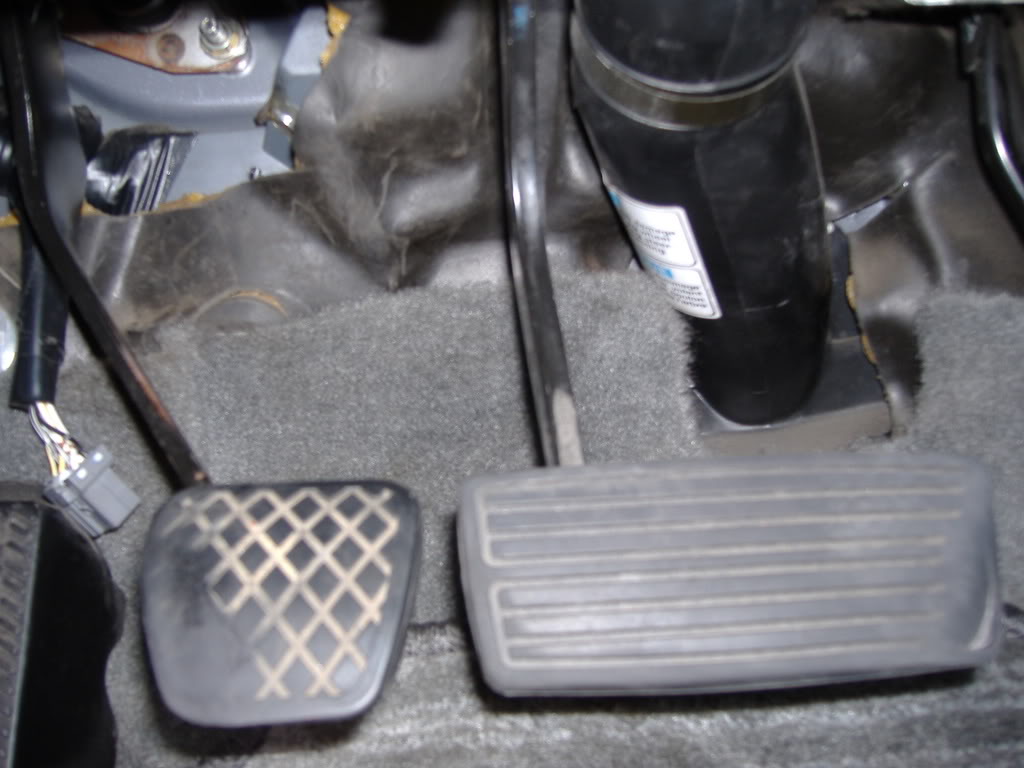
You will also need the manual pedal assembly Dont be half *** and cut your brake pedal in half just buy the whole set. And if your car has cruise control get the matching pedals for a cruise controlled car.(extra arm on pedal for cruise).

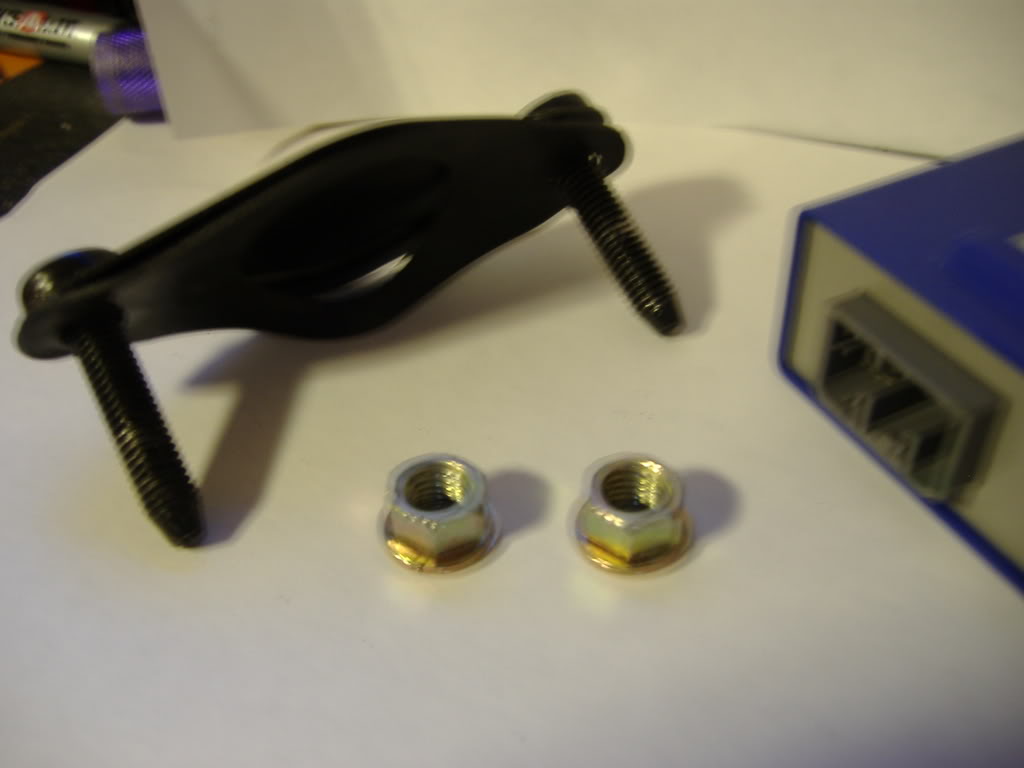
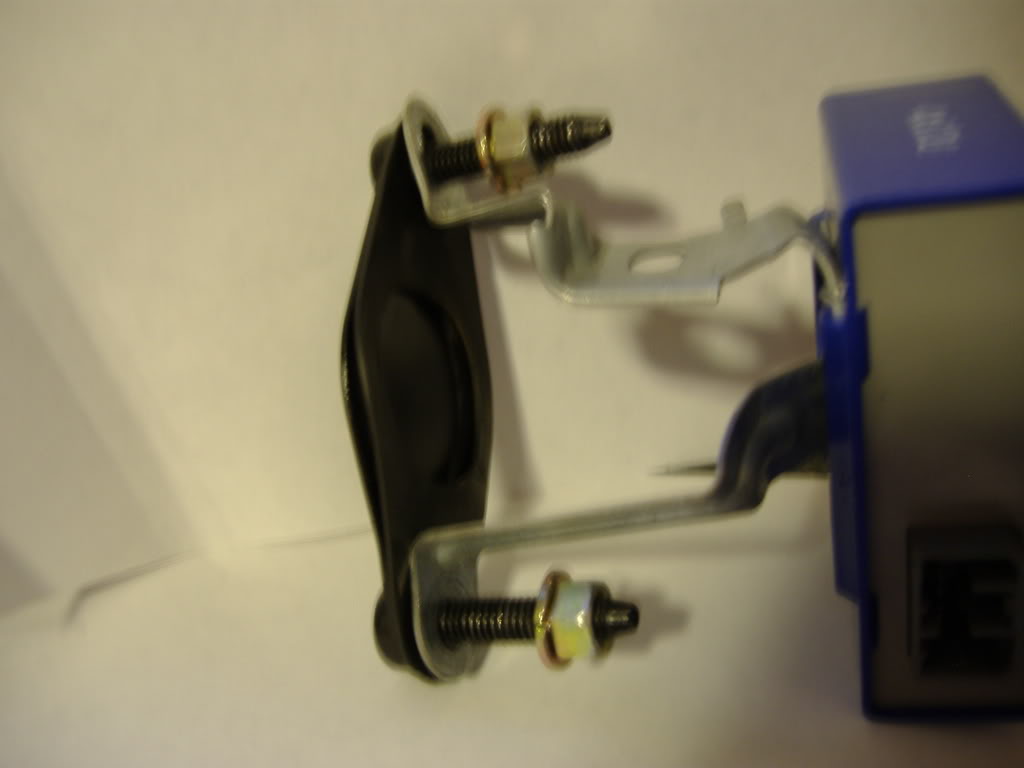
You will need the shift linkage to match your transmission in my case D-series. Make sure you get the rubber mounts and the bitch pin with your linkage.
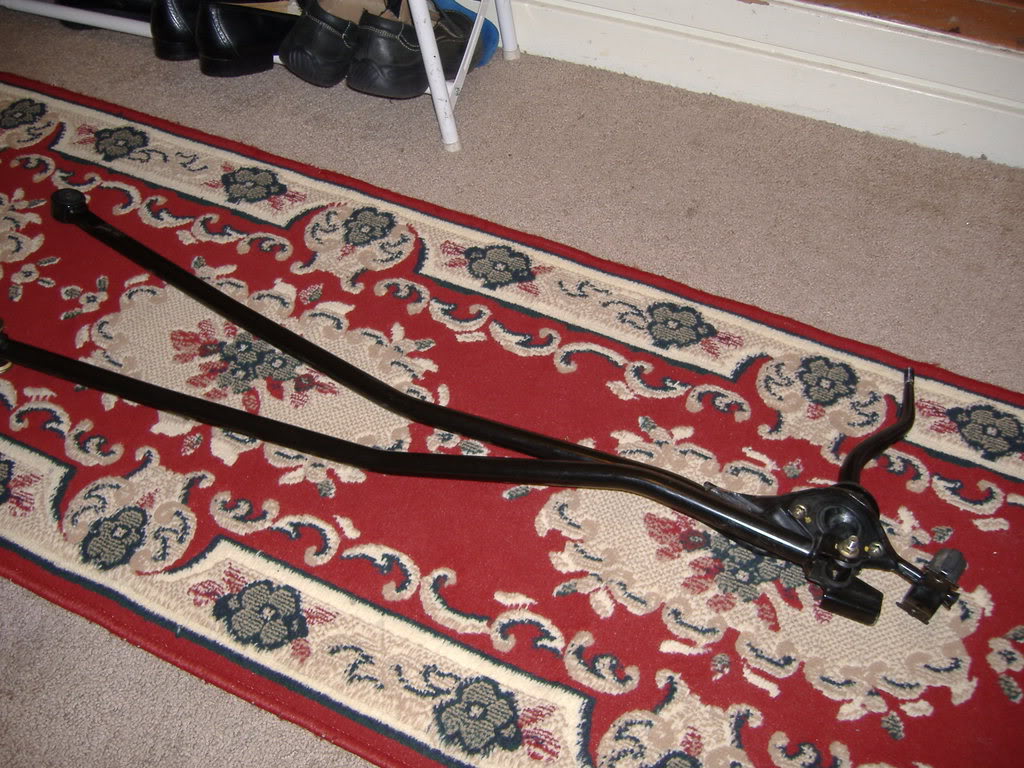
I also modfied a gsr double bend shifter to my d-series linkage sits lower and feels better even out the car.LOL
You will need the master cylinder and arm make sure to get the little cotter pin. really hard to do without.
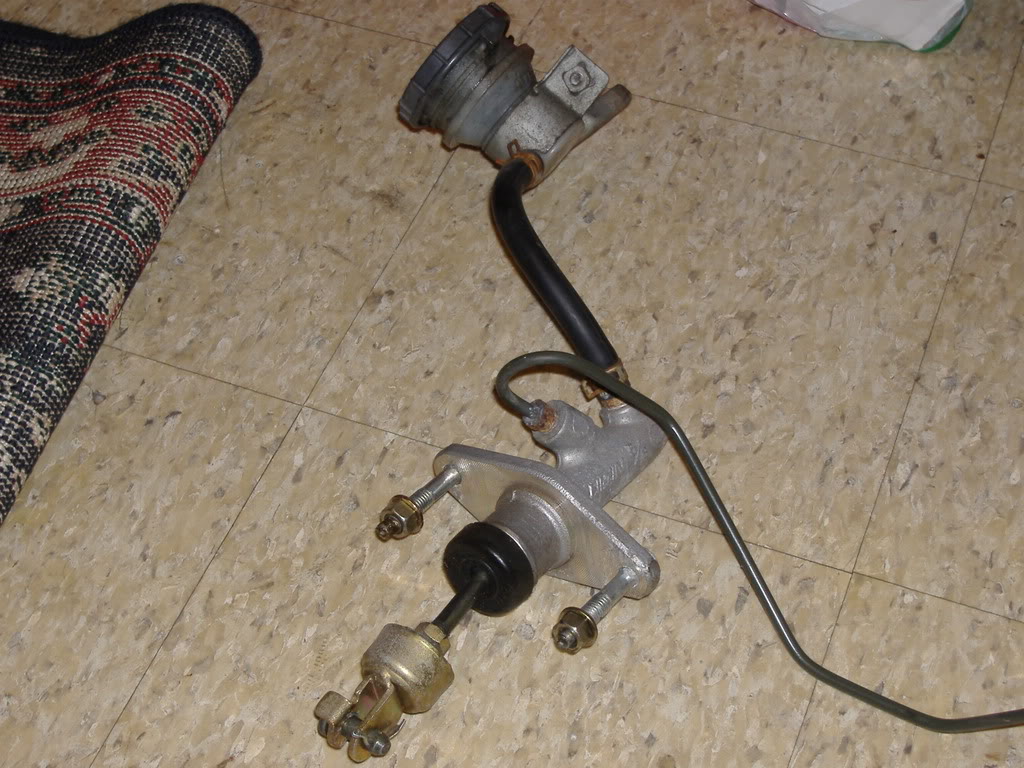
Get all the clutch lines with it to unless you plan on running a stainless soft line all the way.
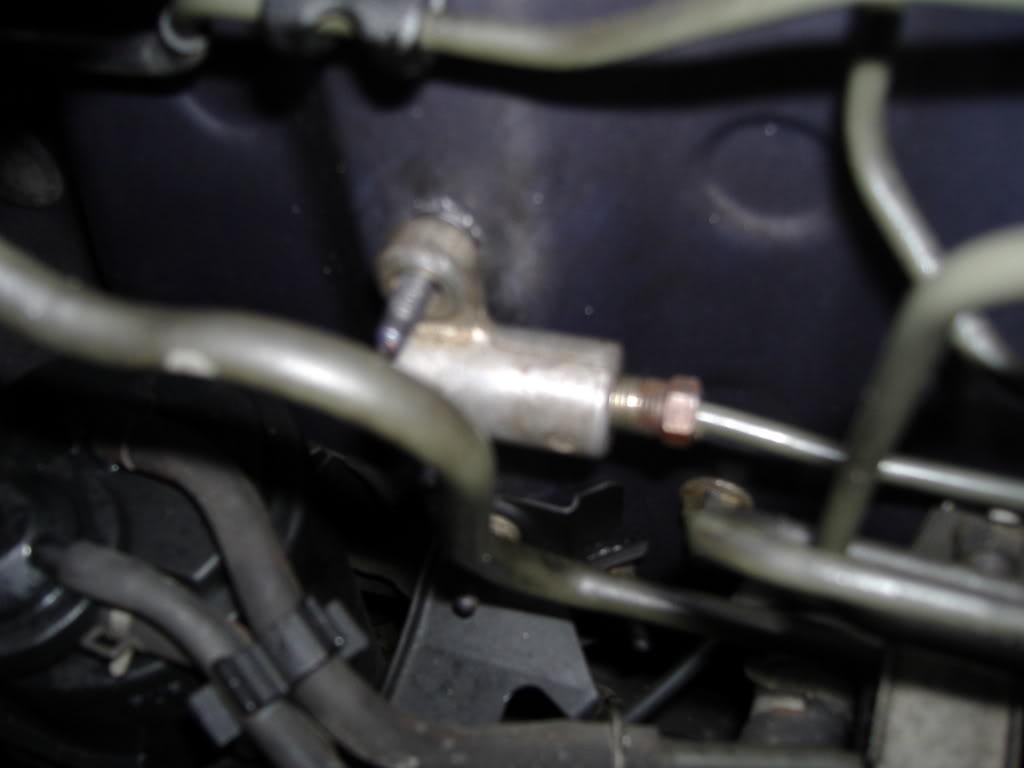
Make sure you also get the firewall coupler for the 2 halves of the clutch line.
You will also need the slave cylinder try to get the other half of the clutch line with it also and all the brackets.

You will need to remove the cover for the clutch master theres (2) 12mm nuts holding it on.theres also going to be a blue box attatched to it this is the ignition interlock box that prevents you from pulling the key out in gear. Just disconnect the connector and tuck it away, you wont need to modify it in any way.
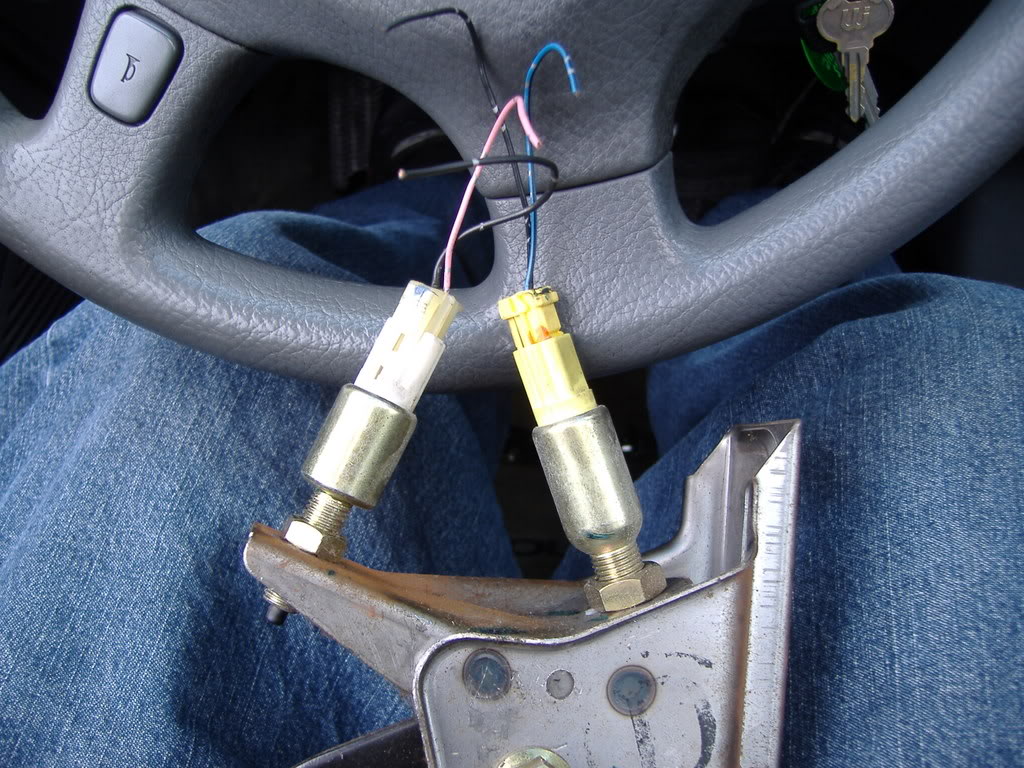
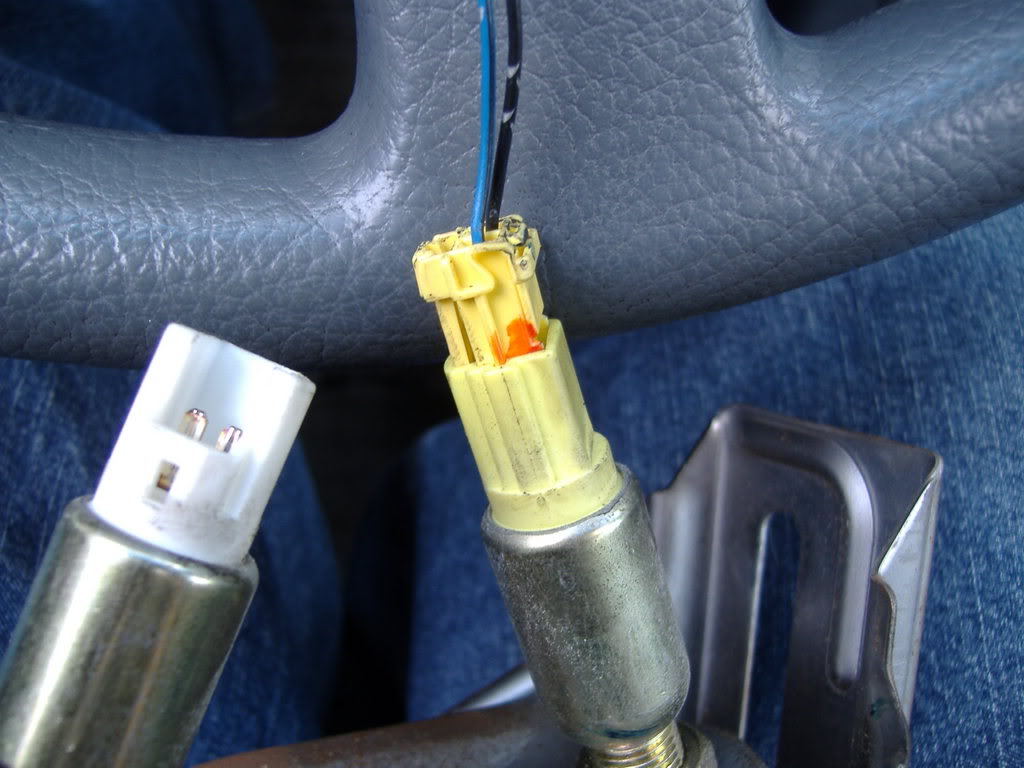
Trim away the foam and rubber around the pedals becarefull not to cut any wires, Put the master cylinder in before you put in the pedal side. Just leave the master hanging for now. Look at your clutch pedal, it should have (2) switches attached to it, An upper one with a yellow connector and a lower one with a white connector. You can go ahead and remove the white lowere one if you want keep the upper one this is going to be wired as a clutch saftey switch.
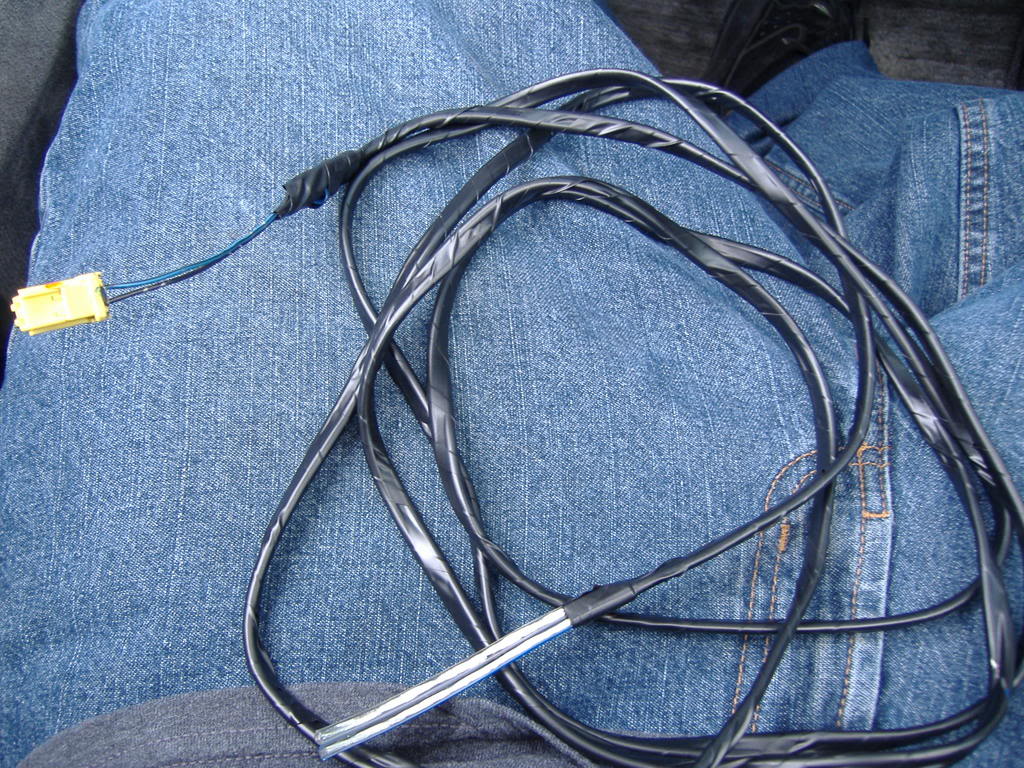
Use butt connectors to lengthen the wire enough so it can reach into your center consol.

You will end up with this.
Well I didnt take pictures of putting the pedals on because its damn cramped down there and I was sweating and pissed off. You will need (1) 8mm bolt with a washer for the top hanger of the pedal. Pull the center of the master into the cabin with one hand wile aligning the bolt holes on the pedal with the other hand, get the nuts started and then line up the top hole and get that bolt started tighten the master nuts down good then finally tighten the upper bolt.

This is the upper bolt.
The reason you have to change you gas and brake pedals is because of this, they are dangerously close to each other.
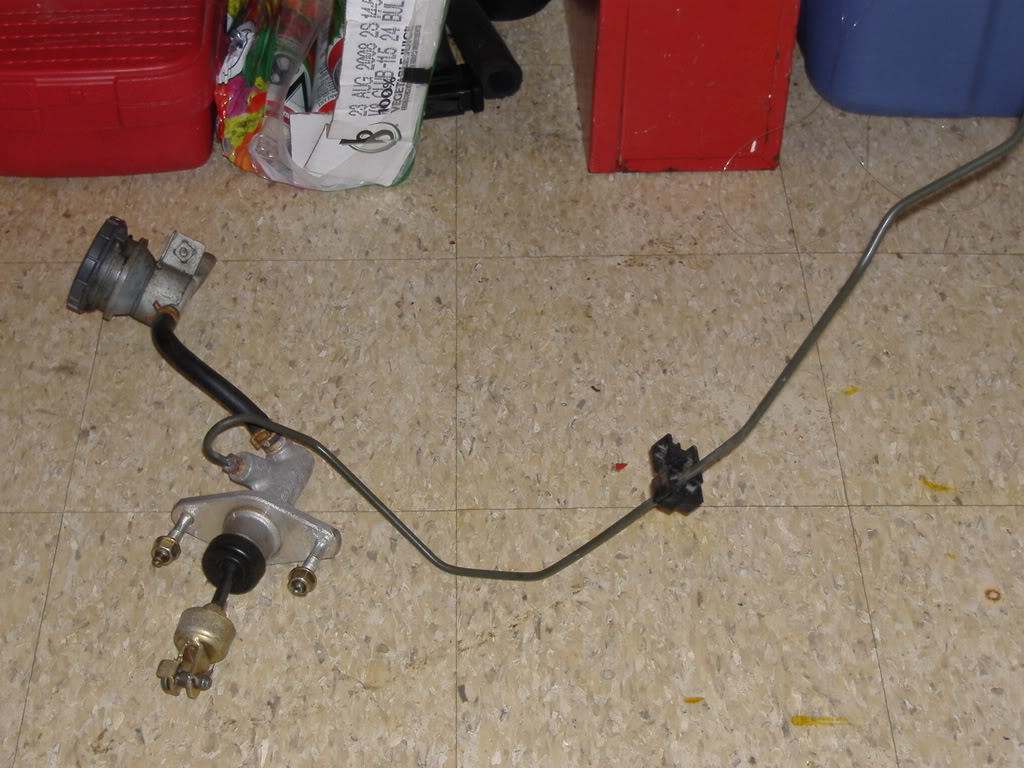
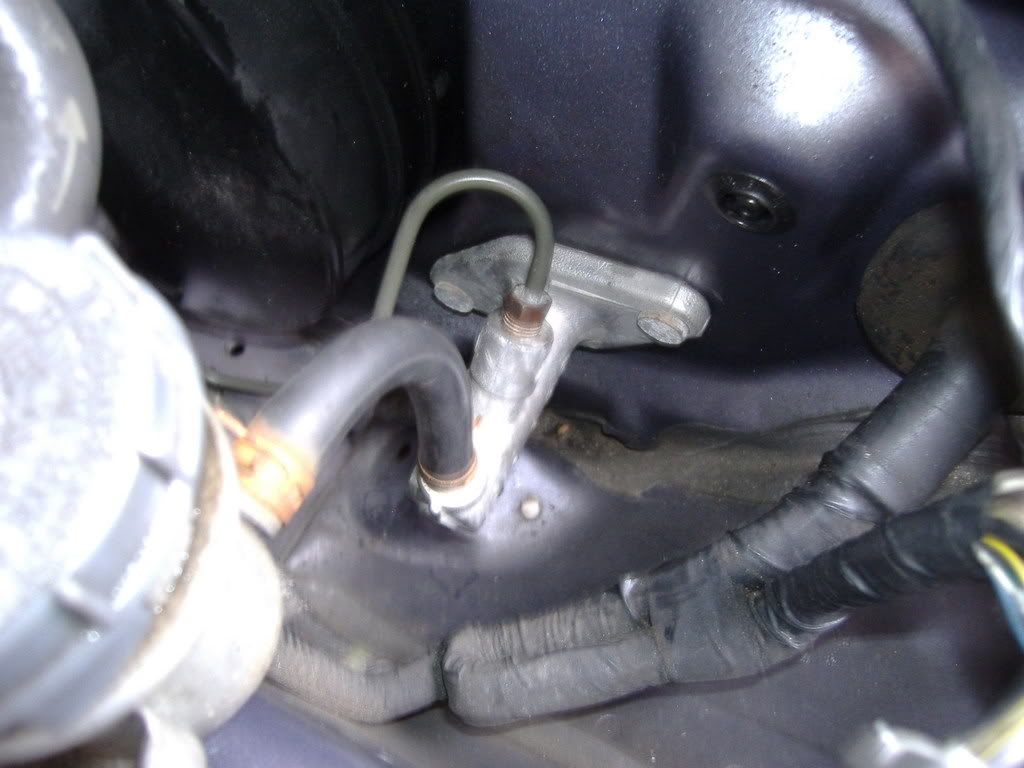
Now move on to the engine bay Leave all the lines disconnected, Once you have the lines in hand youll see the way they fit in they can only go one way. Mount the firewall couple in, it will only go one way one side of the threads are bigger.
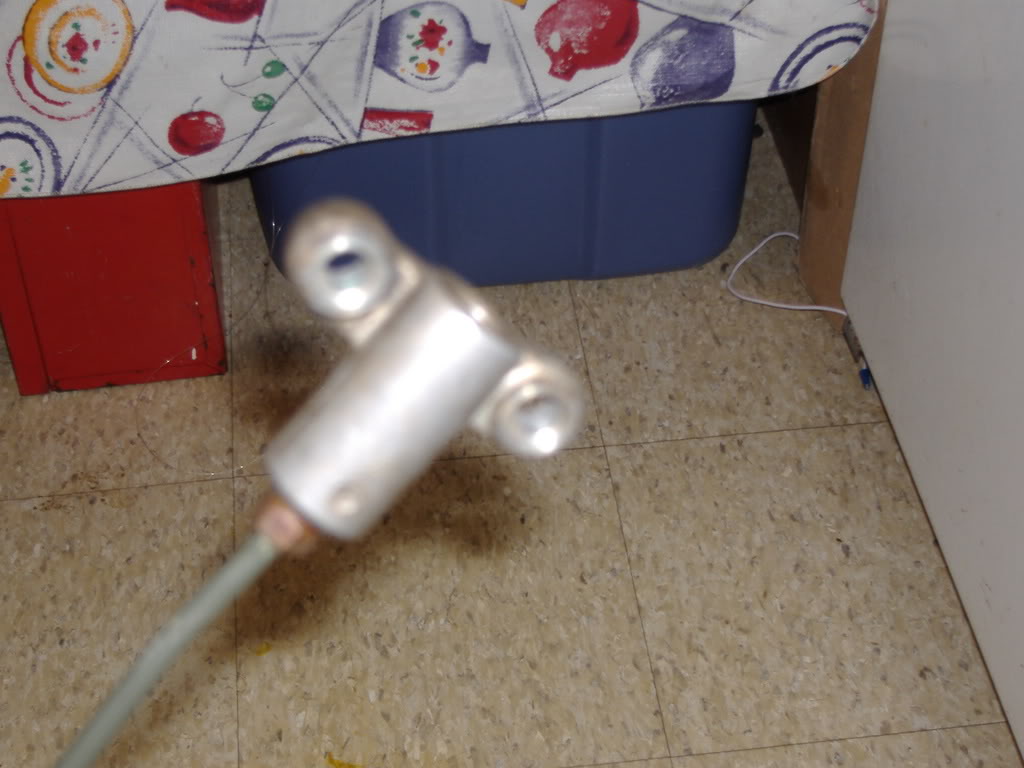
You will need to mount the reservoir for the master the holes are already there you just need to mount it. I suggest you flush all the lines and clean out the reservoir before you install it just to have a fresh start.
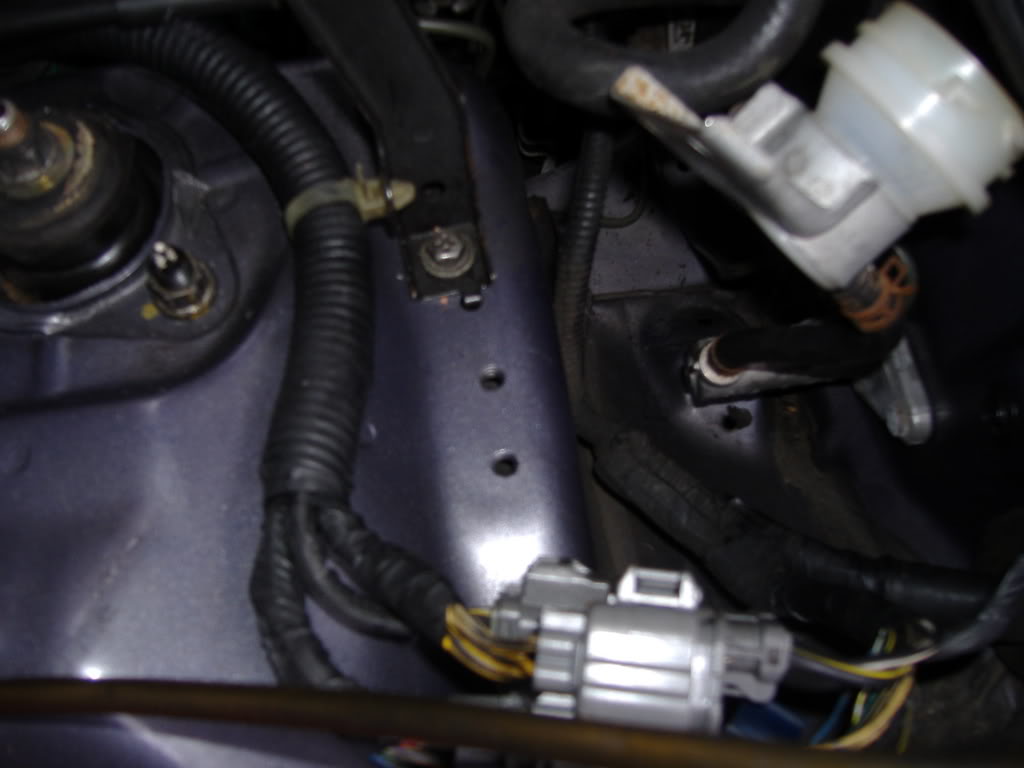
This is how it looks all mounted up.
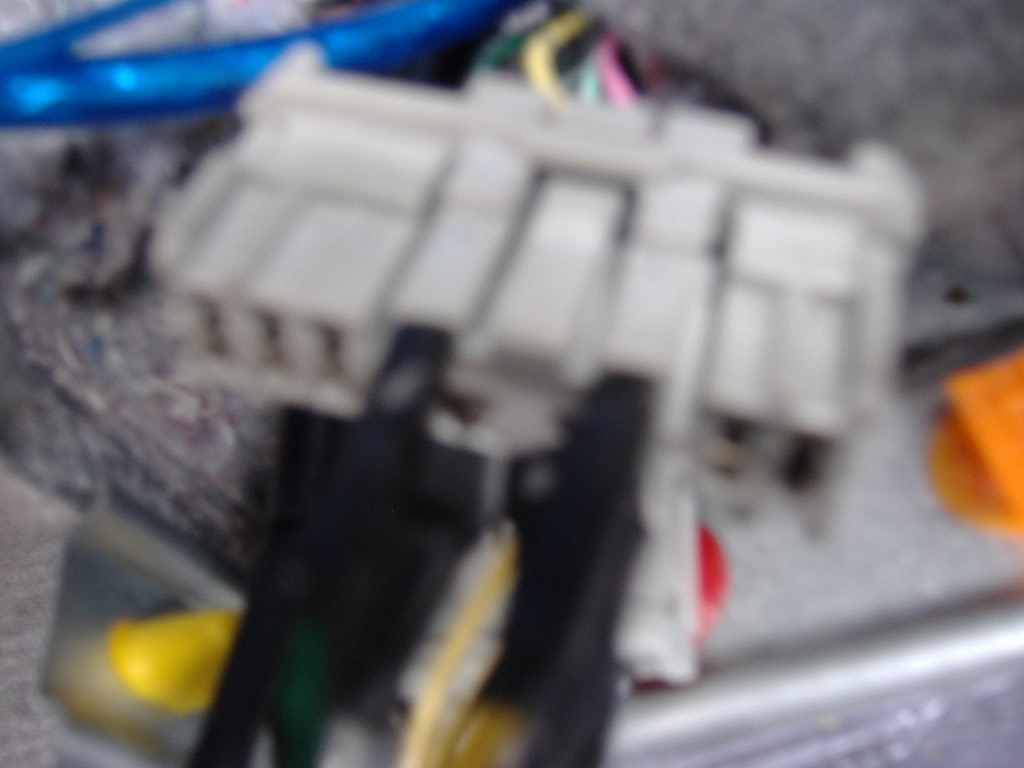
Now we go back in the cabin for the wireing part of the install. Those 2 wires we ran from the pedal have to go to the center consol also you need to run 2 more wires for the reverse light switch on the transmission, I didnt take pics of this as its is straight forward. You should have 4 wires in the center consol now. Disconnect the big harness that is connected to the shifter indicator.
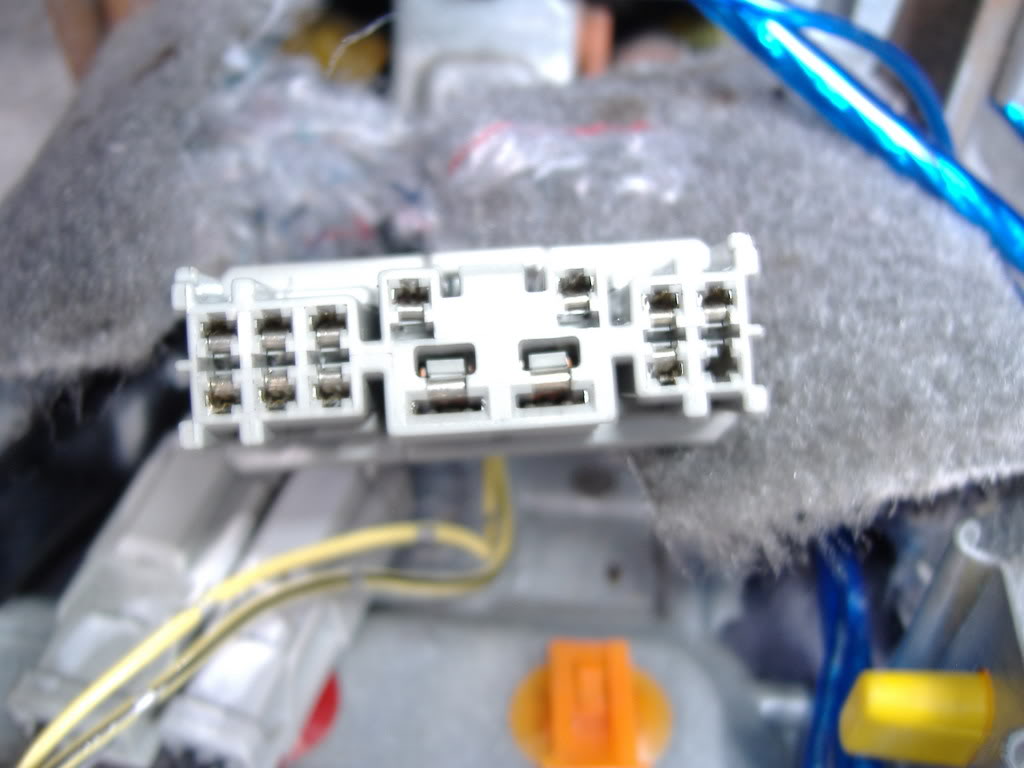
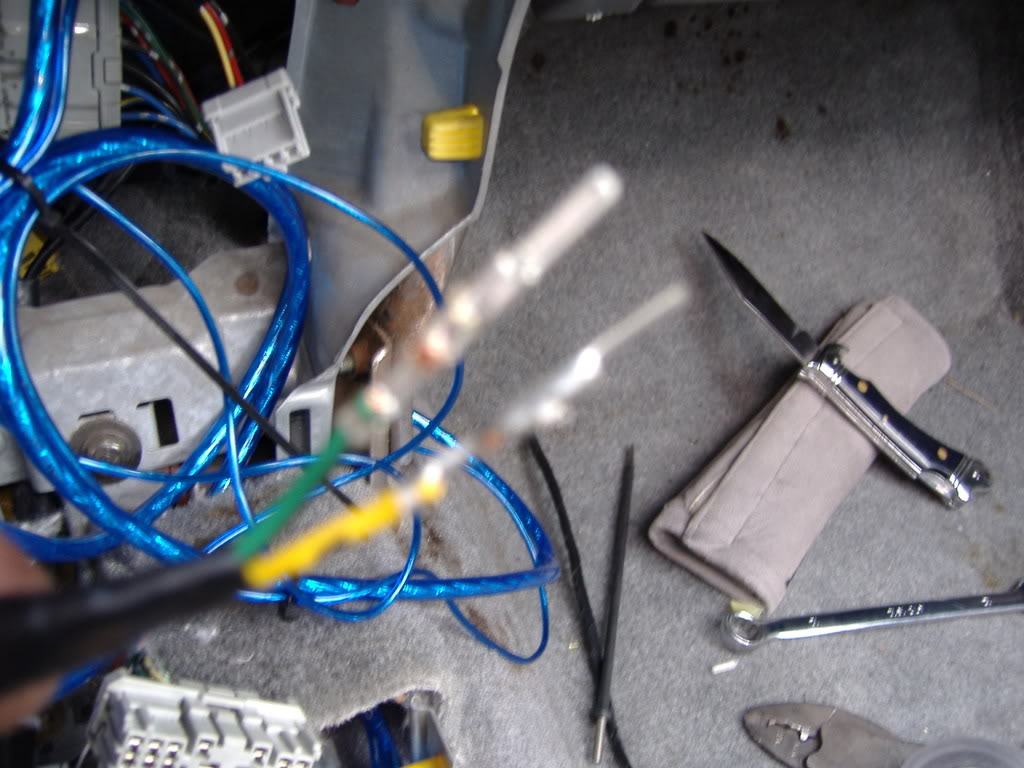
You can see that in the middle center of the connector are two of big female terminals look from the back side of it you will see two of the biggest wires in the harness. Crimp on 2 un-insulated male terminals on the wires you ran from the clutch switch and put electrical tape of heat shrink on them. You will end up with something looking like this.
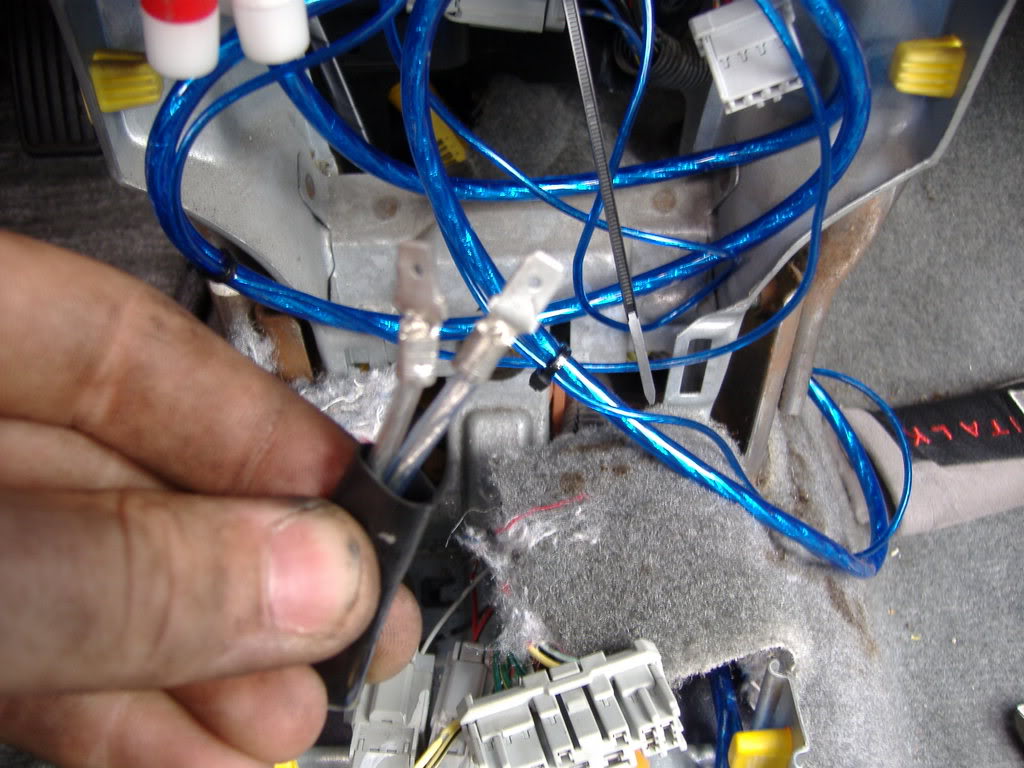
Make sure you put tape on the ends so they dont touch eachother, and plug them into the 2 big plugs in the harness doesnt matter witch way you plug them in, (your going to have to make the terminals a little narrower to fit)
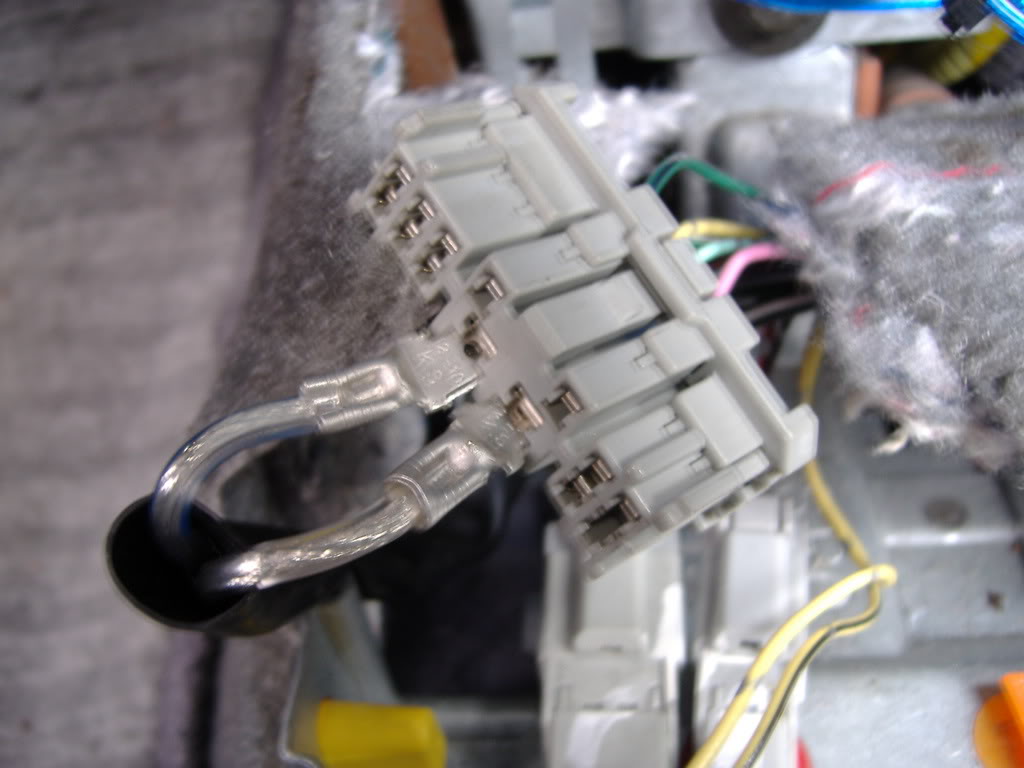
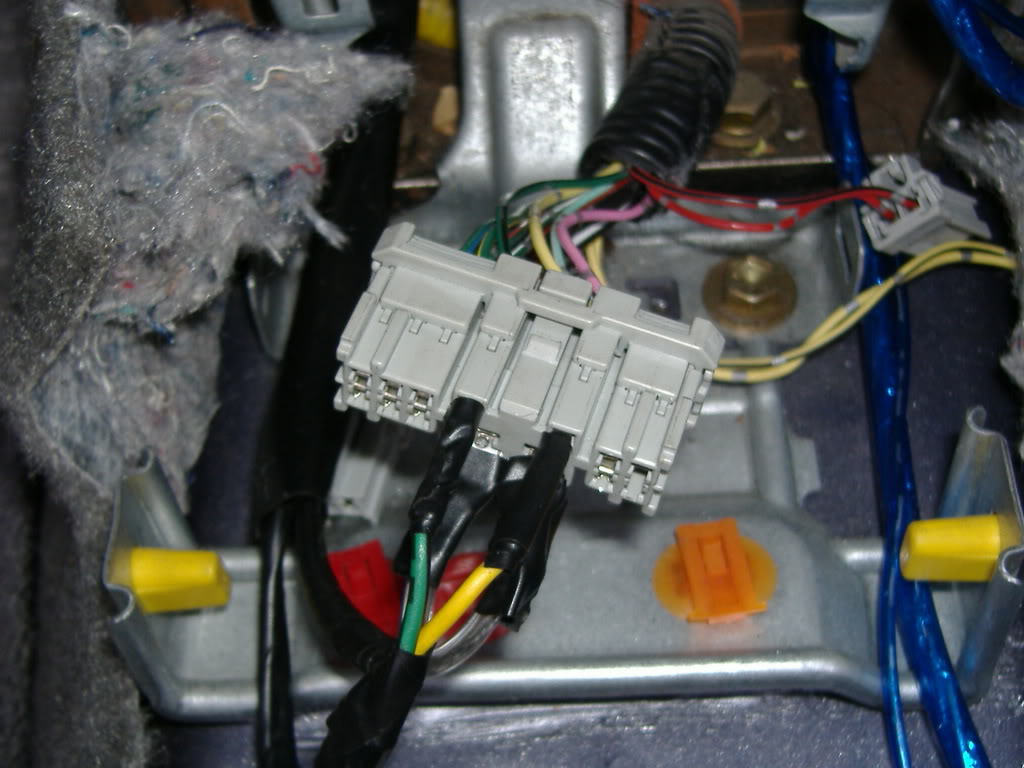
Now for the reverse light switch, Depin the yellow and the green wire from the shifter side of the harness and cut about 2 inches off wire with them, Crimp these to the wires you ran from the transmission and you will end up with something looking like this.
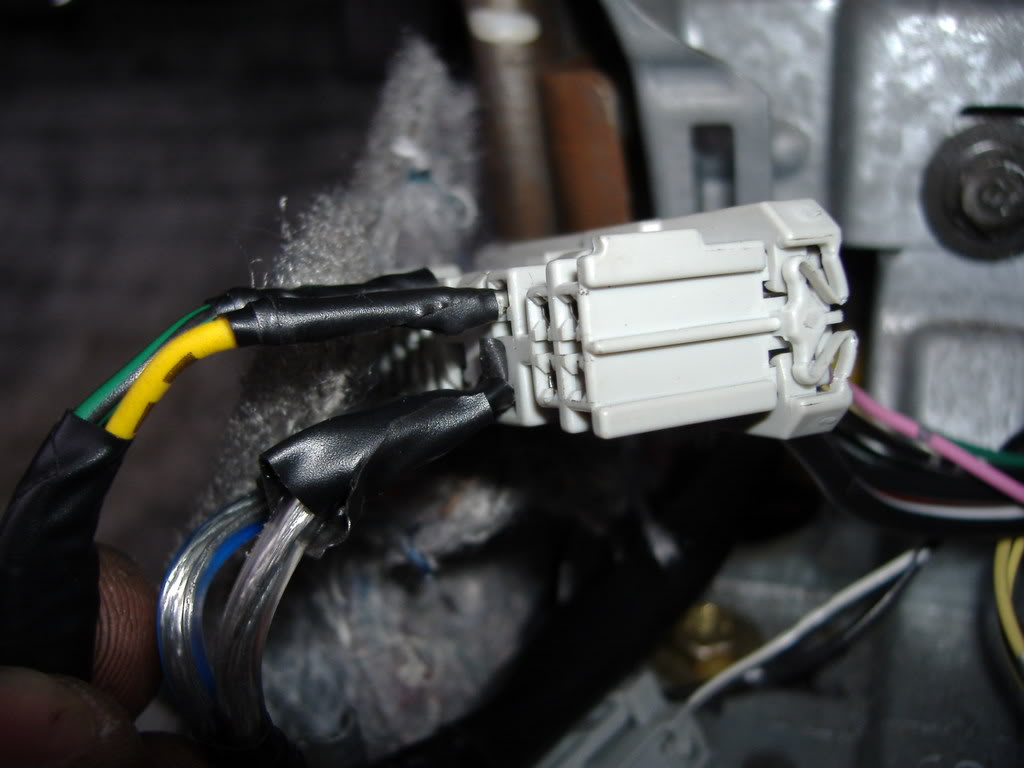
Plug those into the 2 top connector pins to the corrosponding colors Green/black tracer to green/black tracer and yellow to yellow. connect the ends of the wires together now at the engine bay and see if the reverse lights go on. Dont get scared when you do this its going to spark a little.
When you plug them in your going to end up with this.
Test the system out now, make sure the car is in park and try to crank it, it shouldnt. Now press the clutch pedal hard all the way down and it should start, If it doesnt check your connectors. Cruise control wont work as of now but to get that working just ground the pink wire in the harness.
Well I got tired and lazy so I didnt do the gas and brake pedals today but probably tomorrow. ~ejoner~
Modified by ejoner at 7:36 PM 9/6/2007
Modified by ejoner at 7:38 PM 9/6/2007
Modified by ejoner at 7:41 PM 9/6/2007
Modified by ejoner at 7:44 PM 9/6/2007
Modified by ejoner at 7:45 PM 9/6/2007
Modified by ejoner at 7:48 PM 9/6/2007
The 95 civic ex/si tranny.
The way you can identify your tranny to tell wether its a dx,hx,vx,si,ex. There is a stamp on it if it says B000 then its a large bearing short gear ex/si =good tranny. A000 =bad tranny.
Your going to need a manual transmission starter as the auto 1 will not line up make sure to also get the bolts as the auto ones are shorter.
You need the flywheel, If your getting all your stuff from a donor car and are on a budjet just inspect your flywheel for cracks if none found just scuff the surface up a little and your good.
You also need the manual transmission flywheel bolts as they are longer. Auto on left manual on right.
You will need the manual throttle cable as the nub on one end is bigger then the auto one (pedal side is bigger)
You will need the auto to manual conversion mount unless you wanna weld, I found that the innovative mount is alot easier and it wasnt expensive at all. 115shipped from spoolinperformancefab.
You will need what is called the inspection plate it covers the flywheel.
You will need the front manual transmission mount. Im not sure if you need the actual rubber mount but I got mine anyway Il let u guys know when it goes in.
You will also need the manual pedal assembly Dont be half *** and cut your brake pedal in half just buy the whole set. And if your car has cruise control get the matching pedals for a cruise controlled car.(extra arm on pedal for cruise).
You will need the shift linkage to match your transmission in my case D-series. Make sure you get the rubber mounts and the bitch pin with your linkage.
I also modfied a gsr double bend shifter to my d-series linkage sits lower and feels better even out the car.LOL
You will need the master cylinder and arm make sure to get the little cotter pin. really hard to do without.
Get all the clutch lines with it to unless you plan on running a stainless soft line all the way.
Make sure you also get the firewall coupler for the 2 halves of the clutch line.
You will also need the slave cylinder try to get the other half of the clutch line with it also and all the brackets.
You will need to remove the cover for the clutch master theres (2) 12mm nuts holding it on.theres also going to be a blue box attatched to it this is the ignition interlock box that prevents you from pulling the key out in gear. Just disconnect the connector and tuck it away, you wont need to modify it in any way.
Trim away the foam and rubber around the pedals becarefull not to cut any wires, Put the master cylinder in before you put in the pedal side. Just leave the master hanging for now. Look at your clutch pedal, it should have (2) switches attached to it, An upper one with a yellow connector and a lower one with a white connector. You can go ahead and remove the white lowere one if you want keep the upper one this is going to be wired as a clutch saftey switch.
Use butt connectors to lengthen the wire enough so it can reach into your center consol.
You will end up with this.
Well I didnt take pictures of putting the pedals on because its damn cramped down there and I was sweating and pissed off. You will need (1) 8mm bolt with a washer for the top hanger of the pedal. Pull the center of the master into the cabin with one hand wile aligning the bolt holes on the pedal with the other hand, get the nuts started and then line up the top hole and get that bolt started tighten the master nuts down good then finally tighten the upper bolt.
This is the upper bolt.
The reason you have to change you gas and brake pedals is because of this, they are dangerously close to each other.
Now move on to the engine bay Leave all the lines disconnected, Once you have the lines in hand youll see the way they fit in they can only go one way. Mount the firewall couple in, it will only go one way one side of the threads are bigger.
You will need to mount the reservoir for the master the holes are already there you just need to mount it. I suggest you flush all the lines and clean out the reservoir before you install it just to have a fresh start.
This is how it looks all mounted up.
Now we go back in the cabin for the wireing part of the install. Those 2 wires we ran from the pedal have to go to the center consol also you need to run 2 more wires for the reverse light switch on the transmission, I didnt take pics of this as its is straight forward. You should have 4 wires in the center consol now. Disconnect the big harness that is connected to the shifter indicator.
You can see that in the middle center of the connector are two of big female terminals look from the back side of it you will see two of the biggest wires in the harness. Crimp on 2 un-insulated male terminals on the wires you ran from the clutch switch and put electrical tape of heat shrink on them. You will end up with something looking like this.
Make sure you put tape on the ends so they dont touch eachother, and plug them into the 2 big plugs in the harness doesnt matter witch way you plug them in, (your going to have to make the terminals a little narrower to fit)
Now for the reverse light switch, Depin the yellow and the green wire from the shifter side of the harness and cut about 2 inches off wire with them, Crimp these to the wires you ran from the transmission and you will end up with something looking like this.
Plug those into the 2 top connector pins to the corrosponding colors Green/black tracer to green/black tracer and yellow to yellow. connect the ends of the wires together now at the engine bay and see if the reverse lights go on. Dont get scared when you do this its going to spark a little.
When you plug them in your going to end up with this.
Test the system out now, make sure the car is in park and try to crank it, it shouldnt. Now press the clutch pedal hard all the way down and it should start, If it doesnt check your connectors. Cruise control wont work as of now but to get that working just ground the pink wire in the harness.
Well I got tired and lazy so I didnt do the gas and brake pedals today but probably tomorrow. ~ejoner~
Modified by ejoner at 7:36 PM 9/6/2007
Modified by ejoner at 7:38 PM 9/6/2007
Modified by ejoner at 7:41 PM 9/6/2007
Modified by ejoner at 7:44 PM 9/6/2007
Modified by ejoner at 7:45 PM 9/6/2007
Modified by ejoner at 7:48 PM 9/6/2007
 09-05-2007, 09:13 PM
#2
Honda-Tech Member

Join Date: Nov 2005
Location: Pittsburgh, PA
Posts: 3,612
Likes: 0
Received 0 Likes
on
0 Posts
good stuff, probably will be auto to manual swapping my buddies car, subscribed for a good DIY 
09-06-2007, 06:57 PM
#3
Junior Member
Thread Starter
Join Date: Aug 2007
Location: Funky 600block Norcal
Posts: 592
Likes: 0
Received 0 Likes
on
0 Posts
Sorry some of the pics are blurry, but this is a lot more detailed then the other auto to manual how to's.
01-17-2008, 10:36 PM
#4
Honda-Tech Member
iTrader: (1)
Join Date: Feb 2004
Location: the 818 valley, CA, USA
Posts: 8,700
Likes: 0
Received 1 Like
on
1 Post
just to add a tip...if u guys dont wanna run ugly lookn wires all the way to the tranny for the reverse lights u can find those same wires on the 14 pin engine harness plug on the driverside..if yur usdm that is...reason i did this is because i did a wire-tuck harness and didnt wana place any more wires in the bay..its #12 (yellow) and # 13 (green/black) on the plug.. 
The following users liked this post:
01-18-2008, 12:37 PM
#5

<TABLE WIDTH="90%" CELLSPACING=0 CELLPADDING=0 ALIGN=CENTER><TR><TD>Quote, originally posted by ME=ADRIAN »</TD></TR><TR><TD CLASS="quote">just to add a tip...if u guys dont wanna run ugly lookn wires all the way to the tranny for the reverse lights u can find those same wires on the 14 pin engine harness plug on the driverside..if yur usdm that is...reason i did this is because i did a wire-tuck harness and didnt wana place any more wires in the bay..its #12 (yellow) and # 13 (green/black) on the plug.. </TD></TR></TABLE>
Are those the ones you loop?
</TD></TR></TABLE>Are those the ones you loop?
02-01-2008, 07:20 PM
#6
Honda-Tech Member
Join Date: Oct 2005
Location: 561, FL, Palm Beach
Posts: 156
Likes: 0
Received 0 Likes
on
0 Posts
Great write up..thanks for the wiring pictures..that's usually what's missing on the other 92-95 guides. I have a question about the reverse light wires though. When you said run them from your tranny, do you mean from the two wires on the tranny all the way into the center console? meaning you leave the harness side dangling?
02-01-2008, 08:55 PM
#7
Junior Member
Thread Starter
Join Date: Aug 2007
Location: Funky 600block Norcal
Posts: 592
Likes: 0
Received 0 Likes
on
0 Posts
harness side dangling? What do you mean by that? Yes you just run the wires from the reverse light switch on the transmission all the way to the center console, if you loom everything nicely it will all look stock.
Trending Topics
02-02-2008, 05:18 PM
#8
Honda-Tech Member
Join Date: Oct 2005
Location: 561, FL, Palm Beach
Posts: 156
Likes: 0
Received 0 Likes
on
0 Posts
you know how there's a reverse light male and female connector? well if you run the wires from the tranny all the way to the console then that would leave the remaining connector(the one that goes to the ecu) hanging. Why can't you just connect the manual tranny connector to the auto one? From what I saw the connector fits.
 02-02-2008, 10:07 PM
#10
Junior Member
Thread Starter
Join Date: Aug 2007
Location: Funky 600block Norcal
Posts: 592
Likes: 0
Received 0 Likes
on
0 Posts
<TABLE WIDTH="90%" CELLSPACING=0 CELLPADDING=0 ALIGN=CENTER><TR><TD>Quote, originally posted by HaiSpeedRacer »</TD></TR><TR><TD CLASS="quote">you know how there's a reverse light male and female connector? well if you run the wires from the tranny all the way to the console then that would leave the remaining connector(the one that goes to the ecu) hanging. Why can't you just connect the manual tranny connector to the auto one? From what I saw the connector fits.</TD></TR></TABLE> Because it goes into the ecu, and not the the reverse lights, Unless you cut the wires at the ecu and lengthen them from the ecu to the center console. I found it easier to just run new wires, then mess with with factory wiring at the ecu.
02-03-2008, 03:00 PM
#11
Honda-Tech Member
Join Date: Oct 2005
Location: 561, FL, Palm Beach
Posts: 156
Likes: 0
Received 0 Likes
on
0 Posts
ahh..I see..makes sense now. One last question, what did you do with the A/T tranny cooler lines? thanks for answering my questions.
Modified by HaiSpeedRacer at 4:59 PM 2/3/2008
Modified by HaiSpeedRacer at 4:59 PM 2/3/2008
02-03-2008, 03:55 PM
#12
Junior Member
Thread Starter
Join Date: Aug 2007
Location: Funky 600block Norcal
Posts: 592
Likes: 0
Received 0 Likes
on
0 Posts
You just disconnect them from the radiator side and just let the radiator drain really well but you will still get occasional drips for a few days.
02-03-2008, 04:06 PM
#13

Join Date: Jul 2004
Location: Farmington, MN, USA
Posts: 4,144
Likes: 0
Received 0 Likes
on
0 Posts
Good detailed write up.
To add, an alternative to the $115 auto-manual mount, you can buy the 5 speed chassis mount from hondaautomotiveparts.com for like $23. Drill out a couple spot welds on the auto one, and weld in the $23 one.
Also, when deciding on hardline or stainless line for the clutch line, always go with hardline. I've used stainless in the past and it works, but the flex in the stainless line won't give you as precise of a pedal feel as the hardline. The hardline won't flex.
03-04-2008, 08:43 PM
#15
Honda-Tech Member
Join Date: Oct 2005
Location: 561, FL, Palm Beach
Posts: 156
Likes: 0
Received 0 Likes
on
0 Posts
It's number 23 on this diagram. http://www.hondaautomotivepart...81%29
Hey ejoner...are you sure it has to be a manual starter? my auto one lines up in the hole just perfect. I thought it has more to do with the bolt needing to be longer. P.S. I finished the swap. A one man effort with a lot of late night wrenching and four letter words. My advice...do not skimp on the clutch..put a new one in there along with a new throw out bearing and replace the ISB since the tranny is off the engine.
Hey ejoner...are you sure it has to be a manual starter? my auto one lines up in the hole just perfect. I thought it has more to do with the bolt needing to be longer. P.S. I finished the swap. A one man effort with a lot of late night wrenching and four letter words. My advice...do not skimp on the clutch..put a new one in there along with a new throw out bearing and replace the ISB since the tranny is off the engine.

 03-12-2008, 04:54 AM
#19
Honda-Tech Member
Join Date: Sep 2002
Posts: 84
Likes: 0
Received 0 Likes
on
0 Posts
a word of caution:
if you are pulling hte clutch lines out of a junkyard car, make sure there is no rust or pitting on them.
I pulled a set of hard clutch lines and one of them had a hole rotted through it and I had to replace the line. It really sucks to do all of the work for the swap and get ready to bleed the clutch and drive the car and the brake fluid comes squirting out of the line!
Just a good inspection should cover you!

The following users liked this post:


